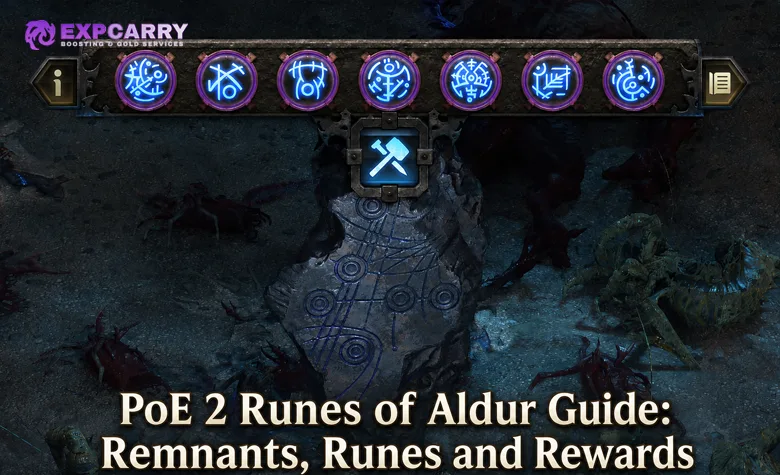
Runes of Aldur rewards are built through decisions rather than revealed after an ordinary fight. At an isolated Remnant, the selected Runic Recipe determines the item being created while its Runeshapes determine the waves and enemy modifiers required to claim it. In an Expedition, Remnants become part of an explosive sequence: the Rune highlighted for propagation affects monsters unearthed later in the chain, so early choices can strengthen every encounter that follows.
The correct strategy is not to select the longest recipe or connect every Remnant automatically. Read the reward, identify the dangerous Rune modifier, check where that modifier enters the sequence, and decide whether the later markers and chests justify carrying it through the remaining chain. A profitable layout is one the build can finish, because an unreachable reward has no practical value.
How the Runes of Aldur Mechanic Works
Runes of Aldur begins with Remnants found during the campaign and expands into Expedition encounters, Grand Expeditions, ocean exploration, faction bosses, and a Pinnacle Boss route. Farrow introduces the mechanic and provides campaign quests that unlock additional crafting features as the character progresses.
An isolated Remnant has between two and ten slots. Larger Remnants are rarer and support recipes capable of producing rarer results. Interacting with the Remnant displays available Runic Recipes that fit its slots and unlocked Runeshapes. Selecting a recipe prepares its sequence, after which the Remnant raises empowered monsters. The crafted item can be claimed only after the encounter is completed.
- Find a Remnant and inspect its number of slots.
- Compare the available recipes by reward, Runeshapes, and combat modifiers.
- Select the result that solves a current crafting, gearing, or market goal.
- Prepare space around the Remnant before beginning the encounter.
- Clear every wave and collect both the created reward and useful monster drops.
Every additional Runeshape adds another enemy wave. Later waves gain additional runic modifiers, which means a long recipe increases both encounter length and the number of effects the build must handle together. The official Return of the Ancients mechanics confirm the two-to-ten-slot range, additional waves, progressive modifiers, Verisium drops, and the crafting systems unlocked through Farrow.
Why Rune Order Matters in Expeditions
Campaign Remnants are self-contained, but Expedition changes the decision from one recipe into a chain. Explosives unearth monster markers, chests, and Remnants in sequence. When a Remnant is completed, one Rune slot is highlighted as the modifier that will propagate to further monsters. That effect applies to enemies raised later in the Expedition, not to packs already cleared.
This creates two values for every Remnant. The first is its direct recipe reward. The second is the effect its propagated Rune has on the remaining chain. An attractive reward near the beginning may force a dangerous modifier onto most of the encounter. The same Remnant placed near the end contributes its item while exposing far fewer monsters to that modifier.
| Position in the chain | Practical effect | When to use it |
|---|---|---|
| Early Remnant | Its propagated Rune affects most later monsters and can amplify the value and danger of a long sequence | The modifier is safe for the build or the remaining markers justify the added risk |
| Middle Remnant | Balances a useful recipe with moderate exposure to its propagated modifier | The build can handle the effect but should not carry it through the entire layout |
| Late Remnant | Provides its direct recipe reward while applying its modifier to only the final section | The recipe is valuable but the propagated effect is dangerous |
| Skipped Remnant | Removes both its reward and its modifier from the chain | The effect threatens the build or reaching it consumes explosives needed for better targets |
Order is therefore a defensive tool. If a highlighted Rune creates a matchup the build handles poorly, route that Remnant late or leave it outside the chain. If the modifier is harmless, placing it early can support a more ambitious encounter. Always judge the actual build: a modifier that barely affects one character may disable the damage, recovery, or defences of another.
Choose Remnant Recipes by Reward and Risk
Do not compare recipes only by slot count. A long sequence can create a specialised Rune, Alloy, Skill, Support, or other valuable result, but the number of Runeshapes also dictates how many waves must be cleared. A shorter recipe producing something the character immediately needs can have better practical value than a rare recipe with no buyer or use.
| Reward goal | What to check | Reason to choose another recipe |
|---|---|---|
| Socketable Rune | Compatible equipment type, exact effect, permanence, and whether the target item is worth finishing | The Rune cannot be used by the build or has little current trade demand |
| Runic Alloy | Guaranteed crafted modifier, eligible target, and the random modifier replacement risk | The item cannot afford to lose any of its existing modifiers |
| Verisium | Current Anvil project, required amount, and whether Runeforging improves the complete defence profile | No suitable item is ready and another recipe supplies a rarer unlock |
| Kalguuran Skill or Support | Whether the build can use its mechanics and support its Runic Ward cost | The gem does not fit the setup and has weak market demand |
| Crafting or metacrafting Rune | Exact restriction, crafting plan, base value, and irreversible consequences | The intended craft has no safe stopping point or costs more than a finished trade item |
| Currency or general reward | Current usefulness, market value, recipe length, and encounter danger | A shorter recipe offers similar value with substantially lower failure risk |
The preview is the decision point. Read the complete recipe and Rune effects before confirming instead of relying on the reward icon. Do not assume that every new Rune is valuable, that every long recipe is profitable, or that a high-slot Remnant must be used immediately.
Players who need the equipment side of the system can use the separate PoE 2 Runecrafting and Runeforging guide to compare Verisium conversions, Runic Ward, Alloys, and eligible Unique upgrades. Remnant routing should decide how to obtain the material; the item guide should decide whether spending it is sensible.
Explore services related to this guide, selected from our Path of Exile 2 catalog.
View All Path of Exile 2 Services


Build a Safe and Rewarding Explosive Chain
Plan an Expedition backwards from its most important target. Identify the Remnant recipe, boss marker, valuable chest group, or dense Runic Monster section that justifies the encounter. Then connect supporting targets while preserving enough explosives and avoiding terrain that blocks a clean route.
- Read every Remnant first. Record its direct reward and highlighted propagated Rune.
- Mark build-breaking effects. Move them late in the chain or exclude them completely.
- Select the primary reward. Secure the target that makes the Expedition worth running before adding optional density.
- Order safe modifiers early. Let manageable effects apply to later packs while delaying dangerous combinations.
- Connect valuable markers and chests. Spend remaining explosives where reward density is highest.
- Check the final combination. Read all accumulated effects as one encounter rather than evaluating each Remnant separately.
Difficulty compounds. Two individual modifiers may be comfortable alone but lethal together when one weakens defences and another increases incoming pressure. The same applies to recovery, speed, ailment, resistance, and damage interactions. Stop adding targets when the next Remnant changes the chain from slow to unreliable.
Leave room to fight around Remnants and avoid beginning a high-investment sequence with a portal, wall, narrow passage, or hazardous terrain controlling movement. Kill nearby ordinary monsters first. During the encounter, prioritise survival over standing beside the next explosive marker; the chain continues only if the current wave is successfully cleared.
Campaign Progression and Remnant Unlocks
Farrow's questline turns simple Remnant rewards into a broader crafting system. Early progression unlocks Verisium Runeforging and Runic Ward. Later stages open Alloys, Unique Runeforging interactions, Ancient Runes, and the Expedition form of the mechanic. Complete Farrow's objectives instead of postponing them until the Atlas, because missing unlocks reduce the recipes and crafting outcomes available from later Remnants.
| Progression stage | Main development | Player priority |
|---|---|---|
| Early campaign | Learn isolated Remnants and unlock Verisium Runeforging | Choose manageable recipes and use Runic Ward only when the Anvil preview improves the item |
| Mid campaign | Expand the recipe pool and unlock Alloy-related crafting | Collect useful materials without risking progression for recipes the build cannot complete |
| Later campaign | Unlock further Rune and Unique Runeforging options | Preserve rare materials for correct bases and learn which modifiers threaten the build |
| Expedition introduction | Remnants become connected through explosive chains | Plan sequence order rather than selecting rewards independently |
| Atlas and ocean exploration | Grand Expeditions, underground areas, faction leaders, and the Pinnacle route become available | Progress the questline while improving Remnant density and reward targeting |
A developing character should favour consistency. Long Remnant encounters are useful only when damage, recovery, and defences can survive the final waves with multiple runic modifiers active. Players blocked by campaign progression can consider a contextual PoE 2 Campaign service, while recipe selection and any permanent item changes still require a build-specific decision.
Grand Expeditions, Logbooks and the Ocean
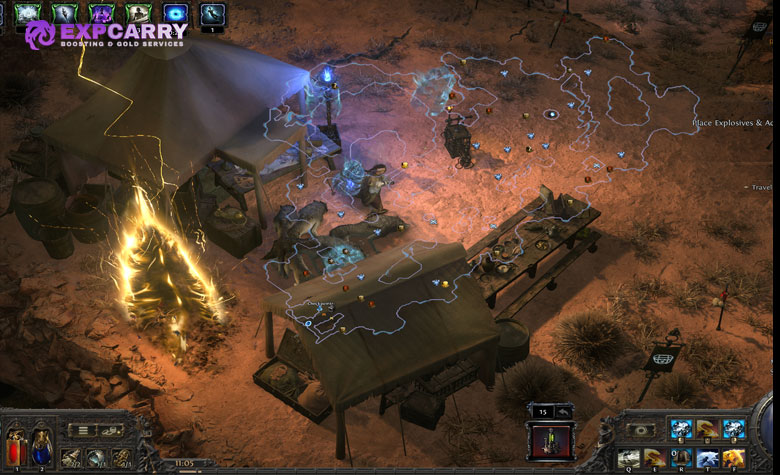
In endgame, using an Expedition Logbook reveals part of the ocean and islands containing Grand Expeditions. These larger layouts combine explosive routing, Remnants, Runic Monsters, improved chests, underground areas, special encounters, and faction leaders. They are not oversized versions of an isolated campaign Remnant: the value comes from planning the complete area.
Grand Expeditions currently allow up to 15 explosives. Their maximum possible number of Remnants scales with Waystone Tier, reaching the highest range in Tier 15 and above maps. The area also receives one or two Expedition map modifiers, and some modifiers can add Remnants, duplicate Runic Monsters, or increase Runic Monster markers. More targets create more opportunity, but they also make sequencing errors more expensive.
Use this priority order when the layout cannot connect everything:
- Quest objective, required underground area, or faction leader needed for progression.
- High-value Remnants with recipes the build can complete.
- Runic Monster density and improved reward chests.
- Optional targets that do not introduce dangerous propagated modifiers.
- Low-value chests or awkward markers that consume too many explosives.
The Grand Expedition questline awards points for the dedicated Expedition Atlas Passive Tree by defeating its bosses. This tree can specialise encounter access, Remnant behaviour, monster density, and related rewards. Patch changes matter here: the official Expedition Atlas Tree update introduced the tree, Liquid Verisium, new Grand Expedition modifiers, and the highlighted Rune propagation system used for current routing.
Medved, Vorana, Uhtred, and Olroth are the four faction leaders associated with the ocean route. Defeating Olroth provides the key used to access the Runes of Aldur Pinnacle Boss. Quest versions provide directed progression, while repeatable encounters support continued farming after the storyline is complete.
Rewards, Verisium and Challenge Progress
Remnant rewards extend beyond ordinary currency. Recipes can create socketable Runes, Alloys, Fluxes, metacrafting tools, Kalguuran Skills and Supports, Runic Ward-related Runes, Ancient Runes, and other specialised outcomes unlocked through progression. Monsters raised by Remnants can also drop Verisium, which pays for transformations at the Verisium Anvil.
Separate three reward layers when evaluating an encounter:
- Guaranteed recipe result: the item shown by the selected Runic Recipe after the Remnant encounter is completed.
- Encounter drops: Verisium and other loot produced by the monsters raised during the fight.
- Expedition chain value: later monsters, markers, chests, underground areas, bosses, and quest progress affected by the complete explosive route.
This distinction prevents a common mistake: choosing a mediocre recipe solely to add another Remnant to the chain. The direct item, propagated modifier, monster drops, and targets beyond it must be judged together.
Runes of Aldur also has eight league challenges. Runecrafting is only one part of the set; other objectives cover character, Atlas, item, and boss progression. Completing every two challenges awards another piece of the Knight of Aldur Armour Set, while the hideout Totem records challenge completion. The official challenge rewards overview confirms the cosmetic milestones.
Common Runes of Aldur Mistakes
- Choosing by slot count: more Runeshapes mean more waves and modifiers, not automatic profit.
- Ignoring the highlighted Rune: its modifier propagates to later Expedition monsters and can change the entire chain.
- Placing dangerous Remnants first: an early modifier affects far more of the encounter than the same choice near the end.
- Connecting every target: limited explosives should secure the best route, not the largest shape on the ground.
- Reading modifiers separately: safe effects can become lethal when combined.
- Skipping Farrow's quests: incomplete progression restricts crafting unlocks and the wider endgame route.
- Spending rewards without a target: rare Runes, Alloys, and Verisium should be evaluated against a suitable item first.
- Copying a farming route blindly: another build may ignore a modifier that disables yours.
When uncertain, take the shorter safe recipe or route the questionable Remnant last. Consistent completions reveal more recipes, materials, Logbooks, and boss progress than repeatedly losing high-investment chains to a modifier the character cannot counter.
Conclusion
Runes of Aldur rewards deliberate sequencing. At a single Remnant, balance the selected item against the Runeshapes required to create it. In Expeditions and Grand Expeditions, add the position of each Remnant, its highlighted propagated Rune, the remaining monster markers, and the limited explosive route to that calculation.
Before starting the next chain, identify one primary reward, move the most dangerous useful Remnant as late as possible, and reread the complete modifier stack. That three-step check protects the encounter while preserving the choices that create its real value.