The Trial of Chaos is Path of Exile 2's escalating Ultimatum-style challenge. Every new room adds another persistent modifier, so the real test is not clearing one encounter but building a combination your character can still handle several rooms later. A successful run can award Ascendancy Points, Soul Cores, corrupted items, Vaal currency and, at the highest tier, access to the Trialmaster.
The safest approach is to protect the part of your build that cannot be replaced. A regeneration build should avoid recovery penalties, a projectile build should reject Random Projectiles, and a character with barely capped resistances should never accept Reduced Resistances. Room mechanics can be learned; a modifier that disables the foundation of your build can end the run before mechanical skill matters.
How to Unlock and Start the Trial of Chaos
The campaign introduction appears in Act 3. Defeat Xyclucian, the Chimera in the Chimeral Wetlands to obtain the quest Inscribed Ultimatum, travel to the Temple of Chaos and place the item in the Temple Offering. The introductory run teaches the room and modifier system while providing an alternative route to an early set of Ascendancy Points.
Later Inscribed Ultimatums determine their own number of trials, area level and reward conditions. Do not rely on an old room-count chart to decide whether an item advances your Ascendancy. Inspect its description before entering: eligible Inscribed Ultimatums explicitly state that completing them grants additional Ascendancy Skill Points. Grinding Gear Games added this wording to the item tooltip in the official Early Access patch notes, making the item itself the reliable check after progression changes.
- Bring the correct Inscribed Ultimatum to the Temple Offering.
- Read the item for its trial count, area level and Ascendancy Point line.
- Cap elemental resistances and improve Chaos resistance before longer runs.
- Equip answers to Bleed, Poison and Corrupted Blood when your gear allows it.
- Leave enough inventory space for room rewards, Soul Cores and Fates.
How Rooms, Modifiers and Risk Work
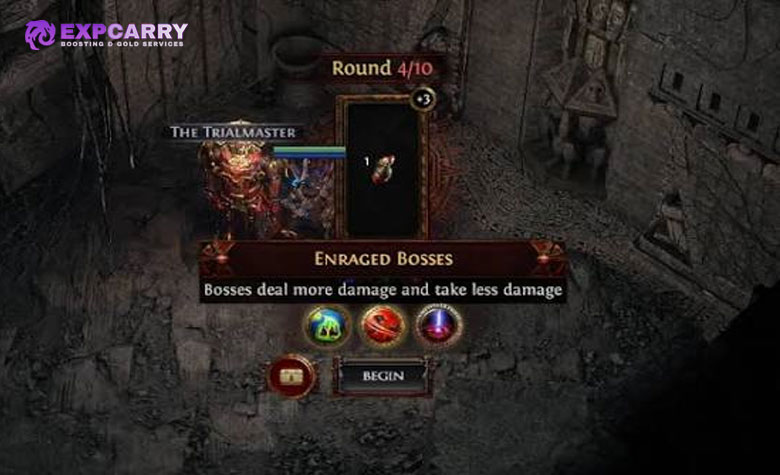
Each chamber gives a clear objective. Completing it preserves the rewards accumulated so far and moves the run to the next decision. Continuing adds another Tribulation, the Trial of Chaos name for a negative modifier. Tribulations remain active for the rest of the run and may return as stronger tiers, which makes the combined set more important than any single choice.
When the Trialmaster offers the next selection, compare all three options against the rooms still ahead. A mild hazard may be reasonable early, while the same choice can become dangerous before a boss. Taking the available rewards and leaving ends the attempt safely; continuing risks the accumulated reward set. Failure before cashing out loses that run's unclaimed rewards and consumes a non-quest Inscribed Ultimatum.
A full ten-room trial places bosses in rooms four, seven and ten. Recovery wells appear before the boss encounters, so refill flasks instead of rushing through the doorway. The encounter has received balance and layout adjustments throughout Early Access, so current information should take priority over fixed strategies written for an older version.
| Room objective | How it works | Safe approach |
|---|---|---|
| Defeat all monsters | Clear the marked packs until no required enemies remain. | Fight from cleared ground and avoid chasing stragglers through active hazards. |
| Survive | Stay alive until the timer expires while new waves appear. | Prioritize space and control over loot or unnecessary rare kills. |
| Collect Vaal Soul Cores | Retrieve the cores and carry them to the Stone Altars. | Open the route first, then deliver each core quickly because carrying it makes the character increasingly vulnerable. |
| Sacrifice monsters | Kill enemies while they stand inside the marked blood circles. | Gather a manageable pack, move into the circle and use controlled area damage. |
| Escort the statue | The statue advances while the player remains close enough. | Clear the next section, return to the statue and avoid fighting in cramped hazard overlaps. |
| Boss | Defeat one of the three Temple bosses with every chosen Tribulation active. | Use the well first and enter with flasks, buffs and defensive resources ready. |
Room layouts, reward frequency and encounter balance can change without altering the basic risk system. Review the current PoE 2 patch notes before investing valuable endgame Inscribed Ultimatums.
Best Trial of Chaos Modifiers to Choose
There is no universal best modifier because every option attacks a different layer of a build. The practical rule is to choose readable hazards or enemy durability before penalties that remove recovery, defences, damage control or movement. A character with strong single-target damage can tolerate tougher monsters; it cannot compensate as easily for losing the resource system that keeps it alive.
| Modifier | Usually manageable when | Reason to reject it |
|---|---|---|
| Shielding Monsters | Your damage removes the added Energy Shield quickly. | Low damage allows enemies to recover their shield and extends every room. |
| Resistant Monsters | You have penetration, exposure or damage well above the room requirement. | Your main damage type already struggles against resistant rares and bosses. |
| Drought | Your sustain does not depend on charges gained from monster kills. | Your Life Flask, Mana Flask or Charms are essential during long rooms. |
| Lessened Reach | Your skill does not depend on large Area of Effect or fast projectiles. | Your clear, targeting or defence depends on either property. |
| Stormcaller Runes | You can keep moving and recognize the ground telegraph. | Your build channels, stands still or already has limited safe ground. |
| Blood Globules | You can lead the projectiles away and reposition after they land. | Higher tiers leave dangerous ground that competes with boss mechanics. |
Tier upgrades deserve extra caution. Repeating a modifier can turn a tolerable Tier I effect into the most dangerous part of the run. Spreading selections across mild first-tier hazards is often safer than upgrading a mechanic that follows the player into every remaining room.
Modifiers that commonly end runs
Reject a modifier when it directly counters your build, even if the other choices look annoying. The following effects are frequent failure points because they weaken a core defence or make later bosses much less forgiving.
- Reduced Resistances: lowers elemental resistances and maximum resistances, sharply increasing incoming elemental damage.
- Reduced Recovery: punishes regeneration, leech and other recovery-heavy characters.
- Damaged Defences: cuts Armour, Evasion and Energy Shield, making it dangerous for nearly every defence-focused setup.
- Toxic Monsters: makes enemy hits inflict Bleed and Poison, which is severe without protection from both ailments.
- Deadly Monsters: raises enemy critical threat and becomes much worse at its upgraded tier.
- Random Projectiles: can break projectile targeting while improving enemy projectile coverage.
- Occasional Impotence: creates forced periods in which the player and minions deal no damage.
- Stalking Shade: adds an invulnerable pursuer that inflicts Ruin; reaching seven Ruin fails the trial.
- Volatile Fiends: releases dangerous explosions when monsters die and can punish close-range clearing.
- Petrification Statues: can immobilize the character when their gaze overlaps a narrow route or an objective.
- Impending Doom: fills space with expanding Physical damage rings that become awkward beside boss attacks.
- Escalating Damage Taken: makes slower objectives increasingly dangerous the longer the room continues.
- Enraged Bosses: increases the pressure in every remaining boss encounter.
If the modifier sequence is the only obstacle between a character and its next Ascendancy milestone, a PoE 2 Trial of Chaos boost is a direct alternative to spending additional Inscribed Ultimatums. Players who want to learn the encounter should instead practise with lower-value items and leave when the offered modifiers attack the build's main defence.
Explore services related to this guide, selected from our Path of Exile 2 catalog.
View All Path of Exile 2 Services


Temple Bosses and Fate Drops
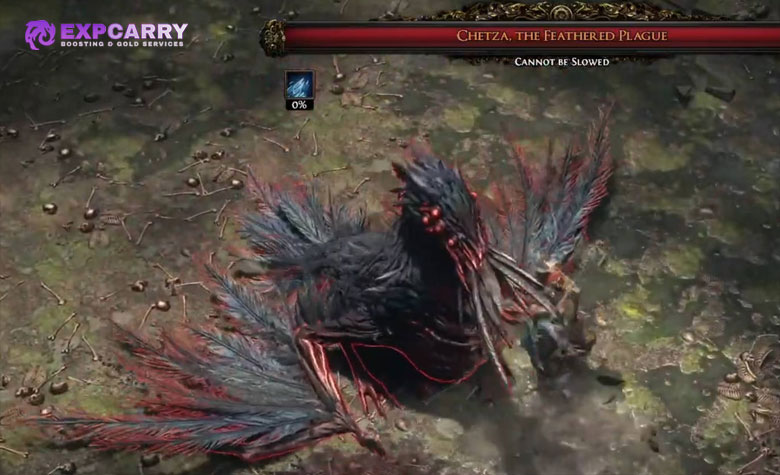
The three Temple bosses appear in a random order during a ten-room run. Their base patterns remain the same, but the selected Tribulations can change which attack is most dangerous. Do not treat room four as proof that the later fights will feel identical: additional modifiers are active by rooms seven and ten.
| Boss | Main pressure | Room-ten Fate |
|---|---|---|
| Bahlak, the Sky Seer | Fast Physical and Lightning attacks, expanding lightning patterns and projectiles. | Deadly Fate |
| Uxmal, the Beastlord | Mixed elemental and Chaos damage, repeated relocations and persistent ground pressure. | Cowardly Fate |
| Chetza, the Feathered Plague | Physical attacks, spikes, corpse-based area pressure and effects that restrict movement. | Victorious Fate |
The Fate is tied to the boss defeated in room ten, not every boss encountered earlier in the run. This means one completion does not normally provide the entire set. Keep moving against Bahlak, avoid filling Uxmal's arena with overlapping ground effects, and give Chetza enough space for its larger physical patterns. If a bad Tribulation combination survives to a boss room, use damage windows patiently rather than trading hits to finish faster.
How to Unlock and Beat the Trialmaster
Collect Cowardly Fate, Deadly Fate and Victorious Fate, then complete a ten-room Trial of Chaos with the set available. Insert all three Fates into the sealed door in the final area to open the route to the Trialmaster's Tower. Missing pieces can be obtained from more runs or purchased from other players through the official Path of Exile 2 Trade site. The three Fates are consumed when the encounter is opened.
Prepare for the Trialmaster before selecting the first Tribulation. Entering his arena with Reduced Recovery, severe defence penalties or an upgraded hazard is much harder than fighting the boss with a set of controlled modifiers. Capped elemental resistances, useful Chaos resistance, reliable ailment answers and recovery that works without constant monster kills make the attempt far more stable.
Trialmaster Attacks and Positioning
The Trialmaster alternates between spear and caster patterns. His spear slam releases branching fissures, his expanding blood slam punishes staying close after the telegraph, and his frenzy combines melee swings with damaging projectiles. A thrown spear creates a growing hazard and marks the transition into his caster sequence. In caster form, he uses blood orbs, rapid elemental projectiles and a heart-shaped blood tether that punishes crossing its boundary carelessly.
Time Stop does not deal its damage immediately. It stores a sequence of attacks, then releases them when time resumes. Watch where the fissures or orbs are prepared and move away from their projected paths as soon as control returns. Fight near the outer portion of the arena so expanding effects occupy less central space, but do not pin the character against the wall. Place persistent hazards along an edge, circle into open ground and attack after the sequence finishes.
- Keep the camera centered enough to read the boss's spear and caster animations.
- Move expanding hazards toward the arena edge instead of dropping them through the middle.
- Save long animation attacks for the end of a Trialmaster sequence.
- After taking a heavy hit, disengage and recover instead of chasing the next damage window.
- During Time Stop, plan the escape path before control returns and avoid panic rolling into a stored attack.
Trial of Chaos Rewards and When to Leave
Room rewards can include currency, corrupted equipment, Vaal Orbs, Soul Cores and other valuable items. Soul Cores are socketable upgrades with different effects, so their value depends on current builds and the economy rather than a fixed ranking. Fates are the key reward from the final Temple boss because they provide Trialmaster access and can also be traded.
Defeating the Trialmaster guarantees one Unique from his encounter pool: Glimpse of Chaos, Hateforge, Mahuxotl's Machination, The Adorned or Zerphi's Genesis. It does not guarantee a particular member of that pool or a valuable roll, and later balance changes can alter which result is most desirable.
For an Ascendancy attempt, success is worth more than squeezing value from every room. Leave if all offered Tribulations would disable recovery, collapse defences or ruin the final boss matchup and the accumulated reward already matters to you. For farming, continue only when the reward value and remaining modifier set justify risking the Inscribed Ultimatum and the unclaimed items.
Final Thoughts
The best Trial of Chaos decision is made for the character that entered, not for a generic tier list. Protect the build's weakest mandatory system, prefer mechanics that can be dodged, and evaluate every choice as if it will still be active against the next boss. On a first clear, consistency should beat greed. Once the rooms and boss patterns are familiar, stronger characters can accept more enemy durability and use the same mechanic as a repeatable source of Soul Cores, Fates and Trialmaster drops.