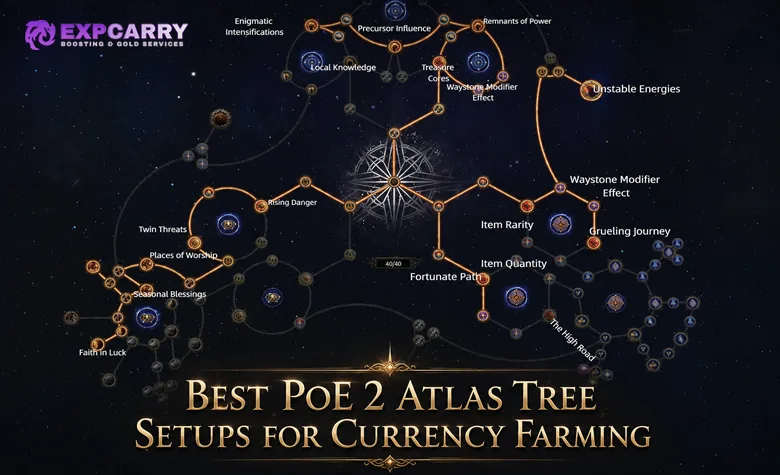
The best PoE 2 Atlas Tree setup for currency farming is not one permanent screenshot. A reliable setup connects five decisions: which Atlas points are unlocked, which mechanic tree is active, which Master options support the run, which tablets and Waystones are consumed, and whether the character can finish the selected content without losing time to deaths or abandoned encounters.
This guide is checked against the live 0.5.4f environment. It provides six setups covering low, medium, and high investment, but it does not promise a fixed number of Divine Orbs per hour. Market prices, input costs, sale speed, map completion time, and failure rate can change the result even when two players copy the same allocation.
Treat every setup below as a testable farming configuration. Run a controlled sample, value only rewards that can realistically be used or sold, subtract every consumed input, and keep jackpots separate from the repeatable baseline.
How Atlas Setups Work in the Current Endgame
The current Atlas is different from the early-access version that required one narrow permanent allocation. The official 0.5.0 endgame notes state that the main Atlas Tree contains more than 300 nodes and that completing the Fortress maps eventually grants enough points to allocate the entire tree. Multi-choice nodes can be changed between their available options without a normal respec process.
This makes an Atlas currency setup a progression order first and an operating configuration later. Early characters still need to choose which routes to reach first. Completed characters differentiate their farms through multi-choice options, separate mechanic trees, Masters, tablets, Waystone modifiers, regional content, and the maps they are willing to run.
| Setup layer | What it controls | What must be verified |
|---|---|---|
| Main Atlas Tree | General mapping bonuses, Waystones, tablets, extra content, monsters, chests, bosses, and reward access | Unlocked points and the currently selected side of every multi-choice node |
| Mechanic tree | Rules and rewards for Expedition, Ritual, Breach, Abyss, Delirium, and other dedicated systems | Quest progress, available points, and whether the selected bonuses affect the content being run |
| Atlas Master | Additional map rules supplied by Doryani, Hilda, or Jado | The active Master and every unlocked selection, up to four after completing its questline |
| Tablets | Guaranteed or scaled content and explicit tablet modifiers | Uses remaining, acquisition cost, overlap, and whether the map can receive that content |
| Waystone | Area level, map modifiers, reward pressure, monster danger, and available revives | Every modifier, build compatibility, and expected cost per completed map |
The PoE 2 Atlas Passive Tree guide covers point acquisition and general priorities. Use that progression foundation before treating a specialised farm as complete.
Choose a Setup by Budget and Build Profile
Budget is more than the price of one tablet. It includes the Waystones consumed, currency used to roll them, replacement cost of tablets, failed maps, time spent buying inputs, and currency trapped in slow-selling rewards. Start with the cheapest setup that your build can complete consistently, then add one layer of investment at a time.
| Setup | Input level | Primary goal | Best build profile | Main risk |
|---|---|---|---|---|
| Essence and Strongbox baseline | Low | Steady crafting stock and generic liquid drops while progressing | Any reliable mapper, including slower or defensive builds | Over-rolling Waystones before sustain and defence are stable |
| Expedition and Grand Expedition | Medium to very high | Verisium, Runic rewards, Logbook progression, and broad trade value | Strong area damage, control, recovery, and dangerous rare handling | Runic combinations or Grand Expedition modifiers exceeding the build |
| Ritual Omens and Audience | Low to high | Omens, Uniques, and progress toward repeatable Ritual encounters | Builds that survive enclosed fights and repeated boss pressure | Bad reward decisions, deferred value, or a failed late altar |
| Breach and Genesis Tree | Medium | Hiveblood, Wombgifts, splinters, Catalysts, jewellery, or currency crafts | Fast clear, movement, sustained recovery, and wide coverage | Failing the Breach speed check or consuming materials on the wrong branch |
| Abyss rare-monster farming | Low to high | Abyss chests, rare monsters, Omens, Depths, and boss rewards | High clear with dependable single-target damage for Depths | Stacked rare modifiers, Rogue Exiles, and expensive jackpot assumptions |
| Delirium rush | Medium to high | Liquid Emotions, encounter rewards, and Delirium progression | Very fast builds that deal damage while moving | Fog timeout, 100% delirious bosses, visual load, and failed reward depth |
If the immediate goal is assisted map completion or a controlled farming batch, a PoE 2 hourly farming service can be assigned a specific target. Results from assisted or piloted play must not be presented as the character owner's personal profit benchmark.
Use a Shared Core Before Specialising
All six setups need the same foundation: sustainable access to maps, enough completed Fortress objectives to unlock useful main-tree points, a build-safe Waystone policy, and a loot filter that does not hide the chosen mechanic's inputs or outputs. A farm that repeatedly consumes its last usable Waystones is not sustainable even if one map produces an exceptional drop.
- Complete Fortress maps and obtain the main Atlas points available at the character's current stage.
- Prioritise Waystone sustain and map-boss Waystone quantity until the usable pool grows across a full test batch.
- Unlock the tablet functions required by the intended mechanic before buying premium tablets.
- Take accessible generic rewards such as Essences, Strongboxes, chests, and rare-monster bonuses that do not add unacceptable map time.
- Add explicit-modifier, rarity, rare-monster, or boss scaling only after the build clears those maps with a low failure rate.
- Check every multi-choice node and active Master before opening the first Waystone of a new batch.
Masters are a separate customisation layer rather than permanent replacements for the main tree. The PoE 2 Masters of the Atlas guide explains Doryani, Hilda, and Jado. Doryani can provide safety or Waystone scaling, Hilda can increase pressure around rares and bosses, and Jado can support Strongboxes, tablet effects, Verisium outcomes, or exceptional-item goals.
Explore services related to this guide, selected from our Path of Exile 2 catalog.
View All Path of Exile 2 Services

Low-Budget Essence and Strongbox Setup
This is the safest starting configuration among the specialised paths compared here because it does not depend on a costly mechanic key, a fully unlocked specialised tree, or a jackpot. Its purpose is to finish Atlas objectives, build a Waystone reserve, collect Essences for crafting or bulk sale, and add Strongbox value without turning every map into a long encounter chain.
| Component | Low-budget choice | Upgrade condition |
|---|---|---|
| Main-tree priority | Waystone sustain, practical tablet access, Essence frequency or quality, and nearby Strongbox value | Add rare-monster and explicit-modifier scaling after the build survives the same Waystone tier reliably |
| Master | Doryani safety, including an additional revival when available, or Jado for Strongbox-focused maps | Move to reward-heavy options only when deaths no longer affect completion rate |
| Waystones | Identified Rare Waystones with every modifier checked | Increase modifier count and effect only when net profit per completed map improves |
| Tablets | No tablet or one inexpensive relevant tablet | Buy a batch only after the base mechanic produces enough sellable volume |
| Liquidation | Bulk Essences, raw currency, useful Waystones, and clearly priced items | Tighten the loot filter when low-value pickups reduce maps per hour |
Do not spend several premium currency items forcing an early Waystone into a theoretical maximum. Use an Orb of Alchemy only when the resulting Rare Waystone can be inspected and run safely. Players who specifically need additional rolling stock can review the PoE 2 Orb of Alchemy option, but its full acquisition cost belongs in the farming ledger.
The main risk is false efficiency. A cheap setup becomes expensive when the player picks up every Rare item, opens low-value interactions far from the route, or runs modifiers that cause repeated deaths. Measure attempted maps, successful completions, and sellable output, not the number of labels seen on the ground.
Expedition and Grand Expedition Setup
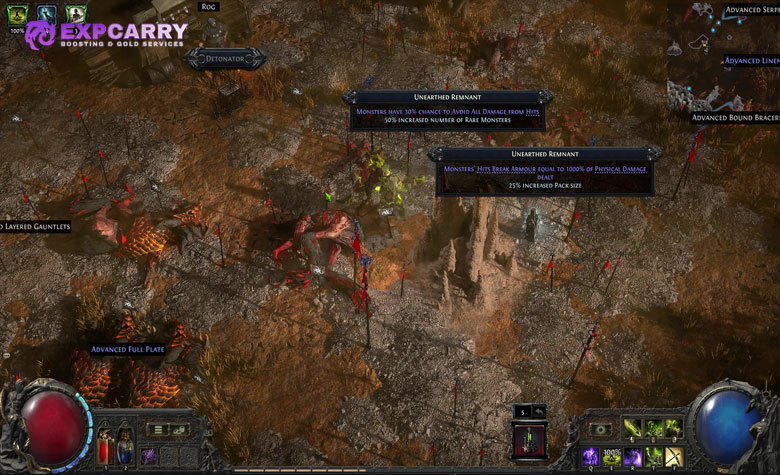
Expedition is the most patch-sensitive setup in this guide. The official 0.5.4 notes added a dedicated Expedition Atlas Passive Tree, Liquid Verisium, and new Grand Expedition modifiers. Any tree copied from before 0.5.4 is incomplete for the current system.
This setup assumes the Runes of Aldur league or another realm where Expedition is enabled. Expedition was temporarily disabled in the permanent Standard leagues during its Runes of Aldur integration, so Standard players must confirm availability in the live client before purchasing inputs.
Begin with regular Expeditions and Ruins of Kingsmarch progression. Prioritise reliable Runic Monster access, useful Remnant outcomes, Verisium generation, and the Expedition-tree choices that match the reward being tested. Feeling Lucky? is relevant only when the plan includes purchasing Liquid Verisium from Farrow. It is not a universal profit node if that currency is never bought or used.
Jado is the natural high-investment candidate when Verisium and tablets drive the strategy. Eastern Knowledge can improve Verisium Remnant outcomes, while Partial Translations can double explicit tablet effects when it triggers. Doryani is a safer alternative when an additional revival or controlled Waystone modifier scaling prevents lost maps. Hilda can support a rare Expedition Monster plan, but the additional danger must be included in the completion-rate test.
| Expedition tier | Inputs | Target outputs | Failure rule |
|---|---|---|---|
| Entry maps | Normal mapping route, affordable Waystones, and free or cheap Expedition access | Verisium, Remnant rewards, Runic crafting materials, and progression | Skip a Runic combination that disables the build's damage or recovery |
| Focused maps | Relevant tablets, stronger Rare Waystones, and unlocked Expedition points | More Runic monsters, better Remnant chains, Liquid Verisium access, and Logbook value | Reduce modifier pressure if deaths erase the gain from extra monsters |
| Grand Expedition | Logbooks, prepared ocean routes, premium tablets or Waystones where applicable, and a fully tested character | Large reward baskets, bosses, Aldur progression, and high-value Runic outcomes | Do not open a premium route until every area modifier and build-disabling condition is checked |
The official 0.5.3 reward changes made Waystone Tier part of Grand Expedition investment: the maximum number of Remnants rises with tier and reaches its highest level in Tier 15 or higher maps. The same patch improved Grand Expedition chests. Raise the tier only when the character's completion rate preserves the extra reward.
Ritual Omens and Audience Setup
Ritual supports both a low-input regional loop and a high-investment reward loop. Maps around Caer Tarth contain Ritual encounters and advance the Ritual tree, so early testing does not require buying the most expensive tablets. The current endgame reward screen offers Uniques or Omens, while unspent Tribute can be sacrificed toward an Audience with the King.
Allocate the Ritual tree around one measurable goal. A direct-reward setup prioritises Tribute efficiency, reward quality, and enough control to identify valuable Omens or Uniques. An Audience setup deliberately preserves Tribute after checking the reward screen. Mixing both goals without recording the sacrificed value makes the farm impossible to evaluate.
- Use maps whose layout lets the build locate and complete every altar efficiently.
- Check dangerous map modifiers before adding repeated Ritual monsters and bosses.
- Set a current minimum value for taking, deferring, or ignoring a reward.
- Record Tribute spent on rewards separately from Tribute sacrificed for Audience progress.
- Do not count an Audience, Head of the King, or later boss reward until the relevant item or encounter is actually obtained.
Ritual's largest risk is decision error rather than entry cost. Deferring a valuable item changes future reward decisions and Tribute use, while rerolling without a price threshold can convert a steady session into an untracked gamble. The combat risk also rises sharply when a confined altar revives dangerous rares or the map boss under several Waystone modifiers.
Breach and Genesis Tree Setup
Breach farming converts clear speed into Hiveblood, Wombgifts, Breachstone Splinters, and access to the Genesis Tree. Maps around the Monastery of the Keepers provide a deterministic starting region. Filling a Breach's progress bar to 100% starts a Stabilised Breach, while the separate Breach progression leads into Domains and bosses.
Use the Breach tree to support encounter duration, monster access, Stabilised Breach consistency, and the output actually being farmed. The character must kill while moving; a build that pauses for long single-target rotations can lose the expanding encounter before theoretical reward bonuses matter.
The Genesis Tree is a second economic decision. Wombgifts and Hiveblood can be converted into jewellery, Catalysts, or currency depending on its allocation. The PoE 2 Genesis Tree guide explains those branches. Select the target before consuming a valuable gift, and do not value a random jewellery craft at an optimistic listing price.
| Breach plan | Best use | Accounting method | Risk |
|---|---|---|---|
| Material sale | The market pays well for unprocessed inputs | Value only quantities that can be sold at a reachable bulk price | Low crafting variance but dependent on market depth |
| Currency branch | The player wants a broad, liquid output basket | Subtract every Wombgift and Hiveblood consumed | Tree setup and material opportunity cost |
| Jewellery branch | The item level and current affix demand justify targeted bases | Use realised sales or a conservative liquidation discount | High variance and slow sale of imperfect items |
| Domain and boss progression | The build can handle the encounter and values its exclusive rewards | Separate access-item value from the eventual boss-drop sample | Single-target failure after investing mapping time |
If a Genesis jewellery result needs additional crafting currency, a PoE 2 Exalted Orb option is an external input source. Record every acquired Orb at full cost and keep it outside the Breach reward basket.
Abyss Rare-Monster Setup
Abyss has a broad budget range. Large Atlas cracks provide Abyssal Depths with a boss, and the reworked tree can scale chests, Depths, monster rewards, and Abyss-specific progression. The final Large Abyssal Trove in a Depth now guarantees Desecrated Currency, while specific Depth bosses also guarantee it. The 0.5.4 patch fixed Atlas passives that were not applying to Abyssal Depths, so pre-fix test results are not a clean current benchmark.
The budget version runs accessible cracks, takes chest and Depths value, and avoids premium rare-monster tablets. The advanced version layers additional Rare Monsters or Rogue Exiles, suitable main-tree bonuses, and a Master configuration that rewards the same density. Hilda's Breeding Season can support a rare-monster test, while Doryani's Evolutionary Pressure trades greater monster danger for rarity and modifier pressure on heavily modified Waystones.
Abyss output must be separated into three baskets: repeatable chest and monster loot, Abyss-specific boss or invitation rewards, and jackpots such as exceptional jewels or scarce Omens. Only the first basket establishes the floor. Reporting one rare jewel across a short sample as normal hourly income is not a valid methodology.
- Use a build with enough area damage to clear moving encounters and enough boss damage for Depths.
- Check the area level when targeting rewards that cannot appear in lower-level content.
- Add Rogue Exiles only after the build can defeat them reliably without losing the map.
- Track time spent inside Depths separately to learn whether the boss route improves or lowers net profit per hour.
- Reduce tablet and monster-effect investment when the death rate rises faster than reward value.
Delirium Rush Setup
Delirium rewards a different profile: fast navigation, damage while moving, and the ability to finish the map boss under heavy pressure. Maps around the Withered Willow provide deterministic Delirium access. The fog direction points toward the boss, the progress bar shows depth and remaining time, and map bosses reached in Delirium are always 100% delirious.
A low-input rush uses a clean layout, the regional access, and a Delirium tree focused on reachable rewards rather than maximum danger. A high-input version adds Delirium tablets, stronger Waystones, and deeper encounter targets only after the build consistently reaches and kills the boss. Since 0.5.3, stacking Delirium tablets also scales the fog's effect, so additional tablets increase risk as well as investment. Liquid Emotions form the main liquid basket, while Potent or Ancient outcomes and later Simulacrum progress belong in separate categories.
| Build check | Pass condition | Failure signal |
|---|---|---|
| Movement | The character advances through the map while clearing | Frequent backtracking or stopping causes the fog bar to expire |
| Area damage | Normal and Rare packs die without long stationary rotations | Reward encounters are reached but cannot be completed in time |
| Boss damage | The 100% delirious boss dies with a safe time and revive margin | Most of the session value is lost at the final encounter |
| Recovery and visibility | The build survives layered ground effects and maintains control | Deaths rise when the screen becomes dense or performance drops |
Do not combine a speed-tested Delirium rush with every slow side mechanic available. Each stop changes the route, fog depth, rewards, and maps per hour. Add one secondary mechanic only if a new sample proves that its net value exceeds the time it consumes.
Roll Tablets and Waystones by Investment Tier
Tablets and Waystones are the operating cost of a focused setup. Since 0.5, tablets of the same type can be used together, but the exact result depends on the mechanic. Empty tablet slots support random non-tablet content, while filling every slot concentrates the map around the inserted tablets and removes that random-content allowance.
| Investment tier | Waystone policy | Tablet policy | Required evidence before upgrading |
|---|---|---|---|
| Baseline | Identified Rare Waystones with safe modifiers and stable sustain | Empty slots or one cheap relevant tablet | At least one complete batch with low failures and positive net return |
| Focused | More explicit modifiers when the build handles their combined effect | One or two relevant tablets with enough uses to lower cost per map | Mechanic output sells or solves an SSF bottleneck consistently |
| High investment | High modifier count, corruption, irradiation, or other reward scaling only when tested | Stacked same-type or complementary tablets with valuable explicit effects | The measured marginal output is greater than input, death, and preparation costs |
Never price only the tablet name. Divide purchase value by realistic remaining uses, then add the Waystone and rolling currency consumed. Compare the added input cost with the marginal output from the same batch rather than assuming that a more expensive tablet or Waystone is automatically more efficient.
Separate Trade Profit from SSF Utility
Trade and Solo Self-Found use the same maps but answer different questions. Trade asks how much value can be liquidated after costs. SSF asks how reliably the setup supplies a current character or crafting bottleneck. Applying a trade price to an SSF-only stockpile produces a number that the character cannot spend.
| Output | Trade valuation | SSF valuation |
|---|---|---|
| Raw currency | Current executable exchange or bulk value | Number of useful crafting attempts enabled |
| Essences, Omens, Runes, and Catalysts | Bulk price after expected sale discount | Progress toward a named item or build requirement |
| Waystones and tablets | Sale value or avoided replacement cost, but not both | Additional sustainable maps in the chosen progression route |
| Rare equipment | Realised sale or conservative price based on comparable sold demand | Immediate upgrade, crafting base, or no current utility |
| Boss access | Current sale value when the access item is tradeable; otherwise measured boss return | Quest progress, unique target, or crafting unlock |
For SSF, score each batch by targets obtained, maps sustained, and useful crafts enabled. For Trade, use net liquidation value. Players comparing farming time with direct currency acquisition can review a PoE 2 Divine Orb option, but purchased currency is not farming output and cannot be added to the reward side of a test.
Measure Net Profit Without False Precision
A credible profit test defines the batch before the first map. Use the same setup for at least 30 attempted maps, or a larger sample when the strategy depends on rare outcomes. Record total elapsed time from purchasing and rolling inputs through stashing and pricing the final rewards. The PoE 2 farming profit methodology provides a broader live-economy framework.
| Metric | Formula | Rule |
|---|---|---|
| Gross liquid value | Raw currency plus executable bulk value plus discounted sellable items | Exclude vendor trash and unsupported asking prices |
| Consumed input cost | Waystones plus tablets plus rolling currency plus keys plus paid rerolls | Use replacement value even when an input was self-farmed |
| Net batch profit | Gross liquid value minus consumed input cost | Keep unsold speculative rares outside the realised result |
| Completion rate | Completed maps divided by attempted maps | Count every failed or abandoned map in the denominator |
| Net profit per attempted map | Net batch profit divided by attempted maps | Do not hide failed inputs behind the number of successful clears |
| Net profit per hour | Net batch profit divided by total elapsed hours | Include buying, rolling, deaths, stashing, and normal liquidation work |
| Baseline result | Net profit without separately labelled jackpots | Use this figure to compare repeatability |
Run a Controlled Atlas Test
Check the official PoE 2 patch notes before buying a large input batch. Re-test after any patch that changes the mechanic tree, rewards, tablet behaviour, monsters, bosses, or item availability. A technical hotfix with no Atlas changes does not invalidate the sample, but a reward or bug-fix patch can. Previously attempted maps carry an item-reward penalty, so reattempts must be logged separately instead of being treated as fresh inputs.
- Record the patch, league, character, setup, active Master, mechanic-tree choices, and loot-filter version.
- Buy or reserve inputs for the entire sample and record their replacement value before running.
- Use one Waystone and tablet policy without silently upgrading the strongest maps mid-test.
- Track attempted maps, completed maps, deaths, abandoned encounters, and total elapsed time.
- Sort outputs into liquid, bulk, slow-sale, SSF-only, and jackpot categories.
- Price the basket at executable values and apply a discount to items that have not sold.
- Calculate baseline and jackpot-inclusive results separately.
- Change only one major variable for the next batch, such as Master, tablet tier, or Waystone pressure.
A 30-map sample can compare stable farms, but it is not enough to prove the expected frequency of extremely rare rewards. For a jackpot strategy, publish the sample size and confidence limitation instead of converting one exceptional event into a permanent hourly claim.
Avoid Common Atlas Farming Errors
Most failed setups are not caused by one bad passive. They fail because the tree, build, inputs, market, and measurement rules target different outcomes.
- Copying a pre-0.5.4 Expedition tree that does not include the current dedicated Expedition system.
- Calling the main Atlas Tree a permanent exclusive build even though it can eventually be fully allocated.
- Buying premium tablets before unlocking the points, Master options, or character power that make them effective.
- Filling every tablet slot while expecting random non-tablet content to remain unchanged.
- Stacking monster effectiveness, rare monsters, bosses, and difficult Waystone modifiers beyond the build's tested limit.
- Combining Delirium speed farming with several slow mechanics and ignoring the lost maps per hour.
- Valuing unsold Rare items at optimistic listing prices.
- Counting self-farmed Waystones, tablets, or keys as free inputs.
- Removing failed maps and deaths from the time or cost calculation.
- Comparing a short jackpot sample with a long baseline sample.
- Using Trade prices to claim SSF profit that cannot be liquidated.
- Changing the tree, Master, tablets, map tier, and loot filter in the middle of one test.
Final Verdict
Of the options in this guide, the low-budget Essence and Strongbox setup is the safest starting point because it builds sustain and produces usable crafting stock without expensive access. Expedition has extensive high-investment scaling after its 0.5.4 tree update, but it also exposes the character to dangerous Runic and Grand Expedition combinations. Ritual offers controlled Omens, Uniques, and Audience progress; Breach converts clear speed into Genesis Tree materials; Abyss rewards rare-monster and Depths capability; Delirium rewards movement and damage uptime.
Choose the setup your character can complete, not the one with the largest creator headline. Unlock the shared core, specialise one mechanic, match the Master and tablets to that mechanic, test a fixed batch, subtract every input, and separate repeatable returns from jackpots. That process produces a defensible Atlas currency strategy even when market prices or the next patch change which mechanic ranks first.