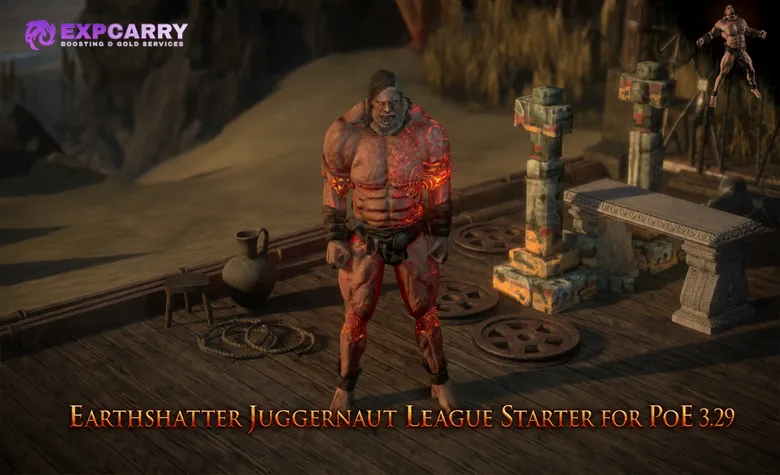
This PoE 3.29 Earthshatter Juggernaut is a physical two-handed Slam build designed for campaign progression, early Maps, and steady endgame upgrades. Earthshatter creates ground spikes that are detonated with Warcries, while Juggernaut supplies Endurance Charges, Armour, stun protection, and reliable movement. The build needs no mandatory Unique Item to begin, making it suitable for a fresh economy and SSF progression.
The core play pattern is deliberate rather than automatic: prepare exerted attacks with Seismic Cry and Intimidating Cry, use Earthshatter to create spikes, then Warcry again to detonate them. A strong weapon matters more than most individual damage upgrades, so the guide prioritizes a clear path from cheap campaign weapons to a high physical DPS endgame rare.
Pre-release notice: This guide was verified on July 21, 2026, before the scheduled Path of Exile 3.29 launch on July 24, 2026. The 3.29 patch notes do not announce direct changes to Earthshatter, Juggernaut, or the core Warcries used here. The setup is based on current 3.28 mechanics plus confirmed 3.29 item and crafting changes, but final performance must be checked after the league is live.
PoE 3.29 Earthshatter Juggernaut Build Overview
The following overview shows the intended league-start version of the build, its damage type, required weapon, expected content, and core combat mechanic.
| Category | Build Plan |
|---|---|
| Class | Marauder |
| Ascendancy | Juggernaut |
| Main Skill | Earthshatter |
| Damage Type | Physical hit damage |
| Weapon | Two-handed axe or two-handed mace |
| Key Mechanic | Exerted Earthshatter attacks followed by Warcry spike detonations |
| League Start Budget | Self-found or cheaply crafted rare equipment with no required Unique Item |
| Primary Content | Campaign, Atlas progression, general mapping, and planned boss encounters |
| Play Style | Active Slam and Warcry rotation with high physical durability |
The build is evaluated as a defensive league-start plan rather than a confirmed 3.29 damage ranking. It has inexpensive entry requirements and clear weapon upgrades, but it uses more buttons than a one-skill mapper.
Earthshatter Build Strengths and Weaknesses
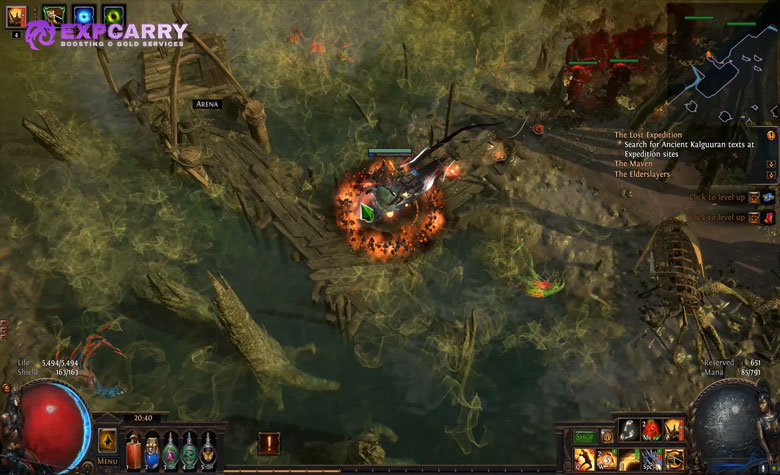
Earthshatter Juggernaut combines accessible rare equipment with strong physical defenses, but its performance depends on weapon upgrades and correct Warcry timing. Review both sides before choosing it as a league starter.
Strengths
- No mandatory Unique Items are required for the campaign or early Maps.
- Earthshatter is available to Marauder after The Siren's Cadence in Act 1.
- Juggernaut provides dependable Endurance Charge generation and Armour scaling.
- Spike explosions allow several parts of one attack to damage a large target.
- Warcries provide offense, recovery, Armour, movement, and charge generation.
- Rare two-handed weapons create a straightforward upgrade path.
- Resolute Technique removes accuracy problems during league-start progression.
Weaknesses
- The build requires a repeated attack and Warcry sequence.
- Damage drops sharply when the weapon falls behind the current area level.
- Fast or small bosses may move away from several spike explosions.
- Slow attacks can feel clumsy until the weapon and tree provide enough Attack Speed.
- Armour is strongest against smaller physical hits and does not solve every damage type.
- Physical Reflect Maps are unsafe for the standard pure physical setup.
- The 3.29 version cannot be considered live-tested before the league launches.
Players comparing several starters can use the PoE 3.29 build overview to check which play style better matches their goals.
How the Earthshatter Spike Mechanic Works
Earthshatter slams the ground and sends out five fissures at the gem's base value. Each fissure deals area damage and creates a spike at the end of its path. The regular gem can keep a maximum of 15 spikes on the ground, so three attacks can reach the unmodified limit. At 20% quality, the gem gains one additional fissure and three additional maximum spikes.
A Warcry used near the spikes causes them to shatter and deal area damage. Another Slam Attack, such as Leap Slam, can also trigger nearby spikes. Earthshatter does not need to hit an enemy to create the spike field, which allows the player to prepare damage before a stationary boss becomes targetable.
The initial fissure and the spike explosions are separate parts of Earthshatter. One target can only be hit by one fissure from each attack, but several spikes created by that attack may hit the same target. Large enemies and careful positioning usually produce better overlap than small enemies moving across an open arena.
Bonuses applied to the Earthshatter attack also affect the spikes it creates. If the attack is exerted, receives a Ruthless Blow, or is Ancestrally Boosted by Fist of War Support, the associated spike damage benefits as well. This is why the build prepares the Slam before placing spikes rather than treating the explosion as an unrelated secondary skill.
Explore services related to this guide, selected from our Path of Exile catalog.
View All Path of Exile Services


Correct Earthshatter and Warcry Rotation
The easiest rhythm is to alternate Earthshatter attacks and manual Warcries. The attack places spikes; the next Warcry detonates them while preparing later attacks. Do not press every Warcry at once without checking whether spikes are already present or whether the next attacks still have exertions available.
Mapping Rotation
- Use Seismic Cry before the first dangerous pack to exert the next six Melee Slam Attacks.
- Use Earthshatter once or twice to create spikes through the pack.
- Use Intimidating Cry near the spikes to detonate them and exert the next two Melee Attacks for Double Damage.
- Use the next one or two Earthshatter attacks while the Intimidating Cry exertions are active.
- Use Seismic Cry when it returns, or Enduring Cry when charges or recovery are needed, to trigger the next explosion.
- Repeat the attack, Warcry, attack pattern instead of waiting at the spike limit.
Normal packs rarely require three full Earthshatter attacks. One Slam followed by a Warcry is faster and safer because the explosion happens before enemies surround the character.
Boss Rotation
- Use Enduring Cry near the boss to gain Endurance Charges and its Life Regeneration buff.
- Use Seismic Cry to prepare six Earthshatter Slams with increased Area of Effect.
- Use Intimidating Cry last before attacking so the boss is Intimidated and the next two Melee Attacks deal Double Damage.
- Use Earthshatter twice while both Warcries are exerting the attacks.
- Use an available Warcry near the spikes to detonate them and begin preparing the next sequence.
- Add a third Earthshatter before detonation only when the boss is stationary and the extra setup time is safe.
Intimidating Cry only keeps an enemy Intimidated while its taunt remains on that enemy. A later Warcry can replace the taunt, so use Intimidating Cry last when the debuff matters. The Double Damage property already attached to an exerted Earthshatter attack still belongs to that attack and its spikes.
Enduring Cry detonates Earthshatter spikes but does not exert attacks. It therefore does not add another exerting Warcry to Overexertion Support. Its role is charge generation, Life Regeneration, emergency recovery, and an additional manual detonation.
Using Leap Slam to Detonate Spikes
Leap Slam is another Slam Attack and can shatter nearby Earthshatter spikes when it lands. This is useful when every Warcry is on cooldown, but Leap Slam may consume an available exertion. Avoid inserting it between Intimidating Cry and the two Earthshatter attacks intended to receive Double Damage.
Earthshatter Gem Links
The main links scale physical hit damage, exerted attacks, and the spikes created by Earthshatter. Start with the available campaign supports and add the complete setup as more sockets become available.
Campaign Three-Link
Earthshatter - Ruthless Support - Melee Physical Damage Support
Before every gem is available, use the best physical attack support offered by current quest rewards. Do not keep a weak support only because it appears in an outdated build.
Campaign and Early Map Four-Link
Earthshatter - Melee Physical Damage Support - Brutality Support - Fist of War Support
Brutality commits the skill to physical damage and prevents it from dealing elemental or chaos damage. Fist of War rewards deliberate Slam timing with a powerful periodic Ancestral Boost.
Recommended Five-Link
Earthshatter - Melee Physical Damage Support - Brutality Support - Fist of War Support - Overexertion Support
Overexertion scales an attack for each Warcry currently exerting it. It is particularly effective when Seismic Cry and Intimidating Cry overlap on the same Earthshatter use.
Recommended Six-Link
Earthshatter - Melee Physical Damage Support - Brutality Support - Fist of War Support - Overexertion Support - Pulverise Support
Pulverise is the general area and damage option. Ruthless Support can be tested for repeated boss attacks, Fortify Support is useful when Fortification is not reliably obtained elsewhere, and Impale Support is appropriate only when the passive tree needs its Impale chance. Confirm the best sixth link in Path of Building with the actual weapon and tree.
Warcry, Movement, Aura, and Utility Gems
The remaining sockets support manual Warcries, mobility, Armour, Mana reservation, and boss utility. Keep the core rotation functional before adding optional gems.
Manual Warcries
Seismic Cry - Intimidating Cry - Enduring Cry - Urgent Orders Support
Urgent Orders makes the manual Warcries faster, reducing the time spent standing still. Seismic Cry exerts six Melee Slam Attacks and gives them more Area of Effect. Intimidating Cry exerts two Melee Attacks for Double Damage. Enduring Cry supplies Endurance Charges and Life Regeneration but does not exert.
Movement Setup
Leap Slam - Faster Attacks Support - Lifetap Support
Lifetap keeps movement available when most Mana is reserved. Add a fourth support only when sockets allow and it does not interfere with the main links.
Defensive Setup
Molten Shell - Cast when Damage Taken Support
Keep the gem levels compatible if Molten Shell is triggered through Cast when Damage Taken. A manually activated Molten Shell can be stronger when timed for a dangerous boss attack.
Auras and Reservation
- Determination: The first defensive priority when more Armour is needed.
- Pride: The main offensive aura for sustained physical damage against nearby enemies.
- Blood and Sand: A low-reservation option that can switch between area and close-range damage.
- War Banner: A situational physical attack tool that can be placed after building Valour.
- Precision: Usually unnecessary after taking Resolute Technique.
Do not activate Pride and Determination together until the character has enough Mana Reservation Efficiency and enough unreserved Mana to attack and Warcry. During leveling, use one major aura with Blood and Sand, then add the second major aura when the reservation setup is ready.
Additional Utility
- Vulnerability: Apply manually to bosses until another reliable application method is available.
- Blood Rage: Optional Attack Speed and Frenzy Charge generation for mapping, with a Life degeneration cost.
- Flame Golem or Stone Golem: Optional temporary utility if sockets are available, but not a core requirement.
Players who want a prepared version with the required links and progression structure can compare the available PoE League Starter builds. The Earthshatter version should still be expected to use several active Warcry buttons.
Should You Use Autoexertion
Autoexertion repeatedly triggers supported Warcries when their cooldowns finish. Triggered Warcries can still exert attacks and detonate Earthshatter spikes, but they do not grant their normal buffs or charges to the player or allies. Each linked Warcry also adds a Mana reservation cost.
Manual Warcries are recommended for the basic league starter because they preserve Seismic Cry's Armour buff, Intimidating Cry's movement buff, and Enduring Cry's charges and regeneration. Manual timing also prevents an automatic trigger from detonating the spike field earlier than intended.
An automated setup can make mapping smoother after the character has sufficient reservation efficiency. Do not link Enduring Cry to Autoexertion if the build relies on it for Endurance Charges or Life Regeneration. Test one automated exerting Warcry before reserving Mana for several.
Juggernaut Ascendancy Order
The recommended Ascendancy order first establishes Endurance Charges, then adds damage and Area of Effect before completing the main movement and Armour defenses.
- Unflinching: Take this after the Normal Labyrinth for an additional maximum Endurance Charge and dependable charge generation when fighting.
- Unyielding: Take this after the Cruel Labyrinth for increased damage, Area of Effect, and stun support per Endurance Charge.
- Unstoppable: Take this after the Merciless Labyrinth so Action Speed and Movement Speed cannot be reduced below their base values and the character cannot be stunned.
- Unbreakable: Take this after the Eternal Labyrinth to double the Armour supplied by the equipped Body Armour and apply part of Armour to Chaos Damage taken from Hits.
Hardcore players or anyone struggling with slows and stuns can take Unstoppable before Unyielding. Unbreakable becomes more valuable after equipping a Body Armour with a strong Armour base. Unrelenting is an alternative final defensive option when the completed character values additional damage reduction per Endurance Charge more than Unbreakable.
Passive Skill Tree Priorities
The exact tree depends on whether the final weapon is an axe or mace. Do not allocate deep weapon-specific clusters until the weapon direction is confirmed.
- Take nearby Maximum Life, Physical Damage, and two-handed attack nodes while leveling.
- Path to Resolute Technique so attacks cannot be evaded and stop investing in Critical Strike stats.
- Add Warcry Speed, Warcry Cooldown Recovery, and Exerted Attack bonuses.
- Take the appropriate axe or mace clusters after obtaining a weapon worth keeping.
- Add Endurance Charges and charge-related bonuses that fit the route.
- Secure a reliable source of Fortification through passives or Fortify Support.
- Add Mana Leech or Mana Cost Efficiency when attack costs become uncomfortable.
- Finish with Armour, Maximum Life, recovery, Jewel Sockets, and damage nodes that provide measurable value.
Resolute Technique prevents Critical Strikes, so Critical Strike Chance and Critical Strike Multiplier are wasted after taking it. A critical Earthshatter version requires different equipment, accuracy, passives, and possibly a different Ascendancy plan; it is not the league-start baseline described here.
Bandits and Pantheon
Bandits: Kill Alira, Kraityn, and Oak for Eramir's Passive Skill Point in the final setup. Helping Oak for +40 Maximum Life is a reasonable temporary campaign option, but changing the reward later costs a Book of Reform.
Major Pantheon: Use Soul of Lunaris for general mapping or Soul of Solaris when concentrating on isolated bosses. Upgrade the selected Pantheon powers when the required Divine Vessels become available.
Minor Pantheon: Choose according to the current weakness. Soul of Shakari helps against poison, Soul of Ralakesh helps with Bleeding while moving and Corrupted Blood after its upgrade, and Soul of Abberath is useful when burning ground is a recurring problem.
Earthshatter Leveling Guide
Leveling focuses on obtaining Earthshatter early, maintaining a current two-handed weapon, and introducing the Warcry rotation one skill at a time.
Act 1
Begin with Ground Slam and the strongest two-handed weapon available. Take Intimidating Cry and Enduring Cry after The Caged Brute. Earthshatter becomes available to Marauder after The Siren's Cadence at level 12, allowing the main play style to begin before Act 2.
Use Earthshatter with Ruthless Support and another physical attack support. Upgrade the weapon whenever a new base produces clearly higher physical damage. A current-level rare weapon is usually more important than a minor passive tree damage node.
Act 2
Add Seismic Cry after Intruders in Black. Begin practicing the full sequence: Seismic Cry, Earthshatter, Intimidating Cry to explode, then Earthshatter with the new exertions. Take Resolute Technique when misses become noticeable.
Use a defensive or offensive reservation skill according to available Mana. Do not reserve so much Mana that Earthshatter or a Warcry fails during a boss sequence.
Acts 3 and 4
Complete the Normal Labyrinth and take Unflinching. Add Determination or Pride when available, then obtain Fist of War Support, Brutality Support, and Overexertion Support as the campaign unlocks them. A four-link is sufficient to finish the campaign when the weapon is updated regularly.
Acts 5 to 10
Repair elemental resistances after each campaign penalty. Complete the Cruel and Merciless Labyrinths when the character can do so safely. Aim for Life, resistances, Armour, movement speed on boots, and a stronger two-handed rare rather than buying low-impact damage Uniques.
Before fighting Act 10 Kitava, prepare equipment that can recover the final resistance penalty. Enter Maps with capped elemental resistances, dependable Life recovery, corrected flasks, and enough unreserved Mana for the entire Warcry rotation.
Additional campaign and progression explanations are available in the Path of Exile guides and services section.
Choosing a Two-Handed Axe or Mace
Both weapon types can complete the build, but they offer different passive routes and combat feel. Compare physical DPS, Attack Speed, and available crafting options rather than selecting a weapon only by its base type.
| Weapon Type | Advantages | Tradeoffs |
|---|---|---|
| Two-Handed Axe | Strong physical DPS bases, efficient physical clusters, and a simple rare weapon path | Does not gain the mace-specific Shockwave option or the same stun focus |
| Two-Handed Mace | Large individual hits, stun support, and access to mace-specific interactions | Very slow bases can make the Warcry rotation feel unresponsive |
| Staff | Earthshatter compatibility and access to block-related options | Requires a different passive route and is not the simplest physical league-start plan |
Axe is the default recommendation when the goal is an uncomplicated high physical DPS rare. Mace is appropriate when a good base or cheap rare is available and the player wants stronger stun interactions. The correct choice is the weapon that produces better real damage and acceptable Attack Speed after accounting for the passive tree.
Do not compare weapons by the large damage number per hit alone. Physical DPS combines the weapon's average physical damage with its Attacks per Second. Earthshatter benefits from large hits and Fist of War, but a weapon that is excessively slow can leave the character trapped in attack animations.
Weapon Progression from Campaign to Endgame
The weapon is the build's most important damage slot. Progress from frequently replaced campaign rares to a permanent crafted base instead of waiting for one specific Unique Item.
Campaign Weapon
Pick up current-level two-handed axe and mace bases and compare their physical damage. Use an Essence of Contempt on a useful base for added physical damage, or use the physical weapon vendor recipe with a Rustic Sash and Blacksmith's Whetstone when appropriate. Add a missing physical damage or Attack Speed modifier at the Crafting Bench.
Replace the weapon whenever the new option produces a meaningful increase. Socket colors and links should not force the build to keep a weak weapon because Earthshatter can be linked in the Body Armour while weapons are replaced.
Early Map Weapon
Buy or craft a rare two-handed weapon with strong local increased Physical Damage, added Physical Damage, and usable Attack Speed. Ignore Elemental Damage prefixes in the Brutality version because the supported Earthshatter cannot deal that damage.
A modest rare with all relevant modifiers is better than a visually impressive Unique that conflicts with the gem links. Check the weapon in Path of Building before spending most of the league-start currency.
Midgame Weapon
Choose the permanent axe or mace path and obtain a suitable high-level base. A fractured physical modifier can make further crafting easier. Essence crafting can supply one reliable modifier while the player searches for another physical prefix and Attack Speed.
The Crafting Bench should fill the strongest missing local modifier that the item can still accept. Before crafting, verify whether the open slot is a prefix or suffix and whether another modifier blocks the desired craft.
Endgame Weapon
The endgame target is a rare two-handed axe or mace with multiple strong local physical prefixes and an Attack Speed suffix. Further upgrades can include a better base, higher modifier tiers, useful quality, or additional relevant suffixes. Compare every candidate in Path of Building because the value of Attack Speed changes with the rest of the setup.
Tidebreaker requires special caution in 3.29. It no longer provides its old increased Physical Damage per Endurance Charge. The new version can generate Brine Charges that grant Physical Damage as extra Cold and Lightning Damage. Brutality prevents the linked Earthshatter from dealing those elemental damage types, so Tidebreaker is not a direct endgame upgrade for this pure physical six-link. Using it requires a separate non-Brutality conversion or extra-elemental plan.
League Starter Gear Priorities
Every non-weapon slot should first solve Life, elemental resistances, attributes, Armour, and Mana requirements. Offensive modifiers become valuable only after these essentials are covered.
| Slot | Early Priorities | Later Priorities |
|---|---|---|
| Helmet | Life, elemental resistances, Armour | Higher Life, Chaos Resistance, useful influence or implicit modifiers |
| Body Armour | Links, Life, resistances, Armour | High base Armour because Unbreakable doubles Armour from this slot |
| Gloves | Life, resistances, attributes | Attack Speed, physical attack modifiers, improved defenses |
| Boots | Movement Speed, Life, resistances | Higher Movement Speed, Chaos Resistance, ailment-related utility |
| Amulet | Life, attributes, resistances | Physical damage, useful anointment, stronger attributes and Life |
| Rings | Life, resistances, attributes, Mana support | Physical damage to attacks, Chaos Resistance, Mana Cost Efficiency |
| Belt | Life, resistances, Strength | Armour, Flask modifiers, higher Life, Chaos Resistance |
| Jewels | Life and one relevant damage modifier | Life with Attack Speed, two-handed damage, area damage, or Warcry utility |
Path of Exile 3.29 removes the old reduced Mana Cost craft from Rings and replaces it with Mana and increased Mana Cost Efficiency options. Do not follow an older gearing list that tells the build to craft the removed flat reduction modifier. Mana Leech, Cost Efficiency, reservation planning, and a temporary Mana Flask are the current solutions.
Flask Setup
Flasks supply movement, recovery, Armour, Chaos Resistance, and temporary ailment protection. Update their modifiers as the character moves from the campaign into Maps.
- Divine Life Flask: Use an instant or fast recovery setup with Bleeding protection when needed.
- Quicksilver Flask: Improves campaign and mapping speed.
- Granite Flask: Adds a large amount of Armour that scales with Armour increases.
- Basalt Flask: Adds another physical defensive layer when available and appropriate.
- Flexible Utility Flask: Use an Amethyst Flask for Chaos Resistance, a Silver Flask for speed, or another defensive flask based on current needs.
Distribute protection from Bleeding, Corrupted Blood, Freeze, Shock, Poison, and Curses across flasks, Pantheon powers, equipment, and passive choices. Do not assume Juggernaut's slow and stun protection grants complete ailment immunity.
How Juggernaut Defenses Work
Unflinching generates Endurance Charges and raises their maximum. Each charge provides physical and elemental damage reduction, while Unyielding converts the charge count into damage, Area of Effect, and stun support. Enduring Cry restores charges during controlled moments and grants Life Regeneration based on nearby enemy power.
Unbreakable doubles the Armour supplied by the equipped Body Armour. This makes a high-Armour rare Body Armour especially valuable. It also allows part of Armour to mitigate Chaos Damage from Hits, but it does not protect against Chaos Damage over Time in the same way.
Unstoppable prevents Action Speed and Movement Speed from being reduced below base values and prevents stuns. It does not make the character immune to every slowing ground effect or all debuffs; it limits how far the relevant speeds can be reduced.
A complete defensive setup still needs capped elemental resistances, a meaningful Life pool, Life recovery, Fortification, upgraded flasks, and a plan for elemental and chaos damage. Armour should be paired with Endurance Charges and other mitigation rather than treated as universal damage immunity.
Recommended Upgrade Order in Maps
Early currency should remove progression blockers before it is spent on luxury damage. Follow this order while adjusting individual steps to the character's current weaknesses.
- Cap Fire, Cold, and Lightning Resistances after the Act 10 penalty.
- Replace the campaign weapon with a stronger physical rare.
- Obtain a five-link for Earthshatter.
- Fix Life, Movement Speed, flask suffixes, and Mana sustain.
- Complete missing Labyrinths and unlock the planned Ascendancy passives.
- Upgrade to a six-link without sacrificing the defensive quality of every other slot.
- Choose the permanent axe or mace passive route.
- Improve Chaos Resistance and protection from dangerous ailments.
- Craft or purchase the endgame physical weapon.
- Add optional damage items only after the character can survive their drawbacks.
Earthshatter damage usually responds strongly to weapon improvements. If mapping damage feels low, check the weapon, support links, active exertions, and spike detonations before replacing several defensive items.
Players who want the weapon, passive tree, gems, and defenses adjusted around a specific budget can use a custom Path of Exile build. The final plan should preserve the core Earthshatter rotation while solving the character's actual defensive weaknesses.
Map Mods and Content Limitations
Several Map modifiers interfere with physical damage, recovery, Armour, or the Warcry cycle. Read every Map before opening it and reroll combinations the character cannot safely handle.
- Physical Damage Reflection: Avoid this modifier unless the character has a verified way to prevent reflected physical damage.
- Cannot Leech: Dangerous when Mana or Life sustain depends on leech.
- Reduced Recovery: Weakens regeneration and other recovery, making Enduring Cry less comfortable.
- Reduced Cooldown Recovery Rate: Slows the Warcry cycle and can disrupt the normal attack sequence.
- Reduced Armour or Maximum Resistances: Can sharply lower the defenses expected from the build.
The build is comfortable in ordinary mapping but is not a one-button screen clearer. Encounters with constant forced movement can reduce spike overlap, while narrow arenas and large stationary bosses can improve it.
Common Earthshatter Build Mistakes
Most early problems come from incorrect spike timing, wasted exertions, weak weapons, or incomplete defenses rather than from Earthshatter itself.
- Using several Earthshatter attacks without detonating the spikes.
- Pressing Warcries when no spikes are nearby and wasting the detonation opportunity.
- Using Leap Slam after Intimidating Cry and consuming a valuable exertion before Earthshatter.
- Assuming Enduring Cry exerts attacks or adds damage to Overexertion Support.
- Using Intimidating Cry before another Warcry and immediately replacing its taunt.
- Keeping a low-level weapon because it has convenient sockets.
- Buying Elemental Damage on a weapon while Earthshatter is linked to Brutality.
- Equipping the reworked 3.29 Tidebreaker without removing Brutality and rebuilding around its new elemental extra damage.
- Stacking Armour while neglecting elemental resistances, Chaos Resistance, recovery, and ailments.
- Activating too many reservation skills and leaving insufficient Mana for the full rotation.
- Copying a pre-3.28 Earthshatter damage value or a pre-3.29 Ring Mana craft.
When to Invest in an Endgame Version
Invest after the player is comfortable with the attack and Warcry rotation. A more expensive weapon cannot correct missed detonations, unexerted attacks, poor positioning, or a Mana pool that cannot complete the sequence.
The first large investment should normally be a high physical DPS rare weapon or a strong six-link base, depending on which provides the larger improvement without breaking defenses. Optional damage-focused equipment should be added only after checking its self-damage, reservation, resistance, and recovery requirements.
Final Earthshatter Juggernaut Recommendations
Use a two-handed physical axe or mace, take Resolute Technique, and keep Seismic Cry, Intimidating Cry, and Enduring Cry manual while learning the build. Alternate Slams and Warcries instead of filling the entire spike limit during ordinary mapping. Against bosses, prepare Endurance Charges, stack Seismic and Intimidating exertions on the first two attacks, then detonate the spikes quickly.
Prioritize the weapon, capped resistances, Life, Armour, Fortification, and Mana sustain before optional damage upgrades. A rare physical weapon is the safest long-term goal for the Brutality version. Tidebreaker's new Brine Charge mechanic belongs to a different 3.29 setup and should not be treated as a direct upgrade here.
This build has the structure of a practical league starter, but the final 3.29 verdict depends on live testing after launch. Verify damage, Mana Cost Efficiency, item availability, and boss performance before committing expensive currency to the endgame version.