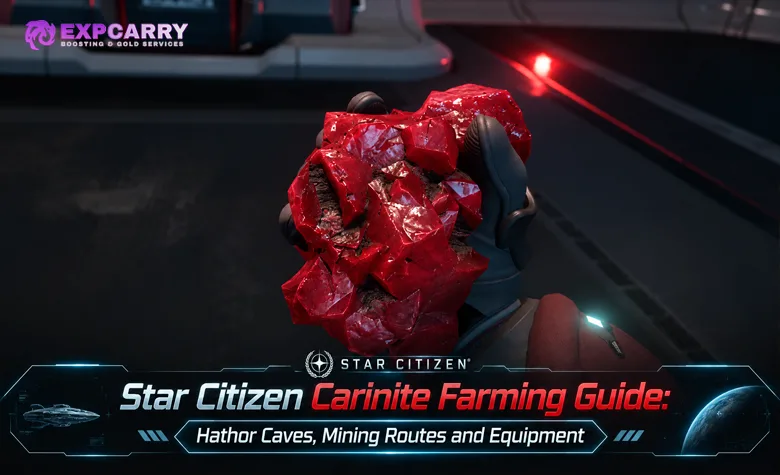
Carinite farming in Star Citizen is centered on the Hathor Align & Mine activity, where players reactivate orbital mining lasers to expose mineral caves on Daymar and Aberdeen. Finding the right moon is only the beginning: a full run involves aligning three Planetary Alignment Facilities, transporting industrial batteries to an Orbital Laser Platform, firing the laser, navigating a hostile cave, and extracting the minerals before the opening collapses. Smaller Carinite deposits can be mined with FPS equipment, while larger compatible deposits require specialized ground mining equipment. Regular Carinite is a core reward associated with this activity, whereas Carinite (Pure) is exceptionally rare. This guide focuses on the complete farming route, cave navigation, mining preparation, and safe extraction in Star Citizen Alpha 4.10.3 LIVE, rather than repeating the material descriptions and Wikelo recipes covered elsewhere.
Short answer: Go to an available Hathor installation on Daymar or Aberdeen, activate its three PAFs, transport three GP-XP Industrial Batteries to the matching OLP, and fire the laser to expose the mining cave. Bring FPS mining equipment, a tractor beam, environmental protection, weapons, and enough storage for the extracted Carinite. Once inside, clear enemies, search the mineral pockets systematically, and leave well before the cave's approximately two-hour collapse window.
Best Carinite Farming Route in Star Citizen
The primary documented source of Carinite is the resource caves opened through Hathor's Align & Mine activity. Four Orbital Laser Platforms are associated with this system: two above Daymar and two above Aberdeen. Each platform has three corresponding ground alignment facilities that must be activated before its laser can be fired. The activity was introduced in Alpha 4.1 and remains part of the Persistent Universe rather than being a limited-time event.
The fastest practical route is not necessarily the closest installation. An already opened cave can save the entire alignment process, while an unused platform may require several trips between ground facilities and orbit. Before starting a full activation, inspect the available Hathor sites and determine whether another player has already opened a usable entrance. This can save considerable preparation time, although open sites are also more likely to attract other miners and hostile players.
| Moon | Orbital Laser Platform | Associated facilities | Main preparation concern |
|---|---|---|---|
| Daymar | Attritus OLP | Attritus PAF-I, PAF-II and PAF-III | Surface travel, enemy encounters and transporting batteries |
| Daymar | Lamina OLP | Lamina PAF-I, PAF-II and PAF-III | Completing the alignment sequence and securing the mining area |
| Aberdeen | Ruptura OLP | Ruptura PAF-I, PAF-II and PAF-III | Extreme surface heat in addition to the normal Hathor hazards |
| Aberdeen | Vivere OLP | Vivere PAF-I, PAF-II and PAF-III | Environmental protection, security and cave extraction |
All four are associated with the same general Align & Mine progression. Current records do not establish that one of these caves consistently produces better Carinite quality or more Pure Carinite than the others. Choose based on which installation is available, how much of its activation has already been completed, your environmental equipment, and the presence of other players. The broader Star Citizen Mining Guide covers general laser mechanics and equipment categories; the route here is specific to Hathor's cave-opening procedure.
Daymar vs. Aberdeen: Which Should You Farm?
Daymar is a reasonable first choice for players learning the Hathor activity because it avoids Aberdeen's extreme heat. Its Attritus and Lamina installations still require the same alignment, transport and laser activation work, and the sites remain exposed to enemy activity. A successful Daymar run therefore depends more on preparation and efficient execution than on the moon being an easier source of minerals.
Aberdeen offers access to the same resource category through Ruptura and Vivere, but environmental protection becomes more important. A Pembroke heat-resistant suit is a sensible choice when operating outside the ship or entering and leaving exposed facilities. Do not arrive wearing ordinary armor and assume that the short distance between your ship and a building makes temperature exposure irrelevant. If the available cave is already open, Aberdeen may still be the faster choice despite the additional equipment requirement.
What to Bring Before Farming Carinite
A Carinite run combines FPS combat, industrial equipment handling, spacecraft travel, and mining. Forgetting a tractor beam or appropriate mining attachment can prevent progress even when your weapons and ship are sufficient. Prepare for the full activity before leaving a station, not only for the moment when you finally reach a mineral deposit.
| Equipment | Purpose | Priority |
|---|---|---|
| Pyro RYT Multi-Tool with OreBit Mining Attachment | Fractures compatible small FPS mineral deposits | Essential for hand mining |
| Tractor beam, preferably MaxLift for heavy objects | Moves industrial batteries and assists with equipment handling | Essential for a full laser activation |
| Flight-ready ship with usable cargo access | Moves players, equipment and batteries between the PAFs and OLP | Essential for a full run |
| Backpack and suitable storage | Carries recovered minerals and separates valuable items | Essential |
| Armor and helmet suited to the environment | Provides protection and supports safe surface operations | Essential |
| FPS weapon, ammunition and medical supplies | Handles Nine Tails, Juvenile Valakkar and possible player threats | Strongly recommended |
| Argo ATLS GEO or Greycat ROC | Works on larger compatible deposits where handheld mining is insufficient | Optional, depending on targets and access |
| Additional crew member or escort | Provides security while another player mines or handles objectives | Recommended for contested sites |
A basic FPS mining loadout is enough to work suitable small deposits after the cave has been opened, but it does not replace the tools needed to activate an untouched Hathor complex. Conversely, bringing a Prospector or MOLE does not automatically make the process easier. These ships specialize in larger mining operations, while Hathor requires substantial ground interaction and has minerals accessible through FPS and compatible ground-vehicle systems.
Best Ship and Crew Setup for the Hathor Route
Choose a ship that can move between ground installations, reach the OLP, and carry the required industrial batteries. Practical cargo access and survivability matter more than installing a powerful ship-mining laser. A small ship may be convenient for reconnaissance, but a larger cargo-capable ship can simplify the physical battery transport stage. If you bring an ATLS GEO or ROC, confirm that the vehicle fits the transport ship and can be deployed at the intended location.
A two- or three-player group can divide the work more efficiently. One player can operate consoles and handle alignment, another can protect the facility and move equipment, and a third can help with transport or later mining. For a larger group, keeping a dedicated lookout near the cave entrance can protect miners who are occupied with fragile rocks and inventory management. Solo completion is possible according to community reports, but the full sequence leaves you vulnerable whenever you are inside a building, handling a battery, or operating a mining tool.
Medical Supplies, Storage and Environmental Protection
Bring enough ammunition and treatment supplies to survive several encounters rather than only one firefight. Alignment activity can attract Juvenile Valakkar, while hostile NPCs and other players may be present at the facilities. A ship with medical facilities provides additional recovery options, but it does not guarantee that lost minerals can be recovered after a death or ship destruction.
Make storage part of the plan before the laser fires. Hand-mined fragments must be collected and carried physically, and large quantities can quickly exhaust available inventory capacity. Separate materials intended for a contract from other gems so you do not accidentally deliver or discard a rare variant. The current official Alpha 4.7 patch notes also confirm the importance of resource quality for supported crafting systems, making it worthwhile to inspect quality information instead of treating all pieces of a mineral as identical.
How to Open a Hathor Carinite Cave
Opening the cave is the most involved part of a complete Carinite farming run. Each orbital laser depends on three ground alignment facilities and the industrial batteries recovered from them. Once the dishes have been aligned and the batteries delivered, players can prime and activate the laser to expose the mineral cave below. The following sequence follows the documented Align & Mine mechanics rather than assuming the cave is permanently accessible.
Step 1: Align the Three Planetary Alignment Facilities
Travel to PAF-I, PAF-II and PAF-III associated with your chosen OLP. Each facility has a large communications dish and nearby buildings containing the controls and access items. To align one dish, you must retrieve three Alignment Blades from secured areas and install them in the alignment console. The blades are associated with security rooms reached through the appropriate PAF Security Keycards. These red keycards can be printed at the facility's terminals after obtaining the required blue Maintenance Keycards from its outer buildings.
Begin by checking the site's outer buildings for blue Maintenance Keycards, then use the corresponding terminals to obtain the red Security Keycards needed for the secured rooms. Recover the three Alignment Blades, then install them one at a time in the dish console. The dish moves after each blade is inserted, and that movement must finish before the next blade can be accepted. Juvenile Valakkar can emerge while alignment is in progress, so keep weapons and medical supplies accessible rather than assuming the console area is safe.
Once all three blades have been inserted and the dish is aligned, the industrial battery garage opens. Retrieve the GP-XP Industrial Battery and secure it for transport. Repeat the process at the other two PAFs until you have three batteries corresponding to the same OLP. Do not mix objectives from different platform groups; the laser activation process depends on the facilities associated with the platform you intend to use.
Step 2: Transport the Three GP-XP Industrial Batteries
The GP-XP batteries are large physical objects, making transport one of the practical bottlenecks of the route. Move each battery with suitable tractor equipment and load it into your transport ship. A MaxLift tractor beam is useful here because it is designed for handling larger objects than an ordinary lightweight tool. Secure the batteries before taking off and avoid leaving them exposed at a facility where another player can interfere with the operation.
Fly to the Orbital Laser Platform belonging to the three completed PAFs. Locate the battery receptacles near the landing pads and install the batteries in their designated positions. The OLP needs all three before its laser can be primed. If a battery cannot be placed, verify its location and the receptacle's current status before assuming that another ground facility must be completed.
Step 3: Prime the Orbital Laser and Obtain the Keycard
After installing all three batteries, enter the main OLP building and find the laser priming controls. The system provides status indicators showing the alignment and battery states, which are useful for identifying an incomplete prerequisite. When the requirements have been met, activate the priming button and obtain the Laser Activation Keycard from the printer beside it.
Keep the keycard accessible because the laser is not fired directly from the OLP's priming console. The activation step takes place at a separate ground bunker near the laser's target area. This separation matters when organizing a group: having one player remain on the platform after priming does not replace the need for someone to reach the firing controls on the surface.
Step 4: Find the Activation Bunker and Fire the Laser
Travel toward the laser impact area on the moon's surface and locate the activation bunker. Community guides place this bunker roughly one kilometer from the intended impact point, although the precise approach varies with the installation. Search the surrounding terrain for the bunker entrance instead of expecting the firing controls to be located directly beneath the orbital platform.
Inside the bunker, insert the Laser Activation Keycard into the designated slot and operate the firing controls. The laser strikes the surface and exposes the entrance to the mineral cave. Wait until the firing sequence has finished before approaching the impact area; the mining entrance becomes usable after the laser stops. The overall activity and its associated cave system were introduced through the official Alpha 4.1 release and remain part of the current mining loop.
Do not immediately drive every available vehicle into the opening. Confirm that the cave is accessible, check for enemies or other players, and identify a safe place to leave your ship and equipment. If the complex was already partially activated when you arrived, inspect the platform and cave state before repeating the full sequence; player activity can leave stages completed or the entrance already open.
Explore services related to this guide, selected from our Star Citizen catalog.
View All Star Citizen Services


How to Navigate Hathor Caves and Find Carinite Deposits
Once the cave opens, the challenge changes from operating facilities to finding mineral deposits and bringing them back out safely. Hathor caves contain several mineral types, hostile creatures and enough space to make careless navigation costly. There is no verified universal left-turn or right-turn route that applies to every Hathor cave in Alpha 4.10.3, so the most reliable method is to explore one connected section at a time while maintaining a clear route to the entrance.
The cave's entrance is also your critical exit point. The documented Align & Mine activity has an approximately two-hour opening period before the cave collapses and closes. Treat this as a hard operational risk, not as a suggestion to spend the entire duration mining. The Star Citizen Wiki Align & Mine reference documents the opening and collapse behavior, although actual server timing and glitches can affect an individual run.
Checkpoint 1: Secure the Entrance and Establish a Return Route
Begin by inspecting the cave entrance and the first accessible chamber before moving deeper. Confirm where your ship, vehicle and any stored equipment are positioned, then select a recognizable landmark near the exit. If other players are present, determine whether the area is contested before committing valuable equipment to the interior. An entrance guard is especially useful because miners concentrating on their lasers may not notice someone entering behind them.
For solo runs, take a screenshot of the entrance and your first major junction. If you encounter a split in the tunnel, decide which branch to explore first and remember the direction needed to return. The aim is to create a sequence of recognizable checkpoints, not to memorize the entire cave from one pass. Avoid dropping valuable equipment as makeshift markers because another player may move it or the object may not remain where you left it.
Checkpoint 2: Search One Branch at a Time
At the first junction, inspect one branch fully before exploring another. Search the walls and accessible floor areas for mineral deposits, then return to the junction rather than continuing blindly through multiple turns. This prevents a common mistake: finding several small nodes quickly, moving deeper while focused on mining, and losing track of the path back to the exit.
When you reach another branching chamber, treat it as a new checkpoint. Look backward to identify the passage you arrived through and choose a visible landmark that will still be recognizable on your return. If you travel with another miner, agree on a simple communication system for cleared branches so the group does not waste time revisiting the same empty chambers. No current authoritative route map establishes fixed Carinite spawns at specific turns, so follow the mineral nodes actually present rather than an invented room-by-room route.
Checkpoint 3: Identify Carinite Before Mining
Hathor caves can contain Carinite alongside Saldynium, Jaclium, Aphorite, Dolivine, Hadanite, Janalite and occasionally Carinite (Pure). Do not assume that every red-looking mineral is the one your contract requires. Approach deposits and inspect the mining information provided by the appropriate tool or vehicle. Where possible, confirm the material's identity before investing time in a difficult fracture, then inspect the collected item in inventory.
Regular Carinite and Carinite (Pure) are distinct resources. A high quality rating on ordinary Carinite does not automatically convert it into the separate Pure variant. For a contract that specifies Pure Carinite, collect and retain the correctly named item rather than using the ordinary mineral as a substitute. CIG's Alpha 4.2.1 patch notes classify regular Carinite as a core resource associated with Align & Mine and Pure Carinite as a rare content item. The same patch also introduced a chance for small Pure Carinite FPS mineables in Hathor caves.
Checkpoint 4: Check Secondary Chambers Without Losing the Exit
After clearing the first accessible deposits, investigate secondary chambers if the cave remains safe and there is enough time to return. Examine side passages rather than only following the most obvious central path; valuable mineables may be found beyond the first area other players enter. However, a deeper chamber does not automatically have a better Pure Carinite probability, and there is no confirmed rule that the rarest mineral always appears at the farthest point.
Do not chase a single promising-looking rock through several unfamiliar branches while carrying a full backpack. Return toward the main route when storage is nearly full, when enemy pressure increases, or when you can no longer confidently identify the path back. An efficient collection run is one that delivers the resources safely, not one that searches every corner while the cave timer expires.
Checkpoint 5: Retrace Your Route and Exit Early
Return through the same recognizable junctions used during exploration. Check your inventory before leaving the final mining chamber, then proceed back to the established entrance landmark. If the group has a dedicated transport player, coordinate collection and unloading before everyone becomes occupied with another mining pocket. Avoid taking an unfamiliar shortcut on the way out simply because it appears to point toward the surface.
Plan to begin withdrawing well before the approximate two-hour limit, leaving a substantial buffer for carrying resources, navigating turns, dealing with enemies and reaching the ship. Community reports describe mineral respawns during the cave's lifetime, but their timings are inconsistent and should not be treated as a guaranteed 30- or 45-minute rotation. If the cave has already been open for an unknown period, prioritize a short, profitable extraction over waiting for another wave of deposits.
How to Mine Carinite with FPS Tools and Ground Vehicles
Carinite is not one universal rock size that requires the same equipment everywhere. Current resource records distinguish small FPS mineables from larger ground-vehicle deposits, including Carinite entries associated with Hathor caves. This makes preparation important: carrying only a handheld tool limits which deposits you can work, while bringing a large mining vehicle may be unnecessary when the available nodes are small enough to mine on foot.
Hand Mining with a Pyro RYT Multi-Tool
For a small FPS-compatible deposit, equip the Pyro RYT Multi-Tool with an OreBit Mining Attachment and aim at the rock. Inspect the mining interface, then increase laser power gradually until the charge enters the optimal range. Keep the charge inside the safe band until the deposit fractures. If the energy rises too quickly, reduce power rather than allowing an uncontrolled overcharge.
Once the rock breaks, collect the resulting mineral pieces and check their identity in your inventory. Make sure you have enough space to retain the recovered Carinite before moving to another deposit. Small Pure Carinite nodes are particularly important to inspect because the rare variant must be stored as the correct item. If your tool cannot affect a deposit, do not keep increasing power indefinitely; first check whether it belongs to a larger mining category.
Using an ATLS GEO or ROC in Hathor Caves
Some Carinite deposits are associated with ground-vehicle mining, and suitable nodes may be more efficiently handled with an Argo ATLS GEO or Greycat ROC. The ATLS GEO is useful where maneuverability and its mining equipment match the deposit, while a ROC can handle compatible vehicle-scale rocks. Actual accessibility still depends on the cave's geometry and whether the vehicle can reach the relevant chamber safely.
Use the equipment that corresponds to the deposit shown by the current mining interface. Do not assume that a ROC can mine every small FPS crystal or that an FPS Multi-Tool can fracture every larger rock. Likewise, a Prospector or MOLE is not required merely because the mineral is valuable. The Star Citizen Mining Guide explains the wider differences between FPS, vehicle and ship mining, while Hathor farming requires matching those methods to the deposits you actually encounter.
Carinite Quality vs. Carinite (Pure)
Alpha 4.7 introduced material quality ratings that can affect supported crafting outcomes. This creates two different characteristics to examine when collecting Carinite: the item variant and its quality rating. An ordinary Carinite item with a high Q-value remains ordinary Carinite, while Carinite (Pure) has its own identity and specific contract uses.
Before depositing minerals into storage, separate regular Carinite by the quality you intend to retain and keep Pure Carinite distinct. Avoid mixing resource requirements when a contract names a particular variant or quality threshold. For players comparing different ways to obtain the exact material needed, the existing Carinite (Pure) acquisition page deals with the separate rare item; it should not be confused with the ordinary mineral collected during a typical farming run.
How to Farm Carinite Efficiently
The most efficient strategy depends on whether you need a small contract quantity, a large supply of ordinary Carinite, or a rare Pure deposit. A solo miner entering an already opened cave has a very different workload from a group activating a completely inactive Hathor complex. Evaluate the preparation time, expected extraction, danger, and return trip together rather than measuring only the minutes spent using the mining laser.
Solo Shortcut: Check for an Already Open Cave
For solo players, the biggest potential shortcut is finding a cave another player has opened. Community reports confirm that players sometimes arrive while the activation process is already complete and can proceed to mining without performing every PAF step themselves. This is opportunistic rather than guaranteed, and the remaining open time may be unknown.
Approach an existing cave as a contested location. Another player or group may still be mining inside, protecting the entrance, or waiting for new mineral nodes. Check for ships, weapons fire and obvious signs of activity before landing, and avoid exposing your cargo ship unnecessarily. If the site is heavily occupied, moving to another Hathor location may be safer than losing equipment during an attempted shortcut.
Group Farming: Split Activation, Security and Extraction
A coordinated group can reduce downtime by assigning separate roles. Have one player handle alignment interfaces, another move batteries and equipment, and a third maintain security during exposed stages. Once the laser fires, miners can search assigned branches while a lookout watches the entrance and a transporter handles recovered minerals. This avoids forcing every participant to stop mining whenever a battery, backpack or security problem appears.
Do not send the entire group into the deepest chamber at once if no one can monitor the exit. Hathor is a PvPvE activity, and losing the ship or being attacked while carrying minerals can wipe out the value of a successful activation. Player accounts in the official RSI Community Hub describe the importance of securing the cave entrance and moving valuable minerals away before continuing to mine. These are player experiences, not guarantees of how every server will behave.
Do Carinite Rocks Respawn Inside an Open Cave?
Several players have reported mineral nodes reappearing during the cave's open period, with suggested intervals ranging from around half an hour to approximately 45 minutes. Those numbers come from community observations, and server performance or future adjustments may affect the behavior. No dependable current official schedule guarantees a fresh batch of Carinite at a particular minute.
If the entrance is secure and plenty of time remains, checking previously mined chambers again may be worthwhile. However, waiting for a possible respawn should not take priority over extracting a full backpack or preserving a rare Pure deposit. The safer approach is to complete a profitable collection cycle, unload the minerals, and only then consider returning while the cave is still open.
How to Extract and Store Carinite Safely
Carinite farming is not complete when a rock fractures. The recovered material must survive the return journey and remain available for the intended contract or crafting objective. That makes the final extraction stage one of the most important parts of the route, particularly at a cave that other players can enter.
For a short solo run, keep recovered minerals in your backpack until you can safely transfer them to suitable storage. For a group run, organize periodic unloading instead of allowing every miner to carry their entire haul for the full cave duration. Confirm that the storage method supports the physical items being collected, and keep high-value Pure Carinite separate from ordinary quantities so it cannot be consumed in the wrong contract.
Reserve Contract Materials Before Converting Carinite
Carinite can be needed directly for Rayari and Wikelo objectives, so consuming every collected unit in a Favor conversion can create another farming problem later. For example, the Rayari research contracts guide documents mineral requirements involving Carinite, Saldynium and Jaclium. These can be gathered during the same Hathor operation when the appropriate deposits are present, but the contract still requires the exact quantities and item types.
Before making a Wikelo turn-in, separate what is reserved for a specific project from what you genuinely have left over. The existing regular Carinite resource page covers direct material requirements and Favor conversion, while this guide concentrates on collecting that supply. If you are comparing several possible resource routes, the Star Citizen mining resources catalog provides the broader material categories without replacing the need to complete the Hathor mechanics yourself.
When to Stop Mining and Leave
Stop the run when storage is full, the expected profit no longer justifies the risk, the cave timer is getting close, or security has deteriorated. There is little value in staying for one more uncertain deposit if you can no longer guarantee a safe return. In contested caves, a partial but successfully extracted haul can be more valuable than an ideal inventory that is lost before reaching storage.
- Check the material names: Confirm the collected Carinite and any separate Pure Carinite.
- Review inventory capacity: Leave room for the material you intend to recover on the way out.
- Confirm the exit route: Retrace your established checkpoints rather than exploring a new tunnel.
- Watch the cave opening: Leave a safety buffer instead of using the entire approximate two-hour window.
- Secure transport: Verify the ship or vehicle is still available before committing to another mining cycle.
- Store the haul: Transfer resources to a safe destination and verify they remain available for the intended use.
Common Carinite Farming Problems and How to Fix Them
The Hathor route has several points where a missing item, failed interaction or environmental hazard can stop progress. Some reported problems are technical issues rather than mistakes in the intended sequence, so separate an unmet requirement from a facility that is not responding correctly. Do not repeatedly consume time and equipment trying to force a broken interaction if another site is available.
The PAF Console Will Not Accept an Alignment Blade
Check whether the previous dish movement has completely finished, since the documented sequence requires the dish to stop before another blade is inserted. Confirm that the blade belongs to the relevant interaction and that the correct PAF console is being used. If the security rooms are inaccessible, inspect the local keycard terminals and verify that the required access item has been obtained.
Players have reported occasional stuck keycard, blade and battery interactions at Hathor facilities. CIG also lists keycard-printer timer problems among the known issues for Alpha 4.10.3. Such failures do not establish a different intended puzzle solution. If the console remains unresponsive despite the proper prerequisites, another PAF or a different available Hathor installation may be a more efficient choice than repeatedly attempting the same broken interaction.
The Orbital Laser Is Primed but Will Not Fire
Verify that all three GP-XP batteries are installed in the matching OLP, the laser has been primed, and the Laser Activation Keycard was obtained. The firing control is in the separate ground bunker, not on the orbital platform. If the firing interface still does not respond, recheck the status indicators before attempting another activation.
Hathor has had community-reported technical issues where completed alignment or inserted keycards did not lead to successful firing. These reports should not be treated as guaranteed Alpha 4.10.3 bugs affecting every installation, but they are a reason to avoid promising that every correctly completed sequence will work flawlessly.
The Mining Laser Cannot Break a Carinite Rock
Check the deposit's mining category before changing equipment. Small FPS rocks are suitable for compatible handheld mining tools, while larger Carinite deposits may require ground-vehicle equipment. If the tool can engage the rock but progress remains difficult, inspect resistance and instability and adjust laser power carefully instead of pushing directly into the overcharge zone.
Current records confirm the existence of small FPS-mineable Carinite, including the rare Pure variant, so it would be inaccurate to describe all Carinite as impossible to mine by hand. Equally, that does not mean every Carinite rock in Hathor caves can be fractured with the basic Multi-Tool.
The Cave Is Empty, Already Open or Closing
If the cave is already open but contains few accessible minerals, another group may have mined the nearby nodes. Explore other safe chambers or consider a later return, while recognizing that community respawn estimates are not guaranteed. If the entrance is closed, determine whether the laser activation has been completed at that location rather than assuming every Hathor cave remains permanently accessible.
When the cave is approaching its collapse time, stop mining and leave immediately. The reported collapse can kill players and destroy equipment remaining inside. Do not rely on a server glitch that once kept a cave open longer than expected; the documented activity is designed around a limited opening window.
You Cannot Find Carinite (Pure)
Pure Carinite is specifically classified by CIG as a rare reward from Align & Mine. Repeated caves without a Pure deposit do not prove that the item has been removed, and there is no verified guaranteed number of runs required to find one. Continue using the correct Hathor source, inspect compatible deposits, and verify the collected item rather than estimating rarity from crystal color alone.
The separate Carinite (Pure) page covers its dedicated material requirements. Do not substitute a high-Q regular Carinite item for a contract specifically requesting Pure Carinite, and do not assume that another player's claimed drop rate applies to your current server.
Carinite Farming FAQ
These answers address additional practical questions about solo access, mining equipment and the Hathor cave system.
Can you farm Carinite without completing all three PAFs yourself?
Yes, when another player has already activated the laser and the cave remains accessible. That shortcut is opportunistic and may involve substantial PvP risk. A completely inactive complex still requires the full alignment and activation sequence.
Do you need a Prospector to mine Carinite?
No. Small Carinite deposits can be mined with suitable FPS equipment, while larger compatible deposits may use an ATLS GEO or ROC. A ship-mining vessel is not a requirement for every Hathor Carinite deposit.
How long does a Hathor cave stay open?
The documented Align & Mine cave opening lasts approximately two hours after activation. Leave with enough time to navigate out and recover your equipment; do not plan to remain until the precise final minute.
Is Pure Carinite guaranteed in every opened cave?
No. CIG classifies Pure Carinite as a rare content item, unlike ordinary Carinite, and its exact spawn probability is not publicly confirmed.
Conclusion
For reliable Carinite farming, prepare the entire Hathor activation before traveling, choose an available Daymar or Aberdeen site, and match your mining equipment to the deposits inside. Explore the cave by recognizable checkpoints, keep the entrance secure, and extract materials before the collapse window becomes a risk. Treat Pure Carinite as a rare additional find rather than the expected result of every run.