
Mining in Star Citizen is the clearest industrial career in the game once you treat it as a chain instead of a single activity. In Alpha 4.8 that chain runs through five stages: you scan for deposits, judge the rock, fracture it, extract the valuable material, and then refine or sell the output in the correct form. The loop got its biggest upgrade in years with the industrial overhaul of Alpha 4.7, which reworked the scanning interface, added material quality values that feed directly into crafting, and pushed mining from a simple money loop into the supply backbone of the whole economy. A modern mining guide has to cover more than one rock and one ship. It has to explain the three mining scales, the current ship lineup including the Drake Golem, mining heads, modules, gadgets, the best locations across Stanton, Pyro, and Nyx, and what to do with the ore once it is sitting in your hold.
The other thing beginners still get wrong is assuming the biggest mining ship is automatically the best place to start. It is not. Star Citizen mining has several entry points, and each one solves a different problem. Hand mining is the cheapest entry. The ATLS GEO and the ROC cover the surface gem game. The Drake Golem is now the true budget ship-mining starter, the Prospector remains the classic dedicated solo miner, and the MOLE is still the best production platform for a crew. The right answer depends on whether you want the lowest cost, the simplest learning curve, the best solo ship, or the highest group output. Mix those questions together and you buy the wrong tool for the job, then blame the job itself.
How Mining Works in Star Citizen
The live mining loop is built around four practical stages: prospecting, fracturing, extraction, and usually refinement. Prospecting means scanning for a deposit and checking its composition, resistance, and instability. Fracturing means pushing the rock's energy level into the green zone until it breaks, without overcharging into the red zone and turning your session into a fireball. Extraction is the collection step after the rock has been broken into workable fragments. Refinement comes after that for most ship-mined ore, because hand-mined gems are ready for trade as they are, while ship-mined material usually has to move through the refinery chain to reach its best return.
The scanning side is much stronger than it used to be. Since the Alpha 4.7 industrial update, the mining interface shows what a rock contains from roughly 3.5 kilometers away, and narrowing the scan can push that identification range out to around 15 kilometers. You no longer need to fly up to every rock just to learn it is 90 percent worthless. The scan display also shows material quality on a scale up to 999. Higher quality ore produces better crafted components, but usually comes in smaller quantities, so every serious rock is now a decision: chase the high-quality vein for crafting value, or fill the hold faster with lower-quality volume.
Three values still decide whether a rock is worth your time. Composition tells you what the rock contains and how much of it is inert filler. A useful habit is skipping rocks with more than about 30 percent inert material, because gravel takes cargo space without paying rent. Resistance tells you how hard it is to move the energy meter. Instability tells you how volatile the rock behaves while charging. A profitable miner does not mine every rock. A profitable miner filters targets before committing time and risk. That difference is one of the most important lines a beginner needs to understand. Ship ore, hand gems, and refined output all sit under Mining Resources, but they are not handled the same way.
The Three Scales of Mining: Hand, Vehicle, Ship
Star Citizen does not really have one mining profession. It has three practical scales that feed the same economy, and each scale has its own gear, targets, and profit logic.
Hand mining and the ATLS GEO
Hand mining is the cheapest possible entry. You need a Pyro RYT Multi-Tool with the OreBit Mining Attachment and a backpack so the trip is actually worth doing. The classic hand-minable gems are Aphorite, Dolivine, and Hadanite, found in caves and small surface deposits. In Alpha 4.8 the hand-scale loop got a premium target: Janalite, an extremely rare small-deposit mineral that sells for a small fortune and spawns around the microTech moons, with Clio as the community favorite. The spawn rate is low, so Janalite hunting is a patience game built on scanning surface signatures from altitude rather than wandering on foot.
The ATLS GEO exosuit is the practical upgrade over the bare multi-tool for this loop. It fractures and collects small deposits faster, carries its own cargo box, and handles cold environments like the microTech moons without constant suit anxiety. If your plan involves serious gem farming rather than an occasional cave stop, the GEO pays for itself quickly.
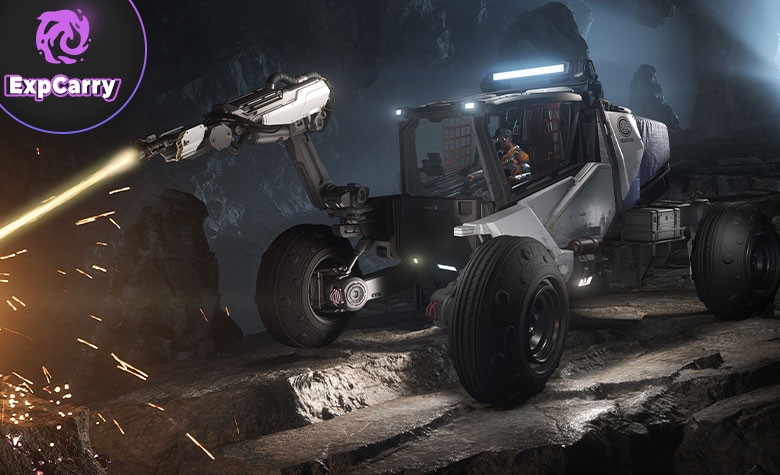
ROC mining
The Greycat ROC covers the middle scale: crystalline surface deposits that are too large for a hand tool and too small for ship lasers. You need the ROC itself plus a carrier ship with a vehicle bay, such as a Cutlass Black, Nomad, or Freelancer MAX. ROC mining is the easiest profitable vehicle route in the game because the deposits are visible, the fracturing is forgiving, and gem output sells directly without refining. It teaches surface route planning and volume discipline before you commit to the full ship-mining loop.
Ship mining
Ship mining is the serious ore game, where laser tuning, heads, modules, gadgets, refinery decisions, and cargo planning all matter. It is also where the money scales hardest, from steady industrial ore runs to Quantainium hunts that can fund a new ship in an evening or delete your current one in fifteen minutes. The ship lineup for this scale is covered next, because it changed meaningfully with the Drake Golem.
Get any Star Citizen service from ExpCarry: raids, dungeons, PvP, leveling, gold, farming, coaching, and custom orders.

Best Mining Ships in Alpha 4.8
The Drake Golem is the first true starter mining ship. It is a single-seat platform with a bespoke Pitman size 1 mining head that cannot be swapped but hits roughly as hard as the strongest size 1 head in the game, plus two module slots and full gadget compatibility. Its mining interface uses a wider green zone than most ships, which makes learning fracture control noticeably less punishing. It carries 32 SCU of ore in two detachable 16 SCU pods, matching the Prospector's capacity at a fraction of the cost. The honest tradeoff: the Golem shines on low-resistance rocks and feels stubborn against hard premium deposits, so treat it as a fast, agile specialist rather than a do-everything miner.
The MISC Prospector remains the benchmark dedicated solo miner. Its size 1 laser is fully swappable, which means you can tune it for hard rocks with a Helix, for control with an Arbor, or for balance with a Hofstede, and it carries the same 32 SCU in saddlebags. If you want one ship that teaches the entire dedicated ship-mining workflow properly and stays useful long term, the Prospector is still the safest answer.
The Argo MOLE is the group production platform. Three independent size 2 mining turrets let a crew split fracturing and extraction roles, and 24 mineral pods keep long sessions running. The Alpha 4.7 gold-standard pass finally made it feel complete: it gained internal storage, an engineering terminal, and a rear cargo elevator that fits 32 SCU of spare ore pods, so an organized crew can swap full pods for empties mid-session and extend runs before the refinery trip. The MOLE only makes sense with actual humans in the seats. Solo, it is an expensive way to do a Prospector's job worse.
Further down the road sits the RSI Arrastra, a large multicrew miner with onboard refineries that is still in development, and the wider engineering direction of the game keeps pushing large industrial ships toward real crew gameplay. For now, the practical ladder is Golem or Prospector for solo, MOLE for groups.
Mining Heads and Lasers
Mining heads are the actual tools doing the work, and choosing one is a philosophy decision, not a shopping decision. Size 1 heads fit the Prospector, size 2 heads fit the MOLE's turrets, and the Golem's Pitman is fixed. The core tradeoff across the lineup is always the same triangle: raw power to beat resistance, optimal window size to keep control easy, and extraction speed to save time after the crack.
The Helix line is the raw power answer, built for high-resistance premium rocks that weaker heads cannot move. The Hofstede line is the balanced workhorse, strong enough for most targets while keeping a workable charge window. The Arbor line trades power for a wide, forgiving optimal window, which makes it a genuinely good beginner head. The Klein and Lancet lines sit between those philosophies with their own window and instability characteristics, and are worth testing once you know which part of the process frustrates you most. In Alpha 4.8 there is one more wrinkle: the crafting system means top heads are not only bought. Building reputation with Shubin Interstellar through mining work unlocks blueprints, including the Helix, so a dedicated miner can eventually craft high-quality versions of the best head in the game instead of settling for shop stock.
Mining Modules: Tuning the Laser
Mining modules slot into the laser head and alter its behavior. Passive modules change the laser permanently while fitted. Active modules are limited-use tools you trigger during a fracture when the situation demands it. The point of the whole system is moving specific rocks from annoying or dangerous into manageable and profitable.
A few examples show the design philosophy. The Focus module reduces laser power but widens the optimal charge window, which is exactly what you want on small unstable rocks. The Rieger module boosts power for hard targets. The Rime module is safety-focused, calming resistance and danger at the cost of output. The Forel module reduces catastrophic charge buildup while improving extraction. The XTR widens the mining window but extracts slower, while the Vaux slows the charge rate but pulls valuable ore faster. On the active side, Surge pushes the rock's energy level up on demand, and Torpid temporarily suppresses a rock's worst stats so you can crack something that would otherwise be out of reach.
The practical lesson is simple. Do not buy modules because they sound technical. Buy them because they solve a problem you have already met. If you overcharge too often, take control and safety modules. If you already run a clean beam, efficiency and yield tools start to matter. The wrong module does not make you advanced. It just makes your mistake more expensive.
Mining Gadgets: Changing the Rock Itself
Where modules tune the laser, gadgets tune the rock. A mining gadget is a handheld device you physically place on a deposit, calibrate by tuning propagation, field range, and axial scatter to find the rock's resonant frequency, and then activate. The rock's stats change, you crack it, and you collect the gadget afterward for reuse. One hard rule: one gadget per rock. Stacking gadgets on the same deposit risks a catastrophic explosion, and the manufacturers warn about it for a reason.
Five gadgets cover the current lineup. The BoreMax is the crack-anything option, drastically cutting a deposit's resistance so tough rocks become breakable, at the cost of touchier charge behavior. The Stalwart also reduces resistance while boosting the optimal charge rate, a powerful combination that punishes sloppy hands with overcharge risk. The Sabir is the safety pick, stabilizing volatile deposits by damping energy fluctuations while shrinking the optimal window slightly. The OptiMax keeps valuable clusters together on shatter so less material is lost, again trading some window comfort for the yield. The Okunis rounds out the set with its own stat mix for miners who want another control profile. Gadgets are sold on refinery decks alongside modules, which is one more reason refinery stations matter even before you refine anything.
One live warning belongs in every honest guide: gadgets and refinery kiosks have both had patch-era misbehavior, from gadgets not applying stats correctly to work orders getting confused by where ore is stored. That does not make mining broken. It means you verify the effect before committing to a dangerous rock, and you check your ore storage state before blaming the refinery terminal.
Ore Types, Gem Types, and What Is Worth Mining
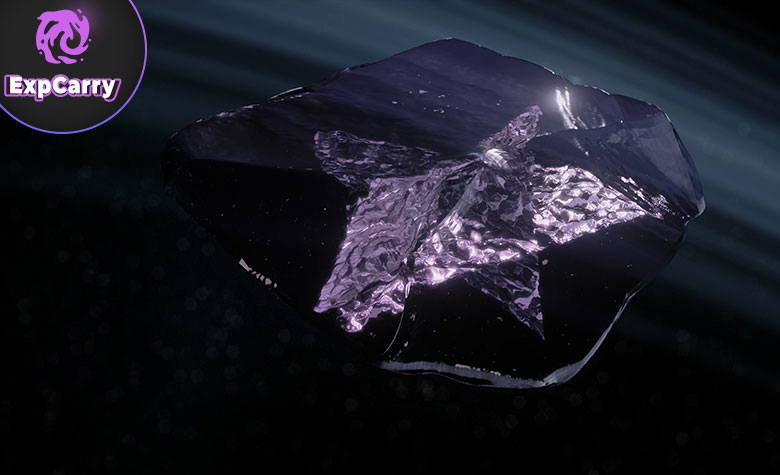
At the simplest level, minables split into hand-scale gems, vehicle-scale crystals, and ship-scale ore deposits. On the hand scale, Aphorite, Dolivine, and Hadanite remain the classic entry gems, with Janalite as the rare premium target that justifies dedicated microTech moon runs. ROC crystals occupy the middle. Ship ore is where the value bands matter more than memorizing every mineral name.
Common industrial materials include Aluminum, Copper, Corundum, Iron, Quartz, Silicon, Titanium, and Tungsten. They crack easily, sell consistently, and are the right place to build clean habits. The higher band includes Agricium, Bexalite, Borase, Gold, Diamond, Hephaestanite, Laranite, and Taranite, where percentages and quality start deciding whether a rock is a payday or a waste of laser time. At the top sits Quantainium, the quantum fuel precursor and the most profitable ore in the game. It is also volatile: once mined, it becomes increasingly unstable and detonates after roughly fifteen minutes, taking part or all of your ship with it. Quantainium runs are planned runs. You know your refinery destination before you fracture the rock, you watch the volatility panel, and you jettison before pride turns into a respawn screen.
Since the crafting economy arrived, one more rule applies across every band: quality is value. Ore near the top of the quality scale feeds better crafted components, so a smaller high-quality vein can beat a bigger low-quality rock. Which specific materials pay best shifts with patches and markets, so pair this guide with our regularly updated best ore to mine guide when planning a session.
Best Mining Locations in Stanton, Pyro, and Nyx
Stanton is still the sane home system for miners. The Aaron Halo asteroid belt between Crusader and ArcCorp is the classic deep-space ore field, famous for Quantainium and free of atmosphere, weather, and most tourists. Lyria around ArcCorp is the traditional Quantainium surface hunt. Aberdeen and the Hurston moons carry well-known ROC gem routes, Magda and Aberdeen offer easy Titanium for habit-building, Daymar remains a Hadanite staple, and the microTech moons, especially Clio, are the current Janalite grounds. Cave systems across the Stanton moons round out the hand-mining loop.
Pyro raises both numbers: richer deposits including Copper, Laranite, Borase, and the Pyro-side rare Stileron, and a real chance of meeting players whose career is taking your cargo. Mine Pyro with an exit plan, a cheap loadout you can afford to lose, or friends. Nyx is the asteroid-heavy frontier option, and its practical anchor is Levski, which serves as the system's main refinery hub. One habit beats every location list: famous spots are starting points, not guarantees. Spawns shift with patches, so scan and let the actual rock decide the run instead of a two-year-old spreadsheet.
Refining and Selling: Turning Ore Into Profit
Hand-mined gems are the simple case: they are ready to trade as they are. Ship-mined ore is only potential profit until it is processed. Refinery decks at stations across all three systems take your raw ore through a work order, and the method you choose is a straight tradeoff between speed, cost, and yield. Fast methods pay less. High-yield methods take longer and cost more. Middle-ground methods like Ferron Exchange are the usual default when you want a reasonable balance without spreadsheet worship. Refineries also have material specializations, so the same ore can refine better at one station than another.
Two practical details save real money. First, refined output does not teleport: you collect it as cargo, which usually means a second trip with a ship that has an actual cargo hold, so factor the pickup into your route. Second, the refinery decision interacts with crafting now. High-quality refined material is worth more as crafting input than as a quick sale, so a miner feeding an org's component production should refine for yield and quality, not speed. If you would rather skip the logistics tail entirely, delivered ores and gems through Mining Resources cover the same need without the refinery queue.
Best Beginner Mining Path From Start to Profit
The cleanest path up the ladder has not changed in spirit, only in hardware. Start with hand mining if your bankroll is weak: multi-tool, OreBit, backpack, cave gems. Add an ATLS GEO if surface gems become your thing, or a ROC with a carrier ship if you want the easiest profitable vehicle loop. Move into ship mining through the Drake Golem if budget matters most, or the Prospector if you want the full swappable-head experience from day one. Only after the solo loop feels natural should the MOLE enter the conversation, and only with real people to crew it.
That order works because each stage teaches the next. Hand mining teaches rock reading and patience. ROC mining teaches route planning and volume discipline. Solo ship mining teaches scanning, fracturing, extraction, refining, and the trade decision at the end. MOLE mining is the scaled-up version of skills you already own, not a giant confusing leap. Along the way, build Shubin reputation through mining work, because blueprints like the Helix are the long-term payoff that turns a casual miner into a self-sufficient one.
Final Thoughts
Star Citizen mining is not hard because the loop is confusing. It is hard because the loop has layers, and new players keep trying to jump to the final layer first. The profession works best when you know the scale you are operating at, bring tools that solve your actual problems, choose rocks by composition, resistance, instability, and quality rather than hype, and already know whether the material in your hold is getting sold, refined, or fed into crafting.
The clean version fits in one paragraph. Hand mining is the cheapest entry and the ATLS GEO is its best upgrade. The ROC is the easiest gem route. The Golem is the budget ship-mining starter, the Prospector is the safest dedicated solo benchmark, and the MOLE is the best real crew miner. Heads set your power philosophy, modules tune the laser, gadgets tune the rock, and only one gadget ever goes on one deposit. Gems sell directly, ship ore earns its real value through the refinery, quality feeds crafting, and Quantainium rewards exactly the miners who respect its timer. Learn those rules and the whole career becomes much easier to read and a lot harder to screw up in the first few hours.


