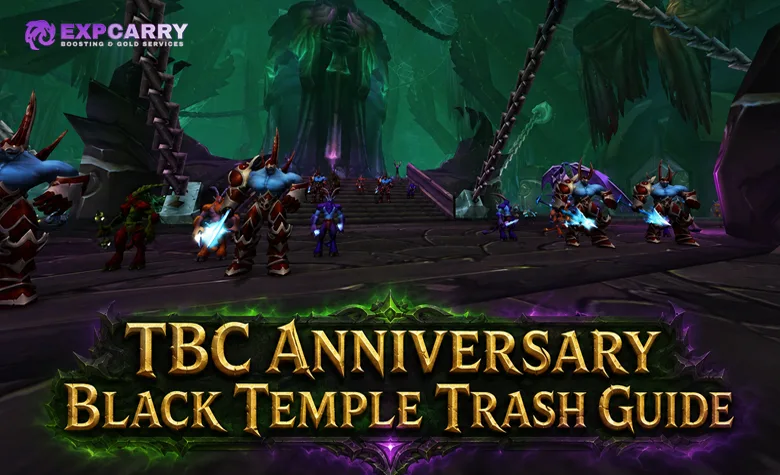
Black Temple trash is not filler between boss encounters. Several packs can silence an entire healing group, remove crowd control, heal other enemies, stun tanks, reflect spell damage, or kill players who enter a pull without full health. A reliable clear therefore depends on marking, line-of-sight pulling, interrupt assignments, dispel coverage, and a kill order understood before combat begins.
Black Temple opens in Burning Crusade Classic Anniversary on August 27, 2026. Blizzard identifies it as a level 70 raid with nine boss encounters and Ashtongue Deathsworn reputation. The official Black Temple announcement also confirms that characters must complete the attunement process before entering, so access should be checked before the raid is formed.
Black Temple Trash Route at a Glance
| Raid section | Main danger | Primary raid call |
|---|---|---|
| Karabor Sewers | Long frontal attacks, healing reduction, splash damage and reflecting turtles | Spread, face large enemies away and kill Aqueous Spawns immediately |
| Courtyard before Supremus | Patrols, airborne casters, fire zones and raid roots | Pull patrols separately and drag flying enemies down before committing melee |
| Temple entrance and Shade of Akama wing | Windfury Totems, Chain Heal, frontal silence and dangerous ranged attacks | Destroy Windfury Totems, kill Mystics first and keep Centurions facing away |
| Shadowmoon wing | Whirling Blades, long roots and Spell Absorption | Move away from blades and stop feeding spells into an active absorption shield |
| Bonechewer wing | Whirlwind, Meteor, tank stuns and damage amplification | Control Blade Furies, kill Blood Prophets and isolate Behemoths |
| Reliquary approach | Rapidly respawning ghosts | Move together and clear at predetermined AoE stops |
| Mother Shahraz approach | Shared damage, enemy healing and death-triggered Whirlwind | Separate priority enemies from the pack and move away before a Mistress of Dementia dies |
| Illidari Council approach | L5 Arcane Charge, Blizzard, poisons and Divine Shield | Keep players topped, maintain absorbs and reserve Mass Dispel |
Pulling Rules and Raid Marks
Assign one puller, one main assist and one player responsible for marks. Tanks should not compete for the same target after the pull begins. Bring ranged enemies behind a wall whenever possible, wait for every tank to establish threat, and only then release area damage. Patrol locations must be checked again after drinking or resurrecting because a safe pull can become a double pull while the raid is stationary.
| Mark | Recommended meaning | Expected action |
|---|---|---|
| Skull | Immediate kill target | All available damage follows the main assist |
| Cross | Second kill target | Off-tank holds it away from Skull when it cleaves or uses frontal attacks |
| Square | Polymorph or another assigned humanoid control | No cleave, DoT or uncontrolled AoE near the target |
| Moon | Banish, Hibernate or alternate control | The assigned player refreshes the effect before it expires |
| Triangle | Dedicated interrupt target | Assigned interrupters use a rotation instead of reacting simultaneously |
| Diamond | Off-tank or third-tank target | Keep it separated and pointed away from the raid |
A pull should not start until the raid leader has named the first target, the controlled targets, and the ability that must be stopped. The detailed Wowhead Black Temple trash reference can be used for linked spell tooltips, but assignments still need to match the group available that night.
Karabor Sewers Before High Warlord Naj'entus
The opening section tests spacing and directional control. Tanks should move large enemies away from the travel path, while ranged players keep enough distance from one another to limit Poison Spit, Geyser, Sludge Nova and Lightning Prod chains.
| Enemy | Dangerous abilities | Pull and kill priority |
|---|---|---|
| Aqueous Spawn | Sludge Nova applies stacking damage and a movement slow. Merge channels healing into an Aqueous Lord. | Kill first. Interrupt Merge if the Spawn survives long enough to begin channeling. |
| Coilskar General | Free Friend removes control effects from nearby allies. Booming Voice increases enemy attack and casting speed. | Use line of sight to separate the General from controlled enemies. Kill it early when the pull depends on crowd control. |
| Coilskar Sea-Caller | Forked Lightning hits targets in front, Hurricane creates a persistent hazard and Geyser launches clustered players. | Face it away, spread the raid and move immediately when Hurricane appears. |
| Aqueous Lord | Vile Slime reduces the target's damage and healing. Crashing Wave reaches far in front of the mob. | Tank it with its front directed into an empty part of the room. Do not stand behind the tank at range. |
| Leviathan | Poison Spit splashes around its target, Debilitating Spray reduces output and Tail Sweep knocks players behind it. | Melee attack from the side rather than stacking directly behind or in front. Ranged players remain spread. |
| Dragon Turtle | Shell Shield reflects half of incoming magic damage while active. | Hibernate it when useful. Casters stop direct damage during Shell Shield and switch targets. |
| Coilskar Harpooner | Harpooner's Mark redirects Dragon Turtles to a marked player. Spear Throw damages several targets and Hooked Net roots its victim. | Control either the Harpooner or its turtle so both mechanics are not active together. |
| Coilskar Wrangler | Lightning Prod chains between nearby players and Cleave hits targets in front. | Spread the raid and keep melee behind or beside the mob. |
Explore services related to this guide, selected from our TBC Raids catalog.
View All TBC Raids Services


Courtyard Trash Before Supremus
The courtyard contains moving patrols and flying enemies that initially remain outside melee range. Clear a stable fighting area before pulling deeper targets. The threat holder for a Dragonmaw Sky Stalker or Wind Reaver should move away from its starting position until the enemy descends far enough for tanks and melee to control it.
| Enemy | Main risk | Correct response |
|---|---|---|
| Illidari Fearbringer | Rain of Chaos creates heavy fire damage, Illidari Flames is a frontal cone and War Stomp damages and stuns nearby players. | Wait for the patrol to separate, pull one at a time and face it away. Everyone leaves Rain of Chaos immediately. |
| Dragonmaw Wind Reaver | Doom Bolt splashes around its target, Freeze roots players in a wide area and Fireball adds sustained damage. | Spread before the pull, drag the Reaver down and interrupt casted damage when possible. |
| Dragonmaw Sky Stalker | Immolation Arrow leaves burning ground beneath players. | Drag it down while the raid keeps moving out of each fire patch. |
| Dragonmaw Wyrmcaller | Cleave, additional Felfire damage and Jab knockback threaten the tank and nearby melee. | Tank with a wall or open space behind the tank and keep the raid out of the frontal arc. |
| Bonechewer Taskmaster | Fury repeatedly increases its damage. | Do not leave it alive while clearing several minor enemies if Fury is accumulating. |
| Bonechewer Worker | Throw Pick can unexpectedly stun a tank. | Healers anticipate a short tank stun. Workers can be cleaned up after higher-risk enemies are stable. |
Temple Entrance and Shade of Akama Trash
This is the most assignment-heavy part of the early raid. Separate Illidari demon packs from Ashtongue groups, watch the large aggro radius of Ashtongue Feral Spirits and wait for the Illidari Nightlord patrol to move away. Engaging the Nightlord risks a raid-wide Fear into nearby enemies.
| Enemy | Danger | Priority and control |
|---|---|---|
| Ashtongue Mystic | Chain Heal restores a large amount of enemy health. Bloodlust accelerates the pack, while Windfury and Searing Totems add dangerous pressure. | Use Skull on the Mystic. Interrupt Chain Heal, offensively dispel Bloodlust and destroy every Windfury Totem immediately. |
| Ashtongue Primalist | Multi-Shot deals high damage to several players. Wyvern Sting disables a target and Sweeping Wing Clip roots nearby players. | Usually kill after the Mystic. Keep players loosely spread and avoid crowding around it. |
| Ashtongue Stormcaller | Chain Lightning punishes stacked players while Lightning Bolt adds sustained Nature damage. | Assign an interrupt and prevent Chain Lightning whenever possible. |
| Ashtongue Feral Spirit | Charge Frenzy repeatedly sends it toward random players. Spirit Bond rapidly restores its health. | Secure threat early, remove or outdamage the healing effect and do not attempt a narrow skip around its large aggro range. |
| Illidari Centurion | Sonic Strike is a long frontal silence. Cleave adds another reason to avoid its front. | Face it completely away from the raid. A Warrior or Druid is generally safer than a Paladin tank when the silence cannot be avoided. |
| Illidari Heartseeker | Rapid Shot delivers extremely fast ranged attacks. Curse of the Bleakheart causes periodic stuns, and Skeleton Shot can create a Fallen Ally if its victim dies. | Banish the Heartseeker when needed. Stop Rapid Shot with an Incapacitate such as Gouge, Repentance or a suitable Engineering grenade, and remove the curse. |
| Illidari Defiler | Rain of Chaos creates lethal ground damage, while Fel Immolate and Curse of Agony strain healers. Banish removes a player from the fight temporarily. | Move from Rain of Chaos immediately and assign curse removal. Do not break control on another demon with careless AoE. |
| Ashtongue Battlelord | Cleave, Concussion Blow and Enrage can create a threat gap while the tank is stunned. | Face it away and give the tank time to rebuild threat after Concussion Blow. |
| Ashtongue Stalker | Blind is a removable poison, while Mind-numbing Poison slows spellcasting. | Assign poison cleansing and prioritize affected healers and casters. |
| Storm Fury | Lightning Cloud creates persistent Nature damage on the ground. | Move the pack away from the cloud instead of forcing melee to fight inside it. |
After Shade of Akama is defeated, the Ashtongue enemies in this area become friendly. Clearing Shade before spending time on optional Ashtongue groups can therefore shorten the route. If roster stability rather than strategy is preventing progression, an organized Black Temple raid run can provide a scheduled alternative without changing the tactical assignments described here.
Shadowmoon Packs Before Teron Gorefiend
Use walls and doorways to collect ranged enemies instead of fighting in the center of each room. Tanks must turn Shadowmoon Champions away, while the raid watches the ground for Whirling Blades that cannot be killed.
| Enemy | Danger | Raid response |
|---|---|---|
| Shadowmoon Champion | Chaotic Light damages players in front. Whirling Blade creates an untargetable hazard that repeatedly uses Whirlwind. | Face the Champion away and reposition the pack whenever a blade blocks the melee area. |
| Shadowmoon Houndmaster | Freezing Trap roots players in a large area, Silencing Shot disrupts casters and Wing Clip slows nearby targets. | Dispel the magic root, especially from tanks and healers who must reposition. |
| Shadowmoon Reaver | Spell Absorption consumes magical effects and gains charges. Those charges later detonate as raid damage. | Call the shield clearly. Casters stop attacking the Reaver and switch targets until Spell Absorption expires. |
| Shadowmoon Riding Hound | Carnivorous Bite applies a physical bleed. | Off-tank the hounds and stabilize their target while the dangerous humanoids are killed. |
Some groups skip the Shadowmoon Blood Mages by staying against the left side and using Mind Soothe near the end of the room. Treat this as an optional coordinated shortcut, not the default route. A failed skip usually costs more time than a controlled pull, especially when players are unfamiliar with patrol positions.
Bonechewer Packs Before Gurtogg Bloodboil
Pull Bonechewer Behemoths separately whenever the room allows it. For mixed packs, control Blade Furies before they activate Whirlwind and kill Blood Prophets before cleaning up the remaining melee enemies.
| Enemy | Danger | Kill priority |
|---|---|---|
| Bonechewer Blood Prophet | Prophecy of Blood causes its target to take increased damage. Bloodbolt adds Shadow damage and a movement slow. | Kill first after the Blade Fury is controlled. Use Incapacitate effects to stop casts because ordinary stun and interrupt plans may not work as expected. |
| Bonechewer Blade Fury | Whirlwind repeatedly damages everyone within ten yards for several seconds. | Polymorph it while the Blood Prophet dies, then kill it under chained stuns. Melee must leave immediately if Whirlwind begins. |
| Bonechewer Shield Disciple | Shield Bash and Throw Shield stun players. Shield Wall heavily reduces incoming damage, while Intervene changes its position. | Switch targets during Shield Wall and return after the protection ends. |
| Mutant War Hound | Cloud of Disease damages nearby players and remains briefly after the hound dies. | Keep it away from the main melee stack. Melee move out of the corpse area after the kill. |
| Bonechewer Brawler | Frenzy doubles its attack rate for a short period. | Use defensive cooldowns or an available Enrage removal when tank damage rises. |
| Bonechewer Behemoth | Charge and Fel Stomp stun players. Fiery Comet splashes, while Meteor divides its damage among players near the target. | Fight it alone. Maintain a controlled sharing group for Meteor without placing the entire raid in one tight Comet stack. |
| Bonechewer Combatant | Basic melee pressure without a defining special ability. | Leave for the end unless it is loose on a healer. |
Reliquary of Souls Gauntlet
The ghosts before Reliquary of Souls respawn quickly, so this section is a movement and pacing check rather than a normal sequence of isolated pulls. The raid must travel as one unit. A fast player running ahead or a healer stopping far behind can stretch the pack across the corridor and prevent tanks from collecting it.
- Restore mana and explain the stopping point before entering the gauntlet.
- Assign tanks to collect enemies from the front, middle and rear of the raid.
- Move together to the ramp or another predetermined safe AoE position.
- Use slows, stuns and defensive cooldowns only after the enemies are grouped.
- Keep healers close enough to cover the moving tanks without standing at the back of the train.
- Do not leave active totems, pets or ground effects behind where a respawn can engage them.
- Resurrect and recover at a safe endpoint instead of attempting to rebuild the raid inside the respawn path.
A less experienced group can use two or three planned AoE stops rather than copying a full corridor pull. The correct route is the one the raid can complete without separating tanks from healers.
Trash Before Mother Shahraz
The lower pleasure-den groups contain numerous minor enemies that can be controlled with tanked AoE, but the linked priestesses require attention. Pull them away from nearby packs so Holy Nova cannot repeatedly heal every enemy in the room.
| Enemy | Danger | Raid response |
|---|---|---|
| Priestess of Delight | Shared Bonds divides incoming damage with the paired Priestess of Torment. Holy Nova damages nearby players and heals nearby allies. | Move the pair away from other enemies and focus the linked targets rather than spreading damage across the full pack. |
| Priestess of Torment | Painful Rage repeatedly increases physical damage and attack speed. Shadow Word: Pain is dispellable, while Lash of Pain pressures the tank. | Kill the linked pair promptly, dispel Shadow Word: Pain and use tank cooldowns if Painful Rage stacks. |
| Mistress of Dementia | Dementia alternates between positive and negative damage effects. An Image of Dementia appears on death and briefly uses Whirlwind. | Call the final health percentage and move melee away before the Mistress dies. Do not chase the temporary image through the raid. |
| Mistress of Woe | Curse of Vitality applies sustained Shadow damage and naturally ends if its target falls below half health. | Remove the curse when practical. Do not deliberately leave a player at unsafe health merely to trigger its expiration. |
Promenade Sentinels and the Illidari Council Approach
Promenade Sentinels should be fought individually. Their normal Arcane Charges create continuous raid damage, while L5 Arcane Charge deals damage equal to the selected player's maximum health. Healers must keep the raid topped, and Priests should maintain or apply Power Word: Shield so the target has an absorb available. A player below full health without an absorb can die to the high-level charge.
| Enemy | Main ability | Priority and response |
|---|---|---|
| Promenade Sentinel | L1 Arcane Charge pressures several players. L5 Arcane Charge can consume a player's entire maximum health. | Pull one Sentinel, keep everyone at full health and maintain absorb coverage. Do not chain-pull while healers are recovering mana. |
| Illidari Battle-mage | Blizzard damages, slows and drains mana. Flamestrike creates persistent fire, while Fireball and Frostbolt add direct damage. | Use Skull. Assign a Rogue or another suitable control player to stop Blizzard with Incapacitate and move from every ground effect. |
| Illidari Archon | Holy Smite deals direct damage and Power Word: Shield absorbs incoming damage. | Interrupt Smite when available and offensively dispel the shield. |
| Illidari Assassin | Paralyzing Poison produces a long stun. Vanish is followed by Ambush, and Riposte disarms its target. | Assign poison removal and stabilize the Ambush target immediately after Vanish. |
| Illidari Blood Lord | Hammer of Justice stuns its target, Judgement of Command deals heavy Holy damage and Divine Shield grants immunity. | Dispel Hammer of Justice. Reserve a Priest's Mass Dispel for Divine Shield instead of waiting through its full duration. |
Interrupt, Dispel and Crowd Control Assignments
| Ability | Enemy | Required answer |
|---|---|---|
| Merge | Aqueous Spawn | Interrupt the channel or kill the Spawn before it completes meaningful healing |
| Chain Heal | Ashtongue Mystic | Use a normal interrupt rotation |
| Chain Lightning | Ashtongue Stormcaller | Interrupt and keep the raid spread |
| Rapid Shot | Illidari Heartseeker | Use Incapacitate such as Gouge, Repentance or an appropriate grenade |
| Blood Prophet casts | Bonechewer Blood Prophet | Use Incapacitate effects rather than relying only on conventional stuns |
| Blizzard | Illidari Battle-mage | Use an assigned Incapacitate and move out of the area immediately |
| Bloodlust | Ashtongue Mystic | Offensively dispel the magic buff from enemies |
| Divine Shield | Illidari Blood Lord | Remove with Mass Dispel |
| Freezing Trap and Hammer of Justice | Shadowmoon Houndmaster and Illidari Blood Lord | Remove the magic debuff from tanks or other critical targets |
| Blind and Paralyzing Poison | Ashtongue Stalker and Illidari Assassin | Use poison cleansing |
| Curse of the Bleakheart, Curse of Agony and Curse of Vitality | Heartseeker, Defiler and Mistress of Woe | Assign curse removal before the relevant pull begins |
| Shell Shield and Spell Absorption | Dragon Turtle and Shadowmoon Reaver | Stop attacking with spells and switch targets until the defensive effect ends |
Role Checklist for Every Pull
| Role | Pre-pull responsibility | During the pull |
|---|---|---|
| Main tank | Confirm Skull, facing direction and line-of-sight destination | Turn frontal attacks away and call unexpected stuns or threat loss |
| Off-tanks | Identify Cross, Diamond and loose-add coverage | Keep controlled targets away from cleave and prevent casters from reaching healers |
| Melee DPS | Locate Whirlwind, frontal and death-trigger hazards | Follow Skull and leave immediately when Whirlwind or hostile ground effects appear |
| Ranged DPS | Spread before splash mechanics and identify caster switches | Stop damage into reflective or absorbing shields and control loose enemies |
| Healers | Divide tanks and assign magic, poison and curse removal | Keep the raid topped for Promenade Sentinels and anticipate tank stuns |
| Priests | Reserve Mass Dispel and plan absorb coverage | Remove Divine Shield and protect players against L5 Arcane Charge |
| Hunters | Confirm the pull path and crowd-control restrictions | Use Misdirection to group ranged enemies without dragging the raid into patrols |
| Rogues and other interrupters | Create a named rotation instead of overlapping cooldowns | Save Incapacitate effects for abilities that ordinary interrupts cannot reliably stop |
Black Temple Trash Rewards
Trash clearing contributes to Ashtongue Deathsworn reputation and can produce raid bind-on-pickup epics, profession recipes, Hearts of Darkness and other valuable materials. Blizzard also confirms that epic gems can appear as rare drops inside Black Temple. These rewards make complete, controlled routes more valuable than repeatedly attempting risky skips.
- Assign loot rules for bind-on-pickup trash epics before the first pull.
- Reserve Hearts of Darkness according to the guild's Shadow Resistance crafting plan.
- Send profession recipes to characters who meet both profession and reputation requirements.
- Track Ashtongue reputation milestones for class trinkets and crafting access.
- Do not promise a specific epic, recipe, gem or material from one raid lockout.
Players primarily targeting Okuno's reputation rewards can schedule their full clears around an Ashtongue Deathsworn reputation route, but reputation efficiency still depends on clearing the available trash without wasting the weekly raid lockout.
Common Black Temple Trash Mistakes
- Starting the pull before crowd-control and interrupt marks are assigned.
- Using uncontrolled AoE beside Polymorph, Banish or Hibernate targets.
- Allowing a Coilskar General to remove control from the rest of its pack.
- Attacking through Dragon Turtle Shell Shield or Shadowmoon Reaver Spell Absorption.
- Ignoring Windfury Totems while an Ashtongue Mystic is alive.
- Treating Rapid Shot, Blood Prophet casts or Blizzard as ordinary kick assignments.
- Pulling an Illidari Fearbringer or Nightlord together with another patrol.
- Standing in front of Centurions, Champions, Aqueous Lords or other frontal attackers.
- Sending the fastest players ahead during the Reliquary ghost gauntlet.
- Entering a Promenade Sentinel pull without full health and absorb coverage.
- Leaving Divine Shield active when a Priest has Mass Dispel available.
- Attempting an optional Shadowmoon Blood Mage skip without confirming the entire raid understands the route.
Final Verdict
Black Temple trash becomes predictable when every pull has one kill target, one control plan and one defensive answer. The most important priorities are Aqueous Spawns and Coilskar Generals in the sewers, isolated Fearbringers in the courtyard, Windfury Totems and Ashtongue Mystics near Shade of Akama, controlled Blade Furies in the Bonechewer wing, disciplined movement through the Reliquary gauntlet, and full-health absorb coverage against Promenade Sentinels. Mark before combat, pull ranged enemies through line of sight, stop attacking defensive shields and reserve the correct dispel for each section. That structure saves more raid time than aggressive skips or uncontrolled area damage.