Serpentshrine Cavern is a level 70 raid for 25 players inside Coilfang Reservoir in Zangarmarsh. It opened with Burning Crusade Classic Anniversary Phase 2 on May 14, 2026. The official Overlords of Outland announcement confirms the location, the six boss roster, and the Tier 5 token bosses. Anniversary realms use the post nerf version of the raid, so older pre nerf guides can include mechanics that are not active here.
This guide covers access, raid composition, a practical boss route, tactics for every encounter, complete boss loot tables, Tier 5 tokens, trash drops, profession recipes, and a weekly clear checklist. The strategies are written for the Anniversary ruleset and account for its increased Tier 5 and epic loot quantities.
Serpentshrine Cavern Requirements and Raid Overview
| Category | Serpentshrine Cavern details |
|---|---|
| Raid format | 25 players at level 70 |
| Location | Coilfang Reservoir in Zangarmarsh; swim through the central pipe and enter through the waterfall portal |
| Anniversary opening date | May 14, 2026 |
| Attunement | Complete The Cudgel of Kardesh on the first character; raid attunements then unlock across the same Battle.net account |
| Bosses | Six encounters ending with Lady Vashj |
| Reset | Weekly raid lockout |
| Tier 5 slots | Gloves from Leotheras, legs from Karathress, and helm from Lady Vashj |
| Standard loot levels | Item level 128 boss and trash epics, item level 133 Tier 5 pieces, item level 138 Lady Vashj armor, and item level 141 Lady Vashj weapons |
| Anniversary loot quantity | Three Tier 5 tokens from each token boss and three different epic items from Hydross, Lurker, and Morogrim |
The SSC access chain begins with The Cudgel of Kardesh from Skarthis the Heretic in Heroic Slave Pens. It requires the Earthen Signet from Gruul the Dragonkiller and the Blazing Signet from Nightbane. The official Blizzard attunement walkthrough lists the complete prerequisites. Groups that still need the access steps or a stable weekly clear can also review the available Serpentshrine Cavern raid options while planning their roster.
Recommended Raid Composition and Assignments
A safe progression roster uses four tank capable players, six or seven healers, and fourteen or fifteen damage dealers. One tank can switch to damage on encounters that need fewer active tanks. Anniversary Heroism and Bloodlust affect the full raid and apply a ten minute lockout, so the raid does not need one Shaman in every party.
- Prepare one Frost Resistance tank and one Nature Resistance tank for Hydross. The resistance cap is 365 against a level 73 boss, but the post nerf Anniversary encounter does not require every tank to reach the cap.
- Assign two additional tanks to collect Hydross adds, Lurker Guardians, Karathress guards, Morogrim murlocs, and Lady Vashj Elites.
- Prepare one Warlock with Fire Resistance, high health, and reliable spell hit to tank Leotheras in demon form.
- Bring several dependable interrupts for Fathom Guard Caribdis and enough crowd control for Lurker Ambushers.
- Use a Protection Paladin or another reliable area threat tank for Morogrim murloc waves.
- Assign mobile ranged damage for Lady Vashj Striders, Enchanted Elementals, Tainted Elementals, and early Toxic Sporebats.
- Bring at least one player with 300 Fishing to summon The Lurker Below from the Strange Pool.
SSC Boss Route and Progression Plan
| Suggested position | Boss | Primary raid check | Notable reward |
|---|---|---|---|
| 1 | Hydross the Unstable | Resistance tanks, controlled transitions, and add threat | Shoulderpads of the Stranger |
| 2 | The Lurker Below | Spout movement and submerge add control | Mallet of the Tides |
| 3 | Morogrim Tidewalker | Murloc threat, area damage, and Water Globule movement | Talon of Azshara |
| 4 | Fathom Lord Karathress | Four tank assignments, interrupts, and totem priority | Tier 5 leg tokens |
| 5 | Leotheras the Blind | Threat resets, a Warlock tank, and Inner Demons | Tier 5 glove tokens |
| 6 | Lady Vashj | Tainted Core passing, add lanes, and the final damage race | Tier 5 helm tokens and Fang of Vashj |
The first five bosses allow a flexible route, while Lady Vashj remains the final objective of a full clear. Morogrim is a useful early target because the Anniversary post nerf murlocs are less durable than their original version. Karathress before Leotheras also gives the raid a straightforward assignment fight before the more punishing personal responsibility check. Players planning a complete gearing route around SSC can compare the relevant WoW TBC Classic progression options before committing weekly lockouts.
Explore services related to this guide, selected from our TBC Raids catalog.
View All TBC Raids Services


Hydross the Unstable Strategy and Loot
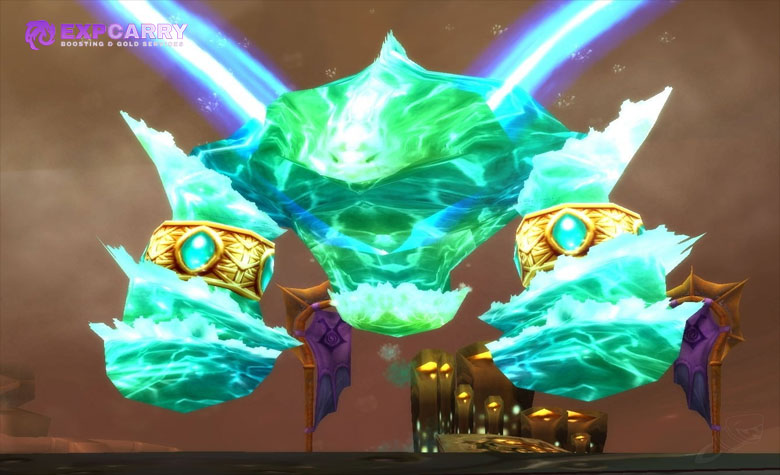
Hydross changes between a purified Frost form inside the cleansing beams and a tainted Nature form outside them. Each form applies a raid wide Mark that raises damage from its school. Moving him across the boundary changes his form, clears threat, and summons four matching elementals. He is immune to Frost damage in purified form and Nature damage in tainted form.
- Start with the Frost Resistance tank inside the beams and spread the raid by at least eight yards for Water Tomb.
- Call the transition at the 100 percent Mark. Stop direct damage, stop refreshing damage over time effects, and let healers move toward the next tank position.
- Move Hydross across the boundary once. The Nature Resistance tank establishes threat while the off tanks collect the four Tainted Spawns.
- Kill the adds before returning to Hydross. Banish can reduce tank pressure if the pickup is unstable.
- Heal Vile Sludge targets in the Nature phase, then repeat the same controlled transition back to the Frost side.
- Never drag Hydross back across the line after a threat loss. A second accidental crossing creates four more adds and usually ends the attempt.
| Loot category | Items |
|---|---|
| Armor, rings, and trinkets | Living Root of the Wildheart, Scarab of Displacement, Band of Vile Aggression, Ring of Lethality, Robe of Hateful Echoes, Boots of the Shifting Nightmare, Wraps of Purification, Shoulderpads of the Stranger, Ranger Generals Chestguard, Blackfathom Warbands, Brighthelm of Justice, Pauldrons of the Wardancer |
| Off hand | Fathomstone |
The Lurker Below Strategy and Loot
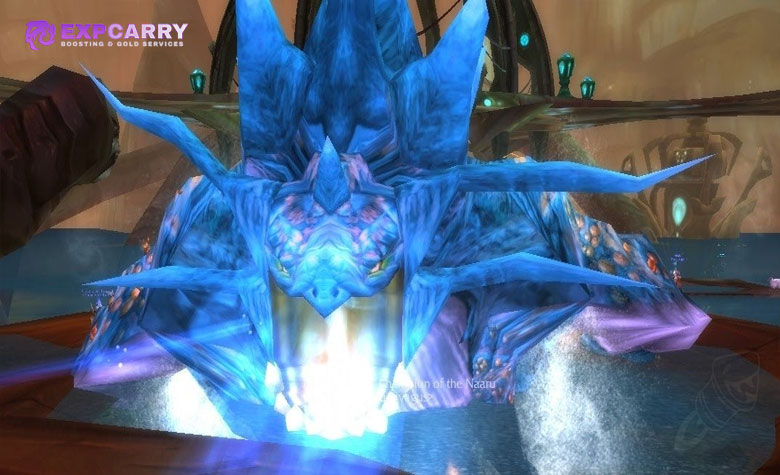
The Lurker Below must be fished from the Strange Pool after the six surrounding platform groups are cleared and the water begins to boil. The encounter alternates between a surface phase with knockbacks and a one minute submerge phase with nine adds.
- Place the main tank at the edge of the central platform, spread ranged players across the available platforms, and keep someone in melee range to prevent lethal Water Bolts.
- Spread by ten yards so Geyser does not hit several players. Melee should stand close to the inner edge so Whirl does not throw them far from the platform.
- When Spout begins, follow its rotation or enter the water just before the beam reaches you. Leave the water after it passes and do not spam jumps through Scalding Water.
- During Submerge, off tanks collect the three Coilfang Guardians on the central platform. Stun them and keep their cleaves away from the raid.
- Crowd control the two Coilfang Ambushers on each outer platform, kill the Guardians first, and then clear the Ambushers.
- Before Lurker returns, prepare for the immediate Whirl, Spout, and Whirl sequence instead of standing exposed on the central platform.
Morogrim Tidewalker Strategy and Loot

Morogrim combines heavy main tank damage with repeating murloc waves. Earthquake damages players within fifty yards and summons two packs of six Tidewalker Lurkers from opposite entrances. Watery Grave teleports four players to the waterfall chambers, while Water Globules replace that pressure below 25 percent health.
- Tank Morogrim beside a pillar and face him away from the raid so only the main tank takes Tidal Wave.
- Assign healers to Watery Grave targets and restore them before the fall damage and the next raid wide event overlap.
- After Earthquake, let the murloc tank establish threat on both packs before broad healing and area damage begin. Frost Traps and low rank Blizzard make the pickup safer.
- Once both packs are grouped, use controlled area damage and keep single target damage on Morogrim only if the murloc wave is stable.
- At 25 percent, move Morogrim toward a corner and away from the waterfall chambers. Every player must watch for slow moving Water Globules and avoid contact.
- Use Heroism or Bloodlust and major cooldowns in the final phase to end the fight before Globules restrict movement.
| Loot category | Items |
|---|---|
| Armor, jewelry, cloak, and trinket | Serpent Coil Braid, Band of the Vigilant, Ring of Sundered Souls, Pendant of the Lost Ages, Razor Scale Battlecloak, Illidari Shoulderpads, Gnarled Chestpiece of the Ancients, Mantle of the Tireless Tracker, Girdle of the Tidal Call, Warboots of Obliteration, Pauldrons of the Argent Sentinel |
| Weapons | Talon of Azshara, Luminescent Rod of the Naaru |
Fathom Lord Karathress Strategy and Loot
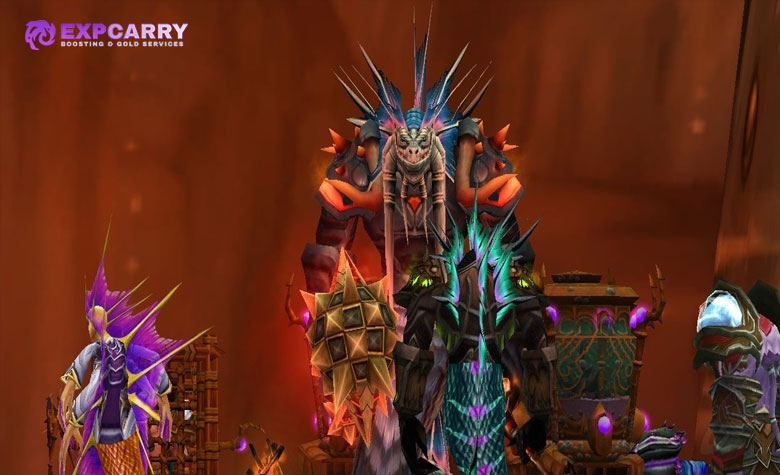
Karathress enters combat with Fathom Guards Tidalvess, Sharkkis, and Caribdis. Each guard needs a separate tank and healing assignment. Karathress gains one of the defeated guards abilities when that guard dies, so the raid must keep handling Spitfire Totems, Beast Within, and Tidal Surge after each target falls.
- Separate all four enemies. Keep Caribdis far from the main group with dedicated interrupters because Healing Wave has unlimited range.
- Kill Tidalvess first. Switch immediately to every Spitfire Totem and use defensive cooldowns against his burst melee damage.
- Kill Sharkkis second while his tank also controls the summoned pet. Be ready for Beast Within damage on Sharkkis and later on Karathress.
- Move to Caribdis third, remain spread by more than ten yards, avoid roaming Cyclones, and interrupt every Healing Wave.
- Do not push Karathress below 75 percent while guards remain because Blessing of the Tides sharply increases his speed for every living guard.
- Finish Karathress while killing each inherited Spitfire Totem and healing Cataclysmic Bolt targets immediately.
| Loot category | Items |
|---|---|
| Tier 5 leg tokens | Leggings of the Vanquished Champion, Leggings of the Vanquished Defender, Leggings of the Vanquished Hero |
| Armor, necklace, and trinkets | Fathom Brooch of the Tidewalker, Sextant of Unstable Currents, Frayed Tether of the Drowned, Soul Strider Boots, Bloodsea Brigands Vest |
| Weapon | World Breaker |
Leotheras the Blind Strategy and Loot

Leotheras alternates between human and demon forms. Human form uses Whirlwind and leaves a dangerous bleed. Demon form attacks at range with Chaos Blast and creates personal Inner Demons. Every form change and every completed Whirlwind resets threat. At 15 percent health, the human and demon forms separate.
- Clear the entire room and assign a physical main tank for human form plus a Fire Resistance Warlock tank for demon form.
- During Whirlwind, move away from Leotheras and heal the bleed. When the cast ends, stop damage until the physical tank rebuilds threat.
- On the demon transition, spread around the Warlock tank so Chaos Blast does not splash through the raid. Wait for Searing Pain threat before attacking.
- Players targeted by Insidious Whisper must stop every other job and kill their own Inner Demon. Only its assigned player can damage it.
- Healers and protection tanks should equip suitable damage tools before the pull and save offensive abilities for a possible Inner Demon.
- At 15 percent, keep the demon copy on the Warlock tank, focus all damage on the human form, and use remaining cooldowns before combined damage overwhelms the healers.
| Loot category | Items |
|---|---|
| Tier 5 glove tokens | Gloves of the Vanquished Champion, Gloves of the Vanquished Defender, Gloves of the Vanquished Hero |
| Armor and trinket | Tsunami Talisman, Orca Hide Boots, Grove Bands of Remulos, Coral Barbed Shoulderpads, True Aim Stalker Bands, Girdle of the Invulnerable |
| Weapon | Fang of the Leviathan |
Lady Vashj Strategy and Loot

Lady Vashj has three phases. Phase 1 ends at 70 percent health. Phase 2 is a shield and add phase in which four Tainted Cores must reach four Shield Generators. Each disabled generator removes five percent of her health, so Phase 3 begins at 50 percent. Anniversary uses the post nerf encounter and Lady Vashj does not cast the removed Persuasion mind control ability.
- Spread around the platform before the pull. A Static Charge target moves away from every nearby player, while melee leave the tank if the debuff lands on the tank.
- Use Grounding Totem against Shock Blast where possible and remove Entangle with Blessing of Freedom, shapeshifting, Cloak of Shadows, or a PvP trinket.
- At 70 percent, send melee to Coilfang Elites, ranged damage to Coilfang Striders, and Hunters or other mobile ranged players to Enchanted Elementals.
- Kill every Tainted Elemental within its short spawn window. The core carrier is rooted and must throw the Tainted Core through the assigned player chain to a Shield Generator.
- When the fourth generator is disabled, kill the remaining adds before attacking Vashj. Let the main tank take proximity threat and rebuild a stable lead.
- In Phase 3, move Static Charge out, avoid Toxic Spore clouds, and kill early Sporebats only when ranged damage can do so without delaying the boss kill.
- Use Heroism or Bloodlust, offensive potions, and every major cooldown at the start of Phase 3. The platform becomes progressively less usable as poison clouds accumulate.
| Loot category | Items |
|---|---|
| Tier 5 helm tokens | Helm of the Vanquished Champion, Helm of the Vanquished Defender, Helm of the Vanquished Hero |
| Armor, rings, and trinket | Prism of Inner Calm, Coral Band of the Revived, Ring of Endless Coils, Vestments of the Sea Witch, Runetotems Mantle, Belt of One Hundred Deaths, Cobra Lash Boots, Krakken Heart Breastplate, Glorious Gauntlets of Crestfall |
| Weapons | Fang of Vashj, Lightfathom Scepter |
Tier 5 Tokens and Loot Priority
Anniversary token bosses drop three Tier 5 tokens per kill. Champion tokens are shared by Paladins, Rogues, and Shamans. Defender tokens are shared by Warriors, Priests, and Druids. Hero tokens are shared by Hunters, Mages, and Warlocks. Exchange them with the appropriate Aldor or Scryer Tier 5 vendor in Shattrath City.
| Slot | Boss | Champion token | Defender token | Hero token |
|---|---|---|---|---|
| Gloves | Leotheras the Blind | Gloves of the Vanquished Champion | Gloves of the Vanquished Defender | Gloves of the Vanquished Hero |
| Legs | Fathom Lord Karathress | Leggings of the Vanquished Champion | Leggings of the Vanquished Defender | Leggings of the Vanquished Hero |
| Helm | Lady Vashj | Helm of the Vanquished Champion | Helm of the Vanquished Defender | Helm of the Vanquished Hero |
- Give early Tier 5 tokens to players who gain an immediate two piece or four piece set bonus instead of awarding every token only by raw item level.
- Prioritize encounter enablers first, including resistance tanks, the Leotheras Warlock tank, and healers assigned to progression damage.
- Evaluate class trinkets by role. A class restricted drop is not automatically stronger than a well itemized alternative.
- Keep Lady Vashj weapons and high demand physical damage pieces on a published priority list before the raid begins.
Serpentshrine Cavern Trash Loot and Profession Recipes
SSC trash can drop item level 128 epics, profession patterns, plans, and Nether Vortex materials. The profession recipes can also appear in Tempest Keep, so guilds should record ownership across both Tier 5 raids.
Weekly Serpentshrine Cavern Clear Checklist
- Confirm the weekly lockout and account wide raid access before invites begin.
- Inspect Frost, Nature, and Fire Resistance sets before traveling to the instance.
- Assign Hydross transitions, Lurker platforms, Karathress tanks, Morogrim murloc pickup, and Lady Vashj core chains in advance.
- Bring one player with 300 Fishing and confirm the Strange Pool is available after the platform clears.
- Restock flasks, food, weapon oils, sharpening stones, mana consumables, health consumables, resistance consumables, and repair gold.
- Publish Tier 5 token and major weapon priorities before the first boss pull.
- Keep Heroism or Bloodlust available for Leotheras final split, Morogrim below 25 percent, and Lady Vashj Phase 3 according to the progression target.
Common Serpentshrine Cavern Mistakes
- Refreshing damage over time effects before a Hydross transition and pulling him back across the boundary.
- Entering the water too early on Lurker or repeatedly jumping through Scalding Water.
- Starting area damage before Morogrim murloc tanks have threat on both incoming packs.
- Ignoring Caribdis Healing Wave or leaving Spitfire Totems alive during Karathress.
- Continuing damage immediately after Leotheras resets threat at the end of Whirlwind or a form change.
- Sending melee players near Lady Vashj Striders or losing a Tainted Core because its carrier was not healed.
- Following a pre nerf Vashj guide that assigns responses to Persuasion even though that ability is removed in the Anniversary version.
Final Verdict
Serpentshrine Cavern is less punishing in its Anniversary post nerf state, but it still tests more than raw damage. Hydross demands clean threat resets, Lurker checks movement, Morogrim checks area threat, Karathress tests assignments, Leotheras tests individual execution, and Lady Vashj requires the entire raid to handle a shared objective.
A roster that prepares its specialist tanks and Phase 2 assignments can turn SSC into a consistent weekly source of Tier 5 gear. Clean preparation and repeatable assignments matter more than adding extra damage dealers without a defined job.