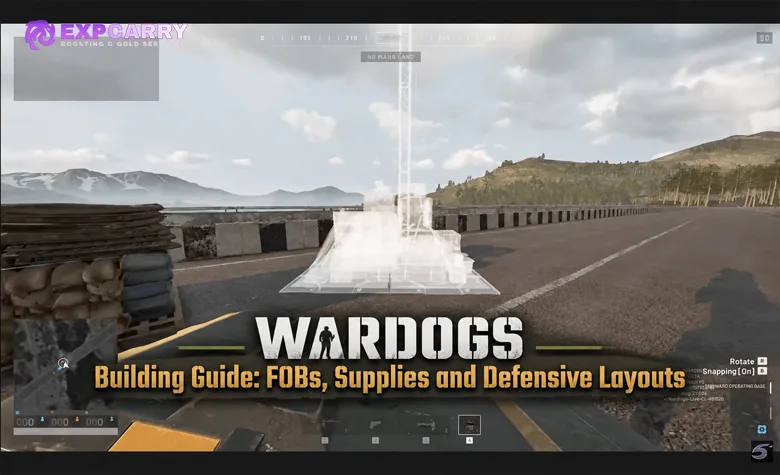
A strong WARDOGS FOB is a logistics system first and a fortress second. Pick a location that trucks can reach, reserve a safe unloading area, protect the FOB core without blocking vehicle movement, and only then spend Build Supplies on walls, shelters or weapon emplacements. Season 2 makes this even more important because major structures such as the L81 Mortar, Stingray and Hot Zone Magnet are much more expensive to build or maintain.
The best FOB is therefore not the base with the most walls. It is the smallest position that can keep receiving the correct supplies, support the current Control Zone, survive an infantry breach and still let friendly vehicles enter, unload, repair or leave without creating a traffic jam.
How to Build a FOB in WARDOGS
The practical building loop is simple: choose the mission, choose the supply route, place the FOB, deliver the correct resources and then build only what that position can support.
- Choose what the FOB is for. Frontline defense, logistics, artillery, anti-air and vehicle support need different layouts.
- Find the vehicle route before placing the FOB. A good infantry position can still be a bad FOB if trucks cannot reach it safely.
- Reserve an unloading area. Do not place the FOB core, a gate and supply interaction points in the same small space.
- Bring Build Supplies first. The initial perimeter, access and cover matter before specialist emplacements.
- Use the correct hammer tier. Season 2 adds structures that specifically require Small, Medium or Large Hammer access.
- Build the traffic skeleton. Vehicle lane, unload point and infantry access come before decorative walls.
- Add one specialist system at a time. A Mortar, CIWS or Drill Rig is useful only if logistics can keep it supplied.
- Keep Build Supplies in reserve. A base with no resources left for repairs can collapse after one successful breach.
The FOB itself is a construction and logistics hub rather than a normal respawn point. Its value comes from the structures, supplies and battlefield influence created around it.
WARDOGS Season 2 Building Costs
Update 0.2.0 makes structures a much more deliberate investment. BULKHEAD specifically targeted buildable spam and increased the cost of several high-impact systems.
| Buildable | Season 2 Build Supply Cost | Previous Cost |
|---|---|---|
| Wood Base | 15 | — |
| Bremmer Wall | 32 | 15 |
| Door | 80 | 22 |
| Gate | 200 | 85 |
| Large Shelter | 250 | New |
| Air Raid Shelter | 200 | 100 |
| Bunker | 200 | 100 |
| Crow's Nest | 200 | 100 |
| L81 Mortar | 600 | 150 |
| Stingray | 650 | 150 |
| MG Nest | 650 | New |
| Talon 9K-SAM | 650 | 1,000 |
| Vanguard CIWS | 1,200 | 1,500 |
| Hot Zone Magnet | 2,750 | 2,250 |
The lesson is not simply that everything became more expensive. Anti-air became cheaper to construct, while Mortar, Stingray and the Hot Zone Magnet demand much more commitment. That changes what a fresh FOB should prioritize.
Do not drop 600 Build Supplies into a Mortar before the base has a safe logistics route, basic cover and enough ammunition to make the weapon useful.
New Season 2 Buildables
| Buildable | Minimum Hammer | Main Use |
|---|---|---|
| Wooden Step | Small Hammer or better | Access, elevation and solving awkward height differences around fortifications. |
| Large Shelter | Medium Hammer or better | Covering important assets and providing protection from weather. |
| MG Nest | Large Hammer | Manned M2 Browning defensive emplacement for infantry and light targets. |
The Wooden Step looks minor, but it solves a common FOB problem: a technically defensive wall that also makes friendly movement awkward. The Large Shelter is especially useful in Season 2 because rain now interacts with damaged and open structures. The MG Nest gives a base another direct-fire option without forcing every defense into CIWS or missile systems. :chatgpt-content-reference{index="1"}
Explore services related to this guide, selected from our Wardogs catalog.
View All Wardogs Services


Small, Medium and Large Hammers
Season 2 keeps the three-tier building concept but changes their relative efficiency.
- Small Hammer: basic field construction and the new Wooden Step.
- Medium Hammer: expanded structures including the new Large Shelter.
- Large Hammer: full construction access including the MG Nest and major specialist systems.
The Medium Hammer now contributes less construction progress per swing, and critical build spots provide a smaller bonus. Large Hammer build rate per swing is unchanged. :chatgpt-content-reference{index="2"}
If the structure you want is missing from the build menu, check the hammer and progression requirement before assuming the placement system is broken. If Support progression itself is the bottleneck, the relevant commercial option is WARDOGS Role Leveling; Cash cannot bypass a required role unlock.
What Supplies Does a WARDOGS FOB Need?
| Supply | Main Purpose | When It Matters Most |
|---|---|---|
| Build Supplies | Construction and structural repair | Initial setup, rebuilding breaches and expanding the base |
| Ammo / Munition Supplies | Restocking weapon emplacements | Mortar, Talon and other sustained fire-support positions |
| Fuel Supplies | Drill Rig and fuel-dependent systems | Strategic Drill Rig FOBs |
| Mechanical Supplies | Vehicle repair and mechanical functions | Vehicle-support and armored-route FOBs |
Deliver the supply the FOB is actually consuming. A fire-support base without ammunition gains little from another truck full of Build Supplies, while a damaged armored route may need Mechanical Supplies more urgently than another defensive wall.
Season 2 Logistics Rewards
Season 2 lowers several base logistics rewards but adds streak bonuses that reward players for completing repeated runs instead of abandoning the vehicle after one delivery.
| Logistics Streak | Bonus per Consecutive Action | Maximum Streak |
|---|---|---|
| Crates | +$100 / +50 XP | 10 |
| Pallets | +$250 / +100 XP | 10 |
| Players delivered | +$25 / +5 XP | 25 |
| Return trips | +$50 / +25 XP | 10 |
This rewards a real logistics loop: HQ → delivery → unload → return → repeat. Leaving a truck beside the first FOB after one run sacrifices both transport capacity and the new streak system. :chatgpt-content-reference{index="3"}
FOB Supplied Assist Changed in Season 2
The FOB Supplied Assist reward is now divided between assisting players instead of giving every nearby player the full reward. This closes an old reward loophole where large groups could all receive the same kickback from one supply action. :chatgpt-content-reference{index="4"}
For actual gameplay, this means the reason to stand around the unloading point should be to help move or use the supplies, not to maximize a passive assist payout.
Best FOB Layout for Public Matches
There is no universal blueprint that should be copied onto every map. The best public-match layout usually has four zones:
| Zone | Purpose |
|---|---|
| Vehicle lane | Lets supply and damaged vehicles enter and leave without reversing through infantry. |
| Unload apron | Protected supply drop area positioned away from the gate and core. |
| Inner core | Protected logistics and important base systems. |
| Combat layer | Walls, shelters, weapons and firing positions facing actual threat directions. |
Keep the gate offset from the FOB core. An open vehicle entrance should never create a straight firing lane through the entire base.
Separate infantry movement from trucks whenever possible. A player shopping from a crate or repairing a structure should not be standing in the only lane used by returning logistics vehicles.
Three Useful FOB Layouts
1. External Unload FOB
Use an unloading apron inside the FOB area but outside the inner defensive wall. Trucks arrive, drop supplies, turn around and leave without entering the protected infantry section.
Best for: public teams, heavy logistics traffic and locations where gate discipline is unreliable.
2. Drive-Through Logistics FOB
Use one vehicle entrance and one exit, with staggered walls preventing either opening from seeing directly into the core. Put the unload point and any repair/refuel function along the protected lane.
Best for: organized squads and repeated vehicle-support routes.
3. Compact Terrain FOB
Use cliffs, buildings, slopes or other natural protection to reduce the amount of artificial perimeter required.
Best for: villages, hills and narrow terrain where a complete vehicle loop is impossible.
The danger is turning natural cover into a trap. Always test whether a truck can still enter, unload and leave under pressure.
How to Choose the Best FOB Location
Search demand around “best FOB locations” is high, but fixed coordinates are usually less useful than a location test because the Control Zone, team pressure and supply routes change.
Score a possible FOB site against these six questions:
- Can a truck reach it quickly?
- Can that truck leave without a long reverse or three-point turn?
- Does terrain hide the core from obvious long-range fire?
- Can the position influence the current or likely next fight?
- Is there enough space for the specialist system you actually want?
- Can infantry breach one entrance and immediately reach everything valuable?
A location that fails two or three of these tests is usually a poor FOB even if it has excellent elevation.
L81 Mortar in Season 2
The Mortar becomes much more expensive to establish and sustain:
- Build cost: 150 → 600 Build Supplies.
- Munition restock cost: 75 → 150.
- A new firing animation reduces practical fire rate.
That turns Mortar spam into a serious logistics commitment. Build one when you have spotting, useful targets and a reliable ammunition route rather than simply because the Large Hammer allows it. :chatgpt-content-reference{index="5"}
For range and elevation rather than FOB construction, use our WARDOGS Mortar & Artillery Calculator.
Talon 9K-SAM vs Vanguard CIWS
Season 2 makes both major anti-air systems cheaper to build, but their roles remain different.
| System | Build Cost | Best Use | Season 2 Change |
|---|---|---|---|
| Talon 9K-SAM | 650 | Longer-range missile pressure against aircraft | Cheaper to build, but reload 2s → 5s and munition restock 50 → 200 |
| Vanguard CIWS | 1,200 | Direct anti-air and short-range defensive fire | Cheaper build cost; structure damage now distinguishes light from heavy cover |
The Talon is now cheap to place but expensive to keep firing. That means Ammo Supplies matter much more than the initial 650 Build Supplies suggest.
CIWS can still punish aircraft hard, but do not build it where buildings, hills or trees remove most of its useful firing arc.
MG Nest: When Is It Worth Building?
The new MG Nest costs 650 Build Supplies and requires the Large Hammer. It mounts an M2 Browning and is best treated as a controlled firing position rather than a universal perimeter solution.
Place it where the gun can cover an actual approach while the gunner remains protected from easy flanking. An MG Nest staring into a wall, hill or empty rear sector is 650 supplies that could have funded the base's core defenses.
Drill Rig and Hot Zone Magnet Changes
Season 2 is designed to make multi-Drill-Rig strategies harder to sustain.
| Drill Rig Value | Old | Season 2 |
|---|---|---|
| Minimum fuel to activate | 1,500 | 2,000 |
| Maximum fuel | 7,500 | 10,000 |
| Maximum uptime | 375 sec | 300 sec |
The post-spawn cooldown after a destroyed rig is also substantially longer. Hot Zone Magnet construction itself rises from 2,250 to 2,750 Build Supplies. :chatgpt-content-reference{index="6"}
A Drill Rig FOB therefore needs an intentional fuel route. Building the strategic system first and asking who will deliver fuel afterwards is backwards.
How to Defend a FOB
Good defense is layered rather than symmetrical.
- Against infantry: offset entrances, protected fallback positions and direct-fire coverage matter more than a huge empty perimeter.
- Against armor: channel vehicles without blocking your own supply road.
- Against artillery: spread expensive systems instead of placing the core, Mortar, ammo and repair station in one impact area.
- Against aircraft: choose Talon or CIWS only when the firing arc and ammunition supply justify them.
- Against logistics disruption: protect the road. A FOB with full walls but no supply route is already dying.
Season 2 also allows barbed wire and sandbags on top of Bremmer Walls, while foundations fit better against slopes, stairs and walls. Doors and gates can no longer be breached with a hammer; the Halligan Bar can breach them instead. :chatgpt-content-reference{index="7"}
How to Repair and Maintain a FOB
Repair the systems that preserve the FOB's function before cosmetic damage.
- Close or repair the active breach.
- Restore the vehicle lane and gate.
- Keep the FOB core protected.
- Restore the weapon or system currently influencing the fight.
- Refill the matching supplies.
- Only then rebuild secondary walls and decorative positions.
Do not spend the final Build Supplies expanding the base. Reserve enough to recover from a breach or indirect-fire hit.
When Should You Abandon a FOB?
A FOB becomes a sunk cost when its position no longer affects the battle and keeping it alive consumes more logistics than it creates in battlefield value.
Stop feeding it when the Control Zone has moved too far away, the supply road is permanently cut, the base cannot project useful fire or movement, or another location would shorten the team's logistics loop dramatically.
The ability to abandon a bad position is part of good building. WARDOGS does not reward a team for owning the prettiest empty fortress on the map.
Common FOB Building Mistakes
- Building walls before planning the truck route.
- Putting the unload point directly in the gate.
- Using one entrance for infantry, logistics and armored vehicles.
- Creating a straight gate-to-core sightline.
- Building to the edge of the available area without a tactical reason.
- Buying a Mortar, Talon or CIWS before stocking the supplies it consumes.
- Using outdated Season 1 building costs.
- Expecting old Mortar or Drill Rig sustain rates to still work.
- Building an anti-air system when the enemy is not using meaningful air power.
- Continuing to supply a FOB that no longer affects the objective.
Best Season 2 FOB Build Order
For a general frontline FOB, this is the safest starting order:
- FOB placement with a tested logistics route.
- Protected unloading area.
- One vehicle lane and separate infantry access.
- Basic cover and first defensive layer.
- Reserve Build Supplies.
- Shelter or protected utility space.
- One specialist emplacement matched to the current threat.
- Matching Ammo, Fuel or Mechanical supply stock.
- Second defensive layer only when the first systems are sustainable.
That order deliberately puts an expensive Mortar, MG Nest, CIWS or Hot Zone system late. Season 2 punishes FOBs that build impressive hardware before creating the logistics required to operate it.
WARDOGS FOB Building: Final Recommendation
Build around access, supply and purpose. Season 2 makes specialized structures stronger decisions rather than automatic additions: Mortars need much more Build and Ammo supply, Talon is cheaper to construct but more expensive to reload, Drill Rigs demand more fuel infrastructure, and the new MG Nest, Large Shelter and Wooden Step give builders additional ways to solve specific problems.
For broader Update 0.2.0 changes, see our WARDOGS Season 2 guide. If you want hands-on help with FOB positioning, logistics routes and squad coordination rather than account progression, WARDOGS Coaching is the most relevant service.