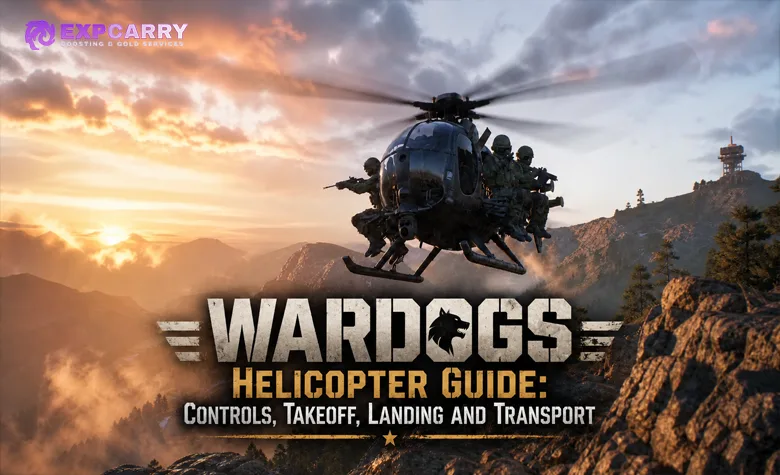
The easiest way to learn helicopters in WARDOGS is to separate flight into four skills: collective controls altitude, pitch controls forward and backward attitude, roll changes the flight path, and yaw points the nose. Learn those inputs in a safe aircraft before attempting fast landings or passenger runs. For mouse and keyboard, the most practical competitive setup is usually Rotary Vehicle Mouse Control enabled with mouse vertical movement on pitch and mouse horizontal movement on roll, while collective and yaw remain available on keys.
Season 2 raises the cost of several armed helicopters, moves the AH-6M Miniguns later in Pilot progression and adds the Flakpanzer Gepard as a dedicated anti-air vehicle. That makes controlled takeoffs, predictable landings and route planning more valuable than trying to learn advanced maneuvers in an expensive aircraft during a live match.
WARDOGS Helicopter Controls
The current community-documented keyboard baseline uses four core helicopter axes. Always verify them in the live client after an update because WARDOGS is still in Early Access and bindings can change.
| Control | Common Default Keyboard Input | What It Does | Beginner Rule |
|---|---|---|---|
| Collective Up / Down | Left Shift / Left Ctrl | Changes lift and climb or descent tendency | Use smooth input; do not treat it like an instant vertical throttle |
| Pitch | W / S | Tilts the nose forward or backward | Forward pitch builds speed; back pitch removes it |
| Roll | A / D | Banks the helicopter left or right | Main tool for changing flight path at speed |
| Yaw | Q / E | Rotates the nose | Useful for heading corrections; weaker as a high-speed turning tool |
| Free Look | Verify live bind | Moves the camera without intentionally steering | Confirm that free look releases cleanly before flight |
| Flares | Verify live bind | Countermeasure against applicable missile threats | Bind somewhere you can reach without moving your flight hand |
The important part is not the exact key. It is understanding that collective is not pitch, yaw is not roll, and the aircraft keeps carrying momentum after you release an input.
Best Mouse and Keyboard Helicopter Settings
WARDOGS mouse flight is not the only way to fly, but it gives much finer corrections than using only digital keys. Most experienced M&K setups use one of two approaches.
| Setup | Mouse Up / Down | Mouse Left / Right | Best For |
|---|---|---|---|
| Roll Mouse | Pitch | Roll | Transport, circle turns, general flying and predictable landings |
| Rifle-Aim Mouse | Pitch | Yaw | Fine nose aiming at low speed and armed-helicopter gun work |
For a beginner, start with mouse Pitch + Roll. Roll remains the more natural way to change flight path at speed, and the layout makes it easier to understand coordinated turns.
Keep keyboard versions of all important axes even when mouse control is enabled. Hard maneuvers can require faster or larger inputs than a low-sensitivity mouse setup provides.
Recommended Beginner Mouse Setup
- Enable Rotary Vehicle Mouse Control.
- Mouse Y: Pitch.
- Mouse X: Roll.
- Keep Collective on easy-to-hold keys.
- Keep Yaw available separately.
- Use low helicopter mouse sensitivity rather than starting high.
- Bind Flares to a button you can hit instantly.
- Keep a dedicated Free Look bind.
Do not copy another player's exact sensitivity before considering mouse DPI, FOV and how aggressively you fly. The useful common pattern across strong pilot setups is low sensitivity and small corrections, not one magic percentage.
Stability Assist, Auto-Hover and Turn Coordination
Flight assists are useful training tools, but using every assist at once can make it difficult to understand what the helicopter is doing.
| Assist | Use It When | Turn It Down or Off When |
|---|---|---|
| Stability Assist | You are learning hover, takeoff and basic transport | You feel the helicopter fighting deliberate aggressive inputs |
| Auto-Hover | You need help stabilizing low-speed logistics or landing practice | You begin learning fast approaches and J-hooks |
| Turn Coordination | You are learning how roll and yaw combine | You want direct control over advanced turns |
Start with one helpful assist rather than stacking everything. Once the same drill becomes predictable, disable one assist and repeat it.
Explore services related to this guide, selected from our Wardogs catalog.
View All Wardogs Services
How to Take Off in a WARDOGS Helicopter
The safest takeoff is a controlled transition from the ground into a low hover, not an immediate full-power climb.
- Test the axes before lift. Confirm pitch, roll and yaw move in the expected direction.
- Increase collective gradually. Let the aircraft become light before committing to a climb.
- Lift only a short distance. A low hover makes incorrect bindings obvious without creating a large crash.
- Stop the climb early. Reduce collective before reaching the exact altitude you want.
- Correct drift with small pitch and roll inputs.
- Only add forward speed once the hover is controlled.
The biggest beginner mistake is overcorrection. The helicopter starts drifting, the pilot waits too long, then adds a large opposite input. The aircraft carries momentum through the correction, producing an oscillation that becomes worse with every reaction.
How to Hover Without Overcorrecting
A useful hover is not perfectly motionless. The goal is to keep movement small enough that you always understand where the aircraft is going next.
Use this drill:
- Lift a few meters.
- Choose one fixed object ahead as your heading reference.
- Hold altitude for 20–30 seconds.
- Correct only one axis at a time when possible.
- Land close to the takeoff position.
- Repeat until the exercise becomes boring.
If every correction immediately creates another correction, your inputs are too large or your sensitivity is too high.
How to Fly Forward and Turn
Pitch the nose forward gently to build speed. Do not immediately push into a steep angle.
At travel speed, turn primarily with roll:
- Bank toward the new direction.
- Add enough yaw to align the nose.
- Use collective if the bank causes altitude loss.
- Start reducing the roll before reaching the final heading.
- Return to level flight before making the next large correction.
Using yaw alone at high speed may rotate the helicopter without changing the actual flight path quickly enough. Roll is what turns the movement vector.
How to Land a Helicopter Without Crashing
A good WARDOGS landing is mostly finished before the helicopter reaches the ground. Bleed horizontal speed first, level the aircraft second, then descend.
- Choose the landing zone early. Check obstacles, slope and exit direction.
- Reduce forward speed before the final approach.
- Level pitch and roll.
- Remove sideways drift.
- Descend using controlled collective.
- Feather the descent near the ground.
- Go around if a large correction is still required.
Sideways movement at touchdown is especially dangerous because landing gear can catch uneven ground and roll the aircraft. Do not force a bad approach just because the LZ is already underneath you.
What Is a Go-Around?
A go-around means abandoning the current landing attempt and setting up another approach.
Use one when:
- The LZ becomes occupied.
- You still have high forward speed.
- The helicopter is sliding sideways.
- You lose visual reference in rain or terrain.
- Anti-air appears during final approach.
- Your planned departure direction becomes blocked.
A second approach costs seconds. Destroying the helicopter costs Cash, travel time and potentially an entire squad.
How to J-Hook in WARDOGS
A J-hook is a fast landing maneuver used to convert forward speed into a sharp turn and deceleration before the final touchdown.
It is not the first landing technique a new pilot should learn.
The concept is:
- Approach with controlled forward speed.
- Start the turn before crossing the landing point.
- Use a strong roll with coordinated yaw and pitch to rotate and bleed speed.
- Manage collective so the aircraft does not drop uncontrollably through the turn.
- Exit the maneuver nearly level with very little horizontal speed.
- Finish with a short vertical descent.
If the maneuver ends with large sideways drift, excessive bank or a desperate opposite input near the ground, the J-hook began too late or with too much speed.
Practice it only after normal landings are repeatable.
Passenger Transport: How to Make a Safe Drop
A transport helicopter is successful when passengers reach useful ground alive and the aircraft survives to make another trip.
- Know the destination before takeoff.
- Choose a primary LZ and a fallback LZ.
- Approach from a direction that leaves a clean escape route.
- Avoid crossing known enemy FOBs or anti-air positions.
- Tell passengers when you are landing.
- Keep the helicopter stable until the group is clear.
- Leave immediately after the drop.
Landing directly inside the Hot Zone is not automatically better than landing behind safe cover 100–200 meters away. Travel time saved is worthless if the helicopter and passengers are destroyed together.
Season 2 Makes Parachute Drops Riskier
Season 2 significantly changes parachutes. They now take longer to fully deploy, do not open below roughly 10 meters, and pulling one below approximately 50 meters during a fast fall may not provide enough time to prevent damage.
The Basic Parachute also rises from $100 to $500, while the Sport Parachute drops from $1,000 to $700.
This reduces the value of the old “fly over the objective and tell everyone to jump” approach. Pilots now have a stronger reason to learn actual insertions and controlled landings.
Season 2 Anti-Air: Gepard, CIWS, Talon and Verba
Season 2 adds the Flakpanzer Gepard, a dedicated mobile anti-air vehicle unlocked in the Driver track. Pilots must now account for moving AA threats rather than only fixed FOB defenses and infantry launchers.
| Threat | Pilot Response |
|---|---|
| Flakpanzer Gepard | Avoid predictable straight approaches and repeated routes; use terrain and distance. |
| Vanguard CIWS | Do not overfly known enemy FOBs or hover inside its firing arc. |
| Talon 9K-SAM | Respect missile-lock warnings and keep an escape route. |
| 9K333 Verba | Do not hover exposed; be ready with countermeasures when applicable. |
| Small arms / mounted guns | Use speed, distance and terrain rather than holding a stationary hover. |
The new Gepard does not mean helicopters are unusable. It means route repetition becomes much easier to punish.
Rain Changes Flying in Season 2
Season 2 introduces a rain preset that affects spotting range and battlefield visibility. Heavy rain also adds synchronized thunder that can mask footsteps and other sounds.
For pilots, the main practical consequences are:
- Long-range visual identification becomes harder.
- LZ obstacles can become more difficult to read early.
- Enemy spotters may also have reduced visibility.
- Repeated routes can still be learned by enemy anti-air even when weather hides them visually.
In poor visibility, commit later and keep a more generous go-around margin.
Season 2 Pilot Progression Changes
Season 2 specifically slows access to the armed Little Bird.
| Aircraft Unlock | Season 2 Change |
|---|---|
| Little Bird AH-6M [Miniguns] | Pilot Level 4 → Level 8; unlock $50,000 → $125,000 |
| Z20 Lakota [Miniguns] | Unlock $75,000 → $85,000 |
| Havoc | Unlock $500,000 → $650,000 |
Armed-helicopter vendor prices also rise substantially in Season 2:
- AH-6M Miniguns: $7,000 → $12,000.
- AH-6R Rockets: $12,500 → $18,800.
- Z20 Lakota Miniguns: $8,000 → $15,000.
- Havoc: $18,000 → $28,000.
That makes practice in a cheap or free training environment even more valuable before taking combat aircraft into a live match.
For the full vehicle hierarchy rather than flight technique, see our WARDOGS Vehicle Tier List. If your aircraft is still locked behind Pilot progression, WARDOGS Vehicle Unlock is the related progression service.
Season 2 Helicopter Damage Changes
Season 2 includes several changes pilots and gunners should know:
- Helicopter cockpit glass now works both ways: shots fired through it can damage the aircraft just as incoming rounds can.
- The calibre reductions also affect vehicle weapons using those ammunition types, including Little Bird and Lakota miniguns.
- Using weapons from the Little Bird bench now carries greater inaccuracy, sway, ADS and reload penalties.
- Late-joining players now correctly see vehicle smoke screens and flares.
These changes reduce the value of treating an aircraft as an invulnerable firing platform.
Best Helicopter for Learning
Use the simplest transport helicopter available to you rather than learning on an expensive attack platform.
The training priorities are:
- Stable hover.
- Straight circuit.
- Controlled 90-degree and 180-degree turns.
- Normal landing.
- Passenger pickup and drop.
- Only then J-hooks and combat flying.
An attack helicopter adds aiming, ammunition, threat selection and anti-air management to a pilot who may not yet have reliable basic control.
Controller Helicopter Controls
Analog sticks can make smooth attitude changes easier, but current controller behavior remains more build-sensitive than keyboard and mouse.
Map the same four concepts first:
- Collective.
- Pitch.
- Roll.
- Yaw.
Then check:
- Dead zones.
- Axis inversion.
- Seat controls.
- Free look.
- Flares.
- Whether the game changes input profile unexpectedly.
Season 2 also fixes several controller-related vehicle issues, including unintended spinning after closing the tactical map and inconsistent ADS behavior on vehicle weapons.
Does WARDOGS Support HOTAS?
Players have successfully used HOTAS hardware in Early Access, but WARDOGS does not have one universally reliable plug-and-play HOTAS profile across every device.
Test native recognition first. Bind collective, pitch, roll and yaw one axis at a time, then restart the game and confirm the settings remain saved.
Avoid starting with third-party virtual-device or input-emulation software. It creates another troubleshooting layer and may introduce anti-cheat uncertainty if the developer has not explicitly approved the specific tool.
Helicopter Controls Not Working: Troubleshooting
| Problem | Check First |
|---|---|
| Mouse only moves camera | Rotary Vehicle Mouse Control and Free Look state |
| Pitch or roll feels reversed | Air Vehicle inversion and axis assignment |
| Helicopter keeps overcorrecting | Mouse sensitivity and Flight Assists |
| Collective sometimes stops responding | Duplicate binds, Free Look and current input state |
| Controller has a large dead area | Dead zone and axis calibration |
| Keyboard infantry controls changed after heli setup | Check duplicated keybinds across categories |
| HOTAS suddenly disables M&K flight | Disable unused device modes and retest native input |
| Settings disappear after restart | Rebind the minimum control set, restart and test before adding advanced binds |
Do not solve a wrong axis by changing sensitivity. Verify that the game is reading the intended input first.
Best Helicopter Practice Routine
| Drill | Pass Condition |
|---|---|
| Hover | Hold a small area without large corrections for 30 seconds. |
| Short circuit | Take off, fly one loop and return under control. |
| Normal landing | Touch down with little or no sideways movement. |
| Go-around | Abort a bad approach without losing control. |
| Passenger drop | Land, unload and leave without hovering over the LZ. |
| J-hook | Finish the maneuver nearly level and slow enough to land safely. |
Do not progress because one attempt worked. Move on when the drill becomes repeatable.
WARDOGS Helicopter Guide: Final Recommendation
Learn collective, pitch, roll and yaw before chasing advanced settings. For most mouse-and-keyboard beginners, enable Rotary Vehicle Mouse Control, use mouse pitch and roll with relatively low sensitivity, keep all important axes available on keys and use Stability Assist or Auto-Hover only as temporary training aids.
Land by removing horizontal speed before descending. Learn a normal approach before a J-hook. Plan passenger drops around an escape route rather than the closest possible point to the objective. In Season 2, more expensive attack helicopters, riskier parachute drops, rain and the new Gepard all punish pilots who repeat predictable mistakes.
If you want direct practice with positioning, landing choices and transport routes in live matches, WARDOGS Coaching is the most relevant commercial option without turning this guide into a sales page.