The AION 2 Cleric is a Mace-wielding healer who combines party-wide recovery, cleansing, defensive buffs, resurrection, and ranged magical damage. Its strongest builds revolve around Healing Light, Radiant Recovery, Light of Regeneration, and Healing Enhancement, while Earth's Retribution, Judgment Thunder, and Chain of Torment provide the offensive foundation. Unlike a passive support class, Cleric must actively manage party health, MP, boss mechanics, and damage opportunities.
This guide focuses on Global AION 2 and uses data from the September 2026 Launch Scale Test. Advanced Access is scheduled to begin on September 30, followed by the official Global launch on October 5. Skill-level recommendations are presented as staged build targets. Final retail limits, Daevanion layouts, equipment values, Stigma availability, boss mechanics, and reward pools must be checked in the released Global client instead of being copied directly from Korea or Taiwan.
Short answer: Prioritize Healing Enhancement, Healing Light, Radiant Recovery, and Earth's Retribution for a balanced Cleric. Establish reliable party healing first, deal damage during safe windows, and replace offensive Stigmas with cleansing, resurrection, or protection when an encounter demands additional support.
| Build | Main purpose | Core skills and utility | Priority stats |
|---|---|---|---|
| Boss Healer | Group survival and sustained boss damage | Healing Light, Radiant Recovery, Light of Regeneration, Chain of Torment, Benevolence | Attack, Heal Boost, MP sustain, HP |
| Solo / AoE | Independent farming and grouped enemies | Judgment Thunder, Divine Aura, Condemnation, Bolt, Earth's Retribution | Attack, Accuracy, cooldown reduction |
| Defensive PvE | Difficult progression and unfamiliar encounters | Healing Light, Radiant Recovery, Absolution, Yustiel's Power, Salvation | HP, Heal Boost, Damage Tolerance, MP |
| Arena | Survival, disruption, and sustained PvP pressure | Defiance, Radiant Recovery, Root, Salvation, Chain of Torment | HP, PvP Damage Tolerance, Accuracy |
| Abyss / Group PvP | Mass healing, cleansing, and frontline support | Benevolence, Absolution, Yustiel's Power, Summon Resurrection | Survivability, healing, cooldown reduction |
How Does Cleric Work in AION 2?
Cleric is the primary healing class and uses a Mace with a Guard. It combines direct recovery, healing over time, debuff removal, party protection, and Earth- and Wind-based offensive abilities. Its defining group utility also includes Summon Resurrection, which can revive a fallen party member when the corresponding Stigma is equipped and available.
The class revolves around three connected priorities: preventing avoidable deaths, preserving enough MP for emergencies, and contributing damage whenever the party is stable. Healing exclusively can waste useful damage windows, while playing Cleric as a full-time damage dealer can consume resources needed for the next dangerous mechanic.
Understanding Cleric's Healing Mechanics
Cleric's main recovery abilities are not interchangeable. They use different targeting rules and solve different problems, so understanding what each ability actually affects is essential.
- Healing Light: Restores HP to the caster and an eligible nearby party member with the lowest HP. It is Cleric's frequently available direct-healing tool.
- Radiant Recovery: Restores HP to the caster and nearby party members while removing a removable debuff. Its combined healing and cleansing function is particularly useful during mechanic-heavy encounters.
- Light of Regeneration: Applies periodic healing to the caster and party members. Use it before or during sustained incoming damage rather than as a replacement for an immediate emergency heal.
- Healing Enhancement: Improves the healing package through Attack-related scaling, making suitable offensive equipment relevant to healing performance.
- Radiant Benediction: Adds recovery through successful offensive actions and rewards a Cleric who continues participating in combat.
Healing Light considers an eligible nearby party member with low HP instead of functioning like a conventional manually targeted heal. Watch range, positioning, cooldowns, and the severity of incoming damage rather than relying only on target switching.
Cleric Strengths and Weaknesses
Cleric's value changes considerably between solo combat and organized content. Its ability to stabilize several teammates is normally more important in a dungeon or large battle than its individual damage output.
| Content | Strengths | Main weaknesses |
|---|---|---|
| Boss PvE | Direct healing, group recovery, cleansing, protection, and resurrection help stabilize difficult encounters. | Poor healing priorities or exhausted MP can turn a recoverable mechanic into a wipe. |
| Solo PvE | Self-healing and defensive tools provide substantial room for mistakes. | Lower dedicated damage can make repeated farming inefficient if the offensive preset is underdeveloped. |
| Arena / 1v1 | Recovery and defensive abilities can extend a fight beyond an opponent's opening damage window. | Personal kill pressure is limited, and wasted defensive cooldowns are difficult to replace. |
| Small-scale PvP | Can repeatedly restore allies and remove important negative effects. | Coordinated pressure on the healer can force several defensive abilities simultaneously. |
| Mass PvP | Group recovery, protection, cleansing, and resurrection become increasingly valuable in prolonged engagements. | Poor backline positioning or separation from the group sharply reduces healing reliability. |
The most effective Cleric is not necessarily the player with the highest raw healing number. Preventing lethal damage, cleansing an important effect, maintaining useful offensive debuffs, and keeping the party moving through mechanics are equally important responsibilities.
Best Cleric Skills and Specialties
Cleric requires a balance between frequently used damage skills and essential healing abilities. Early upgrades should provide dependable MP recovery and functional damage while developing the healing package required for group content.
The following targets use the Global Launch Scale Test skill structure as a reference. In the test build, level 8 provided access to the first specialty selection, further selection capacity appeared at displayed level 12, and a third equipped specialty became available at level 20. Some options had separate thresholds, including level 16. Displayed skill levels may include bonuses from equipment and other progression systems. Verify every threshold in the live Global client before committing expensive resources.
| Skill | Target level | Recommended specialty | When to change it |
|---|---|---|---|
| Earth's Retribution | 8 early; 10 later | Additional MP restoration | Use an offensive chain-related option once resource sustain is reliable. |
| Healing Light | 8 first; work toward 10 | Additional consecutive uses | Consider the low-HP healing option when emergency recovery matters more. |
| Radiant Recovery | 8 for group PvE | Reduced cooldown or additional debuff removal | Choose stronger cleansing when an encounter applies multiple removable effects. |
| Light of Regeneration | Base level initially; improve for dedicated healing | Sustained group recovery | Increase its priority in encounters with frequent party-wide damage. |
| Judgment Thunder | 8, then 10 | Single-target damage or reduced MP consumption | Choose damage for bosses or MP efficiency when sustain is difficult. |
| Chain of Torment | 8; develop further for boss damage | Longer damage-over-time duration | Prioritize stronger debuff effects after reaching the required displayed levels. |
| Condemnation | 8 after Chain of Torment | Additional single-target damage | Use MP recovery when repeated casts create resource problems. |
| Divine Aura | 8; work toward 10 | Boss-oriented attack option | Switch to the area-focused specialty for grouped enemies. |
| Bolt | 8; work toward 10 | Skill Speed | Use an Accuracy-oriented alternative when important attacks regularly miss. |
| Debilitating Mark | Base level; 8 when affordable | Defense reduction or MP recovery | Defense-reduction utility becomes more important against durable enemies. |
| Defiance | Base level; 8 for difficult content | HP recovery or defensive utility | Increase its priority in PvP and survival-oriented presets. |
| Lightning Strike Scattershot | Base level initially | Situational stagger follow-up | Invest when encounter requirements and available thresholds justify it. |
Which Cleric Specialties Matter Most?
Specialty selection should match the content instead of automatically choosing the largest visible damage modifier. A dedicated healer gains more from an additional recovery use when the party is in danger than from improving a damage skill that is rarely cast.
- Healing Light: The additional-use option helps answer repeated damage without immediately consuming a larger cooldown. Later choices can improve healing or cooldown availability.
- Radiant Recovery: Its alternatives can improve cleansing, provide another use, or reduce the cooldown. Each choice solves a different encounter problem.
- Earth's Retribution: Improved MP restoration supports extended healing. Offensive chain options become more attractive after MP sustain is stable.
- Divine Aura: A boss-oriented option supports single-target encounters, while its area-focused alternative is better for grouped enemies.
- Condemnation: Later Critical Hit interactions can create additional offensive opportunities when the required setup is active.
- Defiance: Recovery and Tenacity-related choices gain value when control effects or burst damage are the primary threat.
Do not confuse purchased skill levels with displayed levels increased by Arcana, Daevanion, equipment, or other progression bonuses. Before spending points, check whether an external bonus can complete the next useful threshold.
Where Should You Spend Cleric Skill Points?
Instead of assuming one universal launch skill-point budget, use a staged allocation that establishes a functional healer without leaving solo damage undeveloped.
- First package: Raise Earth's Retribution and Healing Light toward level 8. Develop Judgment Thunder alongside them so ordinary combat remains functional.
- Healing foundation: Unlock Radiant Recovery and Light of Regeneration. Invest in Healing Enhancement once the passive becomes available.
- Damage foundation: Improve Chain of Torment and then Condemnation. Develop Divine Aura to its first useful specialty threshold.
- Core consolidation: Move Healing Light, Judgment Thunder, Earth's Retribution, and the most frequently used skills toward purchased level 10 where the live client permits it.
- Group specialization: Improve Radiant Recovery and the main healing passives before spending heavily on niche offensive utility.
- External levels: Use appropriate Daevanion, Arcana, and equipment bonuses to reach additional thresholds on skills used in the selected preset.
For a player running dungeons primarily as the party healer, Healing Light and Radiant Recovery deserve more immediate attention than maximizing Bolt. Damage becomes more important for independent farming, but sacrificing essential recovery for a small theoretical damage increase is rarely efficient.
Best Cleric Passive Skills
Passive upgrades affect the full build and are particularly important because Cleric's healing and offensive performance share part of their stat foundation.
| Passive | Priority | Main benefit |
|---|---|---|
| Healing Enhancement | Very high for healers | Strengthens healing through Attack-related scaling. |
| Radiant Benediction | High | Adds party recovery through successful offensive actions. |
| Warm Benediction | High | Supports the HP and MP foundation needed for sustained encounters. |
| Earth's Grace | High for hybrid builds | Improves offensive performance through Accuracy and critical-related scaling. |
| Empyrean Lord's Grace | High for damage presets | Adds offensive benefits to regular attacking. |
| Immortal Veil | Medium to high | Improves defensive stability against critical pressure. |
| Prayer of Concentration | Situational | Provides an additional defensive and healing response at low HP. |
| Survival Willpower | High for PvP | Helps against control effects and subsequent incoming damage. |
| Empyrean Lords' Benediction | Defensive option | Supports Block-related survival and recovery. |
| Heal Block | PvP-specific | Useful when reducing enemy recovery supports the selected PvP strategy. |
Healing Enhancement is the defining passive for a support-oriented Cleric. Earth's Grace and Empyrean Lord's Grace deserve greater investment in a solo or hybrid preset. Maintain separate priorities rather than expecting one passive distribution to perform equally well in every mode.
Build 1: Best Cleric Boss Healer Build
The main PvE preset should keep the party alive through repeated damage while contributing useful debuffs and ranged attacks whenever healing is not immediately required. Its purpose is reliable encounter execution rather than maximizing an isolated healing or damage measurement.
Core healing skills: Healing Light, Radiant Recovery, Light of Regeneration, and Defiance.
Core offensive skills: Earth's Retribution, Chain of Torment, Condemnation, Debilitating Mark, Judgment Thunder, and Divine Aura.
Passive priorities: Healing Enhancement, Radiant Benediction, Warm Benediction, followed by appropriate offensive or defensive alternatives.
Stigma direction: Benevolence, Absolution, Summon Resurrection, and either Yustiel's Power, Light of Protection, or an appropriate offensive option according to the encounter and available slots.
Cleric Healing Priority for Boss Fights
Healing follows a priority system rather than a fixed rotation. The correct ability depends on who is taking damage, whether that damage will continue, and what the boss is preparing next.
- Before predictable damage: Apply Light of Regeneration so periodic recovery is active when the party begins taking damage.
- For ordinary HP loss: Use Healing Light to support yourself and an eligible low-HP party member.
- When several players are injured: Use Radiant Recovery, particularly when it can also remove an important debuff.
- During prolonged party damage: Activate Benevolence when equipped and preserve the strongest recovery tools for the dangerous part of the mechanic.
- Before heavy unavoidable damage: Use Yustiel's Power or another equipped protection option when its effect applies to the incoming attack.
- After a death: Use Summon Resurrection only when the casting window is safe enough to avoid creating another casualty.
- During stable periods: Maintain offensive debuffs and use Earth's Retribution to support MP recovery.
Important: Do not consume every major healing cooldown after the first party-wide attack. If another dangerous mechanic follows immediately, preserving one recovery or protection option may be more valuable than restoring everyone to full HP several seconds early.
Cleric Damage Rotation Between Healing Windows
When the party is stable, Cleric should contribute damage instead of remaining idle. Use a short offensive sequence that can be interrupted immediately when somebody needs help.
- Apply Debilitating Mark when its debuff is useful.
- Apply Chain of Torment before Condemnation when the latter requires the corresponding target condition.
- Use Divine Aura during a suitable damage window.
- Cast Judgment Thunder and use its available follow-up interactions.
- Use Earth's Retribution to maintain offensive activity and recover MP.
- Use Bolt when its charge time and stagger contribution fit the encounter.
- Return to healing immediately when a dangerous mechanic or significant HP loss requires it.
Do not commit to a long charged attack while the boss is preparing party-wide damage. Finishing a damage animation at the cost of a missed heal is not an effective trade.
Explore services related to this guide, selected from our Aion 2 catalog.
View All Aion 2 ServicesCleric Boss Guide: Mechanics, Healing, and Loot

Cleric must understand dungeon mechanics because several dangerous attacks cannot be solved through healing alone. The encounters below appeared in Global Launch Scale Test instance data, with additional mechanical context taken from regional versions.
Hard-mode patterns, retail requirements, boss names, and reward distribution may differ in Global. The items below are examples associated with indexed instance reward pools, not guaranteed personal drops from the named boss.
Krao Cave
Krao Cave introduces repeated positioning checks and situations where preparing for predictable damage is more useful than reacting to every minor hit. Preserve enough MP for the final encounter and watch party members who repeatedly fail to reach safe positions.
| Boss | Notable skills and mechanics | What Cleric should do | Possible instance-pool rewards |
|---|---|---|---|
| Neglected Gadioton | Directed laser attacks, ground hazards, and repeated projectiles. | Maintain Light of Regeneration before overlapping attacks. Leave marked areas instead of trying to compensate with continuous healing. | Krao Cave equipment, Soul Codex items, Amplify Stone Fragments, and other instance materials. |
| Enhanced Harcon | Crossing projectile patterns, environmental hazards, and frequent movement checks. | Keep a safe movement route available. Use Healing Light for isolated damage and Radiant Recovery when several players are affected. | Division equipment, including the Mace family, plus applicable accessories and materials. |
| Ultimate Berk | Consecutive forward lunges, a heavy spinning attack, environmental cover, totems, and a required stagger mechanic. | Prepare group recovery for the spinning attack, reach cover before the arena-wide hit, and preserve a suitable stagger ability for the required phase. | Division Mace, Rupture Warhammer, Berk accessories, and applicable progression materials. |
Ultimate Berk is an important encounter for learning Cleric's wider responsibilities. The spinning attack can injure several nearby allies, making group recovery more useful than repeatedly healing one player. During the cover mechanic, move first and heal afterward.
Bolt and Power Burst can provide stagger-related utility when available. Coordinate their timing with the party instead of consuming every suitable ability immediately before a mandatory stagger phase.
Fire Temple
Fire Temple combines persistent damage zones with sudden movement requirements. Cleric must avoid wasting resources on players who remain inside lava or overlapping attacks when those resources will be needed for the next major mechanic.
| Boss | Notable skills and mechanics | What Cleric should do | Possible instance-pool rewards |
|---|---|---|---|
| Red Spark Ignus | Persistent lava puddles, expanding circular attacks, repeated jumps, and targeted ground damage. | Move targeted puddles toward the outer arena, prepare periodic healing before repeated jumps, and avoid overlapping damage with teammates. | Fire Temple equipment, including the Corrupted Judicator family and associated materials. |
| Black Smoke Murute | Heavy slam attacks, delayed circles beneath players, and expanding stomp waves. | Prepare recovery for consecutive hits, but finish moving through the complete wave pattern before committing to longer animations. | Corrupted Judicator Mace, Murute Earrings, and other relevant equipment or materials. |
| Kromede's Desire | Fire-wall maze, temporarily untargetable phases, clone attacks, and targeted line damage. | Prioritize positioning during the maze, avoid unnecessary long casts, and recover the group after reaching a safe area. | Enraged Kromede Warhammer, Corrupted Judicator equipment, Sealed Kromede Wings, Fire Temple artwork, and applicable progression materials. |
Kromede's fire-wall phase is not an opportunity to remain stationary and spam healing. The boss becomes temporarily unavailable while moving walls cross the arena, forcing the party to identify safe openings.
Regional Hard-mode versions may include additional movement checks. Treat those as difficulty-specific references rather than guaranteed mechanics of every Global version.
Draupnir
Draupnir can be demanding for healers because its mechanics combine movement, persistent ground effects, control, and party-wide damage. Its final encounter also rewards coordinated stagger timing rather than using every powerful attack as soon as it becomes available.
| Boss | Notable skills and mechanics | What Cleric should do | Possible instance-pool rewards |
|---|---|---|---|
| Predator Saraswati | Persistent damaging pools, targeted attacks, and a transformation effect associated with a poison-cloud mechanic. | Leave pools immediately. Use Radiant Recovery or Absolution when an applied effect is removable and avoid wasting healing on players who remain in hazards. | Anguish Mace and Guard, Saraswati Earrings, and additional Draupnir equipment or materials. |
| Phantasmal Lakshmi | Large circular attacks with airborne control, falling projectiles, and a healing servant. | Preserve Defiance for dangerous control, prepare group recovery for overlapping damage, and stabilize the group while the servant is eliminated. | Lakshmi Necklace, Anguish equipment, and applicable instance materials. |
| Transcendent Bakarma | Heavy area attacks, persistent red zones, ring-shaped movement mechanics, and a coordinated stagger phase. | Keep emergency healing available, complete the ring movement correctly, and reserve Bolt or Power Burst when Cleric is assigned to contribute stagger. | Anguish Mace, Bakarma Guard and armor, Sealed Blue Wave Wings, Draupnir artwork, and applicable progression materials. |
During Bakarma's dangerous movement phases, complete the required positioning before attempting to recover another player's HP. If several players survive with significant damage, Radiant Recovery followed by sustained healing can stabilize the party before combat resumes.
Keep Summon Resurrection available when it belongs to the selected preset, but do not assume that reviving one player can recover an encounter after a failed mandatory group mechanic.
Build 2: Cleric AoE and Solo Farming
Solo Cleric shifts investment toward offensive efficiency while retaining enough recovery to avoid unnecessary downtime. The goal is to defeat ordinary enemies through repeatable Earth- and Wind-based damage without consuming all available MP or defensive cooldowns.
Core skills: Earth's Retribution, Judgment Thunder, Divine Aura, Chain of Torment, Condemnation, Bolt, and Healing Light.
Important passives: Earth's Grace, Empyrean Lord's Grace, Warm Benediction, and Healing Enhancement.
Offensive Stigma options: Earth Punishment, Noble Aura, Prayer of Amplification, and Power Burst when available.
Recommended Solo Damage Rotation
Cleric deals better practical damage when offensive abilities are used together instead of being cast randomly. In particular, apply Chain of Torment before Condemnation when the latter requires its associated target condition.
- Begin with Debilitating Mark when its effect meaningfully contributes to the fight.
- Apply Chain of Torment to establish the condition used by Condemnation.
- Use Divine Aura and Judgment Thunder for offensive pressure.
- Cast Condemnation while its required target condition is active.
- Use Earth's Retribution between important abilities to maintain MP.
- Use Bolt during a suitable damage or stagger window.
- Recover from unavoidable damage without spending every defensive cooldown on an ordinary pull.
For grouped enemies, use Divine Aura's area-focused specialty when available. Judgment Thunder can also damage nearby targets, making enemy positioning important for efficient farming.
How Many Enemies Should Cleric Pull?
Self-healing makes larger pulls possible, but surviving a pack is not the same as clearing it efficiently. A pull becomes inefficient when most of the rotation is spent recovering instead of attacking.
Begin with groups that allow Divine Aura and Judgment Thunder to hit useful targets consistently. Increase the pull size only when the current setup clears them without exhausting MP or forcing repeated emergency healing.
Earth's Retribution is valuable during prolonged farming because its MP recovery reduces resource-related interruptions.
Build 3: Defensive Cleric PvE
The defensive preset is intended for unfamiliar bosses, difficult dungeon progression, and groups that frequently suffer overlapping damage. Its main difference from the standard boss preset is greater investment in protection and emergency recovery.
Retain Healing Light, Radiant Recovery, and Light of Regeneration while evaluating Absolution, Benevolence, Yustiel's Power, Salvation, and Summon Resurrection against the number of slots available in the Global client.
When to Use Defensive Abilities
- Defiance: Reserve it for dangerous control effects or situations where quickly regaining control prevents further damage.
- Radiant Recovery: Use it when both group healing and removal of a removable debuff are valuable.
- Absolution: Equip it when the encounter requires stronger party cleansing and recovery.
- Benevolence: Use it to support recovery during extended periods of party damage.
- Yustiel's Power: Time its group protection around incoming attacks that its effect can mitigate.
- Salvation: Use it as a powerful personal defensive response, but do not assume it can prevent special wipe mechanics.
Do not remove every damage ability simply because an encounter is difficult. Chain of Torment and Debilitating Mark can still contribute to the party, and unnecessarily prolonged combat creates more opportunities for mistakes.
A defensive Cleric should remain capable of recovering MP, applying basic offensive effects, and participating in mandatory stagger mechanics.
Build 4: Cleric Arena PvP
In Arena, Cleric becomes a survival-oriented combatant who relies on defensive timing, repeated recovery, and disruption. Its personal damage is generally less direct than that of a dedicated damage class, so attempting to play through uninterrupted burst combinations can be counterproductive.
Core skills: Healing Light, Radiant Recovery, Defiance, Earth's Retribution, Chain of Torment, Condemnation, and Judgment Thunder.
Stigma direction: Salvation, Root, Absolution, Yustiel's Power, and available defensive or offensive alternatives according to the matchup.
How to Play Cleric in Arena
- Maintain enough distance to avoid unnecessary damage while keeping access to the offensive target.
- Use Chain of Torment and available damage abilities when the opponent is not preparing a major attack.
- Reserve Defiance for dangerous control rather than an insignificant effect.
- Use Salvation or another protection skill against an attack window it can actually counter.
- Recover when necessary and resume pressure after the opponent spends important cooldowns.
- Avoid committing to charged Bolt when doing so exposes you to an unavoidable attack.
Root and other control effects can create room to recover, but their value depends on the target's resistance and current defensive effects. Wasting control may leave Cleric unable to disengage from the next attack.
Against durable opponents, the fight can become a resource contest. MP sustain and cooldown discipline therefore matter alongside offensive stats.
Build 5: Cleric Abyss and Mass PvP
Large-scale PvP changes Cleric's responsibilities considerably. Instead of chasing individual kills, the class focuses on group stability, cleansing, protection, and safe resurrection during coordinated engagements.
The recommended foundation is Healing Light, Radiant Recovery, Light of Regeneration, Healing Enhancement, and appropriate defensive passives. Stigma selection should emphasize Benevolence, Absolution, Yustiel's Power, Summon Resurrection, and protection-oriented alternatives that fit the current slot limit.
Mass PvP Healing Priorities
- Before engagement: Position behind the main frontline and keep the group within effective healing range.
- During initial pressure: Apply appropriate sustained healing and preserve major protection for coordinated enemy attacks.
- When several allies are controlled: Prioritize useful cleansing rather than repeatedly healing into an unresolved effect.
- When focused: Use personal defenses and reposition without dragging hostile pressure into the other support players.
- After an engagement: Restore resources and determine whether resurrection can be performed safely.
HP, defensive resistance, and PvP Damage Tolerance become more important because surviving enemy focus is a prerequisite for providing any healing.
The broader Abyss systems, including entry requirements, Artifacts, AP, and PvP equipment progression, are covered in the AION 2 Abyss Guide.
Best Cleric Stigmas and Upgrade Order

Stigmas define much of Cleric's flexibility. They can strengthen party healing, add resurrection, improve protection, increase personal damage, or contribute to stagger phases.
The Global test build contained 13 Cleric Stigmas. This does not guarantee that the live Global client will use the same complete list, slot arrangement, upgrade costs, or limits. Treat the following selections as priorities and equip only as many as the current character supports.
| Content | Priority Stigmas | When to swap |
|---|---|---|
| Standard Boss Healer | Benevolence; Absolution; Summon Resurrection; Yustiel's Power or Light of Protection | Exchange one defensive option for damage when the encounter is stable. |
| Hybrid Boss Damage | Earth Punishment; Noble Aura; Prayer of Amplification; Light of Protection | Replace an offensive slot with Absolution or Summon Resurrection when required. |
| Solo / AoE | Earth Punishment; Noble Aura; Prayer of Amplification; Power Burst | Use Benevolence or Salvation if incoming damage repeatedly interrupts farming. |
| Defensive PvE | Absolution; Benevolence; Yustiel's Power; Summon Resurrection | Consider Salvation when personal survival is the main limitation. |
| Arena | Salvation; Root; Absolution; Yustiel's Power | Add offense when control and protection are already sufficient. |
| Abyss / Mass PvP | Benevolence; Absolution; Yustiel's Power; Summon Resurrection | Adjust protection and resurrection priority to the group's organization. |
Which Cleric Stigmas Are Worth Investing In?
- Benevolence: Adds sustained party recovery and is useful when several players continue taking damage.
- Absolution: Combines party recovery with stronger cleansing and is valuable in difficult group encounters.
- Summon Resurrection: Revives a fallen party member. Its tactical value cannot be judged through ordinary damage or healing measurements.
- Yustiel's Power: Provides party protection during dangerous attack windows.
- Light of Protection: Provides party utility. Compare its live effects with support buffs supplied by Chanter before assuming that every benefit stacks.
- Earth Punishment: An offensive Stigma with damage-over-time and stagger utility. Its interactions can strengthen a hybrid damage preset.
- Noble Aura: Provides additional offensive activity through an accompanying Aura.
- Prayer of Amplification: Strengthens offensive damage windows through Attack-related effects.
- Power Burst: Adds a direct offensive ability with stagger contribution.
- Salvation: Provides personal protection when survival is more important than additional damage.
Recommended Cleric Stigma Upgrade Order
- Unlock Summon Resurrection when available to gain access to Cleric's revival utility.
- Obtain Benevolence and Absolution for sustained recovery and stronger cleansing.
- Develop Yustiel's Power or Light of Protection according to the protection required by the regular group.
- Upgrade healing Stigmas when the next level provides a meaningful improvement to encounter reliability.
- Develop Earth Punishment and the offensive package after the main healing responsibilities are covered.
- Invest separately in Salvation, Root, and other PvP-oriented alternatives when those modes become a regular priority.
For a hybrid damage build, Earth Punishment becomes an earlier investment, followed by Noble Aura and Prayer of Amplification. Even then, retain access to the healing, cleansing, and resurrection tools expected from the party role.
Check exact shard costs, available slots, and upgrade limits in the Global client. The wider system is explained in the AION 2 Stigma and Daevanion Guide.
Best Cleric Macros and Manual Skills
Cleric benefits from short repeatable offensive sequences, but healing should remain under direct player control. An automated sequence cannot determine whether the party needs an immediate cleanse, whether the boss is preparing lethal damage, or whether a resurrection attempt is safe.
Use the following only as skill-order templates. Confirm whether the Global client supports an in-game macro system and check its exact command syntax and execution restrictions before creating a macro.
| Template | Suggested sequence | Keep manual |
|---|---|---|
| Basic Boss Damage | Earth's Retribution → available offensive follow-up → Judgment Thunder | Healing Light, Radiant Recovery, Defiance, major defensive Stigmas |
| Debuff Damage | Chain of Torment → Condemnation while its required condition is active | Debuff timing, charged Bolt, emergency healing |
| Hybrid Damage | Earth's Retribution → short offensive follow-up using available skills | Divine Aura placement, major damage buffs, all recovery abilities |
| Solo AoE | Judgment Thunder → suitable repeatable offensive follow-ups | Enemy grouping, movement, recovery, Bolt charge timing |
| Arena / Abyss | Only a short offensive sequence when appropriate | Every cleanse, major heal, control ability, defensive cooldown, and target decision |
Which Skills Should Never Be Fully Automated?
Healing Light, Radiant Recovery, Absolution, Benevolence, Summon Resurrection, Salvation, and Defiance should remain on accessible manual controls. Their value depends on when they are used, not simply on activating them whenever their cooldown expires.
Condemnation also requires attention to its target condition. A sequence that attempts to cast it without the required effect can behave differently from the intended damage cycle.
Do not copy fixed macro delays from another player's setup without testing them against your latency and the controls available in Global.
Best Cleric Stats, Gear, Manastones, and Soul Binding
Cleric's equipment priorities differ from those of a conventional damage dealer because Attack can also contribute to healing through Healing Enhancement. This does not make every offensive item automatically superior: sufficient HP, MP sustain, and defensive stats remain necessary in difficult content.
| Stat | Boss Healer | Solo / Hybrid | Arena / Abyss |
|---|---|---|---|
| Attack | Important for Healing Enhancement scaling and offensive contribution. | Primary offensive investment. | Useful after essential survival requirements are met. |
| Heal Boost | High priority for dedicated group recovery. | Useful, but balance it against clear speed. | Important in prolonged defensive engagements. |
| HP | Enough to survive unavoidable boss damage. | Improves solo reliability. | Very important against coordinated player focus. |
| MP / MP sustain | Essential when repeated healing exceeds ordinary recovery. | Reduces downtime between pulls. | Useful during longer fights and repeated defensive exchanges. |
| Accuracy | Supports offensive contributions and applicable debuffs. | Important for reliable damage. | Useful for offensive pressure and applicable debuffs. |
| Cooldown reduction | Improves access to frequently required abilities. | Improves offensive consistency when meaningful cooldown gaps exist. | Valuable for repeated defensive opportunities. |
| Damage Tolerance / Defense | Improves survival during dangerous mechanics. | Situational. | High priority when regularly targeted. |
| Critical-related stats | Secondary for a dedicated healing setup. | More relevant to offensive damage. | Evaluate after meeting survival requirements. |
What Weapon Should Cleric Use?
Cleric uses a Mace and Guard in the Global test build. Prioritize equipment that supports the healing and damage package rather than selecting another item solely because its displayed grade is higher.
- Acquire a suitable Mace and Guard with useful primary stats.
- Meet the equipment requirements for the next relevant dungeon or activity.
- Improve survivability when current gear cannot withstand unavoidable damage.
- Add functional Manastones instead of immediately chasing perfect combinations.
- Develop retained equipment through appropriate enhancement and Soul Binding.
- Maintain separate PvP priorities when Arena and Abyss become regular activities.
When choosing between offensive and defensive upgrades, identify what is currently ending encounters. Additional Attack may strengthen healing through Healing Enhancement, but that advantage disappears if Cleric cannot survive long enough to cast.
Best Manastones for Cleric
For a dedicated healer, useful Manastone directions include Attack, HP, and other stats that improve dependable recovery or survival. The correct mixture depends on the equipment's existing attributes and the character's current limitations.
Solo and hybrid presets can move more investment toward offense, while PvP setups generally need additional protection against direct player pressure.
Do not consume expensive materials on temporary equipment before checking whether its progression can be transferred or retained. The AION 2 Gear Progression Guide covers the wider equipment system.
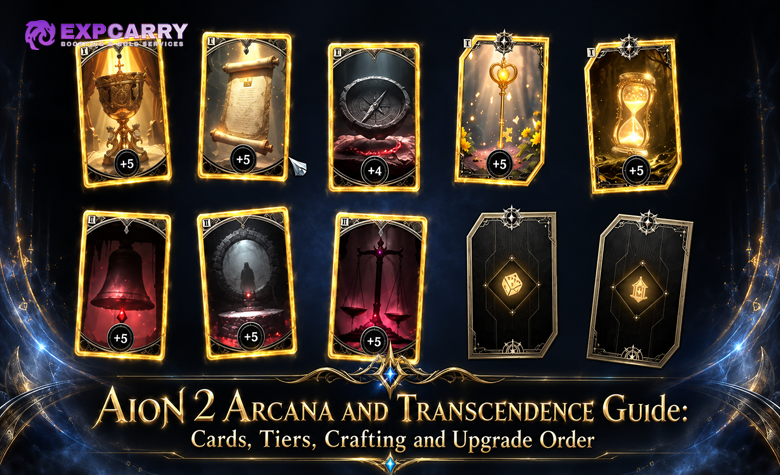
Best Arcana for Cleric
Arcana can improve Cleric through individual stats, set effects, and skill-level bonuses. Evaluate a healing card by its contribution to the equipped preset rather than by grade or general offensive value alone.
For the main healing preset, prioritize effects supporting Healing Light, Radiant Recovery, Healing Enhancement, and other frequently used recovery abilities. A hybrid preset can give greater weight to Earth's Retribution, Condemnation, Divine Aura, and offensive passives.
Which Arcana Bonuses Should You Prioritize?
- Fill every available slot with usable cards before heavily investing in one expensive card.
- Prioritize useful healing skill-level bonuses for a dedicated support preset.
- Compare Attack and defensive stats with the character's current limitations.
- Check whether a set bonus improves practical healing, recovery, or survivability.
- Preserve useful offensive cards for solo and hybrid presets.
- Replace a functioning card only after comparing the complete equipped result.
Protected Soul is a restoration-oriented Arcana set documented in later regional content. Treat it as a regional reference rather than a guaranteed Global launch set until its cards and effects are confirmed in the live client.
Regional Arcana systems have received additions since release. Do not assume that the latest KR/TW slot arrangement or crafting costs apply to Global. See the AION 2 Arcana Guide for the full system.
Best Pantheon Priorities for Cleric
Pantheon provides long-term character improvements. Use it to reinforce the role performed most often rather than distributing investment across every offensive domain.
Regional healer builds commonly examine Life-oriented effects for recovery, Wisdom-related bonuses for sustained performance, and defensive domains for difficult encounters. Exact effects depend on the artwork and progression available in the Global client.
| Domain direction | Recommended use | What to evaluate |
|---|---|---|
| Life | Dedicated healing and recovery | Useful restoration and support-related effects. |
| Wisdom | Sustained healing and resource management | Whether available bonuses improve prolonged combat. |
| Illusion / Time | Rotation and utility alternatives | Actual cooldown or combat benefits from accessible artwork. |
| Justice | Defensive or PvP-oriented progression | Whether available effects improve survival in the selected content. |
| Destruction | Solo and offensive presets | Direct contribution to the character's damage package. |
Do not treat this table as a fixed Global artwork-equipping sequence. Available pieces, domain effects, and progression values must be checked in the current client.
Global test-derived instance data indexed Fire Temple and Draupnir artwork. Confirm their availability and actual Pantheon contribution before building an expensive progression route around them.
Best Cleric Pets, Genus Insight, and Wings
Pets contribute through individual and collection benefits, including Genus Insight. Prioritize obtainable bonuses that improve reliable combat performance instead of assuming that one specific companion is mandatory for healing.
Which Pets Should Cleric Use?
Documented examples include Fungen, a Natura pet, and Black Dragon from the Global Ultimate Founder's Pack. Their existence does not make either pet Cleric's universal best-in-slot companion.
- Prioritize Attack when it strengthens both healing and offense.
- Use HP and defensive bonuses for difficult PvE or PvP.
- Improve Accuracy when solo damage or offensive debuff application is unreliable.
- Collect other useful permanent bonuses when their cost is reasonable.
Evaluate collection bonuses separately from the currently equipped pet. Obtaining additional companions can provide permanent progression even when another pet remains the preferred active choice.
Genus Insight Priorities
Documented Genus Insight families include Cogni, Fera, Natura, Varian, and Special. Each develops through its own collection progression, while available effects depend on the system and client version.
Begin by collecting accessible pets and developing useful bonuses across available families. Focus on Attack, HP, and defensive improvements before spending heavily on niche offensive rolls with little value to the normal group role.
Analysis costs, lock rules, and maximum values differ between regional versions. Do not import mature KR/TW account costs directly into a Global launch plan.
Which Wings Are Worth Using?
Evaluate Wings through their actual progression effects and equipment requirements. Named examples found in Global test-derived reward data include:
- Sealed Kromede Wings: Associated with the Fire Temple reward family.
- Sealed Blue Wave Wings: Associated with Draupnir's indexed rewards.
Neither is automatically Cleric's final best-in-slot choice. Compare the obtained item with the existing Wings, defensive requirements, and available progression options.
Best Cleric Daevanion Boards and Tile Priorities
Daevanion provides long-term progression through connected nodes and skill bonuses. The best Cleric route strengthens important healing abilities without spending excessive resources on unrelated intermediate tiles.
The Global test is a separate progression reference from the later Korean and Taiwanese clients. For example, do not assume that a regional Ariel PvE board is available in Global unless it appears in the live client.
Which Daevanion Tiles Should Cleric Take?
| Priority | Tile type | Reason |
|---|---|---|
| 1 | Healing Light skill bonuses | Improve a frequently used direct-recovery ability. |
| 2 | Radiant Recovery skill bonuses | Support party recovery and useful cleansing interactions. |
| 3 | Healing Enhancement passive bonuses | Strengthen the underlying healing package. |
| 4 | Light of Regeneration and support skills | Improve sustained recovery when important to the selected preset. |
| 5 | Attack and relevant offensive stats | Support hybrid damage and Attack-related healing scaling. |
| 6 | HP, defensive stats, and resource nodes | Develop them when survival or sustain limits progression. |
| 7 | Condemnation, Divine Aura, and offensive passives | Useful for solo and hybrid presets after healing requirements are covered. |
Inspect the complete cost of reaching a tile rather than judging it in isolation. A valuable distant node can be inefficient when its route consumes resources that could complete several important nearby improvements.
Practical Cleric Upgrade Order
- Develop Earth's Retribution and the core healing skills.
- Invest in Healing Enhancement and passives supporting the primary role.
- Unlock useful healing Stigmas and Summon Resurrection when available.
- Establish a suitable Mace and Guard and meet relevant equipment requirements.
- Use Daevanion and Arcana bonuses to complete meaningful displayed-level thresholds.
- Improve Manastones and Soul Binding on equipment worth retaining.
- Develop Pantheon, pet collections, Genus Insight, and Wings through accessible content.
- Create separate offensive and PvP presets after the main healer setup is reliable.
If an upgrade does not improve recovery, solve a resource problem, increase practical damage, or help unlock content, it can usually be delayed.
Common Cleric Mistakes to Avoid
- Copying KR/TW endgame builds directly into Global: Stigma limits, board layouts, equipment, balance values, and external skill levels may differ.
- Ignoring Healing Enhancement: This passive changes how Attack should be evaluated in a healing build.
- Using every heal immediately: Preserve suitable recovery tools for dangerous mechanics instead of exhausting them after minor damage.
- Confusing direct healing with healing over time: Light of Regeneration cannot replace an immediate emergency heal.
- Misunderstanding Healing Light targeting: Its eligible low-HP party-member behavior differs from a conventional manually targeted heal.
- Ignoring Radiant Recovery's cleanse: The ability may be more valuable moments later when a removable debuff appears.
- Neglecting MP sustain: A Cleric who cannot continue casting during a long encounter becomes unreliable.
- Ignoring skill conditions: Condemnation must be used while its required target condition is active in versions where that interaction applies.
- Automating emergency abilities: Healing, resurrection, cleansing, control removal, and protection require situational decisions.
- Trying to heal through wipe mechanics: Correct positioning and mandatory stagger checks take priority over ordinary recovery.
- Overinvesting in temporary gear: Expensive enhancement and Soul Binding should follow a reasonable retention plan.
- Using a solo preset in every dungeon: Healing and Stigma requirements change with party composition and encounter difficulty.
AION 2 Cleric FAQ
Can Cleric and Chanter play together in the same party?
Yes. Cleric focuses on dedicated healing and recovery, while Chanter provides hybrid support and additional utility. Check the live descriptions of individual buffs because some support effects may overlap or use stacking restrictions.
Does Cleric need a specific premium pet to heal effectively?
No. Cleric's healing foundation comes from skills, passives, equipment, and progression systems. Pets provide additional benefits, but no specific premium companion is required for the basic healing rotation.
Should Cleric carry recovery consumables?
Yes. Personal HP and MP consumables remain useful when emergency recovery is unavailable, MP is low, or a dangerous mechanic prevents an immediate skill response. They should support the healing rotation rather than replace it.
Conclusion
AION 2 Cleric performs best when its build combines reliable recovery, efficient resource management, and useful offensive contribution. Establish Healing Light, Radiant Recovery, Healing Enhancement, and Earth's Retribution first, then develop the Stigmas required by regular party content. Use an offensive alternative for solo farming, increase defensive investment for difficult encounters, and prioritize survivability and cleansing in organized PvP. Verify final skill thresholds, Stigma limits, equipment values, dungeon mechanics, and expensive progression decisions in the released Global client.