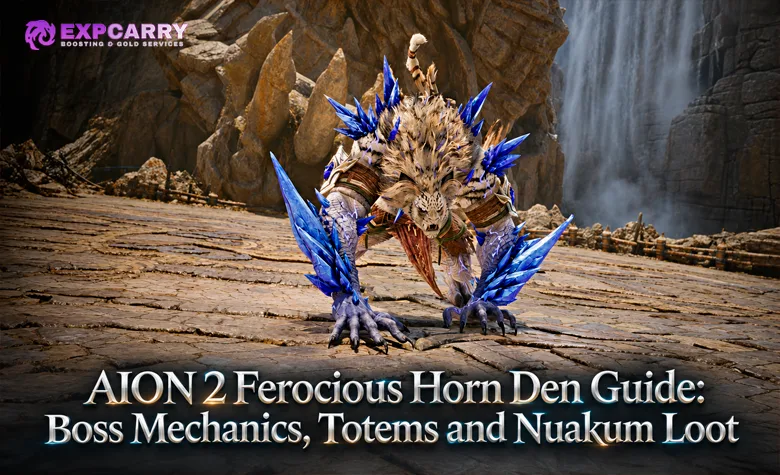
Ferocious Horn Den is one of the most important armor-farming Expeditions in AION 2 Global. It becomes available at level 45 with 2,100 Item Level, but meeting that requirement does not mean your party is ready for the mechanics. Groups usually lose time at four points: Watchdog Kwapo's lightning orbs, the Mau Totem room, Necromancer Duanka's soul attacks, and Ferocious Horn Nuakum's dangerous player-targeted mechanics.
The dungeon rewards Nuakum's Unique armor and the valuable Nuakum Guard, making it a natural farming destination once your character reaches the higher Conquest tier. However, the reward system also makes preparation important. A successful clear does not guarantee the armor piece you want, and claiming unnecessary rewards can waste Odyle Energy. This guide explains the route, boss mechanics, party assignments, loot choices, and a practical farming strategy for the current Global version.
Short answer: Assign players before entering. Clear Kwapo's lightning orbs and jump his shockwave, use bombs to eliminate the totem waves, collect the altar soul during Duanka's summon phase, and rotate interception duties on Nuakum. During Nuakum's energy phase, line up his projectiles with the central orb. For armor farming, track your Guaranteed Reward progress instead of relying on random drops alone.
AION 2 Ferocious Horn Den Requirements and Difficulties
Ferocious Horn Den is an Expedition in the Abyss. Both Exploration and Conquest Normal are available in the current Global progression, with the same level and Item Level requirements. The important differences are the final boss's Frenzy timer and whether certain rewards are bound or tradable. Since the November 4 update, both difficulties also share the same Guaranteed Reward requirement.
| Feature | Exploration | Conquest Normal |
|---|---|---|
| Character level | 45 | 45 |
| Required Item Level | 2,100 | 2,100 |
| Party size | 1–5 players | 1–5 players |
| Dungeon time limit | 60 minutes | 60 minutes |
| Reward claim cost | 40 Odyle Energy per eligible cube | 40 Odyle Energy per eligible cube |
| Nuakum Frenzy | No Frenzy timer listed | Frenzy after 5 minutes |
| Guaranteed Reward | After 28 eligible cube claims | After 28 eligible cube claims |
| Main armor target | Nuakum Unique armor | Nuakum Unique armor |
The recorded Hard version of Ferocious Horn Den is not available on Global as of November 5, 2026. A Hard difficulty option briefly appeared by mistake on November 4 and was removed by a hotfix. Do not build a farming plan around its separate reward table or assume that Hard-mode rewards can already be obtained here.
For a reliable first clear, use a five-player group with a tank, healer, and three damage dealers. The dungeon allows smaller parties, but Nuakum's consecutive interception checks leave much less room for error when fewer players are available.
The October 28 Global update reduced boss Attack in Normal Expeditions by 15%. That makes incoming damage more manageable, but the change does not remove the need to handle orbs, shared damage, or interception mechanics correctly. The November 4 update also increased Exploration rewards to match Normal, with the corresponding refining and crafting materials dropping as Bound items.
Ferocious Horn Den Route: From Kwapo to Nuakum
The dungeon follows a mostly linear route. You fight three bosses and complete a separate Mau Totem encounter between the first and second bosses. The fastest reliable path is the one that avoids unnecessary enemies while collecting every useful checkpoint.
- Enter and reach the Wooden Barricade. Move through the opening section, avoiding optional Mau packs where possible. Take a bomb from the nearby Bomb Chest and use it to destroy the barricade.
- Defeat Watchdog Kwapo. Clear his lightning-orb mechanic, collect the available reward if it fits your farming plan, and continue up the path.
- Break the stone wall and glide down. The route leads toward the Requiem Altar and the Mau Totem encounter. Watch your landing instead of rushing into the next group.
- Complete the Totem encounter and defeat Necromancer Duanka. Use bombs against the enemy waves, destroy the totem, activate the next checkpoint, and prepare for Duanka's soul mechanics.
- Use the Updraft and reach the Howling Throne. After Duanka, follow the route back toward the surface. Activate the Kibelisk before entering Nuakum's arena.
The Kibelisks matter because falling during the traversal or wiping to Nuakum can otherwise cost additional travel time. The final checkpoint before Nuakum is particularly important when your group is still learning his mechanics.
Do not confuse the route's shortcuts with permission to ignore mandatory objectives. You can bypass some ordinary enemies, but the barricade, totem encounter, and required bosses still need to be handled.
Watchdog Kwapo: Lightning Orbs and the Shockwave
Watchdog Kwapo is the first boss. His regular attacks punish players standing in front of him, but the most common wipe comes from Thunder Cry. The party must handle both the lightning orbs and the outgoing wave rather than treating them as one mechanic.
How to Survive Thunder Cry
During Thunder Cry, lightning orbs appear around the arena. They need to be cleared before the howl finishes. If too many remain, the resulting explosions can cover large sections of the floor and overwhelm the group.
- Split the arena into sectors. Assign each damage dealer an area so that everyone does not run toward the same orb.
- Clear the lightning orbs. Pick up or otherwise remove the interactable orbs as the mechanic allows. If a player becomes slowed, another teammate should cover the remaining area.
- Watch Kwapo move to the center. Clearing the orbs does not cancel the following wave.
- Jump the outgoing lightning shockwave. Time the jump for the moving ring rather than jumping immediately when the cast begins.
If the group cannot clear the entire room, focus on creating a safe section where players can survive the remaining explosions. That is more useful than scattering across the arena and leaving dangerous orbs everywhere.
Other Kwapo Attacks to Watch
Kwapo also charges along a marked line, leaps toward players, and uses frontal attacks that can apply Bleed. The tank should keep him facing away from the party, while ranged players avoid standing directly behind the tank.
When one player receives a large circle with arrows pointing outward, that player should move away and everyone else should leave the marked area. The same basic marker language becomes important again during Nuakum.
Common mistake: Players successfully clear the lightning orbs, assume the phase is finished, and then get hit by the shockwave. Always wait for the wave and jump it before returning to damage.
Explore services related to this guide, selected from our Aion 2 catalog.
View All Aion 2 Services
Shining Mau Totem: Bombs, Enemy Waves and Player Positions
The Totem encounter sits between Kwapo and Duanka. It is sometimes described as the Shining Mau Totem encounter, while the dungeon's guidance refers to destroying the Sealed Mau Totem. Regardless of the name used, the objective is the same: deal with the summoned enemies and destroy the totem to open the route forward.
Start by having the whole party enter the area and take positions. Bombs or grenades are available from the platforms on both sides of the encounter. These are intended to make the add waves much easier to control.
Best Totem Room Strategy
The safest approach is to divide the room into a central holding position and two bomb positions.
- Tank: Stay near the central area and collect the incoming Mau enemies without dragging them toward the players collecting bombs.
- Healer: Maintain a position with a clear view of the tank and both sides. Avoid standing where newly spawned enemies can surround you.
- Two damage dealers: Take the left and right bomb positions. Pick up bombs and throw them into concentrated groups of Totem Shamans and Duduka.
- Remaining damage dealer: Help finish surviving enemies, protect the healer, and assist whichever side falls behind.
- Entire party: Once the required enemies are cleared and the totem is vulnerable, focus the totem to finish the encounter.
The main danger is letting enemy waves accumulate while everyone attacks the totem or searches for the bomb chests. Pre-positioning avoids that problem. Bombs are a mechanic of the room, not an optional damage bonus that should be ignored.
If your group wipes here, establish the bomb assignments before the next attempt. The encounter becomes substantially easier once the tank controls enemy positions and the damage dealers use the intended explosives.
Necromancer Duanka: Mau Souls, Shared Damage and Soul Caller
Duanka is the second boss and introduces mechanics that require opposite reactions. One attack asks players to gather and share damage; another asks them to move away from the boss. Confusing those responses is a frequent cause of wipes.
Mau Necromancy: Collect the Altar Soul
During Mau Necromancy, Duanka summons the souls of fallen Mau and attempts to absorb them. The arena provides soul orbs at the altar that help the party deal with these summoned enemies.
- Assign a damage dealer to handle the altar before starting the fight.
- When the souls appear, that player collects the altar's soul orbs.
- The empowered player focuses on killing the summoned Mau souls before Duanka can absorb them.
- The remaining players help control and damage the summons while the tank keeps Duanka positioned safely.
The key is to respond immediately. Sending several players to the altar wastes time, while leaving the summoned souls alive gives Duanka an opportunity to complete the mechanic.
Black Area: Stack to Share Damage
Duanka can root a player inside a large dark area. This is a shared-damage mechanic: the other party members should move into the marked area with the trapped player to divide the incoming hit.
The healer should be ready to restore the group immediately afterward. A player who remains alone inside the shared-damage marker can take far more damage than intended.
Soul Caller: Run Away From Duanka
Soul Caller requires the opposite reaction. Duanka prepares a dangerous area attack while lightning souls move through the arena. The boss's alert gives the party time to retreat.
Move away as soon as the warning appears. Avoid the approaching lightning souls because being slowed or stunned can prevent you from reaching safety before the main attack resolves. Melee players should not wait to finish another skill rotation before moving.
Remember the difference: A rooted ally inside the dark shared-damage area needs teammates nearby. Soul Caller needs everyone to create distance from Duanka while dodging the lightning souls. Calling out the ability name is more reliable than simply shouting “stack” or “run.”
Ferocious Horn Nuakum: Complete Boss Mechanics
Nuakum is the final boss and the main reason to organize the party carefully. His fight combines repeated frontal attacks, persistent bleeding zones, clone interceptions, shared or isolated damage circles, and a dangerous Fafnite Energy phase. In Conquest Normal, he also gains Frenzy after five minutes, making unnecessary mistakes a serious damage-check problem.
Keep the Arena Clear of Bleeding Puddles
Nuakum's attacks apply the Prey debuff. As the effect builds, it can develop into Ruptured Prey and create a damaging zone beneath the affected player after a short delay.
Move toward the edge of the arena when the puddle is about to appear, then return to your assigned position. The tank is especially likely to collect stacks because Nuakum's frontal attacks repeatedly hit the area directly in front of him.
Keeping the middle clear matters later. Nuakum's prey mechanic requires precise player positioning, and the Fafnite Energy phase depends on moving around the central orb. A room filled with overlapping bleeding zones becomes much harder to survive.
Nuakum also has a particularly dangerous multi-hit frontal claw attack. The tank should face him away from everyone else, and melee damage dealers should avoid drifting in front while following the boss.
The Prey Mechanic: Block the Clone and Read the Circle
During the hunt sequence, Nuakum selects and roots a player. A doppelganger then charges toward that target. One teammate must stand between the clone and the rooted player to intercept the charge.
There are two separate jobs during this mechanic: blocking the clone and responding to the circle under the rooted player. Completing one does not replace the other.
| What appears | What the targeted player does | What the party does |
|---|---|---|
| Clone charges the rooted player | Stay positioned so the charge can be intercepted | One unmarked player stands in the clone's path |
| Large circle, arrows pointing outward | Remain isolated from teammates | Everyone else moves outside the circle |
| Small circle, arrows pointing inward | Hold position for the shared hit | Available players stack on the target to divide damage; the assigned blocker handles the clone |
| Another clone charges shortly afterward | Watch for the new target and marker | A different player without an active vulnerability mark blocks |
The player who intercepts a charge receives a mark that makes immediately blocking another attack dangerous. Therefore, the party should establish a rotation before the pull. In a five-player group, the tank can take the first interception if available, followed by designated damage dealers who are not carrying the mark.
Do not memorize one fixed sequence of large and small circles. Their order can vary. Read the arrows every time: outward means spread, inward means share.
The hunt is commonly observed in repeated sequences around the middle portions of the fight. These health-based timings are approximate, so the party should react to the actual target and clone rather than waiting for an exact percentage.
Fafnite Energy: Redirect Nuakum's Projectiles Into the Orb
Later in the encounter, Nuakum creates a large energy orb near the middle of the arena. This phase is often described as the black-hole or Blue Light mechanic. The orb pulls nearby players toward it and deals severe damage at close range.
The objective is not to attack the orb with your normal damage rotation. Instead, the party must use Nuakum's own targeted attacks to destroy it before the dangerous cast finishes.
- Identify the marked player. Nuakum chooses a target for his next projectile.
- Move to the far side of the orb. The marked player should position so the orb sits directly between them and Nuakum.
- Keep the projectile lined up. The incoming attack must pass through the energy orb rather than missing it or striking another player.
- Repeat for subsequent targets. The target may change before another projectile, so everyone must be prepared to move.
- Stay outside the orb's damaging pull. Do not stand inside the orb while trying to line up the projectile.
Current encounter breakdowns describe three successful projectile hits as enough to break the orb during the sequence. The exact health percentage at which this phase begins can vary between accounts of the fight; treat the orb's appearance and target marker as your actual signals.
A party-wide fear can interrupt positioning during this sequence. Players should remain close enough to correct their alignment quickly, but outside the orb's damaging area. The tank should keep Nuakum as stable as possible to make the projectile path predictable.
Common mistake: The marked player runs away from the orb, or another teammate accidentally stands between Nuakum and the orb. Either mistake can prevent the projectile from hitting its intended target and leave the party exposed when the cast completes.
Two Red Projectiles: Use Different Interceptors
Nuakum has another dangerous attack in which a player is rooted or targeted and the boss launches two powerful projectiles in succession. The party must protect that player by intercepting the attacks.
Assign two different players without an active Hunt Mark. The first interceptor steps into the line of the first projectile, absorbs that hit, and moves out. The second interceptor then takes the following projectile.
The first hit applies a vulnerability effect, making it dangerous for the same person to absorb the second projectile. Do not have both interceptors stand on top of each other, and do not allow the originally targeted player to take an unblocked hit.
This is separate from the earlier clone-charge mechanic, even though both require players to step into an attack path. A clear callout such as “first block” and “second block” helps prevent one player from accidentally taking both hits.
Nuakum Frenzy and Damage Timing
Conquest Normal gives the party five minutes before Nuakum enters Frenzy. Once Frenzy activates, the boss becomes substantially more dangerous. Exploration does not list the same enrage timer.
Use major damage cooldowns when the boss can actually be attacked and the group is not about to stop for a mandatory mechanic. Losing a player during an interception usually costs more damage than saving a few seconds by ignoring the assignment.
A group that repeatedly reaches Frenzy should first check whether players are losing uptime because they are scattered, dead, or recovering from avoidable hits. Better positioning and cleaner mechanics often provide a more reliable improvement than replacing one piece of gear.
Best Party Setup and Role Assignments
The recommended setup is one tank, one healer, and three damage dealers. Ferocious Horn Den does not require every group to use one exact class combination, but players should agree on their responsibilities before the first pull.
| Role | Main responsibility | Critical mechanics |
|---|---|---|
| Tank | Keep frontal attacks away from the party and position bosses consistently | Kwapo charge direction, Totem add control, Nuakum bleeding puddles and projectile alignment |
| Healer | Keep the party stable through shared hits and recovery periods | Duanka's shared-damage area, Nuakum's prey circles and marked players |
| Damage dealer 1 | Handle the first assigned special objective | One side of the Totem room, Duanka's altar soul |
| Damage dealer 2 | Cover the opposite side and serve as an interceptor | Other Totem bomb position, Nuakum's second interception |
| Damage dealer 3 | Finish priority targets and cover changing assignments | Remaining Totem enemies, subsequent Nuakum interceptions and projectile targets |
These are starting assignments, not permanent restrictions. If the tank receives a mechanic that prevents them from intercepting, another player must take over. Likewise, any player targeted by Nuakum's Fafnite projectile needs to perform the alignment correctly, regardless of class.
Voice communication makes the fight easier, but a group can also succeed with short, consistent calls: “orbs,” “jump,” “bomb left,” “altar soul,” “stack,” “spread,” “first block,” “second block,” and “line up the orb.”
Ferocious Horn Den Loot: Nuakum Armor and Other Rewards
Ferocious Horn Den is primarily an armor dungeon. In the level-45 Conquest progression, it complements Fire Temple, which is a stronger target for its corresponding weapons and accessories. If you are still planning which dungeon to farm, the AION 2 Dungeons Guide explains how these Expedition tiers fit together.
The most important equipment family here is the Unique, Item Level 86 Nuakum set. The reward pool also includes the Nuakum Guard and other items that can support crafting, upgrades, or collections.
| Reward | Where it fits | Farming priority |
|---|---|---|
| Nuakum Helm, Pauldrons and Breastplate | Unique Item Level 86 armor | Prioritize the slots that replace your weakest current pieces |
| Nuakum Gloves, Greaves and Boots | Unique Item Level 86 armor | Choose missing slots through the Guaranteed Reward system when available |
| Nuakum Cloak | Unique Item Level 86 equipment | Consider it alongside other missing set pieces and the stats your build needs |
| Nuakum Guard | Separate Unique Item Level 86 equipment piece | Rare random reward or longer-term voucher target; not a direct armor-selection option |
| Wrathful Ego | Higher-tier Dragon Lord crafting material; Bound in Exploration | Useful when your next crafted upgrade requires it |
| Other listed rewards | Black Claw equipment, Fera Necklace, stones, materials and collection rewards | Secondary value unless a specific item solves a current progression need |
The drop pool does not mean that every completed run will provide a Nuakum armor piece. Random rewards are still random, and the Guard is considerably harder to target than an ordinary selectable armor slot.
For crafting-material decisions, use the separate Wrathful Mind, Will and Ego farming guide. Ferocious Horn Den is one of the relevant Conquest sources for Wrathful Ego, and Exploration now offers corresponding Bound crafting materials, but an armor-focused character should not automatically spend every available reward claim chasing that material.
Guaranteed Rewards: How to Farm the Armor You Actually Need
The Guaranteed Reward system is the most important protection against repeated unlucky runs. Each eligible reward-cube claim advances the corresponding counter. The reward becomes selectable once the required number of claims has been reached.
Exploration: Select Armor or a Voucher After 28 Claims
Since the November 4 Global update, the Guaranteed Reward in Exploration becomes available after 28 eligible cube claims, matching Conquest Normal rather than the previous three-claim requirement. The selection includes the seven Nuakum armor and cloak slots and the bound Gear Change Voucher: Ferocious Horn Den.
This makes Exploration worth considering when you need a specific selectable armor piece and can clear the dungeon reliably, especially with its improved Bound rewards. However, verify the available reward and progress counter in your own dungeon interface before spending Odyle Energy.
Conquest Normal: Select Armor or a Voucher After 28 Claims
Conquest Normal also has a counter of 28 eligible claims. Once completed, the recorded selection offers the seven Nuakum armor and cloak slots or a bound Gear Change Voucher: Ferocious Horn Den.
If you still need several armor pieces, selecting the missing piece directly is generally the simpler route. Choosing a voucher instead introduces an additional conversion step and may require Kina.
The current Substance Morph records list these conversions:
- Ferocious Horn Den Armor Selection Chest: 1 Gear Change Voucher plus 500,000 Kina.
- Nuakum Guard: 3 Gear Change Vouchers plus 2,000,000 Kina.
The important distinction is that Nuakum Guard is not a direct selectable Guaranteed Reward in Exploration or Conquest Normal. It can appear as a random reward, while the voucher conversion provides a more predictable but substantially more expensive route.
Do not confuse the number of required cube claims with the number of dungeon clears. Check the claim counter in the current client. Likewise, a boss kill by itself does not mean you received a random armor item or advanced your reward counter without claiming the eligible reward.
How to Spend Odyle Energy Efficiently
Each eligible Ferocious Horn Den reward-cube claim costs 40 Odyle Energy in the current Global data. Energy is limited, so a farming session should begin with one clear target: a missing armor piece, a Guard conversion plan, or a crafting material.
- Check your equipment before entering. Write down which Nuakum slots would actually be upgrades. A higher-grade item with unsuitable stats is not automatically the best choice for every build.
- Check the reward pool for your selected difficulty. Exploration and Conquest now have the same Guaranteed Reward counter, but their reward binding rules and combat conditions differ.
- Track claim progress. A run that gives no useful random item can still move you toward a guaranteed selection if you claim an eligible cube.
- Prioritize the rewards that solve your current problem. If you want armor, avoid diverting your entire energy budget to unrelated rewards simply because they are available.
- Compare clear consistency. A reliable group that finishes the dungeon repeatedly is usually more useful than a theoretically faster group that wipes on every Nuakum hunt.
Also remember that the number of possible boss-related reward opportunities and the actual claims you make are not interchangeable. Check the current reward interface before budgeting energy for a full clear. The broader AION 2 Odyle Energy Guide covers regeneration, storage limits, and other activities competing for the same resource.
Why Parties Wipe in Ferocious Horn Den
Most failed runs can be traced to an incorrect response to one of the dungeon's mandatory mechanics. Use this checklist to identify the cause before changing your group composition or spending more on gear.
- Kwapo: Someone must clear lightning orbs, and everyone must still jump the outgoing wave. Assigning orb sectors prevents duplicate movement.
- Mau Totem: Put damage dealers at the bomb positions before the encounter starts. Clear the enemy waves before trying to finish the totem.
- Duanka's summons: Choose one player to collect the altar soul and prioritize the summoned Mau before they are absorbed.
- Duanka's black area: Share the hit with the rooted player. Do not mistake this for Soul Caller, which requires retreating.
- Nuakum's prey: Assign a fresh blocker for each clone charge and read the circle arrows separately. Outward means spread; inward means share.
- Nuakum's energy orb: The marked player must place the orb between themselves and the boss so the projectile hits it.
- Nuakum's double projectile: Use two separate interceptors rather than letting one marked player absorb both attacks.
- Nuakum's bleeding zones: Drop puddles near the edge, preserving the center for later movement and positioning.
If all players understand these responses but the party still reaches the five-minute Frenzy, focus next on damage uptime, skill upgrades, consumables, and whether the group is spending too long recovering after avoidable attacks.
Best Ferocious Horn Den Farming Strategy
For the first successful clear, prioritize survival and learning the complete mechanic sequence. Assign the two Totem bomb positions, Duanka's altar player, and at least two Nuakum interceptors before entering combat. Make sure everyone recognizes the difference between inward and outward arrows.
After the group can clear consistently, shift toward efficient farming. Avoid unnecessary trash fights, activate the checkpoints, keep Nuakum's arena clean, and track your actual reward claims. Spend Odyle Energy according to the equipment slots you still need rather than reacting to the last random drop.
Ferocious Horn Den becomes a strong armor-farming destination once the mechanics are under control. The hardest part is rarely the entry requirement itself: it is coordinating the orb phases, totem waves, shared hits, and interceptions well enough to turn each clear into steady progress toward the Nuakum equipment your character actually needs.