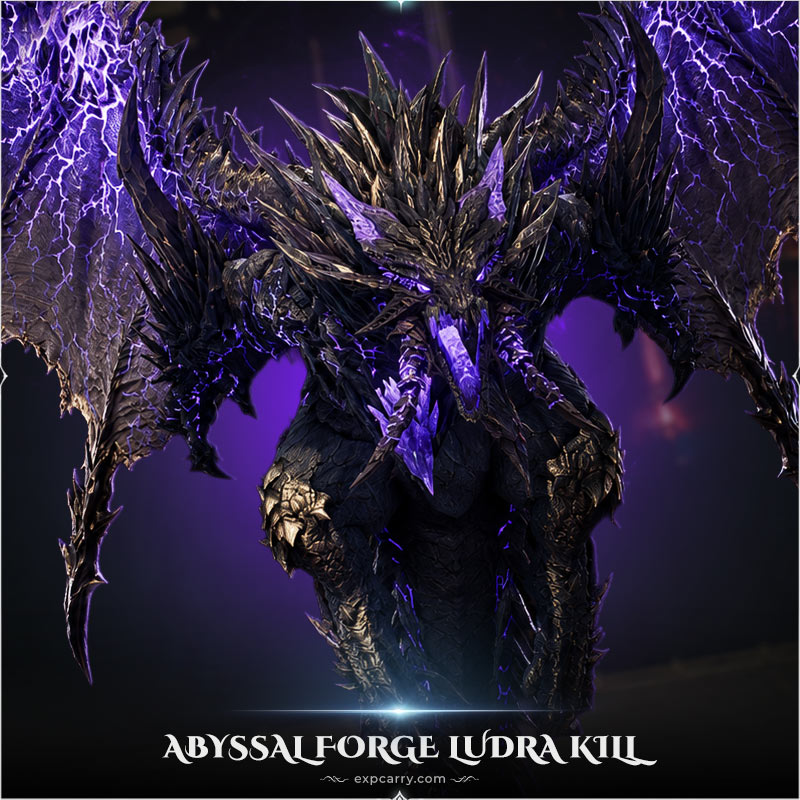
AION 2 Abyssal Forge: Ludra is the first Sanctuary raid, featuring an opening reactor objective, two intermediate encounters, and a final battle against Eternal Ludra. Unlike ordinary Expedition dungeons, it requires a coordinated 10-player group divided into two five-player parties. Players must handle Rahu's bomb transfers, Ketu's gaze and Soul Stone mechanics, and Ludra's orb assignments, color effects, and Bingo phases.
This guide covers the raid route, encounter mechanics, positioning, group responsibilities, common mistakes, and available rewards. Boss strategies are based on documented Korean and Taiwanese encounters, while the Global reward information comes from the September 2026 Launch Scale Test client (version 1.0.21.0). Global Advanced Access begins on September 30, followed by the official launch on October 5. Final retail entry requirements, encounter adjustments, and reward rules should be checked against the released Global client.
Short answer: Abyssal Forge: Ludra is designed for 10 players. Prepare two balanced parties, complete the opening reactor objective, handle Rahu and Ketu, and regroup for Eternal Ludra. Assign bomb receivers, orb handlers, and Bingo search areas in advance. During the final encounter, surviving mandatory mechanics is more important than maintaining uninterrupted damage.
AION 2 Abyssal Forge: Ludra Overview
Abyssal Forge is Sanctuary 1, a raid activity separate from standard five-player Expeditions. Its progression includes an environmental objective, separate party responsibilities, and a final encounter involving the complete raid.
| Category | Details |
|---|---|
| Activity | Sanctuary 1 |
| Final encounter | Eternal Ludra |
| Raid size | 10 players, divided into two five-player parties |
| Opening objective | Central Abyss Fusion Reactor |
| Intermediate bosses | Isolation Specialist Rahu and Abyssal Wings Ketu |
| Main mechanics | Bomb transfers, gaze checks, Soul Stones, orb interception, color separation, and Bingo |
| September Global test rewards | Ludra equipment, Epic gear, progression materials, Kina, and a guaranteed-reward system |
| Publication requirement | Verify final Global retail entry conditions, reward costs, and Sanctuary availability |
The September Global test database lists a cost of 40 Odyle Energy for the final reward cube and an eight-clear guaranteed-reward threshold. However, the database does not independently verify every ceiling-reward rule. These figures should therefore be treated as test-client information until confirmed in the live Global interface.
Older guides may describe an eight-player raid. That format became outdated when NCSOFT expanded Sanctuary groups to 10 players in the July 1, 2026 Korean Chapter 1 update. The same 10-player structure appears in the September Global test data.
Regional reward systems also differ. Korea and Taiwan received a Sanctuary economy update in July 2026, including an increase from 40 to 80 Odyle Energy per rewarded clear and changes to reward frequency. Do not apply those regional values automatically to Global. Likewise, the historical level 45 and item level 2700 entry requirements should not be presented as confirmed Global retail requirements.
How to Prepare for the Ludra Raid
Preparation should focus on assigning responsibilities rather than relying exclusively on equipment strength. Several encounters require players to interrupt their usual damage rotation, move to specific positions, or interact with an object at a precise moment.
Recommended Raid Composition
Organize the 10-player raid into two parties of five. Each party should be capable of surviving and completing its assigned intermediate encounter without depending on constant assistance from the other group.
The following setup is a practical organizational example, not a compulsory class combination:
| Role | Recommended assignment | Main responsibility |
|---|---|---|
| Frontline | One reliable frontline player in each party | Maintain controlled boss positioning and handle directed attacks. |
| Healing | Independent healing coverage for both parties | Recover party HP, remove applicable debuffs, and handle emergency situations. |
| Support | Protection and party buffs where available | Coordinate defensive abilities and improve group stability during difficult mechanics. |
| Damage dealers | Remaining raid positions | Deal damage, eliminate summoned enemies, and complete assigned interactions. |
| Raid leader | One primary caller with a backup | Communicate transitions, safe positions, orb assignments, and Bingo results. |
Cleric is suited to dedicated healing and cleansing, while Chanter can provide additional recovery, protection, and buffs. Both parties should have dependable sustain, particularly because Rahu and Ketu involve separate combat responsibilities.
Assignments to Make Before Entering
Establishing a shared strategy before the first pull prevents players from competing for the same object or leaving an essential mechanic unattended.
- Select a primary raid caller and a backup.
- Build two functional five-player parties for the intermediate encounters.
- Assign players responsible for environmental objects and summoned enemies.
- Choose a player and backup for Ludra's red orb, taking their defensive abilities into account.
- Divide the Bingo arena into predetermined search sections.
- Agree on separate gathering positions for red- and blue-marked players.
- Coordinate major defensive and healing cooldowns for unavoidable damage.
Do not automate important encounter responses through a fixed damage macro. Movement, defensive timing, object interaction, and target switching must remain under the player's control.
Abyssal Forge Raid Route and Boss Order
The raid begins with the Central Abyss Fusion Reactor. Completing this objective opens access to the intermediate encounters. The raid then separates for Rahu and Ketu before all 10 players reunite against Eternal Ludra.
| Stage | Encounter | Main objective |
|---|---|---|
| Opening | Central Abyss Fusion Reactor | Destroy the central objective while responding to auxiliary reactor appearances. |
| Intermediate encounter | Isolation Specialist Rahu | Manage bomb transfers, safe-zone positioning, and restricted arena space. |
| Intermediate encounter | Abyssal Wings Ketu | Survive gaze mechanics, intercept falling orbs, defeat summons, and preserve Soul Stones. |
| Final encounter | Eternal Ludra | Coordinate the complete raid through orb mechanics, two Bingo phases, and final survival checks. |
Central Abyss Fusion Reactor
The opening objective acts as the gateway to the rest of the raid rather than a conventional named-boss encounter. Players must damage the reactor while controlling additional enemies and avoiding its area attacks.
The reactor alternates between attacks affecting different parts of the platform, including circular and cross-shaped patterns. Auxiliary Fusion Reactors periodically appear in separate positions. While an auxiliary objective remains active, damaging the central reactor becomes significantly less effective.
Recommended approach:
- Control newly spawned enemies while applying damage to the Central Abyss Fusion Reactor.
- Watch for an Auxiliary Fusion Reactor appearing on another platform.
- Send designated players to the appropriate updraft or access route.
- Destroy the auxiliary reactor to remove its defensive contribution to the main objective.
- Return to the central reactor and repeat the process until the opening stage ends.
Assigning players to auxiliary reactors in advance prevents the entire raid from wasting damage against a reinforced central objective.
How Do Abyss Stones Help the Raid?
Following the reactor objective, the two-party structure becomes important. In the documented regional version, one party can handle an active boss while the supporting party clears enemies in the Abyssal Refinery and activates beneficial Abyss Stones.
Documented regional effects include:
- Endurance Abyss Stone: Provides HP regeneration.
- Rage Abyss Stone: Increases damage output.
- Knowledge Abyss Stone: Improves Movement Speed and Combat Speed.
These effects support the party fighting the boss. The supporting party should therefore complete its own objectives instead of treating the split encounter as downtime.
Explore services related to this guide, selected from our Aion 2 catalog.
View All Aion 2 Services


Isolation Specialist Rahu Boss Guide
Rahu combines directed attacks, shared safe zones, a transferable bomb, and mechanics that progressively reduce usable arena space. Successful positioning becomes increasingly important as the encounter continues.
The purple bomb requires particular attention because incorrect handling can generate a persistent hazard. Accumulating three of these hazards results in a raid wipe in documented regional encounters.
Rahu Skills and Mechanics
The following table summarizes Rahu's documented regional mechanics and the responses players should prepare before entering the fight.
| Mechanic | What happens | Correct response |
|---|---|---|
| Directed laser | A player receives a targeted attack while a narrow safe sector appears. | Keep the targeted attack outside the safe sector, wait for the targeting direction to lock, and move into safety. |
| Purple bomb | A timed purple effect appears around a player and requires another player to participate in its transfer. | Position the designated receiving player inside the effect before its timer expires. |
| Overlapping circles | Personal circles appear while the surrounding arena becomes dangerous. | Overlap the circles to establish a shared safe position rather than spreading apart. |
| Group-stack attack | A marked player must share a powerful incoming hit with nearby party members. | Gather on the marked player, absorb the shared attack, and then separate for the follow-up hazards. |
| Arena division | The arena is divided into restricted sections, limiting available movement. | Move together into the intended section and place persistent attacks near the outer edge when possible. |
| Abyssal Predators | Summoned enemies appear while Rahu targets a player with a directed attack. | Position the targeted attack so that it strikes the required summoned enemy. |
How to Handle Rahu's Purple Bomb
A purple countdown effect surrounds the selected carrier. The transfer is resolved when the timer completes, so the receiving player must already be correctly positioned inside the effect. If the required handoff fails, a persistent damaging pool can appear.
Regional guides describe the mechanic using slightly different group-positioning instructions. For progression, assign a receiver and keep additional teammates available to assist with the circle. Verify the exact participation requirement against the live Global encounter rather than assuming an older eight-player strategy applies unchanged.
Do not allow the carrier to isolate themselves when the countdown is about to finish. Failed transfers can consume usable space, and three accumulated pools trigger a wipe in the documented encounter.
Rahu's Arena and Summon Mechanics
As the fight progresses, Rahu divides the battlefield into restricted areas. Move with your assigned party and keep persistent ground attacks away from the space needed for later mechanics. Avoid careless positioning near the arena edge.
When Abyssal Predators appear, Rahu marks a player for a directed attack. That player must align the attack with the appropriate summoned enemy. Failing this interaction can create another dangerous pool.
Resolve the required mechanic before returning to your normal damage rotation. Attempting to finish a lengthy ability while the positioning window closes creates unnecessary risk for the entire party.
Abyssal Wings Ketu Boss Guide
Ketu introduces movement checks, summoned enemies, falling objects, direction-sensitive gaze attacks, and a final survival sequence involving Soul Stones. Players must recognize both the current attack and the mechanic that follows it.
Ketu Skills and Mechanics
Watch the boss's animations and environmental objects carefully. Several mechanics cannot be handled correctly through ordinary damage avoidance alone.
| Mechanic | Effect | Recommended action |
|---|---|---|
| Charge and slam | Ketu marks a player, charges toward them, and performs a heavy impact. | Avoid the initial attack and prepare for the follow-up wave. |
| Sweeping shockwave | A traveling wave follows the slam sequence. | Time a jump or glide to pass over the approaching wave. |
| Abyssal Gaze | A dangerous laser opens a sequence involving summoned enemies and environmental effects. | Avoid the initial laser first, then clear the summoned targets while following the safe route. |
| Falling orbs | Orbs descend toward the battlefield. | Assigned players intercept the designated orbs before they reach the ground. |
| Red gaze | A red gaze object checks the direction the character is facing. | Face toward the red gaze object when the mechanic resolves. |
| Blue gaze | A blue gaze object requires the opposite facing direction. | Turn away from the blue gaze object before the check occurs. |
| Soul Stones | Destructible objects grant temporary protection needed for a later damage sequence. | Preserve the stones until the survival mechanic, then destroy an assigned stone at the correct moment. |
How to Survive Ketu's Red and Blue Gaze
The gaze check depends on your character's facing direction, not simply their location. Moving to another part of the arena without rotating the character may still result in a failed mechanic.
- Red: Face the corresponding gaze object.
- Blue: Turn away from the corresponding gaze object.
At approximately half HP in documented regional encounters, Ketu begins using these colored gaze objects. Later sequences can present multiple checks, so observe their order and adjust your facing separately for each one.
After the sequence ends, move to the indicated safe position and prepare for the next attack.
How Do Soul Stones Work?
During Ketu's later mechanics, Mortal Soul Stones appear around the arena. Players also receive targeted, fan-shaped attacks that can destroy these objects if positioned carelessly.
Keep the targeted attacks grouped toward an appropriate area to preserve as many useful stones as possible. Once the attack directions lock, move out of the marked areas.
When Ketu begins the subsequent unavoidable damage sequence, destroying a Soul Stone grants the player who breaks it temporary invulnerability. The protection is not automatically shared with the entire party.
Assign stones before this phase and reserve suitable objects for healers. Several players attacking the same stone can leave someone without the protection needed to survive.
The key is to preserve the stones while the arena attacks are being placed, then activate their protection during the actual survival window.
Eternal Ludra Boss Guide
Eternal Ludra brings the full 10-player raid together for the final encounter. The fight combines personal attacks, assigned orb interceptions, color separation, and two major Bingo mechanics.
The documented regional encounter transitions into its second phase following the first Bingo at approximately 50% HP. Attack frequency can vary depending on group damage, so health thresholds are useful preparation markers rather than an exact second-by-second timeline.
Recommended Ludra Positioning
Ranged players should maintain enough distance from one another to prevent personal ground attacks from overlapping. Melee players must watch Ludra's frontal, wing, and tail animations instead of assuming that standing directly behind the boss is always safe.
Before combat, identify:
- The primary player and backup responsible for the red orb.
- Positions and priorities for additional orb interceptions.
- A direction for baiting frontal and targeted attacks away from the group.
- Consistent gathering areas for red- and blue-marked players.
- Individual Bingo search areas and the person responsible for calling the safe tile.
Retain these assignments after the first major phase transition to avoid unnecessary confusion.
Eternal Ludra Phase 1: Attacks and Orb Mechanics
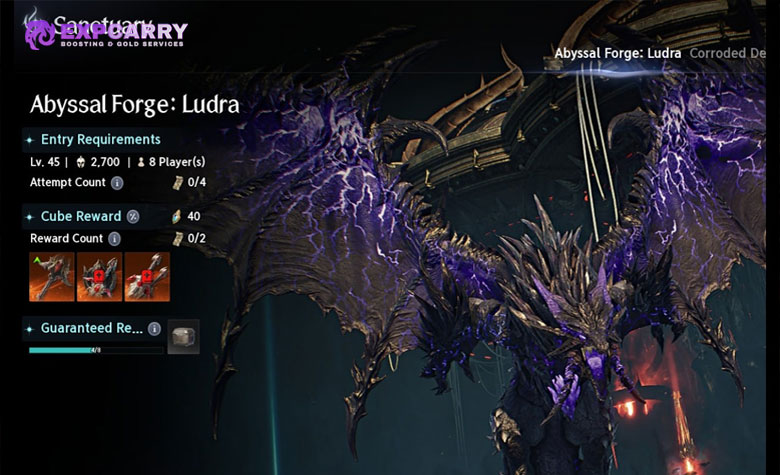
During the opening phase, Ludra establishes attacks that the raid must continue recognizing later. Pay particular attention to the difference between ordinary personal hazards and interactions requiring an assigned player.
| Attack | What happens | How to survive |
|---|---|---|
| Tail swipe | Ludra attacks players near its rear and may apply control effects and bleeding. | React to the tail animation, use an appropriate control-removal ability if needed, and remove the resulting debuff where possible. |
| Sweeping wave | A heavy initial attack is followed by a traveling shockwave. | Avoid the initial impact and jump or glide over the moving wave. |
| Red orb | A dangerous orb appears near Ludra and requires interception. | The designated player absorbs it while an appropriate defensive or avoidance skill is active. |
| Cross attack | A rapid cross-shaped strike threatens several directions around the boss. | Recognize the animation and move into a safe angle or use suitable mitigation. |
| Whirlwind | A powerful area effect forms near the center during the restricted-arena sequence. | Leave the threatened position before the attack resolves. |
| Directed breath | Ludra selects a player for a frontal breath attack. | Direct the attack away from the rest of the raid. |
| Personal ground attacks | Several players receive attacks at their current positions. | Maintain spacing and avoid placing hazards on teammates' escape routes. |
How to Handle Ludra's Red Orb
Ludra's red orb must be intercepted deliberately. It is not a harmless collectible, and an unprepared player should not enter its path.
Assign a player with a suitable defensive or avoidance ability. The protection must be active when that player takes the orb. A failed interception can cause the orb to explode and inflict heavy damage on the raid.
Prepare a backup handler as well. During later combinations, orb interception may overlap with movement mechanics, leaving the primary player unable to complete the assignment safely.
Ludra's Restricted-Arena Sequence
When Ludra limits the combat area, several attacks follow in succession. Treat the sequence as a connected positioning challenge rather than several unrelated hazards.
A central whirlwind can be followed by directed breath, a stomp, and personal ground attacks. The marked player should aim the breath away from teammates, while the rest of the raid maintains enough separation for the subsequent effects.
After the repeated sequence, prepare to leave the restricted area before the final large attack resolves.
How to Complete Ludra's Bingo Mechanic
Bingo is one of Ludra's central raid mechanics. The objective is to locate the correct survival tile through organized testing while avoiding additional boss attacks.
In the documented regional version, the first Bingo begins at approximately 50% HP. The arena displays a grid of 36 tiles, with one tile providing the required protection.
First Bingo: Finding the Safe Tile
Players receive targeted area attacks that can be directed onto individual grid tiles. These attacks are used to identify the tile that remains safe during the final mechanic.
Divide the grid into search areas before the pull so every available test contributes useful information.
- Move immediately into your assigned grid section when Bingo begins.
- Position your targeted attack over a tile that has not yet been tested.
- Move away once the attack position locks.
- Continue checking remaining tiles and communicate each result.
- Announce the safe tile as soon as it is identified.
- Move toward that tile while avoiding any additional incoming attacks.
- Stay within the required protection until the final attack resolves.
- Once the dangerous sequence finishes, leave the tile and regroup for Ludra's vulnerability window.
Bingo priority: Avoid duplicate tile checks. Assigning separate search areas gives the raid more opportunities to reveal the correct position before the final attack.
What Else Happens During Bingo?
Players must continue watching Ludra while investigating the grid. Bingo does not suspend the boss's other attacks.
During the first regional Bingo sequence, Ludra can direct a diagonal breath across the arena. Avoid its path, even if this temporarily requires leaving the grid, and return to the discovered safe tile before the final survival check.
Successful execution leads into an extended vulnerability, or Groggy, window. Save important offensive cooldowns for this opportunity when doing so does not interfere with mandatory mechanics.
Eternal Ludra Phase 2: Colors, Lightning, and Final Mechanics
After the first Bingo, Ludra introduces additional attack patterns and combines previously learned mechanics. Players must continue handling their personal assignments while adapting to more frequent movement requirements.
Phase 2 Attack Patterns
The following attacks are particularly important because some overlap with orb handling or introduce new positioning restrictions.
| Mechanic | What to expect | Recommended response |
|---|---|---|
| Sequential line attacks | Ludra creates consecutive dangerous lines across the arena, including diagonal patterns. | Wait for each strike to resolve and move into the newly cleared space. |
| Orb and sweeping wave | Required orb interceptions overlap with a traveling shockwave. | Coordinate the defensive interaction with the wave timing instead of handling both independently. |
| Double wing strike | Two heavy wing attacks occur in succession. | Prepare mitigation or movement for both hits rather than only the first. |
| Double lightning | Ludra performs a recognizable head movement before releasing two dangerous lightning attacks. | Watch the animation and move promptly to avoid the targeted area. |
| Red/blue separation | Players receive colored effects, with opposite colors becoming dangerous when grouped together. | Separate into consistent same-color groups and avoid crossing between them. |
| Second Bingo | The grid mechanic returns alongside additional offensive pressure from Ludra. | Repeat the original search assignments while continuing to watch the boss. |
| Thunder Zone | Colored protection circles appear for a major survival mechanic. | Find a matching unoccupied circle and enter it at the correct late timing. |
How Does Ludra's Red and Blue Mechanic Work?
Ludra assigns red or blue effects to raid members. Players carrying opposite colors damage one another when they remain too close together.
Immediately divide the raid into matching-color groups. One possible convention is red on the left and blue on the right, although the actual requirement is color separation rather than a particular arena orientation.
Keep these positions consistent if Ludra moves or turns. Avoid crossing through the opposite group while the effects remain active.
Second Bingo: What Changes?
The second Bingo begins later in the documented fight, at approximately 25% HP. Its objective remains identifying the protected tile, but Ludra introduces additional movement pressure during the search.
Use the same assigned search sections from the first Bingo. The raid must also watch for Ludra's sweeping wave and avoid losing sight of the boss while positioning targeted attacks on the grid.
Once the safe tile is discovered, call its location, gather inside the protection, and complete the final attack sequence before returning to damage.
How to Survive Thunder Zone
Thunder Zone requires players to combine color matching with correctly timed entry into individual protection circles.
In the documented regional encounter, each circle protects one player and must match that player's assigned color. Entering too early can cause the temporary protection to expire before the major attack lands.
Recommended procedure:
- Check whether your character is marked red or blue.
- Locate an available protection circle of the same color.
- Approach it without occupying another player's assigned position.
- Watch the remaining mechanic timer and prepare for late entry.
- Enter at approximately the final second and remain protected through the attack.
Do not compete for the same circle. Make sure healers also have accessible protection, and communicate immediately if an assigned position becomes unavailable.
AION 2 Ludra Loot and Rewards
Abyssal Forge provides equipment and progression materials through its completion reward system. The September 2026 Global Launch Scale Test database identifies Ludra weapons, Epic equipment, crafting-related resources, and a guaranteed-reward selection.
Reward categories must be distinguished carefully. An item associated with Abyssal Forge is not necessarily a direct physical drop from Eternal Ludra, and its presence in the reward pool does not guarantee that every player receives it after a clear.
All Ludra Weapons
The following named items appear in the September Global test-derived Ludra reward pool. These are the localized English item names recorded in the available database.
| Class | Weapon | Weapon type |
|---|---|---|
| Gladiator | Ludra's Blade of Extinction | Greatsword |
| Templar | Ludra's Scale Sword | Longsword |
| Assassin | Ludra's Claw | Dagger |
| Ranger | Ludra's Fatal Bow | Bow |
| Sorcerer | Ludra's Grimoire | Spellbook |
| Spiritmaster | Ludra's Abyssal Jade | Orb |
| Cleric | Ludra's Fatal Mace | Mace |
| Chanter | Ludra's Heavenbound Staff | Staff |
| Templar / Cleric | Ludra's Heart | Guard |
Ludra's Heart is a Guard rather than a conventional main-hand weapon. Compare every potential upgrade with your current equipment, including available properties, enhancement progression, and class requirements. The presence of a named Unique item in the test database does not establish a permanent best-in-slot ranking.
What Does the Ludra Reward Cube Contain?
The Global test-derived completion cube contains several listed progression rewards alongside its equipment pools. The following quantities reflect the September test data and should be verified when the retail reward interface becomes available.
| Reward | Listed test quantity | Main purpose |
|---|---|---|
| Kina | 1,000,000 | General character and equipment progression. |
| Amplify Stone Fragment (Unique) (Bound) | 4–9 | Equipment-related progression material. |
| Soul Codex (Bound) | 10 | Soulbinding progression. |
| Silentium (Bound) | 20 | Progression and exchange-related resource. |
| Lesser Manastone (Bound) | 1, chance not established | Equipment socket progression. |
| Lesser Soulstone (Bound) | 1, chance not established | Equipment-related progression. |
| Philosopher's Stone: Revelation (Bound) | 1, listed 30% independent chance | Additional progression material. |
| Lunatic equipment | Dependent on the equipment reward pool | Epic equipment progression. |
| Ludra equipment | Dependent on the equipment reward pool | Named Unique equipment. |
The database lists individual reward-pool weights, but the exact reward-draw count is not independently established. Consequently, calculated per-clear percentages published by third-party trackers should not be presented as official Global retail drop rates.
Ludra Guaranteed Rewards
The September Global test data records a guaranteed-reward threshold of eight rewarded clears. Its listed selection includes Ludra Gear Voucher (Bound), Philosopher's Stone: Revelation (Bound), and eligible Abyssal equipment.
However, the available database does not verify every rule governing the guaranteed-reward selection. Confirm the final counter, eligible items, and claim requirements in the released Global client before planning repeated runs around this figure.
The later Korean and Taiwanese Sanctuary system uses different reward costs and progression rules. Its July 2026 adjustments included halving the required guaranteed-reward count while changing rewarded-clear frequency.
Also distinguish intermediate boss kills from individual reward claims. In the later regional system, Rahu and Ketu no longer provide their former separate reward boxes; their rewards were consolidated into the final completion reward.
Ludra Raid Tips for Every Class
All eight original classes can contribute to Abyssal Forge. Individual equipment, available skills, and reliable execution are more important than copying an outdated regional composition.
| Class | Main contribution | Important reminder |
|---|---|---|
| Gladiator | Melee damage and Stagger contribution where applicable. | Avoid committing to long animations immediately before mandatory movement. |
| Templar | Frontline positioning and defensive utility. | Communicate directed attacks and prepare assigned defensive interactions. |
| Assassin | Close-range damage and mobility. | Maintain visibility of the boss during sweeping attacks and Bingo. |
| Ranger | Ranged damage and flexible positioning. | Complete object and orb assignments without interfering with another player. |
| Sorcerer | Ranged damage and additional-enemy control where available. | Preserve mobility for gaze, grid, and restricted-arena mechanics. |
| Spiritmaster | Sustained ranged damage and summon-related pressure. | Interrupt the usual damage sequence whenever an encounter interaction requires it. |
| Cleric | Dedicated healing, cleansing, and resurrection. | Prepare emergency recovery and preserve personal protection for dangerous phases. |
| Chanter | Party buffs, supplementary healing, and defensive support. | Coordinate major protection effects with the party's Cleric. |
Assigned mechanics take priority over personal damage optimization. A player handling an orb, a Soul Stone, or a Bingo tile must consider that responsibility part of their encounter rotation.
Common Ludra Raid Mistakes to Avoid
The following mistakes are particularly relevant when progressing through the documented encounter mechanics or adapting older regional strategies to Global.
- Using outdated raid-size information: Sanctuary uses 10 players, not the original eight-player format.
- Ignoring Auxiliary Fusion Reactors: Their presence makes damage against the main reactor substantially less effective.
- Failing Rahu's bomb transfer: The receiving player must be positioned correctly before the countdown completes.
- Spreading during Rahu's overlapping circles: This mechanic requires a shared safe area.
- Facing the wrong direction during Ketu's gaze: Face red gaze objects and turn away from blue ones.
- Destroying Soul Stones prematurely: The player who destroys a stone receives the temporary protection needed later.
- Leaving Ludra's red orb unassigned: Its interception requires an appropriate defensive response.
- Testing Bingo tiles randomly: Duplicate checks waste opportunities to reveal the safe tile.
- Mixing opposite-color groups: Red- and blue-marked players must maintain separation.
- Ignoring attacks during the second Bingo: Continue watching Ludra while checking the grid.
- Entering Thunder Zone circles too early: Match the correct color and time the protection carefully.
- Using every offensive cooldown before Bingo: A successful mechanic creates a valuable subsequent damage window.
AION 2 Ludra FAQ
These answers address common questions about Abyssal Forge preparation, progression, and rewards.
Is Eternal Ludra the only enemy in Abyssal Forge?
No. The raid includes the Central Abyss Fusion Reactor objective and the intermediate bosses Isolation Specialist Rahu and Abyssal Wings Ketu before the final encounter.
Can the Ludra raid be completed with random players?
A permanent raid team is not mandatory, but players still need agreed assignments and clear communication. Several mechanics cannot be resolved reliably through individual improvisation.
Are Global Ludra rewards identical to Korean rewards?
Not necessarily. The September Global test database contains its own reward values, while Korea and Taiwan received subsequent Sanctuary economy changes. Check the released Global reward interface before applying regional farming calculations.
Is every Ludra weapon guaranteed to drop from the final boss?
No. Named Ludra items appear in the corresponding reward pool. Their inclusion does not guarantee an individual drop on every clear. The test database also lists a separate guaranteed-reward selection with rules that require live verification.
Conclusion
Abyssal Forge: Ludra rewards organized raid execution. Build two functional five-player parties, assign Rahu's bomb receivers, preserve Ketu's Soul Stones, and establish Ludra's orb and Bingo responsibilities before combat. Keep opposing color groups separated, reserve defensive abilities for mandatory interactions, and use successful mechanics to create controlled damage opportunities. For Global progression, rely on the released Sanctuary interface for final entry requirements, Odyle Energy costs, reward limits, and guaranteed-reward rules rather than treating older regional values or September test data as permanent retail settings.