This AION 2 Ranger guide provides starting build templates for boss damage, solo and AoE farming, defensive PvE, Arena, and group PvP. It explains skill priorities, Stigma choices, manual controls, and how to evaluate gear and supporting progression systems. As of September 29, 2026, the skill descriptions used here come from Global Playtest client 1.0.21.0. Global Advance Access begins September 30, followed by the free-to-play launch on October 5. These are pre-launch recommendations based on documented skill interactions, not a damage-tested ranking of Global endgame builds. Check release-client tooltips before committing rare upgrade materials.
Short answer: Start with Gale Arrow, Deadshot, Drill Dart, Tempest Shot, and Snipe, supported by Focused Eye and Hunter’s Resolve. Use Marking Shot to prepare Precision for Deadshot. Burst Arrow requires a target affected by Slow or Root, while Arrow Scattershot requires Stagger; neither belongs in an unconditional filler rotation. Keep movement, traps, and defensive skills manual.
| Build | Main purpose | Skills and utility | Priority stats |
|---|---|---|---|
| Boss DPS | Ranged damage during safe single-target windows | Gale Arrow, Marking Shot, charged Deadshot, Drill Dart, Tempest Shot, and the Snipe chain; Arrow Scattershot during Stagger | Sufficient Accuracy, then Attack and applicable damage bonuses; compare Critical Hit and Combat Speed |
| AoE / solo | Field packs and repeatable clears | Tempest Shot, Drill Dart, Gale Arrow, Snare Shot into Burst Arrow when eligible, and Explosion Trap | Accuracy as needed, offensive stats, and enough sustain to keep clearing |
| Safer PvE | Learning mechanics and handling dangerous pulls | Defiance for removable control, movement, Mother Nature’s Breath, and selected sustain specialties | HP, applicable Damage Tolerance, Accuracy, and practical damage |
| Arena | Duels and small fights | Snare Shot, manual traps, Marking Shot, Deadshot, Drill Dart, and a saved escape | Accuracy against defensive targets, PvP damage bonuses, HP, and defensive stats |
| Abyss | Organized group PvP | Ranged focus fire, healing reduction, control, and a protected retreat route | Enough HP and PvP Damage Tolerance to survive focus, then Accuracy and offense |
How Ranger Works in AION 2
Ranger is a bow-using ranged damage dealer. Distance gives it time to attack before melee opponents arrive, but range alone does not guarantee safety. Obstacles, incoming control, and ground attacks can still force a retreat. Preserve a movement option instead of spending every escape to chase a target.
The main interactions are straightforward. Marking Shot moves the Ranger in the input direction and grants Precision, which supports critical hits and increases Deadshot’s damage. Gale Arrow supplies an offensive buff. Drill Dart adds area damage, Bleed, and reduced incoming healing. Snipe and its follow-up chain help restore MP, allowing the Ranger to return to MP-consuming attacks without exhausting its resources.
For bosses, the practical goal is to fit charged attacks into safe windows while maintaining line of sight. During solo play, control and careful pull size matter more than trying to gather every nearby enemy. In PvP, force opponents to spend movement before committing to a long charge. Group fights reward attacking the called target from a position where allies can protect your retreat.
The Global Playtest database lists 12 class active skills, 10 passives, and 13 Stigma skills for Ranger in build 1.0.21.0. These are database records rather than a guarantee that every entry is immediately obtainable. The skill table below covers selected priorities, not the complete active roster; Suppressing Arrow is also listed among the class skills. Compare the Ranger skill database with your release client.
Best Ranger Skills and Specialties
Develop a useful damage core before distributing points evenly. The Playtest records list Mastery specialization slots at skill levels 8, 12, and 20, but individual specialization effects have their own requirements, including level 16 options. Unlocking an effect and unlocking an additional slot are different things. Higher effective skill levels also depend on progression bonuses; do not treat every listed level as something a new character can buy immediately with skill points. Stigma specialization requirements follow a separate progression.
| Skill | PvE target | What the choice actually does | Useful swap |
|---|---|---|---|
| Gale Arrow | Develop early once unlocked; prioritize a useful specialization | Damages enemies around the target and grants an offensive buff. Specialties include longer buff duration, use while moving, stronger bonuses against fewer targets, and a shorter cooldown. | Choose mobility for movement-heavy encounters; compare the fewer-target bonus for bosses. |
| Deadshot | Core charged attack after its unlock | Supports up to three charge levels and receives additional damage while Precision is active. A full charge is valuable only when the target remains available and the position stays safe. | Use an eligible speed or mobility specialty when full charges repeatedly collide with mechanics. |
| Drill Dart | Early priority for sustained damage and utility | Hits nearby targets, applies Bleed with healing reduction, and restores MP on a critical hit. Specialties include HP absorption, longer Bleed, faster execution, and additional hits. | Choose sustain for difficult solo pulls; compare damage options once recovery is no longer limiting you. |
| Tempest Shot | Develop for repeatable damage against bosses and packs | An MP-consuming attack that hits enemies around its target. Specialties can reduce MP cost, improve critical chance, or increase damage when fewer enemies are hit. | Choose resource efficiency if MP runs out; compare the fewer-target effect for bosses. |
| Snipe | Maintain the resource-generating part of the rotation | Restores MP and opens Rapid Fire, which leads into Spiral Arrow. Specialties can improve MP recovery, add sustain, or reduce Deadshot’s cooldown on hit. | Use the recovery option when MP limits your rotation; compare offensive choices when resources remain stable. |
| Marking Shot | Use as soon as available for Precision and positioning | Moves the caster in the input direction and grants Precision. Its value comes from preparing a damage window without moving into danger. | Keep it manual and select a safe direction before activating it. |
| Burst Arrow | Conditional follow-up after Slow or Root | Requires an eligible target affected by Slow or Root and deals damage around that target. It is not an unconditional attack that can fill every gap in the rotation. | Use after successful control, such as Snare Shot; omit it from a boss sequence when the required condition is absent. |
| Arrow Scattershot | Conditional damage during Stagger | The base Playtest skill attacks a target affected by Stagger. Despite its name, it is not documented as a general-purpose AoE attack. | Use when the Stagger condition becomes available; do not build ordinary pack clearing around it. |
| Snare Shot | Control and preparation for conditional attacks | Damages enemies around the target and applies Slow. It can create an opportunity for Burst Arrow if the target accepts the debuff. | Preserve it for an approaching opponent when keeping distance is more important than immediate damage. |
| Explosion Trap | Situational control for farming and PvP | Places a trap at the caster’s current location. Enemies must trigger it; you cannot freely place the base skill at a distant ground location. | Set it on a planned retreat route and move away so pursuing enemies cross it. |
| Defiance | Keep accessible for control removal | Removes listed disabling effects and briefly grants status-effect immunity. It is not general damage immunity and does not make every boss attack survivable. | Use manually when the relevant control lands; use a separate defensive skill against incoming damage. |
Skill-point order for a new build: begin with the attacks currently unlocked, then develop Gale Arrow, Deadshot, Drill Dart, Tempest Shot, and Snipe as your main core. Marking Shot should already be part of your controls because it enables the Precision interaction; it does not need to consume most of your early upgrade budget. Invest in Burst Arrow and Arrow Scattershot according to how often their conditions occur. Keep control and defensive tools accessible while directing most early damage investment toward skills you can use consistently.
Specialty rule: choose effects that solve a specific problem. Resource support helps when MP limits attacks; mobility helps when mechanics interrupt them; single-target bonuses help when you can maintain boss uptime. Read both the effect requirement and the available slot count. Do not assume that a specialization’s position in a regional guide matches the same option in Global.
Regional balance note: published translations of the September 16 Korean update report elemental assignments for Ranger attacks. They also describe a fix allowing Deadshot specialty #5’s additional damage to trigger its multi-hit without specialty #4 equipped alongside it. This is the opposite of treating #4 as a required partner. Check the Global tooltip and release notes before building around that regional interaction.
Which Ranger Passives to Upgrade
For an offensive starting point, compare Focused Eye, which supports Accuracy and damage bonuses, with Hunter’s Resolve, which improves critical damage. Hunter’s Soul adds a damage proc associated with critical hits. Their practical value depends on your current stats and point costs, so this is an upgrade shortlist rather than a proven universal ranking. Evaluate Rooting Eye, Melee Fire, and Concentrated Fire according to their activation conditions.
Vigilant Eye belongs among the defensive options: its listed effects include Evasion, maximum HP, and recovery after evading. Compare it with Revitalization Contract, Wind Vigor, and Unyielding Resolve when survival or recovery is limiting a run. An upgrade that prevents repeated deaths can be more useful than a small theoretical damage increase.
Build 1: Ranger PvE Boss DPS
This template suits bosses that remain targetable long enough for ranged attacks and charged damage. Prepare Deadshot while Precision is active, but do not start a long charge just before a forced dodge. The recommended core is a starting point for release testing; exact damage rankings depend on the Global balance, effective skill levels, and encounter.
Core setup: use Gale Arrow when its buff can cover meaningful damage, activate Marking Shot in a safe direction, and charge Deadshot during the resulting Precision window. Keep Drill Dart active when the target can take its effects. Use Tempest Shot while MP permits and return to Snipe and its chain for recovery. Add Burst Arrow only against an eligible slowed or rooted target, and use Arrow Scattershot during Stagger.
Positioning: keep a clear view of the boss while remaining within your healer’s practical coverage. Move before a ground attack occupies your firing position. A slightly shorter damage window is preferable to dying or forcing the healer to abandon the rest of the group.
Strength: ranged pressure and a clear setup for charged damage. Weakness: charges and conditional attacks lose value when the target moves, becomes unavailable, or does not accept the required status effect.
Explore services related to this guide, selected from our Aion 2 catalog.
View All Aion 2 ServicesRanger Boss Guide: Mechanics, Skills and Loot Checks

A reliable boss guide needs a verified encounter name, difficulty, mechanic description, and reward source. The previously circulated names Commander Varkan, Inquisitor Moriel, Fallen Daeva Lord, Experimental Subject #7, Chief Researcher Malkior, and Deus, the Corrupted are not sufficiently verified here to present as a Global encounter roster. The table below therefore gives general Ranger responses to encounter situations, without attaching unsupported mechanics or loot to named bosses.
| Encounter situation | Skills and mechanics | What Ranger should do | Loot verification |
|---|---|---|---|
| Frontal attacks and additional enemies | A boss may threaten its front while additional enemies require a target switch. | Avoid the frontal area and follow the group’s target priority. Use available area attacks when the additional enemies are grouped. | Check the named dungeon and difficulty; a general equipment category is not a boss-specific drop table. |
| Interruptible casts | Some encounters require an interrupt or control effect; not every boss cast accepts ordinary crowd control. | Use only an assigned ability that works on that mechanic. Do not assume a trap’s stun can interrupt an immune boss. | Separate direct boss drops from completion rewards and optional reward chests. |
| Fear and displacement near an edge | Control or forced movement can make positioning more important than damage. | Stay away from dangerous edges and use Defiance for a listed removable effect when available. It does not cancel every scripted displacement. | A mechanic does not establish an item source; verify the actual reward entry. |
| Persistent ground hazards | Unsafe areas reduce the space available for sustained attacks. | Move early and choose a firing position with an exit. Place Explosion Trap only where your current position makes it useful. | Check whether the reward list changes with difficulty or the selected activity mode. |
| Stagger and vulnerability windows | A Stagger window can enable conditional attacks and create time for concentrated damage. | Save relevant skills for the group’s break plan and use Arrow Scattershot when its condition is active. | Do not assume completing a break mechanic guarantees a bow or improves drop odds. |
| Forced movement or flight phases | Some encounters may interrupt normal ground positioning or make a target temporarily unavailable. | Resolve the movement first. Preserve Precision and major damage cooldowns for the next usable window when possible. | Confirm the reward preview and any claim requirements before spending a limited entry or reward resource. |
These are general tactical situations, not claims that a particular Global boss uses all six mechanics. No boss-specific bow, equipment tier, drop chance, or guaranteed reward is asserted without a verified encounter reward table.
Build 2: Ranger AoE and Solo Farming
This template is for field packs and repeatable solo clears. Start fights at a useful distance and pull only as many enemies as your available control and damage can handle. Several enemies reaching you together can erase the advantage of range before the next escape becomes available.
Use Tempest Shot, Drill Dart, and Gale Arrow against grouped targets. Apply Snare Shot, then use Burst Arrow if the selected target has the required Slow or Root effect. Explosion Trap appears at your feet: place it before retreating and lead enemies across that location. Reserve Arrow Scattershot for Stagger instead of treating it as a standard AoE button. Keep an escape ready, and use Defiance if a removable disabling effect catches you.
Priority: meet the activity’s practical Accuracy needs, then improve damage and resource flow. Take a sustain specialty when it reduces recovery between pulls. If enemies force you to kite continuously without attacking, reduce pull size before rebuilding the entire character around defense.
Strength: controlled pulls, repeatable area attacks, and conditional follow-up damage. Weakness: disrupted positioning and targets that cannot be controlled reduce the value of traps and Burst Arrow.
Build 3: Defensive Ranger and Safer PvE
This variant is useful while learning mechanics or fighting without dependable support. Defensive investment gives you more room to recover from mistakes, but it should address an actual source of failure. Extra HP does not solve a missed mandatory mechanic, and control removal is different from damage reduction.
Keep Defiance accessible for disabling effects and consider Mother Nature’s Breath for incoming damage. Use Snare Shot and movement to maintain distance where enemies can be controlled. A sustain specialty on Drill Dart can help with recovery, while HP and applicable Damage Tolerance provide a separate defensive layer. Do not rely on Defiance to absorb a damaging attack.
Strength: better recovery and clearer answers to both control and incoming damage. Weakness: excessive defensive investment can slow clears without helping against mechanics that must be performed correctly.
Build 4: Ranger Arena and Small-Scale PvP
Ranger’s practical PvP plan is to control the approach, protect its retreat, and create time for focused damage. An opponent that still has a gap closer and control removal available may escape the opening setup. Avoid committing every cooldown before seeing how that opponent responds.
Setup: keep Snare Shot, Marking Shot, Deadshot, Gale Arrow, Drill Dart, and an escape accessible. Drill Dart’s healing reduction can matter against a target receiving heals. Use Burst Arrow only after the required debuff lands. Place Explosion Trap at your current position before retreating; its listed PvP stun chance does not make it guaranteed control. Keep Defiance manual.
Matchup adjustment: evaluate Accuracy against evasive or defensive opponents. Against melee, create space after the gap closer rather than charging in its path. Against ranged opponents, use cover and avoid exposing yourself to every available attack while waiting for a full charge.
Strength: ranged pressure, healing reduction, and conditional damage after control. Weakness: failed control, a forced defensive cooldown, or an unsafe charge can give the opponent a decisive opening.
Build 5: Ranger Abyss and Group PvP
In organized group PvP, attack from behind allied protection and help finish the called target. Ranger gains little from chasing alone while the rest of the group changes direction. Plan a retreat route before the opposing group reaches your position.
Coordinate pressure and healing reduction with the group, then switch targets when called. Preserve a slow, trap, or defensive Stigma for enemies entering the back line. Use area attacks when targets cluster, but do not sacrifice a safe position simply to hit one additional enemy. Stop a charge when movement becomes the immediate priority.
Build enough HP and PvP Damage Tolerance to survive the pressure you actually receive, then compare Accuracy and offensive bonuses. A PvE setup should not automatically become your PvP preset: the relevant defensive stats, control interactions, and target behavior differ.
Ranger Stigma Loadouts and Upgrade Priorities
Stigma skills use their own unlock and upgrade system. The four entries in each row below are a shortlist to compare, not a claim that four is the maximum equipped slot count. Use the slots and abilities your Global character has unlocked, and evaluate each skill’s specialization requirements separately from Mastery slots.
| Content | Four abilities to consider first | When to swap |
|---|---|---|
| Boss DPS | Bow of Blessing; Explosive Arrow; Griffon Arrow; Arrow Storm | Use Arrow Storm for Stagger pressure when required; replace an offensive choice with defense while learning. |
| AoE / solo | Explosive Arrow; Griffon Arrow; Arrow Storm; Mother Nature’s Breath | Replace the defensive choice with an offensive buff when pulls are already safe. |
| Safer PvE | Mother Nature’s Breath; Bow of Blessing; Explosive Arrow; Arrow Storm | Keep damage reduction for threatening windows; do not treat an NPC stun chance as proof that every boss can be stunned. |
| Arena | Bow of Blessing; Explosive Arrow; Arrow Storm; Mother Nature’s Breath | Adjust control and damage choices for the matchup. Explosive Arrow gains damage against Slow or Root, but does not require them to be cast. |
| Abyss | Griffon Arrow; Explosive Arrow; Arrow Storm; Mother Nature’s Breath | Trade an area-damage choice for an available buff or utility skill when the group’s plan requires it. |
Upgrade logic: compare the benefit of the next upgrade on a skill you regularly use. Bow of Blessing supports critical hits and Accuracy; Explosive Arrow provides area damage with a conditional damage bonus; Griffon Arrow adds damage over time; Arrow Storm contributes substantial Stagger gauge damage; and Mother Nature’s Breath provides defensive effects. Regional builds also use other options, including Vaizel’s Authority, but this shortlist is not a complete Stigma ranking. The separate Stigma and Daevanion guide explains the broader progression systems.
Ranger Macros and Manual Controls
Use the built-in Skill Macro only for actions its current editor supports and that you are comfortable activating repeatedly. The sequences below are priorities to test, not imported macro commands or a validated Global timing profile. Keep charged attacks, movement, traps, control removal, and encounter-specific cooldowns under manual control.
| Template | Suggested in-game Skill Macro queue | Keep under manual control |
|---|---|---|
| PvE ranged filler | Test Snipe and its available chain as the resource baseline; add Tempest Shot only if supported and MP remains stable | Gale Arrow, Drill Dart, Marking Shot, charged Deadshot, movement, and defensive abilities |
| Boss burst | Use only the tested filler between manually prepared damage windows | Safe Marking Shot → Deadshot during Precision; offensive buffs; Arrow Scattershot during Stagger |
| AoE farming | Test Tempest Shot with a resource-generating fallback; avoid conditional attacks in an unconditional loop | Drill Dart, Snare Shot → eligible Burst Arrow, Explosion Trap, target selection, and movement |
| PvP | Use a short tested damage sequence only when it preserves control of the fight | Control, traps, conditional follow-ups, charged Deadshot, escape, and Defiance |
Test the editor’s handling of unavailable skills, cooldowns, resources, and chain prompts on a safe target. Do not assume it automatically skips every unusable command. In particular, Burst Arrow may be unavailable without Slow or Root, and Arrow Scattershot requires Stagger. Keep the Snipe chain visible and leave Marking Shot outside repetitive sequences so its movement cannot unexpectedly carry you into a hazard.
Ranger Stats, Gear and Manastones

Use the character sheet and combat feedback to identify the actual limitation. Accuracy deserves attention when enemy avoidance or defensive outcomes reduce your attacks’ effectiveness, but it is not a stat to stack indefinitely. Once the target’s practical requirements are covered, compare Attack, applicable damage bonuses, Critical Hit, and Combat Speed. There is no verified universal Global launch threshold in this guide.
| Stat group | Boss PvE | AoE / solo | Arena / Abyss |
|---|---|---|---|
| Accuracy | Cover the encounter’s practical requirements before investing beyond them. | Reassess against stronger enemies rather than assuming all field targets have the same defenses. | Compare against the defensive builds you actually fight. |
| Attack and damage | Compare Attack, applicable damage bonuses, Critical Hit, and Smite according to current values. | Favor damage that improves clear time; maintain enough resource recovery to keep attacking. | Compare PvP damage bonuses after ensuring you can survive and apply pressure. |
| Combat Speed and cooldown | Evaluate whether they add usable attacks inside a safe damage window. | Useful when they improve sustained clearing without exhausting MP. | Value depends on how much of the faster cycle you can use before being forced to defend. |
| Survival | Enough HP and relevant defensive bonuses for unavoidable damage. | Invest when it prevents deaths or excessive recovery between pulls. | HP and PvP Damage Tolerance can be more valuable than another offensive increase during heavy focus. |
Gear: compare a bow’s practical damage, useful bonuses, and upgrade cost. Prioritize improvements that enable your next activity or replace an obvious weakness. Do not exhaust rare materials on an item you expect to replace immediately. Item Level and Combat Power describe different aspects of progression; neither automatically identifies the strongest item for a specific build. The AION 2 beginner guide covers early gearing decisions.
Manastones: choose from the actual options supported by the item. Fill a demonstrated Accuracy shortfall, then compare offensive alternatives. For PvP, evaluate a separate defensive arrangement if your normal damage setup cannot survive long enough to create distance.
Soul Binding: check the preview for the exact enhancement, replacement, or transfer operation. Do not assume that Manastones, potential, binding status, and other item properties all follow the same inheritance rules.
Ranger Arcana Build Priorities
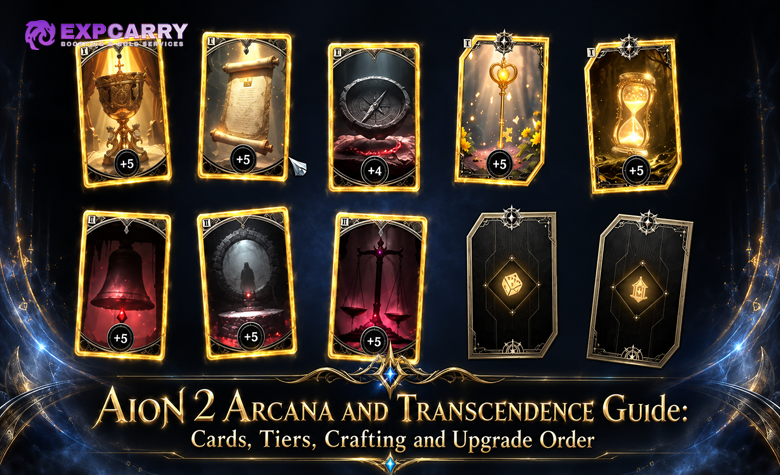
Evaluate Arcana by the skill levels and set effects they provide to your actual setup. A card that completes a useful breakpoint can outperform a rarer card with irrelevant bonuses. Compare improvements to Gale Arrow, Deadshot, Drill Dart, Tempest Shot, Snipe, Focused Eye, and Hunter’s Resolve when those skill bonuses are available in your card pool.
Before replacing a card, check both the lost set effect and its role in another preset. Do not assume every skill can appear on every card or that regional crafting costs apply to Global. The Arcana guide covers the general system; use the current crafting and upgrade previews for the final decision.
Ranger Pantheon: Which God Stats to Build
Pantheon progression uses collectible bonuses, including those associated with statues and artwork. Regional references associate Destruction with Attack, Wisdom with Smite, Time with Combat Speed, and Freedom with Accuracy and Evasion. Treat these as a way to identify relevant bonuses, then check the actual collectible’s Global tooltip and the cost of reaching the next improvement.
For Arena and Abyss, HP, defensive bonuses, or Accuracy may solve a more immediate problem than additional boss damage. Build with the pieces you can obtain and compare their combined effects. A mature regional collection is not a realistic starting inventory for a new Global character.
Best Ranger Pets, Genus Insight and Wings
Evaluate pet progression by the bonuses the system actually grants. Pet appearance alone does not establish which combat stats you receive, and Genus Insight should not be confused with simply equipping a particular-looking pet. For PvE, compare available offensive attributes with any missing Accuracy; for PvP, weigh those against HP and relevant defensive bonuses.
Check which attributes belong to each available Insight slot before spending reroll materials. Do not assume that every slot can roll every stat or that selecting another pet switches the entire bonus setup. Evaluate wings through their displayed combat and collection effects, and confirm the release-client progression rules before following a regional endgame shopping list.
Ranger Skill and Daevanion Upgrade Order
Build around the skills you can use consistently and the activity you actually play. Check the next meaningful breakpoint before spending points or progression materials, and distinguish a new specialization option from an additional specialization slot.
- Make the core usable: develop Gale Arrow, Deadshot, Drill Dart, Tempest Shot, and Snipe as they unlock, while using Marking Shot to prepare Precision.
- Unlock meaningful specialties: compare the level 8 and 12 options and slot requirements, then evaluate later effects and the third Mastery slot as your effective skill levels increase.
- Upgrade relevant passives: compare Focused Eye, Hunter’s Resolve, and Hunter’s Soul with the cost and benefit of improving an active attack.
- Complete a practical Stigma setup: combine available damage, buff, and utility choices; include Mother Nature’s Breath when damage reduction improves survival.
- Plan Daevanion paths: compare the total cost of reaching useful skill-level or stat nodes, including connecting nodes, instead of choosing by color alone.
- Improve supporting systems: use Arcana and collectible bonuses to reinforce the same skills and stats rather than scattering investment across unrelated effects.
- Keep activity-specific setups: save damage and PvP or survival presets where supported, and check which systems each preset actually records.
Ranger Build Mistakes to Avoid
Before rebuilding your character, check whether damage is being lost to unsafe positioning, missing conditions, or resource problems.
- Charging Deadshot without Precision when you could safely prepare it, or charging immediately before forced movement.
- Using Marking Shot without checking the movement direction.
- Putting traps, movement, Defiance, or defensive cooldowns into a repetitive sequence.
- Treating Burst Arrow as unconditional filler or Arrow Scattershot as ordinary AoE damage.
- Stacking Accuracy without checking whether more of it still improves results against the target.
- Standing beyond practical healer coverage or losing line of sight.
- Trying to place Explosion Trap remotely instead of planning around its placement at the caster.
- Chasing beyond allied protection in group PvP.
- Confusing specialization-effect requirements with slot unlocks, or copying regional macro timings without testing.
- Presenting unverified boss names, mechanics, or equipment categories as a confirmed Global loot table.
- Spending Arcana, pet, or equipment materials before checking the current replacement, reroll, and transfer rules.
AION 2 Ranger FAQ
These short answers cover two common class-selection and gearing questions.
Is Ranger good for solo play?
Its ranged attacks, slows, and traps provide useful tools for controlled pulls. Solo comfort depends on positioning, gear, and the enemy’s susceptibility to control. Keep an escape available and remember that Defiance removes listed control effects rather than granting general damage immunity.
What is the best Ranger stat?
There is no universal answer. Address a demonstrated Accuracy shortfall, then compare offensive bonuses for your current build. In PvP or difficult solo content, enough HP and appropriate defensive stats may provide the larger practical improvement.
Conclusion
Ranger’s starting damage plan combines Gale Arrow, Precision-assisted Deadshot, Drill Dart, Tempest Shot, and the Snipe chain. Use Burst Arrow after eligible control and Arrow Scattershot during Stagger, while keeping movement, traps, and defenses manual. Develop passives and supporting systems around the skills you actually use. These Playtest-based templates provide a launch starting point; final priorities should follow the Global release client and encounter testing.