The AION 2 Spiritmaster is a ranged damage dealer built around elemental summons, sustained pressure, debuffs, and crowd control. Its main advantage is the ability to combine direct attacks with spirit-generated damage while adapting its abilities to bosses, grouped enemies, and PvP. A practical Spiritmaster build develops its main attacks, useful summons, Elemental Fusion, reliable MP recovery, and passives that improve the complete damage cycle.
This guide is checked for September 29, 2026 and uses the September Global Launch Scale Test as its Global reference. Advanced Access begins on September 30, followed by the official Global launch on October 5. Skill descriptions from the test are a useful starting point, but recommended allocations are progression templates rather than a verified Global retail best-in-slot build. Regional endgame limits and balance changes should not automatically be applied to Global.
Short answer: Build around Combustion, Elemental Fusion, productive spirit uptime, and Spirit Strike. Use Water Spirit to support MP recovery, Fire Spirit for grouped targets, and suitable buffs such as Enhance: Spirit's Benediction when available. Adjust control and protection for PvP. Elemental Fusion requires four accumulated charges from spirit skill activations, not one cast of each of the four different elemental summons.
| Build | Main purpose | Core skills and utility | Priority stats |
|---|---|---|---|
| Boss DPS | Extended single-target encounters | Elemental Fusion, Combustion, Jointstrike: Curse, productive summons, Enhance: Spirit's Benediction | Sufficient Accuracy, offensive scaling, useful cooldown reduction |
| AoE / Solo | Grouped enemies and independent farming | Fire Spirit, area-specialized Elemental Fusion, Dimensional Control, Cold Shock | Attack, MP sustain, area damage, enough HP to survive pulls |
| Defensive PvE | Unfamiliar bosses and difficult progression | Earth or Wind Spirit as needed, Defiance, Siphon, Command: Proxy | Survival, reliable hits, stable sustained damage |
| Arena | Single-target pressure and control | Soul's Cry, Cry of Terror, Seize Magic, Magic Block | Accuracy and relevant effect accuracy, HP, damage, defensive resistance |
| Abyss / Group PvP | Backline pressure and team utility | Cursed Cloud, fear effects, elemental damage, defensive utility | Reliable pressure, survivability, relevant PvP bonuses |
How Does Spiritmaster Work in AION 2?
Spiritmaster uses an Orb and fights alongside summoned elemental spirits. Unlike a straightforward ranged caster, the class manages several interconnected systems: spirit skill activations, elemental charges, MP recovery, conditional attacks, and the timing of its larger damage abilities.
Spirit skill activations build the charges used by Elemental Fusion. At four stacks, the Four Elements state enables Fusion; using it consumes that state. Further charges cannot accumulate while Four Elements remains active. The counter tracks activations rather than four distinct spirit types, so repeatedly summoning every element is not a mandatory condition for each Fusion.
Spiritmaster also has to manage where its summons and the player character are positioned. Moving out of a dangerous attack is mandatory, but unnecessary dismissals, poor summon placement, and lost attack uptime can reduce actual damage considerably. Check which spirits remain active instead of assuming every new summon replaces the previous one.
What Do the Four Elemental Spirits Do?
Each spirit contributes a different combination of damage and utility. Choose your investment and active setup according to the encounter rather than treating all four summons as equally important in every build.
- Fire Spirit: Its spirit skill damages multiple nearby enemies, making it useful for grouped targets as well as offensive summon setups.
- Water Spirit: Provides single-target attacks and restores the Spiritmaster's MP when its attacks land.
- Earth Spirit: Offers enmity and defensive utility. Its presence does not automatically make the player immune to damage or replace a party tank.
- Wind Spirit: Combines area damage with HP recovery for the Spiritmaster, making it a situational sustain option rather than merely another elemental charge source.
Water is useful when MP recovery limits your damage, while Fire contributes to area pressure and Wind can help with recovery. Several spirits can coexist in the referenced skill system. A fixed “last spirit” rule is therefore not a universal build requirement: what matters is which summons remain active, whether they are attacking, and what your current preset gains from them.
Spiritmaster Strengths and Weaknesses
Spiritmaster performs differently depending on how much freedom the encounter gives it to maintain damage and respond to spirit-triggered opportunities.
| Content | Advantages | Main limitation |
|---|---|---|
| Boss PvE | Multiple damage sources, sustained pressure, useful debuffs | Lost spirit uptime and missed conditional attacks reduce output. |
| Solo PvE | Summons, range, MP recovery, flexible protection | Poor resource management and excessive pulls make farming slower and less reliable. |
| Arena / 1v1 | Fear, sustained pressure, and disruptive Stigmas | Fast opponents can punish wasted control skills or incorrect defensive timing. |
| Small-scale PvP | Can pressure one target while interfering with another | Several attackers can overwhelm a caster without coordinated protection. |
| Mass PvP | Backline debuffs and area pressure support coordinated engagements | Exposed positioning and uncontrolled target switching reduce its contribution. |
The practical difference between an average and effective Spiritmaster is not simply item quality. It is the ability to keep dealing damage without missing an important mechanic, wasting a conditional skill, or exhausting MP before the next damage window.
Best Spiritmaster Skills and Specialties
Your first investment should establish a reliable damage loop. Combustion provides frequent direct damage, Cold Shock helps maintain MP, and useful summons support both damage and elemental charge generation. Dimensional Control is another MP recovery tool when its spirit-triggered activation becomes available.
The targets below are staged recommendations based on the Global test-client skill structure, not a requirement to level every listed skill immediately. Purchased levels and the displayed total after Daevanion, equipment, or Arcana bonuses are different. Character-level requirements can also prevent you from reaching a target even when you have spare skill points.
| Skill | Recommended target | Specialty direction | When to change it |
|---|---|---|---|
| Combustion | 8 first; work toward purchased level 10 | Fewer-target damage for bosses; reduced MP cost when sustain is difficult | Choose its accuracy option when unreliable hits are the immediate problem. |
| Cold Shock | 8 when available | Additional MP recovery | Consider Multi-Hit or HP absorption after MP stabilizes. |
| Elemental Fusion | 8, then purchased level 10 | Delayed additional damage or elemental offense for bosses; area conversion for packs | Choose according to available specialty slots and the number of targets. |
| Summon: Water Spirit | 8 as a useful early goal; 10 later | Spirit skill activation chance or Water Spirit Attack | Prioritize its uptime when MP recovery is limiting sustained damage. |
| Summon: Fire Spirit | 8 after the core attacks; 10 later | Spirit skill activation chance or spirit critical damage | Prioritize it sooner when grouped enemies dominate your content. |
| Summon: Earth Spirit | Base level initially; 8 if the preset benefits | Spirit activation or the spirit's defensive specialty | Raise its priority when its utility improves solo or defensive play. |
| Summon: Wind Spirit | Base level initially; further investment as needed | Spirit activation and useful sustain | Invest when its healing contribution is valuable; it is not mandatory solely to unlock Fusion. |
| Jointstrike: Curse | 8 after the first core investments | Longer curse duration or Multi-Hit | Its mobile specialty becomes useful in movement-heavy fights. |
| Dimensional Control | 8 after the first core investments | Delayed additional damage or Multi-Hit | Consider control-oriented specialties for suitable enemy groups. |
| Rapid Scattershot | Base level; 8 if regularly used | Mobility, HP absorption, or MP recovery | Invest according to how often its activation condition occurs. |
| Defiance | Base level; 8 for its recovery specialty | Control removal and additional HP recovery when selected | Keep its reactive purpose in mind; it is not a general damage-reduction button. |
| Soul's Cry | Base level in ordinary boss PvE | Fear and control utility | Move it higher for PvP or enemies that can actually be feared. |
In the referenced active-skill system, specialty slots open at displayed levels 8, 12, and 20. Additional specialty options become available at their own thresholds, including level 16. Unlocking an option does not necessarily unlock another slot. These active-skill thresholds should not be applied to Stigma upgrades, which follow their own progression.
Where Should You Spend Your Skill Points?
A useful Spiritmaster allocation develops in stages. Do not copy a full Korean endgame point total onto a Global character whose level, purchased-skill limits, or external bonuses differ.
- First damage package: Develop Combustion, Cold Shock, and Spirit Strike. Add Water Spirit when its damage and MP recovery help you maintain pressure.
- Conditional damage package: Improve Elemental Fusion, Jointstrike: Curse, and Dimensional Control as their useful levels become available.
- Summon development: Improve the spirits your preset actually uses. Fire is a useful offensive investment; Earth and Wind should earn their points through the utility or damage they contribute.
- Damage consolidation: Raise important skills toward their purchased-level targets, then use external bonuses to reach valuable specialty thresholds.
- Preset-specific investment: Put additional points into Defiance, Soul's Cry, or other utility when the selected content requires them.
At the first important specialty threshold, choose an effect that solves a real problem. Extra MP recovery on Cold Shock can be more useful than a theoretical damage increase if your current rotation repeatedly runs out of resources. Conversely, when MP is already stable, offensive specialties become more valuable.
Best Spiritmaster Passive Skills
Passives deserve substantial investment because some improve the entire damage package rather than a single attack. The following priorities are a practical starting point; they are not a measured ranking for every Global gear setup.
| Passive | Priority | Reason |
|---|---|---|
| Spirit Strike | First offensive priority for PvE | Supports the PvE damage contribution of the caster and spirits. |
| Spirit's Descent | Useful offensive investment | Evaluate its contribution alongside your summon uptime and Ancient Spirit setup. |
| Mental Focus | High for damage presets | Compare its offensive gain with the next available level of your other core passives. |
| Corrode | After the strongest core investments | This is a passive, distinct from the Stigma Jointstrike: Corrode. |
| Element Unification | High after the core package | Supports offensive scaling during sustained combat. |
| Spirit Revitalization | High when summon cooldowns limit uptime | Its cooldown interaction can improve the availability of important summons. |
| Spirit Protection | Situational | Useful when learning difficult content or developing a safer preset. |
| Spirit Communion / Revitalization Contract | Situational | Compare their actual recovery or utility with your current needs. |
For a general boss build, begin with Spirit Strike and compare Mental Focus, Spirit's Descent, Element Unification, and Spirit Revitalization as your next investments. Their relative value depends on unlocked levels, current bonuses, and whether damage or summon availability is limiting the build.
Build 1: Spiritmaster Boss DPS
The boss preset is designed for long fights where maintaining consistent damage matters more than following an inflexible sequence. Keep your spirits productive, maintain useful debuffs, and take advantage of Elemental Fusion and Dimensional Control when they become available.
Core skills: Combustion, Cold Shock, Elemental Fusion, Jointstrike: Curse, Dimensional Control, and the elemental summons that support your selected setup.
Primary passives: Spirit Strike, Mental Focus, Spirit's Descent, Element Unification, and Spirit Revitalization, developed according to your current point budget.
Stigma direction: Evaluate Summon: Ancient Spirit, Enhance: Spirit's Benediction, Jointstrike: Corrode, and Flame Blessing as offensive candidates. Jointstrike: Destructive Attack is an alternative when its damage and stagger contribution fit the encounter. Equip only as many as your character's unlocked slots permit.
Recommended Boss Rotation
The objective is to maintain damage and respond to available skill windows. Use the following priority framework rather than treating it as a fixed eight-button combo.
- Establish a safe position and apply the preparation required by your selected buffs and Stigmas.
- Keep your chosen spirits attacking. Maintain Water Spirit when its MP recovery is needed instead of repeatedly dismissing useful summons.
- Apply Jointstrike: Curse and use Combustion between important cooldowns.
- Use Cold Shock before MP shortages prevent you from using higher-priority abilities.
- Use Dimensional Control during its brief activation window after a spirit skill; it also contributes MP recovery.
- Spend Elemental Fusion when Four Elements is available and the target can be damaged.
- Align Ancient Spirit and offensive buffs with a usable damage window. Ancient Spirit's skill can grant Four Elements directly, so watch for additional Fusion opportunities.
- Continue the damage loop while preserving movement and reactive defensive skills for mechanics.
Important: Holding Four Elements prevents further normal charge accumulation. Avoid delaying Fusion for a minor benefit, but do not cast it into invulnerability or an imminent loss of target access.
Jointstrike: Destructive Attack deserves separate consideration when the party needs additional stagger contribution. Keep its charged execution under manual control so that the attack lands at the intended charge stage and during the correct mechanic.
Explore services related to this guide, selected from our Aion 2 catalog.
View All Aion 2 ServicesSpiritmaster Boss Guide: Mechanics and Loot

Spiritmaster's main responsibility in a dungeon is to maintain damage while responding immediately to encounter mechanics. Summons do not replace player movement, object interactions, or assigned party duties.
The bosses below appear in Global test-client instance data. The mechanic summaries also draw on regional encounter references, including higher difficulties; they are preparation notes, not a verified script for every Global launch mode. The reward column lists instance-pool examples, not a guaranteed drop from the boss in that row.
Krao Cave
Krao Cave illustrates why a ranged Spiritmaster cannot simply remain at maximum distance throughout every encounter. Positioning checks and directed attacks may require quick movement toward a particular safe area.
| Boss | Notable mechanics | Spiritmaster response | Possible loot |
|---|---|---|---|
| Neglected Gadioton | Encounter references describe ground hazards, directed laser attacks, and projectiles. | Keep an escape route clear. Avoid dodging one attack into another hazard. | Krao Cave equipment and materials; check the selected mode's reward preview. |
| Enhanced Harcon | Projectile patterns and environmental hazards require repeated repositioning. | Do not retreat automatically to the arena wall. Follow safe gaps while preserving attack uptime. | Krao Cave equipment and accessory pools; rewards vary by mode. |
| Ultimate Berk | Regional references include lunges, spin attacks, rock-cover positioning, and a stagger check. | Reserve suitable stagger skills when required and move to cover before committing another long action. | Conquest-pool examples include Division Orb, Rupture Jewel, and Berk Ring. |
The listed equipment is associated with the instance's reward data. Its appearance here does not establish a guaranteed personal drop or an exclusive boss source. Compare the selected difficulty and reward cube before farming; an appropriate Orb is the relevant weapon target for Spiritmaster.
Fire Temple
Fire Temple requires attention to persistent arena hazards and phases during which attacking the boss is unsafe or impossible. Save important cooldowns for windows when you can actually use them.
| Boss | Notable mechanics | Spiritmaster response | Possible loot |
|---|---|---|---|
| Red Spark Ignus | Regional references describe lava puddles, circular attacks, and jumps toward players. | Place targeted hazards away from the group's safe area when the mechanic requires it, then return to a usable casting position. | Fire Temple equipment and materials from the selected reward pool. |
| Black Smoke Murute | Arm attacks, delayed ground circles, and expanding waves appear in encounter references. | Watch the complete sequence instead of reacting only to its first impact. | Fire Temple equipment and accessories; the indexed pools include Murute Earrings. |
| Kromede's Desire | Regional references include a moving fire-wall phase, clone attacks, and targeted line damage. | Navigate safe openings and restart damage when the target becomes accessible. | Conquest-pool examples include Corrupted Judicator Orb, Enraged Kromede Jewel, Sealed Kromede Wings, and Fire Temple artwork. |
If your selected difficulty includes Kromede's fire-wall phase, surviving it takes priority over keeping the rotation aligned. Hold major damage abilities when the boss is unavailable and resume from your current skill state when the phase ends.
Ferocious Horn Den
Ferocious Horn Den appears in the Global test-client instance and reward data. Its inclusion in a database does not establish when every difficulty becomes accessible. The mechanics below are regional encounter references and may differ in the Global mode you enter.
| Boss | Notable mechanics | Spiritmaster response | Possible loot |
|---|---|---|---|
| Watchdog Kwapo | Regional references include exploding orbs, shockwaves, and targeted projectiles. | Keep a safe route available and respond to the actual wave telegraph rather than finishing another attack. | Black Claw equipment and associated instance reward pools. |
| Necromancer Duanka | Regional references describe protected adds, an orb interaction, and a central pull. | Follow the vulnerability mechanic before switching damage to adds, and preserve movement for dangerous pulls. | Equipment and materials from the selected Ferocious Horn Den reward pool. |
| Ferocious Horn Nuakum | Higher-difficulty references include bleeding, blood puddles, clone dashes, interception duties, and an orb phase. | Keep required areas clear and follow assigned mechanics. Do not assume the same interception or orb rules apply in every mode. | Indexed examples include Black Claw Orb, Nuakum equipment, Sealed Dark Veil Wings, and Ferocious Horn Den artwork. |
These are reward-pool examples, not fixed drop guarantees or verified retail percentages. Entry requirements, available modes, and reward eligibility must be read from the Global activity panel rather than imported from Korean or Taiwanese Hard-mode guides.
Build 2: Spiritmaster AoE and Solo
The AoE preset changes the purpose of your damage loop. Instead of maximizing pressure on one durable target, it aims to damage grouped enemies efficiently while avoiding MP shortages between pulls.
Core skills: Fire Spirit, Elemental Fusion with its area specialty when available, Combustion, Cold Shock, Dimensional Control, Jointstrike: Curse, and useful supporting summons.
Supporting choices: Water Spirit for MP recovery, Wind Spirit when HP recovery helps, Earth Spirit where its defensive utility is useful, and appropriate AoE or buff Stigmas.
How to Play the AoE Build
Begin with a manageable group and a safe retreat path. Keep enemies close enough for your area attacks to connect. Elemental Fusion needs its area-conversion specialty to serve as the corresponding AoE tool; do not assume its base version hits the entire pack.
- Approach from a direction that leaves a clear escape path.
- Use Fire Spirit and your chosen supporting summons against the group.
- Apply Jointstrike: Curse where its area can cover useful targets.
- Use Dimensional Control when it activates and maintain damage while charges accumulate.
- Use area-specialized Elemental Fusion on a properly grouped pack.
- Recover MP through Cold Shock, Dimensional Control, and Water Spirit uptime as needed before the next pull.
Do not build your farming routine around pulling the maximum possible number of enemies. Repeated emergency movement and deaths can erase the benefit of a larger pull, especially when your gear offers little protection.
Build 3: Defensive Spiritmaster PvE
The defensive build is intended for unfamiliar dungeon mechanics, unstable groups, and solo activities where losing a little damage is preferable to repeatedly dying.
Keep the fundamental damage package, but adjust utility to the actual cause of failed attempts. Spirit Protection, useful recovery, Command: Proxy, and appropriate elemental summons can help. Defiance is a reactive control-removal tool, not a substitute for avoiding a boss attack.
- Earth Spirit: Provides enmity and defensive utility where the encounter permits it; it does not guarantee control of a party boss.
- Defiance: Keep it available for removable control effects. Its HP recovery specialty adds value when selected.
- Siphon: Consider this recovery option when its use fits the encounter and your Stigma budget.
- Command: Proxy: Shares incoming damage with an eligible spirit. Keep that spirit alive and within the required distance.
- Cold Shock: Maintains MP recovery; Wind Spirit can separately help with HP recovery when included.
Do not try to solve every survival problem by replacing offensive abilities. Incorrect movement, inadequate defensive stats, or a weak weapon making fights unnecessarily long may be the real issue. Make a targeted change and check whether it improves consistency.
Build 4: Spiritmaster Arena PvP
Arena Spiritmaster is built around limiting the opponent's opportunities to attack. Elemental pressure remains useful, but defensive timing and crowd-control decisions matter more than following a fixed boss rotation.
Core direction: Keep Combustion, appropriate summons, and Elemental Fusion as the offensive foundation. Evaluate Soul's Cry, Cry of Terror, Seize Magic, Magic Block, and Defiance according to unlocked abilities and the matchup. The control Stigmas are candidates, not a requirement to equip all of them together.
How to Play Against Different Opponents
Against melee characters, preserve enough distance to attack without giving them an uninterrupted engagement. Watch for control immunity and do not spend every defensive response on the same attack.
Against ranged damage dealers, pressure their movement and defensive resources before committing your strongest damage window. A failed control attempt can leave you exposed to retaliation.
Against support-oriented opponents, combine sustained pressure with disruption. Time your utility around their recovery opportunities instead of assuming a short damage sequence will immediately secure a kill.
Keep movement, Dodge, Defiance, fear, and other emergency responses under manual control. Losing a defensive ability to an automatic sequence can leave it unavailable when the opponent commits.
Build 5: Spiritmaster Abyss and Group PvP
In group combat, Spiritmaster benefits from a protected backline and coordinated control. Chasing one target through the opposing frontline can separate you from support and interrupt the pressure you were already creating.
Keep a functioning damage package, then assess Cursed Cloud, Soul's Cry, Cry of Terror, Magic Block, and appropriate protection. Area damage matters when enemies are grouped; targeted disruption matters when a particular opponent is threatening your party.
- Before engagement: Establish a position with cover or a clear retreat path.
- During engagement: Pressure the group's selected target and coordinate control instead of scattering it across unrelated enemies.
- When focused: Prioritize movement and survival over spending Elemental Fusion immediately.
- After displacement: Check your summons and resume pressure from a safe position.
Abyss gear and progression deserve a separate investment plan. For entry requirements, AP, objectives, and equipment context, use the AION 2 Abyss Guide.
Best Spiritmaster Stigmas and Upgrade Order

Stigmas provide important build-changing abilities. The number of available slots, upgrade limits, and acquisition costs must match your Global character. An expanded regional endgame loadout is not automatically usable at Global launch.
Relevant choices include Summon: Ancient Spirit, Enhance: Spirit's Benediction, Flame Blessing, Jointstrike: Corrode, Jointstrike: Destructive Attack, Siphon, Cry of Terror, Cursed Cloud, Seize Magic, Magic Block, and Command: Proxy. The passive Corrode and the Stigma Jointstrike: Corrode are different skills.
| Content | Priority abilities | When to swap |
|---|---|---|
| Boss DPS | Summon: Ancient Spirit; Enhance: Spirit's Benediction; Jointstrike: Corrode; Flame Blessing | Evaluate Jointstrike: Destructive Attack for stagger, or replace an offensive option with required protection. |
| AoE / Solo | Ancient Spirit; Enhance: Spirit's Benediction; Cursed Cloud; Jointstrike: Corrode or Siphon | Choose recovery when incoming damage is slowing repeated pulls. |
| Defensive PvE | Command: Proxy; Enhance: Spirit's Benediction; Ancient Spirit; Siphon or an offensive option | Restore damage once the encounter becomes mechanically reliable. |
| Arena | Cry of Terror; Seize Magic; Magic Block; Command: Proxy | Adapt to the opponent, control resistance, and available slots. |
| Abyss | Cursed Cloud; Cry of Terror; Magic Block; a defensive or offensive alternative | Increase protection when your group cannot reliably defend its backline. |
Which Stigmas Should You Upgrade First?
For general PvE, establish a complete usable set before spending heavily on situational alternatives. The following order is a starting recommendation, not a universal ranking for every unlock stage.
- Summon: Ancient Spirit: Adds summon damage and additional access to Four Elements through its skill.
- Enhance: Spirit's Benediction: Provides a damage, protection, and recovery window for the caster and spirits.
- Jointstrike: Corrode / Flame Blessing: Develop whichever offensive option your current setup uses most effectively.
- Jointstrike: Destructive Attack: Invest when its charged attack and stagger contribution justify a slot.
- Siphon or Command: Proxy: Develop an appropriate defensive option when survival is the immediate limitation.
- PvP control Stigmas: Upgrade separately when Arena or Abyss becomes a regular part of your progression.
Do not automatically maximize one Stigma while leaving the rest of your equipped set undeveloped. Compare the next actual upgrade effect with its cost, and distinguish Stigma progression from the specialty-slot thresholds of ordinary active skills.
The broader system, including upgrade materials and reset considerations, is covered in the AION 2 Stigma and Daevanion Guide.
Spiritmaster Macros and Manual Skills
Short sequences can simplify repeated inputs, but Spiritmaster still requires decisions about conditional attacks, resources, charged abilities, and encounter mechanics. A fixed sequence cannot replace watching the current combat state.
The templates below describe combat priorities rather than executable macro commands or guaranteed one-button behavior. Use the options actually provided by the Global client; external keyboard or mouse automation is not the same as an in-game skill-chain feature.
| Template | Suggested repeatable sequence | Keep manual |
|---|---|---|
| Boss spirit setup | Activate the selected summons and maintain their useful uptime without unnecessary dismissal. | Elemental Fusion timing, Ancient Spirit, buffs, charged attacks, defensive movement. |
| Basic damage | Maintain Jointstrike: Curse and use Combustion between higher-priority opportunities. | Dimensional Control activation windows and MP recovery decisions. |
| AoE | Establish Fire Spirit and supporting damage against a controlled pack. | Enemy grouping, area-specialized Elemental Fusion, Dodge, emergency defense. |
| Arena | At most a short damage sequence that does not consume defensive resources. | Crowd control, defensive cooldowns, movement, and target selection. |
A common mistake is expecting Elemental Fusion to activate at the same step of every sequence. Charge generation and additional activations can change that timing. Charged attacks also need deliberate release timing rather than an unconditional repeat.
Test a short sequence against a stationary target, then check it during movement and target changes. A sequence that works on a training target may fail when a boss becomes untargetable or a defensive response is required.
Best Spiritmaster Stats, Gear, Manastones, and Soul Binding
The most useful stat depends on what currently limits your build. More damage does little if important attacks miss, summons lose uptime, or MP recovery cannot support sustained combat. Conversely, stacking additional Accuracy after it stops solving a hit problem can displace more useful offensive stats.
| Stat group | Boss PvE | AoE / Solo | Arena / Abyss |
|---|---|---|---|
| Accuracy | Maintain reliable hits against the selected content. | Check whether misses are reducing clear speed. | Distinguish ordinary hit accuracy from the accuracy of relevant control effects. |
| Attack / Damage Boost | Compare offensive gains once attacks connect reliably. | Improves clear speed across repeated pulls. | Supports damage during successful pressure windows. |
| Cooldown reduction | Useful when it improves important summon or buff availability. | Consider it when repeated pulls expose meaningful cooldown gaps. | Balance it against survival and the effects available on actual gear. |
| Critical-related stats | Compare with other damage stats at your current gear level. | Useful when they improve sustainable clear speed. | Evaluate against enemy defenses and PvP requirements. |
| MP sustain | Improve when long fights expose a resource problem. | Important for repeated pulls without excessive downtime. | Helpful, but not at the expense of essential protection. |
| HP / defensive stats | Enough to survive required mechanics and unavoidable damage. | Increase for difficult solo content. | Higher priority when regularly targeted by other players. |
Which Equipment Should You Upgrade First?
Start with an appropriate Orb, then compare your other equipment slots by actual benefit and replacement risk. A higher item grade alone does not establish that an item is the best upgrade, and weapons for another class are not alternatives to your Orb.
A practical gear progression order is:
- Acquire a usable Orb with meaningful offensive stats.
- Meet the equipment requirement for your next relevant activity.
- Improve a weak armor or accessory slot if it limits survival or overall performance.
- Use functional Manastones before spending heavily on perfect rolls.
- Develop Soul Binding and expensive upgrades on equipment you expect to retain.
- Keep a separate PvP equipment plan when Arena and Abyss become regular activities.
For Manastones, address the current limitation: Accuracy when hits are unreliable, offensive stats when damage is the bottleneck, or survivability when incoming damage ends attempts. This is a decision framework rather than a fixed stat weight for every character.
Soul Binding should follow the same principle. Avoid expensive rerolling on equipment that will soon be replaced, especially before confirming the applicable transfer rules. See the AION 2 Gear Progression Guide for the wider equipment and transfer system.
Best Arcana for Spiritmaster
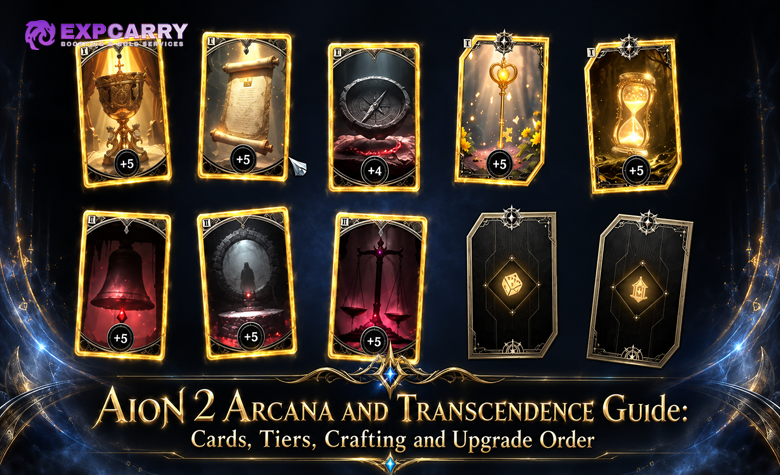
Arcana can contribute more than basic combat stats. Relevant skill-level bonuses may help reach an important displayed-level threshold, but their value depends on the skill, its current level, and the specialty slots or effects the extra level actually unlocks.
For a boss preset, examine bonuses supporting Combustion, Elemental Fusion, productive summons, Spirit Strike, and other useful passives. For AoE, prioritize the abilities that contribute most to your actual area rotation. PvP may justify defensive or control-oriented alternatives.
The practical evaluation order is straightforward:
- Check whether the card improves a skill included in your current preset.
- Determine whether its added level unlocks a useful specialty or meaningful scaling.
- Compare the complete equipped combination rather than card rarity alone.
- Keep useful alternatives for PvP and defensive PvE instead of dismantling every non-DPS option.
Named card families and exact skill-level combinations from mature regional accounts are not guaranteed Global launch options. Base your plan on the cards and effects available to your character.
For the complete card and progression system, read the AION 2 Arcana Guide.
Pantheon Priorities for Spiritmaster
Pantheon development should support the content you play most. Compare obtainable bonuses with the resources needed to unlock them, particularly while your core skills and equipment still need improvement.
Do not choose a domain solely because its name sounds appropriate for a caster. Inspect its actual effects and verify whether relevant bonuses benefit the player, summoned spirits, or both. A regional collection route is not automatically the most efficient Global route.
- Offensive setup: Prioritize useful damage bonuses that improve your actual combat output.
- Rotation setup: Consider available cooldown effects when important abilities have identifiable downtime.
- Defensive setup: Take survivability bonuses when they help you complete content more consistently.
Artwork associated with Fire Temple and Ferocious Horn Den appears in the indexed reward data. Verify its current acquisition source and placement effect before making repeated dungeon runs solely for a collection bonus.
Best Pets, Genus Insight, and Wings
Pets, Genus Insight, and Wings contribute to character progression, but collectible pets are separate from Spiritmaster's combat summons. A benefit belonging to one system should not automatically be assumed to apply to the other.
Which Pets Should Spiritmaster Use?
Prioritize obtainable pets with useful collection or equipped benefits. A premium pet such as Black Dragon should not be presented as a mandatory Spiritmaster purchase or best-in-slot choice without comparing its actual effects with other available pets.
For general progression, evaluate the following effects when they are available:
- Attack and broadly useful damage bonuses.
- Accuracy when ordinary attacks are missing.
- Critical-related bonuses according to their actual contribution.
- HP or protection for demanding solo and PvP content.
Genus Insight Priorities
Genus Insight is a pet-collection progression system. Use the groups, unlock conditions, and bonuses shown in your Global client rather than assuming a Korean or Taiwanese collection chart has identical requirements.
Register accessible pets and claim attainable improvements first. Then compare the cost of the next collection milestone with its benefit to your current preset. An expensive collection is a poor early investment if the same resources would substantially improve core combat progression.
Which Wings Are Worth Using?
Compare Wings by their actual stats, progression value, and upgrade requirements, not just appearance. Examples in the Global test-derived dungeon data include Sealed Kromede Wings and Sealed Dark Veil Wings.
Neither is automatically Spiritmaster's final best-in-slot choice. Check the obtainable version, its requirements, and your alternatives before committing upgrade resources.
Spiritmaster Daevanion Boards and Tile Priorities
Daevanion development should reinforce useful combat improvements before resources are spread across unrelated branches. Relevant skill-level nodes can be especially valuable when they help reach a specialty threshold.
Only plan routes through boards available to your Global character. In particular, do not assume that an Ariel route from a Korean or Taiwanese guide is available in Global simply because the regional guide recommends it.
Which Daevanion Tiles Should You Take?
Evaluate the complete path cost, including intermediate nodes. A valuable skill tile may justify a longer route, but its benefit must exceed what you could gain by spending those points elsewhere.
| Priority | Tile type | Reason |
|---|---|---|
| 1 | Useful Combustion and Elemental Fusion skill bonuses | Can strengthen core attacks or help reach valuable specialty thresholds. |
| 2 | Relevant elemental summon levels | Improves summons that actually contribute to the selected preset. |
| 3 | Spirit Strike and other useful passive bonuses | Supports broader offensive scaling. |
| 4 | Efficient Attack and Damage Boost nodes | Improves damage without requiring an expensive detour. |
| 5 | Useful cooldown-related nodes | Helps when important summon or buff cooldowns limit output. |
| 6 | Defensive and PvP-specific branches | Develop these when your regular content requires them. |
This is a list of candidate investments, not a universal route or a promise that every listed bonus appears on every board. Inspect the available Global layout and compare the total cost of each useful destination.
Practical Spiritmaster Upgrade Order
When several systems compete for limited resources, the following order helps prevent early spending from becoming fragmented:
- Establish Combustion, Cold Shock, useful summon uptime, and Spirit Strike.
- Develop Elemental Fusion, Jointstrike: Curse, and Dimensional Control as their upgrades become accessible.
- Unlock a functional Stigma set with appropriate damage buffs and utility.
- Meet the next relevant equipment requirement and improve your Orb when worthwhile.
- Use Daevanion and Arcana bonuses to reach meaningful skill thresholds.
- Improve practical gear weaknesses with Manastones and sensible enhancement.
- Develop Pantheon, pets, Genus Insight, and Wings through obtainable progression.
- Invest in specialized Arena, Abyss, and defensive alternatives after the main preset works reliably.
If an upgrade does not improve your damage loop, unlock useful content, or solve a survival problem, it can usually wait until the more important parts of the build are established.
Common Spiritmaster Mistakes to Avoid
Small build and rotation errors can have a substantial cumulative cost during a long encounter.
- Copying a Korean endgame build into Global: Skill limits, equipment, boards, and available Stigma slots may differ.
- Ignoring resource recovery: Use Cold Shock and available recovery tools before MP shortages interrupt your damage.
- Holding Elemental Fusion unnecessarily: Four Elements prevents further normal charge accumulation until it is consumed.
- Assuming Fusion requires four different summons: Its normal charge condition counts spirit skill activations, not one activation from each element.
- Overinvesting in control for ordinary boss fights: Fear and similar effects may contribute little against immune enemies.
- Automating every button: Conditional attacks, charged abilities, defensive responses, and major cooldowns need appropriate timing.
- Forcing damage during mechanics: Another attack does not compensate for dying, missing an interaction, or causing a party wipe.
- Applying a fixed stat ranking everywhere: Check actual hit reliability, damage, cooldown gaps, and survival before replacing equipment.
- Upgrading temporary gear too heavily: Verify item lifespan and transfer rules before committing expensive materials.
- Using one preset everywhere: Boss PvE, solo farming, Arena, and mass PvP have different requirements.
AION 2 Spiritmaster FAQ
These answers address practical class questions that do not require a separate build section.
Is Spiritmaster available to both Elyos and Asmodians?
Yes. Both factions can select Spiritmaster. The class's core identity remains centered on elemental summons and ranged magical damage.
Does Spiritmaster use an Orb or a Spellbook?
Spiritmaster uses an Orb in the Global test-client class data. Spellbooks belong to a different weapon category and should not be treated as interchangeable equipment.
Can Spiritmaster play effectively without expensive equipment?
You can establish a functional leveling and early-progression setup with the class's core skills and obtainable gear. Difficult endgame content still requires appropriate equipment, unlocked abilities, and competent execution.
Should a new Spiritmaster create separate PvE and PvP presets?
Yes, once the relevant options become available. PvE usually prioritizes sustained damage, while PvP places greater value on control, disruption, mobility, and protection.
Conclusion
AION 2 Spiritmaster rewards productive summon uptime and timely use of its conditional attacks. Develop Combustion, Cold Shock, Elemental Fusion, useful summons, and offensive passives first. Match Stigmas to your damage and survival needs, use Water Spirit for MP support and Fire Spirit for grouped targets, and consider Wind Spirit when recovery matters. Treat the recommended builds as Global progression templates and confirm expensive decisions against the released client.