




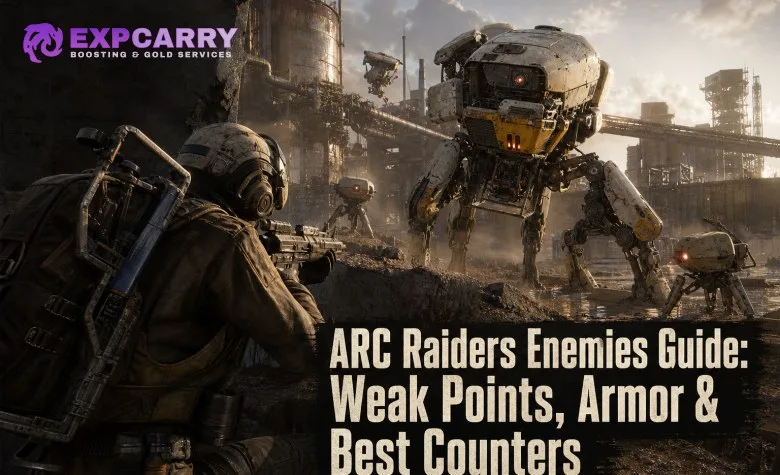
ARC enemies are not beaten by simply emptying magazines into their center mass. Read the plating first: bright yellow parts are direct-damage weak points, matte white surfaces are comparatively vulnerable, and shiny dark-gray armor requires enough ARC Armor Penetration before it can be stripped. In the live game, the best general answer is to bring a weapon that can handle armor, prioritize alarms and support units before damage dealers, and only commit to heavy targets when you have cover, ammunition, and an extraction plan. This guide covers the current enemy roster and reflects Live Update 1.39.0, released on July 28, 2026.
How ARC armor and weak points work
Every serious ARC fight starts with target identification. Armor color tells you whether you should keep shooting, reposition for a weak point, or change weapons.
| Visual cue | What it means | Best response |
|---|---|---|
| Bright yellow, matte parts | Weak point; damage goes directly into the ARC. | Make this your first firing priority whenever you have an angle. |
| Matte white plating | Unarmored or lightly protected surface. | Most weapons can work, though moderate or better ARC Armor Penetration is more efficient. |
| Shiny dark-gray plating | Armored surface. | Use moderate-or-higher penetration to break it, or rotate to a yellow joint, canister, core, thruster, or rear angle. |
That means a low-penetration weapon is not automatically useless against a large ARC, but it is a poor tool for firing into intact dark armor. Once a plate comes off or a yellow weak point is exposed, switch your attention there immediately. The same rule matters even more in a squad: one Raider can open armor while the others hold the weak-point angle.
For a current comparison of armor-piercing guns, ammo economy, and utility choices, use the ARC Raiders weapons and gadgets guide. The practical PvE core is an ARC-capable primary such as Anvil, Ferro, Bettina, or Kettle depending on your budget and range plan; close-range armor work is where Dolabra becomes a high-risk specialist option.
Threat priority before you shoot
- Kill the alarm or targeting unit first. Snitches, Spotters, and nearby drones can turn a controlled fight into a drawn-out encounter with reinforcements or artillery pressure.
- Clear immediate close-range pressure. Ticks, Pops, Fireballs, Comets, and Fireflies punish a player who stares at a boss while ignoring the ground around them.
- Break the heavy target’s safe angle. Force a Bastion, Bombardier, or Sentinel to expose a joint, canister, or firing window rather than trading shots in the open.
- Loot only after the area is stable. ARC combat is loud. Reload, check the nearest approach routes, and expect other Raiders to investigate.
ARC scanners also communicate their alert state: blue is routine patrol behavior, yellow means investigation, and red means the machine has entered combat. If stealth matters, do not wait for red before deciding whether to disengage.
Small ARC enemies: fast counters and common mistakes
Small units are individually manageable, but they are often what makes a larger encounter lethal. They take away your cover, reveal your position, force movement, or punish slow reactions.
| Enemy | Weak point or opening | Best counter | Do not do this |
|---|---|---|---|
| Snitch | Thrusters | Destroy it immediately before it can call nearby ARC reinforcements. | Leave it alive while fighting a heavy ARC. |
| Wasp | Thrusters | Track the engines; destroying them destabilizes it. | Waste armor-piercing ammo on a simple drone when a clean thruster shot is available. |
| Hornet | Unarmored rear thrusters | Take a rear angle and dodge when its attack cue sounds. | Stand still in its firing line while focusing another target. |
| Tick | Any exposed body area | Kill quickly with any weapon; dodge roll if it attaches. | Try to tank the latch while reloading. |
| Pop | Fragile body | Create distance, climb when possible, or bait its detonation with a well-timed dodge. | Backpedal into a corner. |
| Fireball | White core exposed during its attack | Let it open, shoot the core, then move away from the resulting fire. | Stand in front of it waiting for the panel to open. |
| Comet | Fragile explosive chassis | Use heavy ammo or explosives, then dodge laterally before detonation. | Run straight backward and assume the blast will miss. |
| Firefly | Yellow body canister; semi-armored thrusters | Hit the canister or strip the thrusters to destabilize it. | Ignore it during an indoor or close-cover fight. |
Snitch, Spotter, and Surveyor: information threats
Snitches are always high priority. Their purpose is not direct damage; it is escalating the encounter by loudly alerting nearby ARC. If you are trying to remain quiet, either avoid the patrol completely or destroy the Snitch before starting on anything else.
Spotters make Bombardiers worse. They assist the larger artillery unit by establishing target information. Destroy the Spotter before it settles into target lock, then move under a roof, bridge, or other vertical cover so the Bombardier cannot freely punish you from above.
Surveyors are valuable but slippery. Their vulnerable window appears while they fire their laser, and they can flee rapidly. Explosives and disabling tools such as Hornet Drivers or Showstoppers are useful because they create a real damage window instead of a long chase through exposed terrain. If you cannot safely stop it, do not burn all of your ammunition pursuing it across an open map.
Turret and Sentinel: win with cover, not a damage race
Turrets and Sentinels punish predictable peeks. A Turret is best handled by baiting its fire from hard cover, then returning damage while it is committed. A Sentinel is a long-range firing threat with a yellow canister on its arm. Its red beam and converging yellow beams telegraph its attack sequence; use those cues to get behind cover before the shot, then punish the canister during downtime.
The important distinction is that cover must be hard. A low object that still leaves your head or upper body visible is not a Sentinel counter. Break line of sight fully, reload, and only re-peek when you have a shot on the canister rather than its armored front.
Mid-tier ARC enemies: armor angles and control windows
These machines are where armor knowledge begins to matter more than raw DPS. Bring enough ammunition for a real fight, establish a retreat lane before the first shot, and avoid pulling multiple threats into the same open area.
| Enemy | Priority target | Reliable counterplay |
|---|---|---|
| Shredder | Thrusters | Use substantial cover, wait out its attack signal, then hit thrusters with heavy ammo, explosives, or armor-breaking tools. |
| Bombardier | Yellow leg joints and rear canister | Destroy Spotters, stay under vertical cover, avoid its close shockwave, and attack from rear or joint angles. |
| Bastion | Yellow leg joints and rear canister | Use corners to deny its weapon line; stun or disable it, then work joints rather than its front armor. |
| Leaper | Leg joints and eye | Use a doorway or structure it cannot fit through, then punish legs and eye from safety. |
Shredder
Shredders are no longer confined to Stella Montis; Flashpoint spread them across the map pool. They are dangerous because they can punish a player who treats a small amount of cover as enough. Do not start this fight in the open. Find a building edge, a solid wall, or a reliable sightline break first, then aim for the thrusters. Heavy ammo, explosives, and dedicated armor-breaking tools are much more sensible than trying to whittle it down with a weak general-purpose weapon.
Shredders were added broadly in the Flashpoint update, alongside the Vaporizer and Close Scrutiny operation. For the official overview of that content change, see Embark’s Flashpoint announcement.
Bombardier
Bombardiers become far easier once you stop fighting the whole group at once. First remove any Spotter that can help establish its targeting. Next, use overhead protection or a tall structure to block artillery pressure. Its yellow leg joints and rear canister are the meaningful damage targets; its front-facing armor is not where you want to spend a prolonged volley.
Do not crowd it. The Bombardier has a dangerous close-range shockwave, so a close-range armor breaker only works when you have a clear exit and understand when to retreat. Wolfpack Grenades are a strong supplemental damage option, but grenades should support a good firing angle rather than replace one.
Bastion
A Bastion is slow enough to manipulate but dangerous enough to delete an exposed Raider. Draw it toward a corner or structure that prevents it from freely tracking you. Its yellow leg joints and rear canister are the main targets, while the front remains a poor place to trade. Stuns and disables can create a decisive damage phase, but do not chase a stun window into an open lane.
Expect nearby Wasps and Hornets around Bastions. Clear the drone pressure if it is forcing you out of cover, then return to the heavy target. Trying to ignore every add while tunnel-visioning the canister is one of the most common ways to lose an otherwise controlled fight.
Leaper
Leapers are a terrain check. Their leg joints and eye are vulnerable, but their movement punishes players who choose a flat, open battlefield. Doorways, small buildings, sheds, and other gaps a Leaper cannot enter let you keep a safe firing lane while it struggles to reach you. Explosives, Wolfpack Grenades, disables, and focused fire on the leg joints all improve the fight.
Do not confuse “indoors” with “safe.” Make sure the building has an exit, does not trap your squad in a dead end, and does not leave you vulnerable to another Raider holding the doorway.
Explore services related to this guide, selected from our ARC Raiders catalog.
View All ARC Raiders Services


Flying heavy ARC enemies: Rocketeer and Vaporizer
Rocketeers and Vaporizers demand the same core discipline: fight from cover, target mobility components, and refuse to stand underneath their preferred firing lane.
| Enemy | Weak points | Best counter | Main danger |
|---|---|---|---|
| Rocketeer | Thrusters, scanner area, rear silver canister | Break thrusters or use disables to destabilize it; shoot from cover between attack cycles. | Rocket pressure in open terrain. |
| Vaporizer | Thrusters and scanner area | Wait out its defensive shield, then pressure exposed mobility points from hard cover. | Laser fire and a shield that blocks thrown items. |
Rocketeer: Its thrusters and scanner area are the core weak points, with a silver canister on its back offering another useful rear angle. Breaking thrusters can destabilize it. Hornet Drivers and other disabling tools can also create safer windows, while Wolfpack Grenades provide meaningful burst if you can land them without exposing yourself.
Vaporizer: Introduced in Flashpoint and later added to more maps and conditions, the Vaporizer uses laser pressure and can deploy an energy shield that blocks thrown items. Do not throw grenades into an active shield. Instead, reset behind cover, wait for its shield cycle to end, and focus the thrusters or scanner when you have a clean angle. The official Riven Tides notes also confirm that Vaporizers were expanded to additional maps and conditions.
Boss-tier ARC: Queen and Matriarch
Queen and Matriarch fights should be treated as an event, not opportunistic side loot. Their yellow leg weak points are the safe early targets. After armor plates are removed, a red glowing core becomes the major damage opportunity. Do not begin the fight unless your squad has enough healing, shield recovery, ammunition, a protected reposition route, and a realistic plan for other players hearing every shot.
The practical boss sequence is simple:
- Choose the arena before you aggro. Identify hard cover, a lane for retreat, and where each player can shoot without stacking in one blast zone.
- Clear support threats. Drones, nearby elites, and hostile Raiders are often more dangerous than a few seconds of delayed boss damage.
- Work yellow leg weak points. Do not waste your best ammunition into intact armor unless stripping that plate creates the core window.
- Commit to the exposed core. This is where coordinated burst and high-value ammunition matter.
- Reset between attack cycles. Heal, reload, recover shields, and re-establish angles rather than forcing every second of damage.
- Secure the highest-value loot and leave. A boss kill is not complete until you extract with the core rewards.
Bosses can also summon or attract additional ARC pressure, so a solo player should be especially conservative. If the map is already loud, the route to extraction is poor, or another squad is clearly waiting for the finish, skipping the fight is often the profitable decision. For deeper preparation and loot triage, see the ARC Raiders boss and elite guide.
Special ARC encounters: ARC Turbine, Assessor, Probes, and Husks
ARC Turbine
The ARC Turbine is a high-threat special encounter rather than a normal patrol enemy. It can lay mines before landing and deploy cluster lightning missiles against nearby Raiders. Its spinning weak point is accessible while it is landed. Clear mines carefully, avoid standing near teammates, and only move into the damage angle after you have identified a route out of the blast area.
Assessor and Close Scrutiny
The Assessor is tied to the Close Scrutiny ARC Operation. It is a large landing machine associated with valuable salvage, but the danger comes from the ARC patrols and Vaproizer pressure around it. Treat the objective area as a contested event: scout from range, identify whether another team is already committed, and do not breach or loot blindly without checking nearby cover and exits.
Probes and Husks
ARC Probes can be breached with your Raider Tool, but doing so signals nearby ARC. Breach only when you are prepared to fight or leave quickly. Husks are old machine remains that can contain useful ARC materials; they are lower-risk loot opportunities, but searching one in a popular area still exposes you to nearby Raiders.
When the fight is likely to create a PvP problem, use the same discipline you would in any extraction encounter: confirm audio, avoid overextending for one more loot container, and keep a reset route ready. The ARC Raiders PvP guide explains how to manage those third-party decisions and protect an extraction after a loud objective.
Best anti-ARC preparation by objective
| Raid objective | Bring | Avoid |
|---|---|---|
| Quiet materials or quest run | Affordable weapon, enough healing, shield recovery, and a fast answer for Ticks or Snitches. | Starting heavy fights that consume your ammunition and announce your route. |
| Elite hunt | Moderate-or-better armor penetration, extra ammo, hard-cover plan, and at least one burst or disable tool. | Open-field pulls and entering without a retreat lane. |
| Boss or operation | Dedicated ARC damage, backup ammunition, healing, shield recovery, explosives or utility, and a coordinated squad plan. | Fighting with a full inventory, no extraction route, or a squad that has not assigned add control. |
| Solo heavy-target attempt | Cover-rich terrain, a weapon you can afford to lose, and a strict disengage rule. | Trying to out-DPS a boss or Leaper in the open. |
Current balance and content updates can change weapon breakpoints, gadget reliability, and enemy distribution even when weak-point anatomy remains familiar. Patch 1.39.0 fixed inconsistent damage for Seeker Grenades and Wolfpack Grenades, making both more dependable supplemental tools again, but neither replaces correct positioning or ARC Armor Penetration.
Final enemy-fighting rules
- Yellow first, armor second. A clean weak-point angle is usually worth more than extra shots into plating.
- Do not ignore support units. Snitches, Spotters, Wasps, and Hornets frequently decide whether a heavy encounter stays controllable.
- Fight heavies from a chosen lane. Cover, an exit, and a reload window matter more than forcing constant damage.
- Use grenades during real openings. Throwables are best when the target is exposed, destabilized, or unable to escape—not as panic damage.
- Extract after the win. The more valuable the ARC loot, the less reason there is to linger for optional kills.
If you want optional hands-on help with a difficult ARC hunt, boss objective, or safer high-value extraction, ExpCarry’s ARC Raiders services offer manually completed coaching and carry options. They are not required to progress, but they can help when a specific objective is blocking your next upgrade.





