




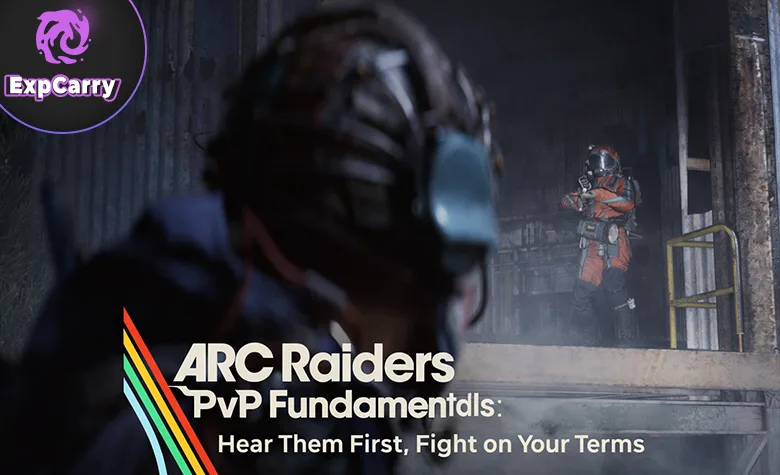
Winning PvP in ARC Raiders is less about chasing every sound cue and more about creating the first favorable trade. Your aim matters, but clean positioning, disciplined peeks, a protected reset route, and fast decisions matter more when one fight can attract ARC pressure and other Raiders. This guide explains how to take better fights, recover when you are surprised, and turn a small advantage into a safe extraction. It is written for the live game as of Update 1.39.0, released July 28, 2026, which also improved water footstep audio and changed how defensive PvP affects matchmaking.
The PvP Rule That Changes Every Raid: Fight for a Reason
Do not treat every Raider you see as a mandatory kill. In an extraction shooter, a fight is good only when winning improves your raid more than avoiding it. Before firing, make a fast decision based on three questions:
- What do I gain? A safer extraction, control of valuable loot, a contract objective, or a clear path through a dangerous area are meaningful reasons.
- What can go wrong? Consider nearby ARC, open terrain, noise, limited healing, a missing teammate, and the chance that another squad is already moving toward the shots.
- Can I leave if this goes badly? If you do not know your next cover position or retreat lane, you are not ready to commit.
The practical conclusion is simple: take fights when you have information, cover, and an exit. Rotate away when you have none of them. A player who extracts with useful loot has won the raid even without a PvP elimination.
ARC Raiders’ matchmaking is designed to account for both a player’s likelihood of success and playstyle, rather than simply placing everyone into one PvP-only pool. As of Update 1.39.0, initiating fights affects your playstyle estimate, while defending yourself no longer does. That is useful context, but it should not make you passive when attacked: protect yourself, stabilize, and choose the response that keeps control of the encounter. Read the official Update 1.39.0 notes.
Prepare a PvP Kit That Lets You Reset
A reliable PvP kit is not necessarily your most expensive kit. It is the kit that gives you an answer at your intended engagement range and enough recovery tools to survive the first mistake.
| Kit element | Priority | What it solves in a player fight |
|---|---|---|
| Primary weapon | Match it to the map and your route | Lets you hold the range you expect instead of forcing bad pushes. |
| Secondary weapon | Bring one when possible | Gives you an immediate answer when your primary is empty or unsuitable at close range. |
| Shield and healing | Never treat them as optional | Creates the reset window that turns a losing trade into a new fight. |
| Utility | Bring a purpose-built tool | Smoke, deployable cover, traps, mobility, or denial tools can break sightlines and control a lane. |
| Ammo | Plan for an extended exchange | Prevents an avoidable loss after you win the first trade but cannot pressure the follow-up. |
Pick one clear job for your utility before you deploy. A visibility-breaking tool is for disengaging or crossing exposed ground; a blocking or trapping tool is for protecting a doorway, revive, body, or retreat lane; a damage tool is for forcing an opponent out of cover. Throwing utility merely because a fight has started often gives away resources without changing the geometry of the fight.
Weapon choice should follow range and terrain, not a static tier list. Compact interiors, stairwells, and connected rooms reward a weapon that remains dangerous at close range. Long exterior rotations reward a weapon you can fire accurately from cover without exposing yourself for too long. For current weapon roles, budget options, and gadget considerations, use our ARC Raiders weapons and gadgets guide alongside this PvP playbook.
Aim Better by Making Easier Shots
Raw mechanical aim is important, but the most repeatable improvement is reducing the difficulty of the shot before you press the trigger. In third-person fights, players often lose because they expose too much of their character, try to track a sprinting target in the open, or keep firing after the exchange has already become unfavorable.
Use cover as part of your crosshair placement
Before you peek, place your crosshair where an enemy is most likely to appear. Keep it at a useful upper-body height while moving through doors, stair landings, windows, and the edges of solid cover. This means you are making a small correction when someone appears rather than dragging across the entire screen after being surprised.
Start with short, deliberate exposure:
- Stop behind hard cover and identify the enemy’s last confirmed position.
- Peek only far enough to see the expected angle.
- Fire a controlled burst or a small number of accurate shots.
- Return to cover before reloading, healing, or deciding whether to widen the angle.
Do not repeatedly use the same peek rhythm. If you show from the same side at the same height, a patient opponent can pre-aim the next exposure. Change side, timing, elevation, or the entire lane after a trade.
Do not reload in the opponent’s winning window
Reloading is safest when you have fully broken line of sight, moved behind hard cover, or confirmed that your teammate is holding the opponent. If the enemy is close and actively pushing, swapping to a ready secondary is often safer than attempting a reload in front of them. The correct choice depends on your weapons and remaining rounds, but the decision should be intentional before the fight becomes frantic.
Train one aim habit at a time
Use low-risk raids, the range, or routine combat encounters to practice one behavior rather than trying to fix everything at once. Good drills include entering every doorway with your crosshair already placed, taking only quick tag peeks for one raid, or forcing yourself to break line of sight before every reload. Review deaths by asking whether you missed a shot or made that shot unnecessarily difficult through a poor angle.
Explore services related to this guide, selected from our ARC Raiders catalog.
View All ARC Raiders Services


Positioning: Build a Fight Line, Not a Hiding Spot
Good positioning is a line of connected cover that lets you see, shoot, move, and leave. A single rock, crate, or doorway can protect you briefly, but it becomes a trap when it has no second exit and the opponent knows exactly where you are.
Prioritize hard cover and two exits
Hard cover stops bullets and breaks sightlines. Soft concealment can hide movement, but it should not be your only protection once shots begin. Whenever possible, hold a position with:
- a protected firing angle;
- a second cover position within one movement;
- a route that does not require crossing the opponent’s aim line;
- enough space that a grenade, ARC threat, or aggressive push cannot trap the entire team.
This is especially important during extraction. Do not all stand on the same obvious side of the extraction area. One player can watch the likely approach while another protects the flank or maintains a retreat path. If a third party arrives, a spread team with crossfire can disengage or trade; a stacked team often gives the new squad a single easy angle.
Take high ground only when it is usable
Elevation is valuable when it reveals routes, gives cover, and has a safe way down. It is a liability when it silhouettes you, limits escape, or makes you an obvious target for every nearby Raider. A roof or ledge is strongest as temporary information control: confirm movement, take a favorable opening trade, then relocate before opponents can surround it.
Use ARC activity as both warning and cover
Shots, explosions, machine attacks, and environmental chaos create information. If another team is fighting ARC, they may be distracted, low on resources, or forced into predictable cover. That can create a strong third-party opportunity, but it can also mean the area is becoming too loud to control. Enter only if you know where you will hold after the first shots; otherwise, stay wide, observe, and let the fight reveal more information first.
Bosses, elite enemies, and high-value map conditions naturally increase PvP exposure because they concentrate attention. If you are entering one of those zones for PvE progress, plan your perimeter and extraction before committing to the target. Our ARC Raiders boss and elite guide covers the PvE side of building those safer kill windows.
How to Take the First Shot
The best opening shot is not always the first shot you can take. Fire when the target is exposed enough to convert damage into control, not when you can only scratch them and announce your position.
Take the opener when at least two of these are true:
- the target is away from hard cover or moving through a predictable lane;
- you have a stable angle and a prepared follow-up position;
- your squad can immediately support the same target;
- the enemy is distracted by ARC, looting, healing, or another team;
- you control a retreat route if the target survives the first burst.
If you are solo, be even stricter. The first shots must either create a realistic finishing opportunity or buy you space to rotate. A long exchange from the same position usually benefits the side with more teammates, more ammunition, or better nearby cover.
Fight Strategy: Trade, Pressure, Reset, Finish
Think of a PvP encounter as a series of short phases rather than one continuous gunfight. The goal is to keep the opponent reacting while you preserve your own options.
1. Trade safely
When you take damage first, do not panic-swing toward the sound. Move into hard cover, identify the direction, and check whether you can safely heal or move. If you cannot return meaningful damage from your current position, the first objective is survival, not an instant counter-kill.
2. Pressure from a new angle
Once both sides know the location, the player who changes the geometry gains the advantage. Move laterally, use a second route, or have a teammate hold the original angle while you flank. Avoid the common mistake of walking directly back into the same sightline after healing. The enemy has already adjusted their aim for it.
3. Reset before resources become the problem
Break contact when you lose your exit lane, cannot safely revive a teammate, are repeatedly tagged without an effective trade, or hear another team approaching without control of both sides of the fight. A reset means more than backing up: break line of sight, heal, reload, regain information, and re-enter from a route that changes the opponent’s decision.
Sound is central to this process. Update 1.39.0 specifically improved water footsteps and added more distinct dodge-roll sounds, so listening for movement can provide better confirmation than before. Do not rely on audio alone, however; use it to narrow the likely direction, then verify with a safe camera check or peek. Embark’s matchmaking overview also reinforces that unpredictable player encounters remain part of the intended Topside experience.
4. Finish without feeding a third party
A downed opponent is not permission to sprint into unknown space. First secure the surviving enemy’s angle, check likely approaches, and listen for new movement. Loot quickly only after the area is controlled. The longer you remain around bodies, open containers, or a loud fight site, the more likely another group is to arrive with fresh resources and full information.
Solo, Duo, and Trio Decision Rules
| Queue type | Primary PvP advantage | Biggest mistake | Best response to pressure |
|---|---|---|---|
| Solo | Fast rotation and low noise | Taking a long frontal fight against multiple players | Break sight, reposition, and isolate one angle at a time. |
| Duo | Simple crossfires and quick support | Both players peeking the same lane | Assign one holder and one rotator. |
| Trio | Layered angles, revives, and sustained pressure | Stacking tightly or chasing separate targets | Keep spacing, focus one threat, and retain a rear guard. |
Communication should be short and actionable: direction, distance, number of players seen, damage dealt, whether you are healing, and where you are moving next. “Two, left doorway, I am resetting right” is more useful than a vague warning after the enemy has already moved.
Common PvP Mistakes That Lose Good Kits
- Looting immediately after a kill: secure the area and listen first. A body is a predictable third-party magnet.
- Wide-peeking after taking damage: heal, reposition, or use utility. Do not give the enemy the same target twice.
- Holding one piece of cover too long: every second reveals more about your position and reduces your escape options.
- Chasing through unfamiliar terrain: an injured enemy may be baiting you into a squad, trap, ARC patrol, or extraction defense.
- Using expensive gear without a plan: high-value equipment should support a route, contract, or objective—not force reckless aggression.
- Ignoring inventory management: entering a raid short on healing, shields, ammunition, or replacement kits makes every death harder to absorb. Keep your stash ready with these ARC Raiders keep, sell, and stash rules.
A Simple Raid Routine for Better PvP Results
- Before deployment: choose a weapon range, recovery tools, and one utility purpose. Identify whether your raid is for loot, contracts, ARC objectives, or deliberate PvP practice.
- After spawning: locate nearby hard cover, likely routes, and a direction you can rotate if early shots begin.
- Before entering a hot area: pause briefly, listen, and decide whether you will engage, bypass, or observe.
- When contact starts: trade from cover, communicate the threat, and avoid a repeated same-angle peek.
- After winning: secure, reload, heal, check the flanks, then decide whether the increased noise means it is time to extract.
For broader route planning, progression priorities, and extraction fundamentals, pair this guide with the ARC Raiders ultimate guide. The strongest PvP players are usually not the ones who take the most fights; they are the ones who arrive at each fight with a usable position, enough resources to reset, and a clear reason to stay or leave.
If you want help rebuilding a depleted stash, progressing through difficult objectives, or learning high-risk encounters with a coordinated group, ExpCarry’s ARC Raiders services are available as an optional next step.





