




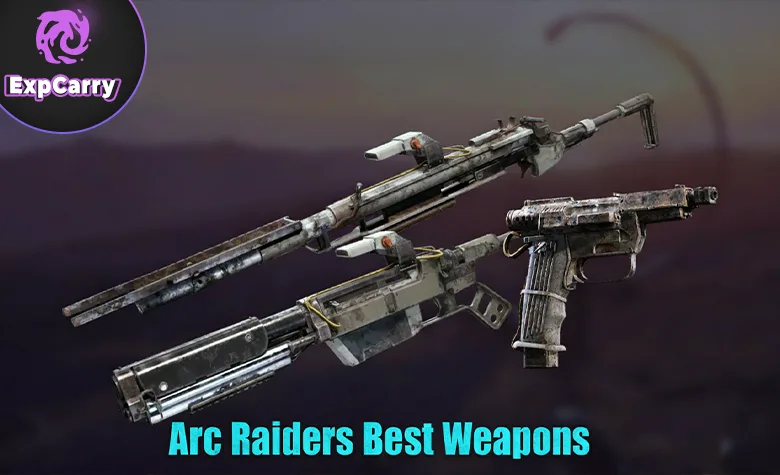
For the current ARC Raiders live build, Update 1.39.0, the safest all-purpose weapon core is Anvil, Kettle, Ferro, Bettina, Tempest, or Dolabra, depending on your budget and target. Anvil and Ferro provide exceptional value against armored ARC, Kettle remains an efficient general-purpose rifle, Bettina is the premium PvE assault rifle, Tempest is the more controllable PvP choice, and Dolabra offers the strongest close-range performance if you can afford to risk a Legendary weapon. Your gadgets should solve the weakness of that weapon package: mobility for heavy or long-range builds, area denial for close-range fights, and reconnaissance or concealment for loot-focused raids.
This guide ranks the current weapon roster for mixed PvPvE play, separates specialized PvP and ARC-killing choices, and provides practical loadouts for solo, squad, budget, boss, and high-value runs. The rankings account for combat performance, ammunition economy, upgrade scaling, crafting burden, durability, and the cost of losing the weapon.
Current ARC Raiders Weapon Meta in Update 1.39.0
ARC Raiders Update 1.39.0 went live on July 28, 2026. It fixed inconsistent Seeker Grenade and Wolfpack Grenade damage but did not introduce a broad weapon balance pass. The most recent major weapon changes remain the Bettina fire-rate increase, durability adjustments, Photoelectric Cloak power-cost reduction, and expanded Extended Barrel options introduced in Patch 1.29.0.
You can review the latest confirmed changes in the official ARC Raiders Update 1.39.0 notes. The important loadout implication is that Seeker and Wolfpack Grenades are dependable choices again, while Bettina remains one of the strongest weapons for sustained fights against armored machines.
The meta cannot be reduced to raw damage. A weapon is genuinely strong when it can win the fights common to your chosen map without making every failed extraction financially painful. Cheap upgraded weapons often outperform expensive stock weapons in practical raids because they are easier to replace, repair, and support with enough ammunition.
ARC Raiders Weapon Tier List
| Tier | Weapons | Best use |
|---|---|---|
| S | Anvil, Ferro, Kettle, Bettina, Dolabra | Best overall value or dominant specialist performance |
| A | Tempest, Renegade, Stitcher, Canto, Vulcano, Burletta, Equalizer, Jupiter, Aphelion | Strong meta choices with cost, range, or handling limitations |
| B | Venator, Il Toro, Arpeggio, Bobcat, Torrente, Osprey, Hullcracker, Rascal | Effective in the correct role but less consistent or economical |
| C | Rattler, Hairpin | Recovery runs, limited inventories, or highly specific playstyles |
This is a mixed PvPvE ranking rather than a laboratory DPS chart. Legendary weapons are judged against their acquisition and replacement burden, while common and uncommon weapons receive credit for being sustainable across repeated raids.
S-Tier Weapons
Anvil
Anvil is the best compact all-purpose weapon for players who can consistently land deliberate shots. It uses Heavy Ammo, hits hard, damages armored ARC effectively, and remains useful at ranges where most sidearms become unreliable. Its slower firing cycle punishes missed shots, so it works best from cover rather than during a desperate open-ground spray.
Anvil is particularly valuable as a secondary weapon. Pair it with a close-range automatic gun and use it to open fights, break ARC components, or punish a Raider exposing their head and shoulders from cover.
Ferro
Ferro combines high per-shot damage, Heavy Ammo penetration, and low replacement pressure. It is excellent for targeting ARC weak points and opening PvP engagements, but its break-action behavior makes it dangerous to use without cover. Fire, break line of sight, reload, and change position instead of standing still for another shot.
Ferro becomes much less forgiving inside buildings. Pair it with Stitcher, Canto, Burletta, or another weapon that can stop a close push.
Kettle
Kettle remains one of the strongest economy weapons because Light Ammo is easy to support and the rifle performs well across ordinary PvE and defensive PvP encounters. Its semi-automatic firing mode rewards controlled input and accurate tracking. It is not ideal for heavily armored boss targets, but it handles common machines and exposed Raiders without forcing you to risk an expensive kit.
Prioritize recoil control and magazine capacity. A Kettle that stays on target is more useful than one built entirely around theoretical fire rate.
Bettina
Bettina is the premium assault rifle for ARC-focused raids. Heavy Ammo gives it strong armor performance, and its automatic fire allows you to maintain pressure on exposed machine components. It also remains dangerous against players, although recoil, ammunition weight, and operating cost make it less comfortable than Tempest for routine PvP.
Use Bettina when your plan includes elite ARC, boss damage, or a contested objective where you may need to damage machines and Raiders without changing weapons constantly.
Dolabra
Dolabra is a Legendary Energy Clip shotgun with exceptional close-range stopping power and enough flexibility to threaten targets beyond normal shotgun distance. Its major disadvantage is not combat performance but loss value. Bringing it into an ordinary scavenging run is unnecessary unless your stash and Energy Clip supply can absorb a failed extraction.
Build the rest of the loadout around safely reaching Dolabra range. A Snap Hook, Barricade Kit, concealment option, or long-range secondary helps prevent enemies from controlling the engagement distance.
A-Tier Weapons and When to Use Them
- Tempest: The best premium automatic rifle for PvP-oriented players. It is controllable, flexible, and effective at medium range, but its cost prevents it from replacing Kettle as the default economy choice.
- Renegade: A hard-hitting lever-action rifle for disciplined medium-range fighting. It rewards headshots and elevated angles but requires a close-range backup.
- Stitcher: A reliable, affordable SMG for interiors and emergency defense. It loses effectiveness quickly when the enemy creates distance.
- Canto: A high-rate Medium Ammo SMG with excellent close-range PvP potential. Recoil control is essential, so avoid wasting an entire magazine during a bad chase.
- Vulcano: A powerful semi-automatic shotgun that can dominate doorways and confined rooms. Its range dependency and ammunition consumption make it map-sensitive.
- Burletta: A practical sidearm with low commitment and dependable performance against Raiders. Its weak armor performance limits its PvE role.
- Equalizer: Excellent sustained damage against large ARC targets, but its rarity, preparation requirements, and limited flexibility make it a planned boss weapon rather than an everyday gun.
- Jupiter: A premium sniper rifle for weak-point shots and opening damage. It needs long sightlines, ammunition planning, and a squad capable of protecting the shooter.
- Aphelion: A powerful Energy Clip battle rifle with strong PvP potential. It is effective but difficult to justify when a less expensive weapon can complete the same ordinary raid.
Explore services related to this guide, selected from our ARC Raiders catalog.
View All ARC Raiders Services


B-Tier and Situational Weapons
B-tier does not mean unusable. These weapons can be excellent when the map, objective, and secondary weapon support their intended role.
- Venator: Still a dangerous semi-automatic pistol, but previous balance reductions and its resource requirements make Burletta or Anvil more attractive for many kits.
- Il Toro: Strong from cover at close range, especially after upgrades, but its slower reload and reduced ranged reliability punish open-ground fights.
- Arpeggio: A functional burst rifle that rewards accurate burst placement. Automatic alternatives are generally more forgiving when a Raider pushes unexpectedly.
- Bobcat: Extremely fast at close range but ammunition-hungry and expensive relative to the advantage it provides.
- Torrente: Useful for sustained suppression and large targets, although its handling and commitment time create openings for mobile opponents.
- Osprey: Effective for long-range picks but less flexible than Renegade, Ferro, or Jupiter once the fight moves indoors.
- Hullcracker: A specialized Launcher Ammo weapon for heavily armored ARC. It should not be your only answer to enemy Raiders.
- Rascal: A compact explosive specialist that can punish grouped targets and machine components, but limited ammunition and close-range risk prevent it from becoming a general-purpose primary.
C-Tier Weapons
Rattler can complete low-risk runs, but its overall performance is overshadowed by stronger Medium Ammo rifles. Hairpin has stealth and recovery-run value, yet its slow operation gives opponents too much time to respond during direct fights. Use either when replacement cost matters more than combat consistency, not because they represent the strongest version of their weapon class.
Best Weapons for PvP
The best PvP weapons are those that can punish a short exposure, finish a damaged target, and remain controllable while you move between cover.
| Fight type | Recommended weapons | Decision rule |
|---|---|---|
| Close-range interiors | Dolabra, Vulcano, Canto, Stitcher | Force the opponent through a doorway or narrow lane |
| Flexible medium range | Tempest, Kettle, Renegade | Use cover and avoid uncontrolled full-magazine sprays |
| Opening damage | Ferro, Anvil, Jupiter, Osprey | Take one clean shot, then reposition or switch weapons |
| Budget defense | Kettle, Stitcher, Burletta | Protect your extraction without overinvesting in the kit |
Weapon choice will not compensate for fighting from a bad lane. Before committing, confirm that you have cover, a retreat route, and enough information to avoid walking into a second squad. ExpCarry’s ARC Raiders PvP fundamentals guide covers sound reads, positioning, and disengagement rules in greater detail.
Best Weapons for PvE and Bosses
Heavy Ammo, Launcher Ammo, and Energy Clip weapons become more valuable when the objective is destroying armor or repeatedly hitting exposed components. For routine ARC, however, ammunition efficiency still matters. Burning premium rounds on every small machine leaves you underprepared when an elite target or hostile squad arrives.
- General ARC clearing: Kettle, Anvil, Ferro, Bettina.
- Elite ARC: Bettina, Anvil, Hullcracker, Equalizer.
- Long-range weak points: Ferro, Jupiter, Osprey, Renegade.
- Boss-focused squad damage: Bettina, Equalizer, Hullcracker, Jupiter.
- Mixed ARC and PvP objective: Bettina plus Canto, or Ferro plus Tempest.
Do not evaluate a boss weapon only by its damage. A workable boss kit also needs a protected firing position, enough ammunition, healing and shield recovery, an answer to smaller ARC, and a plan for other Raiders approaching the noise. See the ARC Raiders boss and elite guide before risking a high-end weapon against Queen, Matriarch, Turbine, or another dangerous target.
Best Gadgets and Utility Tier List
Gadgets are strongest when they create information, movement, or time. A second damage item is not automatically better than a tool that prevents an ambush or creates a safe extraction route.
| Tier | Gadgets and utility | Primary value |
|---|---|---|
| S | Snap Hook, Photoelectric Cloak, Seeker Grenade, Wolfpack Grenade | Mobility, concealment, reliable target pressure |
| A | Barricade Kit, Pulse Mine, Gas Mine, Trigger 'Nade, Integrated Shield Recharger | Area control, ambush protection, sustain |
| B | Noisemaker, Powered Descender, Binoculars, Integrated Binoculars | Information, distraction, route-specific movement |
| Situational | Flame Spray, Crash Mat, Dockmaster's Detector, musical instruments | Specific maps, objectives, traversal, or ARC manipulation |
Snap Hook
Snap Hook is the best universal traversal gadget because vertical movement changes both looting routes and combat angles. It can create an escape path, bypass a dangerous ground-level approach, or place a long-range weapon above an opponent. Check the landing area before committing; moving upward into an exposed roof is not an escape.
Photoelectric Cloak
The Photoelectric Cloak conceals you from ARC and became more efficient after Patch 1.29.0 reduced its power consumption. It is ideal for solo loot runs, disengaging from machine attention, and moving through areas where shooting would reveal your position. It is not permission to ignore nearby Raiders or environmental noise.
Seeker and Wolfpack Grenades
Update 1.39.0 fixed inconsistent damage behavior for both grenades. Use them to pressure enemies behind cover, force movement, or contribute damage while you heal and reload. Do not throw every grenade at the first target; keeping one for a pursuing squad or extraction fight often has greater value.
Mines, Barricades, and Trigger 'Nades
Pulse Mine and Gas Mine are strongest when they protect a route you are no longer watching. Barricade Kit creates time during revives, reloads, or extraction holds. Trigger 'Nade gives you more control over detonation timing but requires attention that may be unavailable during a chaotic close-range fight.
Best Meta Loadouts
Budget Solo Loadout
- Primary: Kettle
- Secondary: Anvil or Burletta
- Gadget: Snap Hook or Photoelectric Cloak
- Utility: One grenade, healing, and shield recovery
This setup handles routine ARC without risking premium equipment. Kettle covers common engagements, while Anvil improves armor damage and Burletta provides a cheaper defensive option. Extract once the haul exceeds the value of the kit instead of turning an economy raid into an unnecessary boss attempt.
Solo PvP Loadout
- Primary: Tempest or Renegade
- Secondary: Canto or Stitcher
- Gadget: Snap Hook
- Utility: Seeker Grenade and a mine
Use the primary to create the first health advantage, then switch to the SMG if the enemy closes distance. Snap Hook prevents you from being trapped on one level, while the mine protects a flank during healing or looting.
Close-Range Indoor Loadout
- Primary: Dolabra or Vulcano
- Secondary: Anvil
- Gadget: Barricade Kit or Snap Hook
- Utility: Gas Mine or Trigger 'Nade
Do not chase long-range opponents across exposed space with this build. Control stairs, corners, doorways, and extraction rooms. Anvil gives you a limited but meaningful response when the enemy refuses to enter shotgun range.
ARC Boss Loadout
- Primary: Bettina or Equalizer
- Secondary: Tempest, Canto, or Anvil
- Gadget: Integrated Shield Recharger, Snap Hook, or Photoelectric Cloak
- Utility: Wolfpack Grenade, healing, and extra ammunition
The secondary is not optional. Boss noise attracts Raiders, and a specialized ARC weapon may respond poorly to a fast PvP push. Establish an exit lane before firing and avoid spending every consumable during the opening damage window.
Long-Range Squad Loadout
- Primary: Jupiter, Ferro, or Osprey
- Secondary: Tempest or Canto
- Gadget: Snap Hook or Binoculars
- Utility: Seeker Grenade or Pulse Mine
The long-range player should not operate alone. One teammate watches the approach while another pressures damaged targets. After firing, change angles before taking another shot; repeated shots from the same position make the squad easy to flank.
Weapon Upgrade and Mod Priorities
Most non-Legendary weapons can be permanently upgraded from Tier I to Tier IV after constructing the Gunsmith. The value of an upgrade varies by weapon, but the practical priority is consistent:
- Upgrade weapons you can replace. A sustainable Tier IV weapon is more useful than one premium gun you are afraid to deploy.
- Fix the weapon’s main weakness first. Control recoil on automatic weapons, improve reload or capacity where downtime is dangerous, and support range on precision weapons.
- Use Extended Barrel on genuine ranged builds. Patch 1.29.0 expanded the mod into multiple tiers and improved the top version’s projectile velocity and falloff performance.
- Test handling in the Practice Range. A statistically strong attachment can still be wrong if it makes your sight transition or recoil pattern uncomfortable.
- Do not carry incompatible ammunition. Every unnecessary stack reduces room for healing, utility, and extracted loot.
Keep the materials needed for your next upgrades rather than hoarding every weapon and component. The ARC Raiders keep-versus-sell guide provides a repeatable stash-cleanup method for maintaining several usable kits.
Common Loadout Mistakes
- Using two weapons with the same weakness: Ferro plus Jupiter leaves you vulnerable indoors, while Vulcano plus Canto gives you few answers across open terrain.
- Bringing a boss weapon without PvP protection: Other Raiders can arrive while your attention, ammunition, and healing are committed to ARC.
- Overpacking ammunition: Carry enough for the objective and a defensive fight, but leave inventory space for actual extraction value.
- Building only for damage: Recoil, reload exposure, sight transition, and magazine capacity decide many practical fights.
- Ignoring replacement cost: A weapon that empties your material reserve after two failed raids is not a sustainable default loadout.
- Saving gadgets forever: Utility has no value after you are knocked out. Use it when it creates a safe reposition, revive, reload, or extraction.
- Fighting at the wrong range: Move the engagement toward your loadout’s advantage instead of accepting the opponent’s preferred lane.
Final Loadout Recommendations
Choose Kettle or Anvil for dependable economy, Bettina for armored ARC, Tempest for flexible PvP, Ferro for precise opening damage, and Dolabra for premium close-range power. Then add a secondary that covers the primary weapon’s weakest distance. Snap Hook is the safest general gadget, Photoelectric Cloak is excellent for solo survival, and the corrected Seeker and Wolfpack Grenades provide reliable offensive pressure in Update 1.39.0.
Do not copy a high-cost meta kit without considering the map and objective. Indoor routes favor shotguns, SMGs, mines, and barricades. Open areas reward precision rifles, mobility, and reconnaissance. Boss attempts need armor damage, ammunition reserves, sustain, and an answer to third-party PvP. If you want help obtaining blueprints or rebuilding a depleted inventory, ExpCarry’s ARC Raiders services offer optional manual farming and guided carry support.





