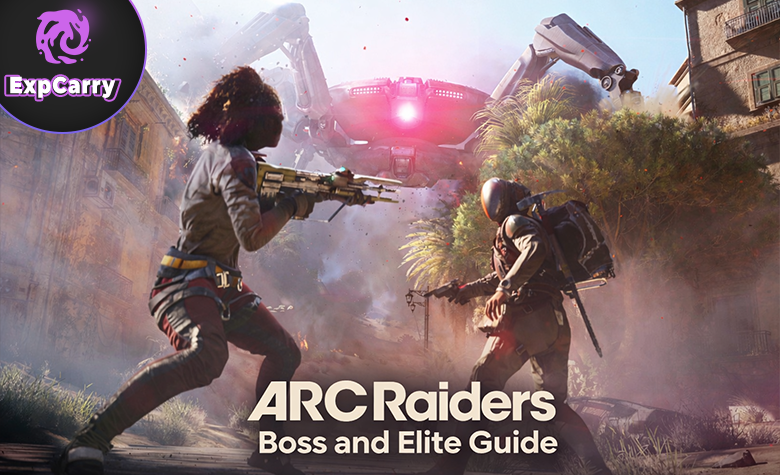
ARC Raiders Boss and Elite Guide

ARC Raiders Boss and Elite Guide: Safe Kills and Best Drops is a practical PvE playbook for taking down the hardest ARC targets without turning every pull into a coin flip. It is written for repeatable farming in a live map: how to approach bosses and elites safely, what usually causes wipes or kit losses, and how to build consistent kill windows that still work when the area is noisy, other players rotate nearby, or the fight gets messy.
Most failed boss attempts happen for the same reasons: teams pull too early without a lane, they burn cooldowns into the wrong moment, they ignore threat cues and get boxed in, or they tunnel the boss while the real danger is adds, sightlines, and one lethal attack they could have respected for a few seconds. This guide gives you a simple, repeatable script to fix those patterns, plus a verified drop focus so you know what is worth risking a fight for and what should be treated as a bonus.
What This ARC Raiders Boss and Elite Guide Covers
This guide covers a repeatable approach to bosses and elite ARC units that keeps you alive and keeps your loot safe. You get a pre-fight checklist, a safe kill script that explains when to commit and when to disengage, and clear role callouts so teams do not overlap responsibilities or leave a critical job undone. The goal is not to list every possible enemy name. The goal is to teach the patterns that decide most fights: threat cues, range discipline, positioning lanes, add control, and timing that turns a scary target into a controlled target.
It also covers drops in a way that supports real progression. Boss and elite loot can be high value, but not every drop is worth the same risk at your current stage. You get a loot priority model that tells you what to secure first, what to extract immediately if the fight becomes unstable, what to keep for upgrades, and what is safe to sell later. If you follow the plan, you will fight fewer bad engagements, win more good ones, and leave knowing you protected the items that actually move your account forward.
Boss and Elite Quick Checklist

This checklist exists so you can decide in seconds whether a boss or elite fight is a good idea right now. Safe kills start before the first shot. You want space to move, a clear retreat route, a plan for threat spikes, and a reset option if the fight turns into a third-party magnet. If you cannot answer those basics, the best play is often to delay, rotate, or pull the target into a cleaner lane instead of forcing a bad commit.
Use the table as a pre-commit filter. Identify the enemy profile, name the most common failure, and state the one safe plan out loud. That single habit prevents most deaths because it forces the team to fight the fight they are actually about to have, not the fight they wish they were having.
| Target type | Most common death cause | Safe kill plan | Best drops to watch |
|---|---|---|---|
| Boss-tier ARC (Queen, Matriarch) | Team gets boxed in, resets too late, then loses the kit when a spike overlaps third party pressure | Pick a lane, fight in cycles, and treat extraction as part of the plan; if the fight gets noisy, secure the core loot and leave | Queen Reactor, Matriarch Reactor, Matriarch core loot such as Aphelion blueprint |
| Heavy elite with burst (Bastion, Sentinel, Bombardier) | Players face-tank damage spikes and get deleted during one bad step | Hold distance, rotate hard cover, commit only during a planned burst window, then reset before the next spike | Bastion Cell, Sentinel Firing Core, Bombardier Cell |
| Elite with adds and chaos pressure (Leaper, Rocketeer, Surveyor) | Adds and movement threats stack pressure and force panic movement that breaks the team | Assign add control, clear or peel pressure threats on spawn, keep one clean lane open for resets and revives | Leaper Pulse Unit, Rocketeer Driver, Surveyor Vault |
| Ranged threat or information threat (Snitch, Spotter) | Line of sight mistakes and uncontrolled exposure cause chain downs before stabilization | Break sightlines first, force reposition, punish during downtime, and stay in cover loops instead of open trading | Snitch Scanner, Spotter Relay |
| Event elite cluster | Overpulling multiple threats and getting third-partied mid-fight | Split the cluster, pull one threat, finish, then re-evaluate before continuing | Boss/elite exclusive parts, plus high-value core loot if Queen or Matriarch is present |
Safe Kill Playbook: How Boss Fights Stay Controlled
Safe boss and elite kills are built around one principle: you do not win by standing in danger, you win by creating a repeatable window where the target is predictable and your team is safe. That window can be a positioning advantage, a cover loop, a disable chain, or a burst timing that lands when the target is least threatening. If you brute force damage outside a window, you are gambling your kit for no reason.
Think in cycles. Cycle one is setup: you take space, test threat, and force the enemy into a pattern while keeping your exit clean. Cycle two is commit: you spend damage and control tools to push the fight toward a finish inside your window. Cycle three is reset: you stabilize, reload, and decide whether to re-engage, reposition, or extract. Teams wipe when they skip setup, overcommit without a reset plan, or keep fighting after the window is gone.
Threat cues and the three-second rule
Most lethal hits are not random. They are signaled by a cue: a charge-up animation, a sound change, a stance shift, a lock-on behavior, a ground tell, or a sudden add spawn that changes pressure. Your job is to treat cues as commands. When you see a threat cue, you do not negotiate. You do the safe reaction for three seconds, then you resume the plan. Those three seconds are what keep you alive.
Build a simple team habit: one caller names the cue, the team executes the reaction, and then the team returns to the window. The common failure is trying to finish a magazine, finish a reload, or force a revive while the cue is active. Cue obedience keeps fights calm. Calm fights are fast fights, because you stop losing time to panic rotations, chain downs, and broken positioning.
Space, lanes, and the reset that saves your gear
Every boss and elite fight should have a lane. A lane is the direction you intend to move when pressure rises. If you do not pick a lane, the lane picks you, and it usually picks a bad one. Choose a lane with hard cover, avoid dead ends, and keep your retreat route clear. This is not cowardice. It is how you keep the fight under control when the target changes behavior or when another team shows up.
Your reset is what protects your loot. When your window ends, you do not keep trading. You rotate, heal, reload, and re-enter only if the fight is still favorable. If another team arrives, your reset becomes extraction discipline: secure the best drop, break contact, and leave. Dying with a full bag is not bravery. It is wasted farming time.
Best Drops That Actually Matter and Where They Come From

"Best drops" are only real if they convert into power: workshop station upgrades, high-end crafting, or blueprint progression. In ARC Raiders, the most reliable way to define "best" is simple: exclusive enemy drops that unlock workshop tiers or enable top-end crafts, plus boss-tier cores that contain high-value components and blueprints. Use the table below as your fight selection rule, because it ties targets to specific outcomes instead of vague hype.
| Boss or elite target | Exclusive drop | Why it is a best drop | What it unlocks or enables |
|---|---|---|---|
| Queen | Queen Reactor | Boss-tier component with high progression value | High-end crafting and long-term project value; treat as secure-and-extract priority |
| ARC Matriarch | Matriarch Reactor, Matriarch core loot | Boss-tier component and core loot with blueprint value | Matriarch core has a high chance to drop the Aphelion blueprint; Matriarch Reactor is also used in Aphelion crafting |
| Sentinel | Sentinel Firing Core | Key upgrade item for weapon progression paths | Used for Gunsmith Level 3 upgrade path |
| Bastion | Bastion Cell | One of the strongest "gating" drops for gear progression | Used for Gear Bench Level 3 upgrade path |
| Surveyor | Surveyor Vault | High-impact gating drop that compresses many runs into one outcome | Used for Medical Lab Level 3 upgrade path |
| Leaper | Leaper Pulse Unit | High-demand utility gating drop that many upgrades chain through | Used for Utility Station Level 3 upgrade path |
| Rocketeer | Rocketeer Driver | Explosives progression gate and a common upgrade bottleneck | Used for Explosive Station Level 3 upgrade path |
| Bombardier | Bombardier Cell | Refiner progression gate and common upgrade bottleneck | Used for Refiner Level 3 upgrade path |
| Wasp | Wasp Driver | Early-to-mid progression item with clear conversion into weapon progress | Used for Gunsmith Level 2 upgrade path |
| Hornet | Hornet Driver | Early-to-mid progression item with clear conversion into gear progress | Used for Gear Bench Level 2 upgrade path |
| Snitch | Snitch Scanner | Utility unlock item that stays relevant because it changes runs, not just stats | Used for Utility Station Level 2 upgrade path |
| Tick | Tick Pod | Early progression gate that is common but still mandatory | Used for Medical Lab Level 2 upgrade path |
| Fireball | Fireball Burner | Early progression gate for refining paths | Used for Refiner Level 2 upgrade path |
| Pop | Pop Trigger | Early progression gate for explosive paths | Used for Explosive Station Level 2 upgrade path |
| Spotter | Spotter Relay | Situational but valuable utility drop for planning and information control | Utility build progression and loadout flexibility |
If you are farming the Matriarch specifically for Aphelion, the only clean rule is speed and security. The blueprint is tied to the Matriarch core, and Matriarch Reactor is also pulled from that core. If you win the core, secure it immediately and treat extraction as the priority when the map becomes noisy, because core loot is the entire point of the fight.
Loot Priority Rules You Can Apply in the Field
Secure items that are hard to replace and broadly useful before you secure items that are easy to replace or only valuable as currency. If you only have time to grab one thing, grab the item that would block your next upgrades if you did not have it. If you are overloaded, drop low-impact stacks first and keep high-friction components. If you are unsure whether something is a keep or a sell, ask one question: will I spend this in my next workshop upgrades or crafts. If yes, protect it. If no, it is either sell value or scrap value, and it should not crowd out the items that move your account forward.
Common Boss Fight Mistakes and the Fix That Stops Each
This section is here because most boss losses are not caused by lack of damage. They are caused by one repeated decision mistake. Players pull without a lane, they commit without a reset plan, they ignore threat cues, or they keep fighting when the window is gone. Those mistakes feel small in the moment, but they compound fast because bosses and elites punish one bad sequence harder than normal enemies do.
Use this as a correction tool. When you lose a kit, do not blame the target. Name the mistake. Then apply one fix for the next run. If you correct even one habit, your success rate climbs sharply, because most teams are not losing to the boss. They are losing to their own positioning and timing.
The simple fixes that make hard targets farmable
If you get boxed in, your fix is lane discipline: pick a lane before the pull and do not chase outside it. If you get deleted by spikes, your fix is cue obedience: treat threat cues as commands and give them three seconds of respect. If you lose to adds, your fix is assignment: one player calls adds, one player anchors the lane, and the team clears or peels pressure threats on spawn. If you lose to third parties, your fix is extraction discipline: secure the best drop, break contact, and leave instead of proving a point.
These fixes are not glamorous, but they work because they remove the chaos that bosses thrive on. When the fight becomes predictable, you win more, you spend fewer kits, and your farming becomes consistent instead of emotional.
Conclusion
ARC Raiders bosses and elites are only scary when you fight them on their terms. The safe approach is simple: build a window, commit inside the window, and reset when the window ends. Pick a lane before you pull, respect threat cues with fast reactions, control pressure threats with clear assignments, and treat extraction as part of the fight, not an afterthought. Those habits turn high-risk targets into consistent farms.
The "best drops" are the ones that convert into real progression. Boss-tier targets like Queen and Matriarch are worth the risk because their exclusive components are high-impact, and the Matriarch core is tied to blueprint progression such as Aphelion. Elite ARC units are worth farming when you need their exclusive drops for workshop upgrades, because those items unlock the next tier of crafting and reduce the number of wasted runs you have to do.
Fight selection is the hidden skill. If the lane is bad, the map is hot, and you cannot secure extraction, skip the commit and rotate. If the lane is clean and you know exactly which exclusive drop you are hunting, run the fight like a script: setup, commit, reset, secure, and leave. That is how you win more fights, lose fewer kits, and extract with the drops that actually move your account forward.