




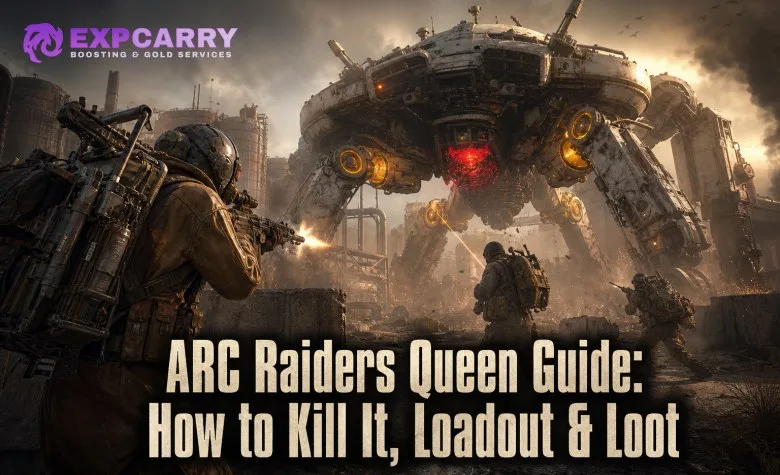
The Queen is ARC Raiders’ highest-risk Harvester Event target: a colossal boss whose yellow leg joints create the first reliable damage window and whose exposed red core is the moment to spend your best ammunition. Go in with a coordinated squad, armor-capable weapons, plenty of healing and shield recovery, and—most importantly—a route to cover and extraction before the shooting starts. As of Live Update 1.39.0, released July 28, 2026, Wolfpack Grenade damage has been fixed for consistency, making it a more dependable supplemental boss tool; the update did not announce Queen-specific balance changes.
Queen Quick Strategy: What to Do First
The Queen is an Extreme ARC boss associated with Harvester Events. Current community databases list her on Dam Battlegrounds, Spaceport, and Blue Gate. Do not treat the encounter as a normal high-health enemy: it is a loud, long PvPvE event that draws nearby ARC patrols and Raiders looking for the same rewards.
- Scout before aggroing. Identify two pieces of hard cover, a retreat lane, nearby vertical cover, and the closest realistic extraction option.
- Clear immediate threats. Remove Snitches, Spotters, drones, and any heavy ARC that can disrupt the team while you fight the Queen.
- Focus yellow leg joints. Do not dump ammo into intact dark armor when a joint angle is available.
- Take the red-core damage window. When the core is exposed, call it out and commit burst damage, explosives, and coordinated fire.
- Reset after every attack cycle. Break line of sight, reload, heal, restore shields, and reposition rather than trying to maintain constant damage.
- Loot with an exit plan. The Queen kill is only profitable if you extract. Expect other Raiders to arrive during the fight or wait for the aftermath.
For the wider weak-point system, armor colors, and counters for the smaller machines that make Queen fights collapse, use the ARC Raiders enemies, weak points, and counters guide.
Where the Queen Spawns and When You Should Fight Her
The Queen appears during Harvester Events, not as a standard patrol. Current community resources place these encounters on Dam Battlegrounds, Spaceport, and Blue Gate. The event condition matters more than a fixed route: check the available map conditions before deploying, then decide whether your spawn, squad kit, and extraction options support a full boss commitment.
| Situation | Best Decision | Why |
|---|---|---|
| You have a coordinated squad, cover-rich approach, and extra supplies | Commit to the kill | You can rotate aggro, control adds, and protect the loot phase. |
| You are solo with a budget kit | Farm only safe opportunities or leave | A full kill can consume too much ammunition and expose you to third parties. |
| Another team is already fighting from strong cover | Scout, avoid open interference, or rotate away | Entering late without a plan often turns you into the easiest target. |
| Your extraction route is distant or contested | Do not overcommit for one more damage phase | Queen loot has little value if you cannot carry it out. |
Dam Battlegrounds can offer more open sightlines, while Spaceport and Blue Gate terrain can create better hard-cover loops depending on the event location. There is no universal “best” Queen arena. Choose a firing area with solid objects that fully block line of sight, enough space to spread the squad, and at least one route that does not force everyone through the same open lane.
Queen Weak Points and Attack Responses
The Queen’s yellow leg joints are the dependable starting targets. Breaking or exploiting these weak areas is far more efficient than firing at protected plating. Her red glowing core becomes the major burst-damage opportunity after the right armor and weak-point sequence. Save high-value ammo, grenades, and coordinated cooldowns for that exposure instead of wasting them at the start.
| Queen Threat | What It Means | Best Response |
|---|---|---|
| Laser pressure | The Queen can punish a long, predictable firing lane and exposes a key damage opportunity during laser use. | Break line of sight with hard cover, then re-peek from a different angle for joints or the exposed core. |
| Mortar barrage | Open-ground teams can be forced out of position or separated. | Move early and laterally; do not stack behind the same small object or run toward a dead end. |
| Close-range stomp or electrical pressure | Players who crowd underneath the boss can be knocked out before they can loot. | Maintain spacing, avoid standing directly under the body, and leave yourself a clear escape line. |
| Nearby ARC and Raider pressure | The event’s noise attracts additional threats that can end a clean boss attempt. | Assign one player to watch adds and approach lanes whenever possible. |
Do not confuse cover with concealment. A low barrier that leaves your upper body exposed will not reliably protect you from the Queen’s long-range pressure. Use buildings, heavy terrain, structural walls, or other objects that completely sever sightlines. If your chosen position has no second exit, it is not a safe boss position—it is a trap.
Explore services related to this guide, selected from our ARC Raiders catalog.
View All ARC Raiders Services


Best Queen Loadouts
The best Queen loadout is not one expensive weapon. It is a complete kit that can damage armor, survive a prolonged PvE fight, respond to nearby Raiders, and still leave inventory capacity for loot. Your exact weapon choice should follow what you can afford to lose and which range your event location creates.
Recommended Squad Boss Kit
| Slot | Recommendation | Purpose | Important Limitation |
|---|---|---|---|
| Primary weapon | Anvil, Ferro, Bettina, or Kettle with suitable ARC Armor Penetration | Reliable armor work and yellow-joint damage at practical ranges. | Do not fire continuously into intact dark armor when a weak-point angle is available. |
| Secondary weapon | A dependable PvP or close-range weapon you already handle well | Defends the squad when Raiders push during reloads or looting. | A dedicated anti-ARC gun alone can leave you exposed in player fights. |
| Grenades | Wolfpack Grenades as supplemental burst damage | Good for core windows and high-pressure moments. | Use from safety; grenades do not replace a clean firing angle. |
| Healing | More than your normal raid baseline | Lets you reset after laser, mortar, or third-party damage. | Healing cannot compensate for fighting without cover. |
| Shield recovery | Carry enough for multiple resets | Restores fighting capacity between attack cycles. | Do not attempt a long revive or recharge in a visible lane. |
| Utility | A disabling or control tool if your squad has access to one | Can create a safer burst or reposition window. | Utility availability depends on your equipped gear and unlocked options. |
Squad role split: one Raider maintains the best joint/core angle, one handles immediate adds and watches flank routes, and one flexes between recovery, damage, and loot security. In a trio, all players should still be ready to rotate roles—the Queen fight becomes dangerous when the designated add-clear player is downed and nobody notices a Snitch or drone arriving.
Budget or Solo Queen Kit
For solo players, the goal is not to race a full boss kill. Take a weapon you can replace, sufficient healing and shield recovery, and only enough explosives to capitalize on a safe opening. Fight from terrain that provides hard line-of-sight breaks, set a strict ammunition limit, and disengage if you lose your cover loop, attract multiple hostile Raiders, or cannot see a viable extraction.
A solo Raider should prioritize survival over proving damage output. If other players have already taken control of the event, it is usually smarter to rotate toward an extraction or a separate objective than to enter a loud, open fight with no ownership of the terrain. The ARC Raiders solo survival and extraction guide explains how to make those disengage decisions before a raid turns into an unrecoverable loss.
How to Kill the Queen Safely
1. Build a Cover Loop Before the First Shot
Your squad needs a primary shooting position, a fallback position, and a route between them that avoids open ground. Spread out enough that one mortar pattern or laser sweep cannot hit the whole team, but stay close enough to revive and cover each other. Avoid fighting from inside a dead-end building: it may block the Queen, but it also gives rival Raiders one doorway to hold.
2. Remove the Threats That Ruin the Fight
Snitches, Spotters, and mobile drones are not background noise. They escalate pressure, compromise cover, or force a player to stop shooting at the worst possible moment. Clear them first when they are actively affecting your position. A short delay on the Queen is cheaper than losing your only safe angle to reinforcements.
3. Work the Legs, Then Burst the Core
Focus fire on yellow leg joints. Rotate around the Queen instead of insisting on one frontal position; your team wants angles, not raw exposure time. When the red core becomes visible, call a short burst window and commit your best damage. Reload and restock between windows so nobody is caught empty when the core appears.
4. Respect the Reset
After the Queen attacks, do not instantly re-peek from the same spot. Move, heal, recover shields, and use a different angle if possible. This habit reduces predictable deaths to the laser and makes it harder for hostile Raiders to pre-aim your team’s next exposure.
5. Treat the Last Phase as a PvP Event
The final damage and loot phase is when the encounter often becomes most dangerous. Community reports consistently note that Queen parts and Harvester rewards can create a scramble among Raiders, including players who arrive late. Keep one player on security when possible, call out loot priorities before the kill, and never send all three players into the same exposed loot area.
Use the same rules you would for any contested extraction: confirm audio, watch approach lanes, and do not chase a fleeing opponent while carrying irreplaceable materials. For post-boss positioning and third-party decisions, see the ARC Raiders PvP positioning and disengage guide.
Queen Loot: What Can Drop and What to Prioritize
Current community loot databases list the Queen as a source of high-tier ARC materials and components. The standout item is the Queen Reactor, but the rest of the table can also matter for crafting, upgrades, and high-end weapon progression. Drop availability is not a promise on every kill, so treat any individual item as a possible reward rather than guaranteed loot.
| Loot Category | Known Examples | What to Do With It |
|---|---|---|
| Legendary | Queen Reactor | Protect it immediately; move it to your safest available inventory space and plan extraction. |
| Epic | Magnetic Accelerator, Complex Gun Parts | Keep if needed for active crafting or upgrades; otherwise assess value against inventory pressure. |
| Rare ARC and advanced materials | ARC Motion Core, ARC Circuitry, Advanced Mechanical Components, Advanced Electrical Components, Advanced ARC Powercell | Useful for progression and crafting; retain only what supports your current goals. |
| Rare recyclable materials | ARC Coolant, ARC Flex Rubber, ARC Thermo Lining, ARC Synthetic Resin, ARC Performance Steel | Take them when space allows, but do not die overweight for low-priority surplus. |
| Uncommon material | ARC Alloy | Worth extracting when it fits your upgrade plan, but lower priority than rare and legendary rewards. |
Loot in a deliberate order: legendary and epic items first, then materials required for your next active upgrade or project, then everything else. Do not fill your bag with lower-value materials while a teammate is still exposed or while the event area remains unsecured. If your stash is already cluttered, use the ARC Raiders keep, sell, and stash planning guide to decide what actually deserves space after extraction.
Common Queen Mistakes That Lose the Raid
- Starting without an extraction plan. The boss is not the final objective; getting out is.
- Firing into intact armor. Rotate for yellow joints instead of wasting costly ammunition.
- Stacking the squad in one cover spot. Mortars, electrical pressure, and PvP grenades punish this immediately.
- Ignoring support ARC. A Snitch, Spotter, or drone can turn a stable fight into a wipe.
- Reloading during the core window. Keep magazines ready before committing to leg damage.
- Rushing every loot piece. The ground around a dead Queen is a predictable ambush zone.
- Forcing a solo kill in bad terrain. Leaving with a smaller haul is better than losing a full kit.
Final Queen Farming Rule
The Queen is worth fighting when you control the terrain, have enough supplies for several reset cycles, and can leave with the loot. Your damage plan is simple—yellow leg joints first, exposed red core second—but your success depends on preparation, add control, cover discipline, and resisting the urge to overstay after the kill. If you want optional coordinated help for difficult ARC hunts or high-value extractions, ExpCarry’s ARC Raiders services are available, but a disciplined squad plan remains the most reliable Queen strategy.





