




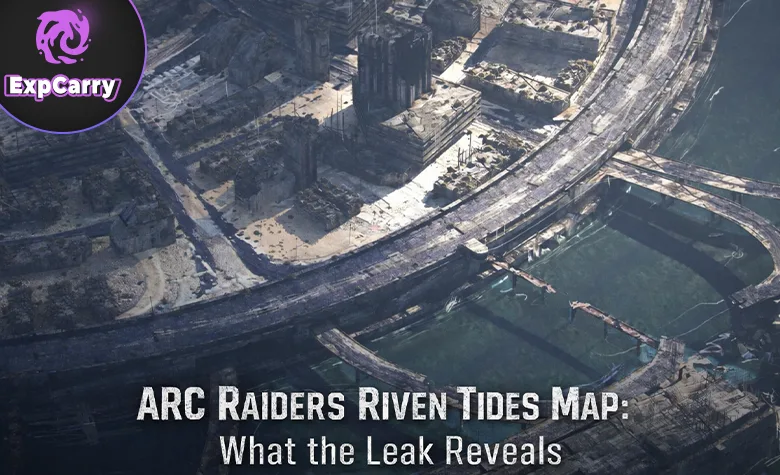
Riven Tides is a compact coastal map where strong loot, exposed travel lanes, vertical buildings, and frequent third parties all overlap. The reliable way to profit is not to force every high-value POI: choose one primary objective from your spawn, use the shoreline or interior cover to rotate, and leave once your bag contains the upgrade materials, weapons, or trinkets you came for. As of Live Update 1.39.0, released on July 28, 2026, Riven Tides remains a live destination; the latest update did not announce a fundamental map-layout change. Read the current official patch notes for game-wide changes that can affect your raid.
Riven Tides at a Glance
Riven Tides was introduced as a coastal Rust Belt map with the Riven Tides update and brings together an abandoned resort, a working-port aesthetic, beach loot, dense interiors, and industrial verticality. Its four main landmarks are Hotel Panorama Azzurro, Port Authority Building, Stacking Yard, and Customs House. The distance between them is short enough that a long gunfight, an ARC alarm, or a loud locked-room breach can pull Raiders in from multiple directions.
The map also has its own large ARC threat, the ARC Turbine. Unlike a conventional roaming target, it can travel through the air and land on elevated locations, making the fight difficult to start and even harder to finish without drawing attention. Embark recommends choosing the fight location carefully, bringing traversal tools and Adrenaline Shots, and avoiding a rushed close-range approach because the Turbine uses electrical attacks and motion-detection mines. Embark’s ARC Turbine guide is useful preparation if you intend to hunt one rather than simply loot around it.
| Area | Best for | Primary risk | Best decision |
|---|---|---|---|
| Hotel Panorama Azzurro | Residential, Commercial, and locked-room loot | Indoor ambushes, stairwell traps, Shredders | Clear one wing, then leave rather than sweeping every floor |
| Port Authority Building | Weapon containers, security-oriented loot, PvP | Close-range pushes and fast third parties | Enter only with a clear exit route and enough healing |
| Stacking Yard | Industrial and Exodus loot, traversal, secret-room attempts | Long sightlines, high-ground pressure, ARC patrols | Loot the edge first; contest the center only when prepared |
| Customs House | Mixed loot, tunnel rotations, extraction-side resets | Players holding entrances and underground choke points | Use it as a rotation and extraction anchor, not a prolonged fight |
| Seabed and shoreline | Beachcombing, nature resources, lower-commitment looting | Open sand and limited hard cover | Farm only when your route stays near a usable extract |
How to Read the Map Before You Commit
Your spawn should determine the first two minutes. Riven Tides punishes fixed “best route” advice because a Hotel-side spawn, a Wavebreaker-side spawn, and a central spawn place you in completely different races for the same loot. Open the map immediately, identify the nearest extraction options, then pick one of three plans:
- Fast-value plan: Push the nearest major POI, take only the highest-value containers or a locked room, and rotate out before the next wave of Raiders arrives.
- Safe-material plan: Work the outer shoreline, smaller buildings, containers, nature-resource nodes, and beachcombing spots, then extract before you are overloaded.
- Contest plan: Enter Stacking Yard or Port Authority with a combat-ready kit, accept that PvP is likely, and keep a retreat lane before opening high-profile loot.
Do not cross the open middle simply because the next POI is visible. The shortest line is often the most predictable line. On this map, a safer route usually follows a wall, container lane, building edge, or elevation change that breaks sightlines. Use ziplines and roof access as repositioning tools, not as automatic shortcuts: a Raider watching the destination can turn a fast rotation into an easy elimination.
Best Riven Tides Loot POIs
Hotel Panorama Azzurro: Best for Dense Indoor Value
Hotel Panorama Azzurro is the map’s main resort complex and one of the best places to find a dense mix of Commercial and Residential loot. It also contains multiple locked rooms, which makes it especially attractive if you already have a relevant Hotel keycard. That same density is the problem: every hallway, balcony, stairwell, and room doorway can become an ambush angle.
Run the Hotel with a strict rule: choose a wing and a vertical lane before entering. If you enter through the west side, clear the accessible rooms in that section, check nearby containers, and leave through a different route if you hear a second team approaching. Do not repeatedly run central stairs after making noise. Raiders commonly hold transitions rather than individual loot rooms.
- Prioritize locked rooms only when you have a key and a safe approach.
- Listen for ARC pressure before moving through enclosed rooms; fighting a Shredder indoors can expose your position to the entire building.
- Use balconies, roof access, and windows to confirm whether another team owns the next wing.
- Leave after a successful locked-room opening if your inventory already contains valuable items. The remaining floors are rarely worth a full-team collapse.
Port Authority Building: Best for PvP-Ready Weapon Loot
Port Authority is a compact, loud, high-contact POI. It is a good destination for Raiders who want weapon containers and security-focused loot, but it is a poor place to “just take a quick look” with a weak kit. Its platforms, rooms, and upper levels create short engagement distances and make it easy for a third party to arrive before you finish looting.
Approach from cover, pause before entering, and identify whether the building has already been opened. Open doors, empty containers, active ARC fire, and recent footsteps all matter. If another team is inside, do not automatically rush. Holding an outside angle and waiting for them to leave may be safer than forcing a room-to-room fight.
For stronger fighting fundamentals, use the ARC Raiders PvP positioning and disengage guide. Its core rule fits Port Authority perfectly: do not turn an even fight into a lost raid by chasing through an unfamiliar doorway after landing damage.
Stacking Yard: Best for Industrial Loot and High-Risk Rotations
Stacking Yard is the strongest all-purpose loot POI when you need Industrial or Exodus-oriented finds, but it is also one of the hardest locations to control. Containers, cranes, raised walkways, ladders, and open lanes give every squad multiple ways to flank. The Yard’s value comes from its density; its danger comes from how visible nearly every move becomes.
Start at the outer containers closest to your spawn and loot inward. This gives you an early exit if you hear a team climbing a crane, moving on metal, or fighting ARCs nearby. Only take the central crane structures when you have enough ammunition, healing, and time to respond to a push from more than one direction.
Community mapping has identified a secret-room puzzle near the western side of Stacking Yard. Its buttons and route details can vary, and the activity is inherently noisy and time-consuming. Treat it as a coordinated squad objective, not a mandatory farm. A two- or three-player group can assign one Raider to watch long angles while the others search and activate buttons; solo players should usually take visible loot and rotate away.
Customs House: Best for Resetting a Bad Route
Customs House is a smaller multilevel POI with above-ground rooms, underground access, and a nearby extraction role. It is valuable because it lets you convert a messy raid into a controlled exit: rotate through it after Hotel or Port Authority, replenish from mixed containers, check your extraction options, and decide whether your bag is already worth protecting.
The mistake here is treating the tunnel as safe. Tunnels reduce sightlines, but they also create predictable entrances. Stop before committing to a tunnel, listen for movement, and avoid healing or inventory management in the most obvious choke point.
Explore services related to this guide, selected from our ARC Raiders catalog.
View All ARC Raiders Services


Beachcombing and Shoreline Loot
Riven Tides has beachcombing locations and buried-loot interactions that make the outer coastline worth checking, particularly when you are farming map-specific trinkets or need a lower-pressure alternative to central POIs. Community map resources currently track beachcombing spots, Ship Models, containers, ARC locations, extracts, and traversal points; use an interactive Riven Tides map to plan a route around your actual spawn rather than memorizing a single path.
Beachcombing is best used as a supplement, not your only plan. The shoreline has fewer hard-cover options, so you should scan ridgelines, seawalls, and nearby access paths before stopping to dig. If the area has been quiet and an extraction is close, it can be an efficient way to finish a raid. If you hear fighting moving toward the coast, stop searching and rotate first.
Three Practical Loot Routes
1. Central Spawn: Stacking Yard to Customs House
- Move toward the outer containers at Stacking Yard, avoiding the most exposed central lane.
- Loot Industrial containers, ARC-related finds, and accessible crates without climbing into a prolonged crane fight.
- Reassess after your first full inventory row: if you have valuable materials, rotate toward Customs House instead of pushing Port Authority.
- Use Customs House to check mixed loot and choose the nearest available extraction.
Use this route when: you need materials, have a balanced kit, and do not want to bet the raid on Hotel keycards. Avoid it when: Stacking Yard is already loud with multiple squads or a large ARC fight has exposed every approach.
2. Hotel-Side Spawn: One Hotel Wing to Shoreline Exit
- Enter the closest Hotel wing and commit to a single floor or wing.
- Open a locked room only if you have the correct keycard and can leave through another route.
- Take Residential and Commercial loot, then exit toward the shoreline rather than crossing the Hotel again.
- Check safe beachcombing opportunities only if the coast is quiet and an extraction remains practical.
Use this route when: you have a Hotel keycard, need sellable loot, or want a fast solo raid. Avoid it when: you hear sustained fighting inside the Hotel before entry; arriving late to an indoor fight often means facing a team that already owns the best angles.
3. Wavebreaker or Port-Side Spawn: Port Authority to Controlled Extract
- Scout Port Authority from outside before spending resources on the entrance.
- If it is quiet, loot weapon containers and high-value rooms quickly; if it is occupied, hold an exit angle or rotate to Customs House.
- Do not chase through the building after a damaged enemy unless your team has confirmed the remaining angles.
- Once your inventory has a weapon, key loot, or valuable components, prioritize extraction over another major POI.
Use this route when: you are ready for short-range PvP and have enough healing to survive a fast third party. Avoid it when: you are carrying a low-cost or free kit and your actual goal is safe materials.
ARC Turbine: When to Hunt It and When to Ignore It
The ARC Turbine is a high-attention objective, not routine map loot. It can land on rooftops and towers, relocates when threatened, and becomes dangerous if you attempt to rush it at close range. Since Live Update 1.36.0 increased the value of ARC Turbine loot, a successful kill can be more worthwhile than it was at release—but the increased reward does not remove the exposure created by a long, loud fight.
Fight it only when all of these are true:
- Your team has a clear approach and a retreat path.
- You can maintain damage without standing directly beneath it.
- You have traversal and healing tools for a reposition or escape.
- Nearby POIs are not already occupied by multiple Raider teams.
- You are prepared to extract shortly after the kill rather than continue looting.
If the Turbine is perched in a crowded area, already attracting gunfire, or forcing you to cross open sand, ignore it. A clean extraction with targeted materials is better progression than losing a full kit in a fight you did not need to take. If you are building a dedicated ARC-hunting setup, see the ARC Raiders boss and elite guide for safer target-selection and reset rules.
Extraction Rules That Keep Riven Tides Profitable
Riven Tides becomes dangerous late in a raid because surviving teams naturally converge on the remaining routes. Before you open your inventory, ask one question: if another squad arrives right now, can I leave without winning the fight? If the answer is no, keep moving.
- Do not wait until your bag is completely full to leave; high-value loot is not useful until it reaches Speranza.
- Do not call attention to yourself at a major POI when a quieter extraction-side path is available.
- Keep an emergency heal and a movement option for the final rotation rather than using everything in an earlier skirmish.
- Use Raider Hatches when available and appropriate for your route, but never assume a hatch approach is uncontested.
- After extraction, sort project materials and upgrade components before selling trinkets or surplus gear. The ARC Raiders keep-versus-sell guide can help prevent profitable Riven Tides runs from turning into stash clutter.
Common Riven Tides Mistakes
- Routing from the map name instead of the spawn: Running to Hotel from the wrong side can mean arriving after every valuable room has been opened.
- Overstaying Stacking Yard: Its loot is excellent, but every additional minute increases the chance of being watched from elevation.
- Entering Port Authority without an exit: A strong weapon room is not worth being trapped in a hallway by two squads.
- Treating beachcombing as risk-free: The loot may be quieter, but sand offers little protection when another Raider sees you first.
- Forcing the ARC Turbine: It is an optional high-risk target, not an obligation whenever it appears.
- Ignoring the extraction plan: The best Riven Tides route is the one that ends with your items safely extracted.
Riven Tides rewards fast judgment more than exhaustive looting. Target the POI that fits your spawn and current objective, rotate before the map collapses into one noisy fight, and extract once your raid has already succeeded. If you want help completing difficult objectives, ARC hunts, or safer high-value extractions, ExpCarry’s ARC Raiders carry services are an optional route for players who prefer guided progression.





