




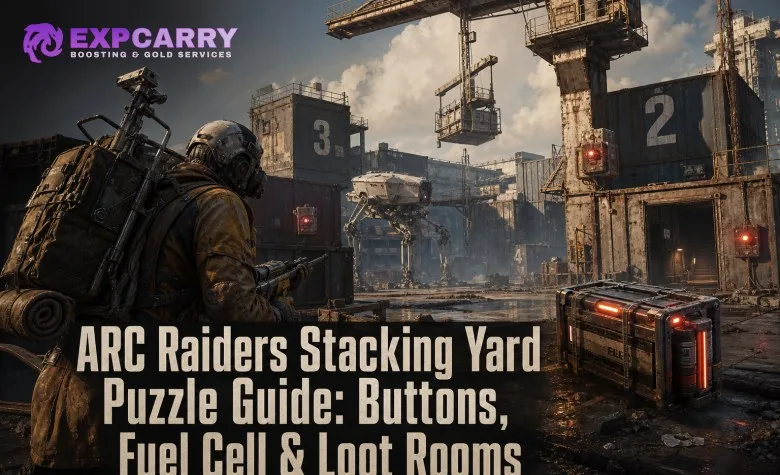
The Stacking Yard puzzle on Riven Tides is a two-stage environmental objective: activate four randomized red buttons, then use the spawned Fuel Cell to power the upper control point and open the main loot room. The important part is that button and Fuel Cell positions can change between raids, so use a repeatable search pattern instead of expecting one fixed set of locations. This guide reflects the live game after Update 1.39.0, released July 28, 2026; that update did not list changes to the Stacking Yard puzzle.
Stacking Yard Puzzle: Quick Solution
- Enter Stacking Yard on the Riven Tides map and clear or avoid nearby ARC patrols.
- Find and activate four red buttons around the numbered buildings, crane structures, catwalks, and container-side approaches.
- After the fourth activation, search Stacking Yard for the Fuel Cell.
- Carry the Fuel Cell to the damaged lift beneath the elevated crane-side control area.
- Inspect the lift’s repair panel and provide the materials it requests for that raid.
- Raise the Fuel Cell to the upper level, then insert it into the terminal or fuse point.
- Loot the newly powered main room, then decide whether the secondary lift/container reward is worth the additional time and exposure.
- Leave promptly if your squad is low on healing, ammunition, or safe extraction options.
The puzzle is best completed by a duo. One Raider operates the lift while the other rides it with the Fuel Cell. A solo clear is possible with careful item placement and movement tools, but it is less reliable and substantially riskier when other players are nearby.
Preparation Before You Commit
Stacking Yard is an exposed industrial point of interest with elevated sightlines, multiple approach lanes, and enough interaction noise to attract other Raiders. Do not treat it like a free locked room. Start only when you have enough space in your inventory for a Fuel Cell and prospective loot, plus enough recovery items to survive a drawn-out fight.
| Priority | Why It Matters at Stacking Yard | Practical Rule |
|---|---|---|
| Inventory space | The Fuel Cell must be carried during the lift phase. | Do not arrive nearly full; leave room for the cell and high-value loot. |
| Healing and shield recovery | Catwalks and crane approaches expose you to long angles. | Bring enough recovery to reset after a tag rather than re-peeking immediately. |
| Close- and mid-range weapon coverage | The compound mixes tight rooms, stairs, containers, and open lanes. | Use a kit that can fight inside a control building and disengage across the yard. |
| Mobility utility | Some button checks and solo recovery plays benefit from vertical access. | A Snap Hook can be useful, but do not rely on it as a guaranteed puzzle requirement. |
| Squad communication | The lift requires coordination and the area invites third parties. | Assign one player to watch approaches while others interact. |
Do not start a loud ARC fight in the middle of the button sweep unless it is blocking a required route. Small threats that reveal your position or force you out of cover are the immediate problem; use the priorities in our ARC Raiders enemies and weak-points guide if you need a quick refresher on handling patrol pressure without exhausting your kit.
How to Find All Four Red Buttons
You need four button activations, but the exact active spawn points rotate. Community guides consistently report that the buttons appear around the same broad structure groups rather than in one permanent sequence. There is no verified requirement to press them in a specific order.
The safest method is to search the compound in a loop. Avoid zigzagging across open ground after every button; that wastes time and makes it easy for another squad to predict your route.
Best Button Search Order
- Check the ground floor first. Search exterior building corners, support pillars, low rails, container-side edges, and the areas around the bases of the crane structures.
- Clear each numbered control building. Check doorways, interior corners, floor-level wall sections, and the edges of the surrounding platforms.
- Take the stairs and catwalks. Inspect railings, landings, upper edges, and the approach paths leading toward the cranes.
- Search crane interiors and cabins. These small rooms are easy to skip and are among the most common missed locations.
- Finish with the outer railings and container routes. Check areas that are slightly off the direct path, especially exterior concrete corners and lower rail sections.
Look for the red interaction button itself rather than expecting an obvious objective marker. Keep your camera low when moving around rails and supports, then look up before leaving a crane or catwalk. The Fuel Cell can also be easy to miss because it is commonly found low to the ground after the button stage.
Button Sweep Rules That Save Time
- Do not assume a missing button is on the highest crane. Finish the lower buildings and supports before repeating vertical checks.
- Ping every cleared structure in a squad. This prevents two players from searching the same crane while the last button sits on an unchecked ground-level edge.
- Listen after each activation. Footsteps, zipline movement, gunfire, and ARC alerts matter more here than shaving a few seconds from the route.
- If you have thoroughly checked the recurring spawn zones and still cannot find a button, stop forcing the run once the raid becomes unsafe. The puzzle is optional loot, not a reason to lose an extracted kit.
Explore services related to this guide, selected from our ARC Raiders catalog.
View All ARC Raiders Services


Fuel Cell Locations and the Broken Lift
Once all four buttons are active, begin the Fuel Cell sweep immediately. It can appear around Stacking Yard rather than directly at the final terminal, so retrace the low ground, container lanes, building edges, and sandy or open sections you passed during the button search. Keep scanning the ground; players often run past the cell while focusing on the upper structures.
When you have the Fuel Cell, carry it to the damaged lift below the elevated control area. Inspect the repair panel before committing to the lift phase. The materials requested can vary by raid, so do not enter Stacking Yard assuming a fixed battery, wire, or component requirement. If the repair cost is not worth spending from your bag, extracting the Fuel Cell is not an alternative objective; decide whether to abandon the puzzle and move on.
How the Lift Phase Works in a Duo
- Repair the lift after checking its current material request.
- One Raider takes the Fuel Cell onto the platform.
- The second Raider stays at the controls and holds the lift activation.
- Keep the lift operator protected. Releasing the control can interrupt the ascent or leave the carrier exposed.
- At the top, the carrier moves the Fuel Cell to the terminal/fuse point and inserts it.
- Once the powered access opens, regroup before looting rather than letting both players rush through the same doorway.
Assign roles before touching the panel: carrier, operator, and overwatch. In a duo, the operator must briefly cover both the lift control and the likely approach. In a trio, the third Raider should hold the most dangerous lane rather than crowding the platform.
Can You Complete Stacking Yard Solo?
Yes, but a solo clear is a workaround, not the intended low-risk method. The main issue is that the lift normally needs one player to hold the controls while another travels with the Fuel Cell. Players have reported using a Snap Hook or physics-based item-placement tricks to retrieve or reposition the cell after operating the lift, but those methods depend on positioning and can fail under pressure.
For a solo attempt, make the decision before you repair the lift:
- Proceed if the area is quiet, you have a mobility tool, your route to extraction is short, and you can afford to lose time attempting the transfer.
- Stop after the button phase if you hear active PvP, see ARC pressure building, or have already collected valuable raid loot.
- Do not force a solo gimmick while exposed on the platform. A failed attempt can turn you into an easy target with no cover and no clean exit.
Solo Raiders should generally value survival over perfect completion. For safer decision-making around loot, rotations, and extraction timing, see our ARC Raiders solo survival and extraction guide.
Stacking Yard Loot Rooms and What to Expect
The main reward is the powered room reached by completing the full Fuel Cell sequence. Stacking Yard also has a secondary container/lift opportunity that players can miss while focusing only on the main terminal path. Treat the second room as a bonus rather than a guaranteed reason to remain in a contested area.
| Reward Area | Access Requirement | Decision Rule |
|---|---|---|
| Main control-area loot room | Four buttons, Fuel Cell, repaired lift, powered terminal | Primary objective; complete it if your squad can protect the lift phase. |
| Secondary lift/container reward | Additional lift access and time in the area | Take it only when the compound remains secure and extraction is still realistic. |
Do not expect a fixed item, guaranteed weapon case, or permanent high-tier drop. Locked-room value is inherently variable, and the correct play changes with your current bag, remaining supplies, nearby gunfire, and extraction distance. If you already have a full pack of useful materials, blueprints, or upgraded gear, leaving with certainty is usually better than gambling several more minutes for an extra container.
If your inventory is filling during the run, use the rules in our ARC Raiders keep-or-sell and stash guide to protect items that advance quests, Workshop plans, or your next dependable kit.
Common Stacking Yard Puzzle Mistakes
Searching for a fixed button map
The buttons rotate between raids. Use a fixed route, not a fixed list of four coordinates. Searching all ground-level zones, then buildings, then cranes is more reliable than chasing a screenshot from another session.
Finding the Fuel Cell before checking the lift repair
You can waste valuable time carrying the Fuel Cell around only to discover that the lift needs materials you do not have. Check the panel as soon as possible, then decide whether the raid can support the full completion.
Both teammates using the lift
The lift is a vulnerable interaction point. One player needs to operate it while the carrier rides; both Raiders standing on the platform creates an avoidable failure point.
Looting before securing the room
A powered door and loud lift activity tell nearby players exactly where you are. One Raider should hold the entrance or a nearby angle while the other checks containers. Swap roles if necessary instead of stacking in a small room.
Staying after the objective is complete
Stacking Yard becomes more dangerous the longer you remain. Button activations, repair sounds, ARC combat, and opened doors create a trail of information. Once the main room is looted, reassess your extraction immediately.
Best Team Plan for a Safe Clear
A coordinated duo or trio should treat Stacking Yard as a short objective with clear phases, not a place to farm indefinitely.
- Approach quietly: identify cover, crane sightlines, and at least one route out before entering the center of the compound.
- Sweep buttons by sector: one player checks lower structure edges while the other clears interiors or upper platforms. Keep verbal callouts short.
- Confirm the Fuel Cell: after button four, regroup before beginning the low-ground search so nobody gets isolated.
- Inspect and repair: verify the lift requirement, repair it, then assign carrier, operator, and overwatch.
- Power the terminal: finish the lift quickly, but pause before opening the next doorway if you hear players rotating in.
- Loot with security: take high-value items first, protect the doorway, and avoid extended inventory sorting.
- Extract on purpose: rotate toward the safest available extraction rather than returning through the center of Stacking Yard unless the path is confirmed clear.
The same principles apply to every contested objective: information, cover, and a viable exit are more valuable than chasing one more container. If another squad arrives during the final phase, use the reset and disengage rules in our ARC Raiders PvP guide; a controlled retreat is often the winning play when your bag is already full.
Final Takeaway
The reliable Stacking Yard solution is simple: search all recurring button zones systematically, find the Fuel Cell after the fourth activation, verify the lift’s live repair request, then coordinate the carrier and operator roles before powering the upper terminal. The hard part is not memorizing four locations. It is managing randomized spawns, vertical exposure, noisy interactions, and the decision to leave once the reward is secured.





