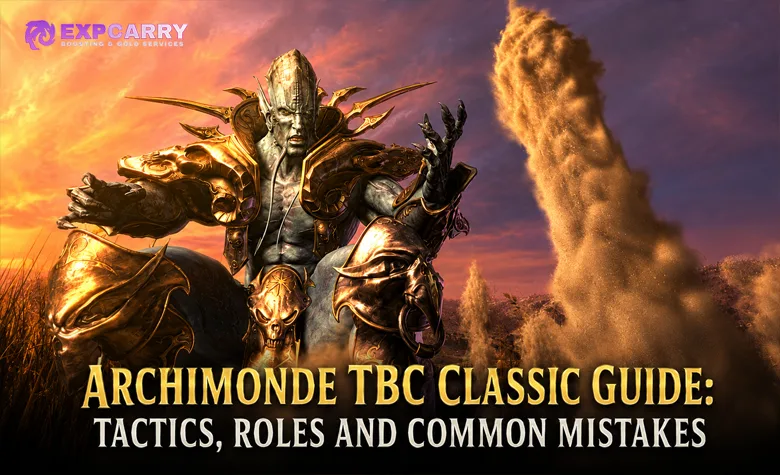
Reaching Archimonde changes the rhythm of Battle for Mount Hyjal. There are no defensive waves to clear before this pull and no phase rotation to memorize. Instead, the encounter asks 25 players to keep safe ground available, control Fear, remove one dangerous curse, and land correctly after being thrown into the air. A single casualty changes the fight because Archimonde converts player deaths into Soul Charge attacks against the whole raid.
The Blizzard Phase 3 schedule places the global opening of Battle for Mount Hyjal on August 27, 2026. Archimonde is its fifth boss. This guide is built around practical assignments and decision rules so every raider knows what to do before damage, healing, or movement becomes urgent.
What the Raid Must Accomplish
The playable portion of the encounter uses one repeating set of mechanics. At 10% health, Protection of Elune shields the raid and the wisp event resolves the kill. The real objective is therefore to reach that threshold without feeding Archimonde a sequence of Soul Charges.
- Keep one active tank in melee range at all times.
- Preserve open ground instead of chasing uninterrupted damage.
- Give every party a dependable answer to Fear.
- Place curse removers where they can reach every raid sector.
- Separate players far enough that Air Burst does not collect several targets.
- Treat every personal survival error as a possible raid-wide event.
Archimonde allows very little room for individual improvisation. A clear assignment map is more valuable than adding another damage cooldown to the pull plan.
Assignments to Finish Before the Pull
Start at Tyrande Whisperwind in the Night Elf camp. Every raider must collect Tears of the Goddess, place the item on an easy key, and check its remaining duration. The item exists for two hours, can be reused, and has a 10-second cooldown. Players still completing the entry requirements can use the Mount Hyjal access checklist to identify missing progression steps before raid day.
- Name the main tank and confirm the tank's Fear response.
- Assign each Shaman to a party and mark the expected Tremor Totem area.
- Place Mages and Druids in separate sections of the field for curse removal.
- Give each healer a primary area while maintaining continuous tank coverage.
- Divide the raid into loose sectors so players do not collapse into one cluster.
- Confirm which players have Fear Ward, Will of the Forsaken, a PvP trinket, or another verified personal answer to Fear.
- Require a Tears of the Goddess check again after any event that may remove or expire the item.
How to Use the Fighting Area
The tank should establish Archimonde in a location that leaves several movement routes for the raid. Parties take separate sectors around that position. A sector is not a stack point: its members stay within useful healing, decurse, and Tremor Totem range while leaving enough room to limit Air Burst to as few people as possible.
Doomfire will eventually make part of the original layout unusable. When that happens, the affected sector shifts toward clean ground and the adjacent sector makes room. Players should not defend an assigned marker after the route becomes dangerous. The purpose of the layout is to organize coverage while allowing controlled movement.
- Keep the main tank isolated from players who may carry Air Burst into melee.
- Leave a clear route from every sector to additional safe ground.
- Do not place all healers or all curse removers on the same side.
- Move as a sector only when necessary; random cross-field movement consumes space and breaks assignments.
- Re-establish range to the party's Tremor Totem after every relocation.
Explore services related to this guide, selected from our TBC Raids catalog.
View All TBC Raids Services
Combat Priority Order
Every player should use the same priority system. This prevents damage meters or a nearly finished cast from overriding the mechanic that keeps the attempt alive.
- Avoid Doomfire and create distance from it before Fear.
- Keep the tank protected from Fear and continuously healed.
- Move away from nearby players when selected by Air Burst.
- Use Tears of the Goddess during the downward part of the fall.
- Remove Grip of the Legion as soon as it appears.
- Restore the sector layout and required support ranges.
- Deal damage only after the higher priorities are secure.
Doomfire Movement Rules
Doomfire creates a moving line of fire rather than one stationary hazard. Contact causes 2400 Fire damage and applies a burn that begins at 2250 damage every three seconds before weakening over time. The trail remains active for 45 seconds, so poor movement can remove a large part of the field for a long period.
React to the direction of the fire, not to the player it appears to follow. Step into open terrain without cutting through another sector. If the fire blocks melee access, melee players stop attacking until a clean approach exists. If it enters a ranged sector, that group moves together far enough to restore room between Fear paths and the flame.
The burn has no normal dispel. Ice Block, Divine Shield, and Cloak of Shadows can remove it, but those abilities are emergency exits rather than a positioning plan. Healers should assist an affected player while that player continues moving away from the trail.
Fear Coverage and Timing
Archimonde's Fear can force the raid to run for as long as eight seconds. The dangerous part is not Fear by itself but the uncontrolled path through active Doomfire. Track the encounter timer and widen the gap from every flame before the cast begins.
Tremor Totem affects party members within its radius, not the entire raid. A Shaman in every party gives the cleanest coverage, but rosters without five Shamans need a documented alternative for each uncovered group. Fear Ward, Will of the Forsaken, and PvP trinkets can fill specific gaps. They should be assigned instead of used by everyone on the same cast.
A Warrior is the preferred main tank for this job because Berserker Rage can prevent Fear from removing the tank from position. The tank and healers should treat every Fear window as a scheduled survival check, even when the field currently looks safe.
Air Burst and Tears of the Goddess
Air Burst deals 3000 Nature damage in a 13-yard area and throws affected players high above the battlefield. The landing, not the initial damage, is the main threat. The current Wowhead Archimonde reference confirms that Tyrande's item is the standard answer to the fall.
- Leave nearby players as soon as the selection becomes visible.
- Allow the launch to reach its highest point without activating the item.
- Watch the character begin descending.
- Activate Tears with enough height remaining to account for latency.
- Land, locate Doomfire, and return through a safe route.
Using the item immediately after launch wastes its brief effect before the fall is complete. Waiting until the character is almost touching the ground risks a delayed input and a fatal landing. Mages have class alternatives such as Slow Fall or Blink, but carrying Tears gives the entire raid one consistent procedure.
Grip of the Legion Coverage
Grip of the Legion is a curse with a five-minute duration. It deals 2500 Shadow damage every two seconds until a Mage or Druid removes it. This makes curse coverage a positioning assignment rather than a simple reaction test.
Each decurser needs a primary sector and a neighboring backup sector. When one is airborne or moving away from Doomfire, the backup handles both areas. Healers keep the victim stable only until the curse is removed. Leaving Grip active and attempting to outheal it wastes mana and creates an unnecessary death risk.
What Soul Charge Does After a Death
Every player death gives Archimonde access to one Soul Charge based on the dead character's class. The raid leader should identify the version immediately because the correct recovery changes with its secondary effect.
| Class group | Raid effect | Recovery priority |
|---|---|---|
| Druid, Shaman, Hunter | 4500 Nature damage across eight seconds and 2250 Mana removed | Use efficient raid healing, protect healer mana, and avoid adding any preventable damage |
| Warrior, Rogue, Paladin | 4500 Physical damage followed by 50% additional damage taken for eight seconds | Stop offensive risks, use mitigation, and keep everyone away from Doomfire until the debuff ends |
| Priest, Mage, Warlock | 4500 Fire damage followed by a four-second silence | Prepare tank protection before the silence and recover raid health as soon as casting returns |
A healthy raid may live through one charge. The danger is the next casualty: another death grants another charge, and the combined effects can quickly remove all recovery time. After the first death, the raid should reduce movement risks and stop treating normal damage output as the priority.
Main Tank Responsibilities
Archimonde uses one active tank. Other tanks should contribute through an appropriate damage or healing setup unless the raid leader keeps one as emergency support. The main tank's essential job is to remain a valid melee target. If no player is in melee range, Archimonde can use Finger of Death, a one-second cast that inflicts 20000 Shadow damage on a player.
- Secure threat before high damage begins.
- Track Fear and activate Berserker Rage before control is lost.
- Maintain melee contact during every reposition.
- Move only when the current tank location threatens the raid's usable space.
- Announce movement early enough for healers to adjust range.
- Do not chase a perfect boss position through an active Doomfire route.
Healer Responsibilities
The healing plan needs uninterrupted tank care and distributed raid coverage. Name the healers responsible for the tank, then assign the remaining healers to sectors. At least one planned tank healer must be able to respond during each Fear window.
- Bring the tank to a safe health level before Fear.
- Remain in the assigned sector's support network while avoiding tight stacks.
- Cover Air Burst damage without following launched players into unsafe ground.
- Stabilize a Grip target while calling for the decurse.
- Recognize the Soul Charge class group before choosing recovery cooldowns.
- Protect personal survival because a healer death also activates Soul Charge.
Melee DPS Responsibilities
Melee damage is valuable only while the area around Archimonde remains safe. Players should distribute themselves around the available melee space without standing beside the tank. When Doomfire reaches that area, disengaging is the correct tactical choice.
- Leave room between the tank and any player who could be selected by Air Burst.
- Exit early when the fire removes a safe attack position.
- Know where the party's Tremor Totem is located before Fear.
- Save a personal Fear answer for the cast where normal coverage fails or the path becomes lethal.
- Return to the boss only through a route that does not cross another sector.
Ranged DPS Responsibilities
Ranged players control space by holding their sectors and moving before Doomfire reaches them. A selected Air Burst player separates from the group, while the remaining players preserve their positions rather than following. Mages and Druids stop damage immediately when their assigned Grip target needs a decurse.
- Maintain access to the assigned healer, decurser, and Tremor Totem.
- Interrupt a cast if finishing it would delay movement.
- Keep the 13-yard Air Burst area away from neighboring groups.
- Shift toward unused ground without trapping another sector.
- Rebuild the spread before resuming maximum damage.
The Final 10% Event
At 10% health, the normal encounter ends. Protection of Elune makes the raid immune while Archimonde attempts to kill players and the wisps gather around him. Continue following the raid leader's instructions, but no additional damage phase needs to be planned beyond reaching this threshold alive.
Common Mistakes and Corrections
- Mistake: A player enters without Tears or carries an expired item. Correction: verify every inventory before each pull.
- Mistake: Tears is used near the top of Air Burst. Correction: activate it after the descent begins.
- Mistake: Several players stand inside one 13-yard area. Correction: keep a loose spread inside each sector.
- Mistake: Players react to Fear only after it lands. Correction: increase the distance from Doomfire before the cast.
- Mistake: A party assumes another group's Tremor Totem will protect it. Correction: document party-specific coverage and backups.
- Mistake: All curse removers occupy one side. Correction: give every sector a primary or backup Mage or Druid.
- Mistake: Healers attempt to sustain Grip for several ticks. Correction: call and remove the curse immediately.
- Mistake: The tank is moved out of melee range. Correction: preserve melee contact throughout repositioning.
- Mistake: DPS continue their rotation after a death. Correction: identify the Soul Charge and stabilize first.
- Mistake: A group protects its marker while Doomfire closes the route. Correction: relocate to safe ground and rebuild coverage.
- Mistake: Melee refuse to disengage from fire. Correction: accept lost damage and wait for a clean return path.
- Mistake: Personal Fear breaks are all spent together. Correction: assign backups for later Fear casts.
Pull Ready Checklist
- Tears of the Goddess is present, active, and bound for every player.
- The Warrior tank knows every Fear timing and keeps Archimonde in melee range.
- Each party knows its Tremor Totem coverage or assigned alternative.
- Every sector has a reachable Mage or Druid for Grip of the Legion.
- Healers know tank coverage, sector coverage, and Soul Charge recovery calls.
- All players understand the Air Burst radius and the correct Tears timing.
- Doomfire escape routes are clear before the pull begins.
- The raid agrees to stop damage whenever movement or recovery takes priority.
Raiders who need a coordinated route through the complete instance can compare their plan with the available Hyjal Summit completion formats. A guild-led group should apply the same standard by confirming every assignment before Archimonde is engaged.
Final Strategy Summary
Archimonde is controlled through advance preparation rather than a complex phase script. Protect the main tank from Fear, distribute Tremor Totem and curse coverage by party, move sectors before Doomfire consumes their space, separate every Air Burst target, and use Tears during descent. Once the raid reaches 10% without triggering a cascade of Soul Charges, the protected wisp sequence finishes the encounter.