MoP Classic Celestial Dungeons are not simply Heroics with larger health bars. In the current Season 3 version, every run layers raid-style mechanics, stronger enemies, Kor'kron Banners, Celestial powers, Siege of Orgrimmar-inspired boss abilities, and a currency system on top of the original nine Pandaria dungeons. The mode is still queueable at item level 435, but that number only tells you when Dungeon Finder lets you in. It does not tell you when the run will feel comfortable.
The practical goal is different depending on your character. A fresh level 90 uses Celestial Dungeons to catch up, a raider uses them to target Celestial gear and Legendary quest progress, and a geared main can farm August Stone Clusters quickly. This guide focuses on the parts that decide whether a run is smooth or miserable: the best group setup, the dangerous boss mechanics, the nine-dungeon route, current loot, and how much currency a complete farming session actually produces.
MoP Classic Celestial Dungeons at a Glance
| Rule | Current Season 3 value | Why it matters |
|---|---|---|
| Queue requirement | Item level 435 | This is the Dungeon Finder minimum, not a comfort recommendation. |
| Group size | 5 players | Standard tank, healer, and three DPS structure. |
| Enemy scaling | 45% more damage and 135% more health | Large trash pulls and missed boss mechanics punish weak groups quickly. |
| Season 3 hazards | Kor'kron Banners plus Nazgrim, Kardris, and Blackfuse-inspired boss abilities | Groups must react to extra mechanics that do not exist in normal Heroic runs. |
| Celestial Witness | 20% more damage and healing, 20% less damage taken for 30 seconds | Coordinating all four Celestials creates the strongest burst window in the mode. |
| Current currency | August Stone Clusters | Used for current Celestial gear and other rewards. |
| Currency storage cap | 200 | The cap was increased from 70 to 200 on June 17, 2026. |
| Current Celestial gear | Season 3 vendor versions are item level 528 | Celestial Dungeons remain a strong catch-up and targeted gearing route. |
Blizzard originally introduced Celestial Dungeons as the MoP Classic replacement for Raid Finder. The official instanced-content overview describes them as a difficulty above Heroic dungeons with raid-level mechanics, target-farmable gear, currency, and Legendary quest progress. Season 3 keeps that foundation but makes the mode substantially more aggressive.
Season 3 Turns Familiar Heroics Into Real Five-Player Checks
The current modifier is Glory to the True Horde. Enemies in Celestial Dungeons deal 45% more damage and have 135% more health than their normal baseline. That changes the pace immediately. A trash pack that can be ignored in Heroic may survive long enough in Celestial mode to complete a dangerous cast, stack tank damage, or combine with a Kor'kron Banner.
Those banners are one of the easiest mechanics to underestimate. They empower nearby enemies, so leaving a banner active while continuing a normal AoE rotation is effectively choosing to make the pull harder. Blizzard significantly reduced Kor'kron Banner health on June 17, 2026, but they should still be killed quickly when they appear in dangerous packs unless another mechanic is an immediate threat.
Bosses also gain periodic abilities inspired by General Nazgrim, Wavebinder Kardris, and Siegecrafter Blackfuse. The exact overlap matters less than the rule it creates: you cannot tunnel the original dungeon boss script and assume every extra effect is harmless. The Season 3 Blizzard announcement confirms these three Siege of Orgrimmar sources and the new Kor'kron layer.
Your counterweight is Celestial Witness. When all four Celestials are called, the group gains 20% increased damage and healing while taking 20% less damage for 30 seconds. Use that window on a boss, a dangerous double pull, or a section where seasonal mechanics overlap. Blowing it on harmless trash wastes the strongest group-wide tool Celestial mode gives you.
Best Celestial Dungeon Group Prioritizes Utility Over Pure DPS
There is no required meta composition because Celestial Dungeons are designed for the standard Dungeon Finder structure. A good premade, however, should be built around interrupts, dispels, crowd control, emergency healing, and fast banner swaps. Pure single-target damage matters less than being able to solve several different problems across nine dungeons.
A Safe All-Round Premade
One strong utility-first example is Protection Paladin, Restoration Shaman, Survival Hunter, Frost Death Knight, and Warlock. This is not the only good group, but it covers nearly everything the mode asks for without depending on one player for every answer.
- Protection Paladin: strong defensive coverage, interrupts, stuns, emergency healing, and useful dispel support.
- Restoration Shaman: Bloodlust or Heroism, a short-cooldown interrupt, Purge, strong group healing, and emergency cooldowns.
- Survival Hunter: safe ranged damage, traps, Misdirection, Tranq Shot, and reliable target switching for banners.
- Frost Death Knight: cleave, Death Grip, interrupts, stuns or control options, and Raise Ally for combat recovery.
- Warlock: strong sustained damage, Healthstones, Shadowfury-style control, and Soulstone utility.
If you do not have those exact classes, preserve the functions. Bring one Bloodlust source, at least two reliable interrupts, one battle resurrection if possible, a ranged DPS who can switch quickly, and enough crowd control to stop dangerous trash. A group that covers those jobs is usually better than five individually high-ranked specs with overlapping utility.
Item Level 435 Is the Door, Not the Comfort Zone
Blizzard's original Celestial Dungeon development notes set the queue floor at item level 435. That requirement still matters, but Season 3 tuning is much higher than the first version of the mode. A 435 character can enter, yet low stamina, weak weapons, missing enchants, and poor secondary stats become obvious when mobs have more than double normal health.
For consistent clears, there is no official comfort item level beyond the 435 queue requirement. Improve your gear as far as your available catch-up sources allow and make sure key pieces are properly gemmed and enchanted. Once the group reaches current raid-catch-up levels, execution, interrupts, dispels, and seasonal-mechanic handling become more important than chasing an arbitrary minimum number.
If gear itself is the blocker, the MoP Classic BiS gear service is relevant to players building a more complete set, while the specific Celestial Dungeon service is the more direct option for players who only need this five-player mode.
Explore services related to this guide, selected from our Mists of Pandaria Classic catalog.
View All Mists of Pandaria Classic Services


Celestial Dungeon Boss Route Across All Nine Dungeons
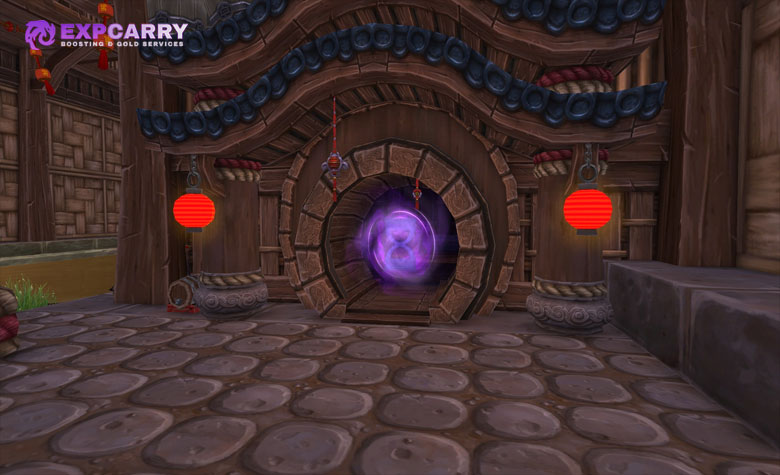
Every boss matters because each one awards 2 August Stone Clusters, and the final boss awards an additional 3 Clusters only when all earlier bosses in that dungeon have been defeated. Skipping required encounters to rush the exit can therefore reduce the value of the run even when the dungeon technically feels faster.
| Dungeon | Boss route | Main danger | Base full-clear Clusters |
|---|---|---|---|
| Stormstout Brewery | Ook-Ook -> Hoptallus -> Yan-Zhu the Uncasked | Yan-Zhu brew combinations and seasonal overlaps can turn the last room chaotic. | 9 |
| Temple of the Jade Serpent | Wise Mari -> Lorewalker Stonestep -> Liu Flameheart -> Sha of Doubt | Touch of Nothingness and Figments of Doubt punish poor dispels and slow target swaps. | 11 |
| Shado-Pan Monastery | Gu Cloudstrike -> Master Snowdrift -> Sha of Violence -> Taran Zhu | Hatred management and seasonal mechanics make the final encounter dangerous when players tunnel. | 11 |
| Scholomance | Instructor Chillheart -> Jandice Barov -> Rattlegore -> Lilian Voss -> Darkmaster Gandling | Five bosses, dangerous trash, and Gandling's room mechanic make it the longest high-yield run. | 13 |
| Gate of the Setting Sun | Saboteur Kip'tilak -> Striker Ga'dok -> Commander Ri'mok -> Raigonn | Raigonn phase handling, add pressure, and poor positioning during seasonal abilities. | 11 |
| Mogu'shan Palace | Trial of the King -> Gekkan -> Xin the Weaponmaster | Xin's weapon hazards punish players who stack carelessly or stop watching the room. | 9 |
| Scarlet Halls | Houndmaster Braun -> Armsmaster Harlan -> Flameweaver Koegler | Large trash pulls and Koegler's fire mechanics become much harsher under Season 3 scaling. | 9 |
| Siege of Niuzao Temple | Vizier Jin'bak -> Commander Vo'jak -> General Pa'valak -> Wing Leader Ner'onok | Long encounter phases, bombs, adds, and Ner'onok wind pressure punish sloppy movement. | 11 |
| Scarlet Monastery | Thalnos the Soulrender -> Brother Korloff -> Commander Durand and High Inquisitor Whitemane | The final resurrection sequence can snowball if interrupts and target order break down. | 9 |
The Fast 9-Cluster Runs
Stormstout Brewery, Mogu'shan Palace, Scarlet Halls, and Scarlet Monastery each pay 9 August Stone Clusters for a full boss clear. These are attractive when you want short, repeatable runs instead of maximum currency per individual dungeon. The real efficiency depends on queue time and group quality, but their three-encounter structure generally makes them easier to chain than Scholomance.
Stormstout is usually the cleanest farm when the group handles Yan-Zhu correctly. Mogu'shan Palace is also straightforward if players respect Xin's room hazards. Scarlet Halls becomes dangerous when a geared tank assumes Season 3 scaling means every trash pack can still be stacked together. Scarlet Monastery is quick, but Durand and Whitemane punish groups that forget the resurrection sequence or miss key interrupts.
The 11- and 13-Cluster Runs
Temple of the Jade Serpent, Shado-Pan Monastery, Gate of the Setting Sun, and Siege of Niuzao Temple each provide 11 Clusters for a complete clear. These are usually the better choice when you care about currency per queue rather than raw speed. Temple is particularly useful because Sha of Doubt can also matter for the Legendary questline.
Scholomance gives 13 Clusters because it has five bosses. It is the highest base currency payout in one dungeon, but not automatically the best farm per minute. More bosses, more trash, and Gandling's room mechanic give the run more places to lose time. If your group is strong, it is efficient. If the group is undergeared, four short dungeons can be less frustrating than repeatedly wiping inside Scholomance.
Boss Mechanics That Cause Most Celestial Wipes
Season 3 mechanics can create dangerous overlaps anywhere, but a few original dungeon bosses remain especially good at punishing groups that only remember their Heroic versions vaguely.
Sha of Doubt: Dispel First, Then Kill Your Figment
Sha of Doubt applies Touch of Nothingness, which causes the affected player to damage nearby allies periodically. A healer or dispel-capable player should remove it quickly instead of letting the group heal through unnecessary damage. When Figments of Doubt spawn, destroy them before they become fully infused with energy. A fully charged Figment explodes, damages the group, and heals Sha of Doubt, extending the fight and creating more opportunities for Season 3 abilities to overlap.
This encounter matters beyond loot. MoP Classic allows players to take the alternate "When in Doubt" route in Wrathion's Legendary chain, using the Celestial Sha of Doubt kill instead of the original Sha of Fear path. ExpCarry's MoP Classic Legendary Cloak guide covers that progression separately.
Taran Zhu: Stop Playing at Maximum Hatred
Shado-Pan Monastery teaches the same lesson every expansion cycle: the Hatred resource is part of the fight, not decoration. When your Hatred gets too high, use the encounter's Meditate mechanic rather than staying locked into your normal rotation. The fight becomes much less forgiving when Celestial seasonal effects arrive while multiple players are already mishandling Hatred.
Keep the boss controlled, avoid unnecessary damage, and do not force the healer to solve a mechanic every player can manage personally. This is also a good fight for saving a group Celestial burst window if the run has been shaky.
Raigonn and Ner'onok: Movement Is the Real DPS Check
Raigonn is not a stationary target dummy. In the first phase, players use the launchers to reach and destroy his Weak Spot while the rest of the group controls incoming adds. Once the Weak Spot is destroyed, Raigonn's armor breaks and the fight shifts to positioning, Fixate handling, and finishing the boss. A Siege of Orgrimmar-inspired seasonal ability during the wrong moment can punish anyone who is already standing badly.
Ner'onok is similar for a different reason. Quick-Dry Resin is countered by repeatedly jumping before it hardens, while his bridge phases force the group to move into the wind and reach him. Gusting Winds can be interrupted once a player gets back into range. Treat survival and movement as part of your damage rotation. A dead DPS contributes nothing to the last-boss currency bonus.
Darkmaster Gandling: Do Not Lose the Main Room
Gandling can send players into side rooms, forcing them to fight their way back while the remaining group continues handling the boss. This is why Scholomance feels worse with a weak healer or low DPS than its 13-Cluster payout suggests. One slow side-room return can leave the tank and healer dealing with a long boss phase while seasonal mechanics continue spawning.
Save personal cooldowns if you know your spec struggles alone. The players left in the main room should not panic and overpull surrounding effects. Clean execution is more important than trying to turn the final boss into a speedrun.
Celestial Dungeon Loot and Expected Farm per Full Sweep

Bosses award the current August Stone Cluster currency, and a full clear pays based on the number of bosses in that dungeon. The nine base dungeon payouts add up to 93 August Stone Clusters. The first Celestial Dungeon completion of the day adds 4 Clusters, while subsequent completions that day add 2 each. If you full-clear all nine dungeons in one day, those completion rewards add 20 Clusters. The rotating daily quest adds another 3, bringing a full nine-dungeon circuit with all completion rewards and one daily quest to 116 Clusters.
The current storage cap is 200 August Stone Clusters, increased from 70 on June 17, 2026. A single nine-dungeon circuit therefore fits under the cap, but continued farming can still push you into it. Check your currency before starting another long run so later rewards are not wasted.
| Farm plan | Expected Clusters | Best use |
|---|---|---|
| One short 3-boss dungeon | 9 | Quick queue, daily completion, or light farming. |
| One 4-boss dungeon | 11 | Better currency per successful queue. |
| Scholomance full clear | 13 | Highest base payout from one dungeon. |
| Celestial Dungeon completion reward | +4 first, +2 later | The first completion of the day pays 4; subsequent completions that day pay 2 each. |
| Rotating daily quest | +3 | Adds currency plus 150 Valor Points. |
| All nine dungeons | 93 base | Achievement progress, broad target farming, and a full currency circuit. |
| All nine plus completion rewards and daily | 116 total | 93 from dungeon boss payouts, 20 from nine same-day completion rewards, and 3 from the daily quest. |
Season 3 Celestial gear is based on Siege of Orgrimmar Raid Finder-equivalent rewards and the vendor versions are item level 528. The vendor also offers Tier 16 tokens and a broad selection of current raid-style armor, weapons, and trinkets. Costs vary by slot: many one-handed weapons and smaller accessories sit around 30 Clusters, major armor pieces generally cost more, and high-value trinkets commonly cost 50.
This makes the currency route more reliable than waiting for one specific random drop. If your best upgrade costs 50 Clusters, a full daily-centered farming session can cover it without a weekly currency cap. With the current 200-Cluster storage cap, one complete nine-dungeon circuit also leaves substantial room before you need to spend.
Celestial Dungeons also preserve Legendary quest progression. End bosses can contribute Sigils of Power and Wisdom, later stages can award Secrets of the Empire and Titan Runestones, and key quest items can also be purchased through the August Stone system. That is why the mode remains useful even after basic catch-up gear stops being attractive.
Run Faster Without Turning Every Pull Into a Wipe
- Take the rotating daily before queueing. Missing the quest means giving up extra currency and Valor for content you were already going to run.
- Use the correct Celestial role power. Do not ignore the entrance buffs because your gear is high. Season 3 assumes players use the system.
- Kill Kor'kron Banners quickly. Empowered enemies are usually more dangerous than the few seconds of DPS lost by switching targets.
- Save group burst for a real wall. Celestial Witness is strongest on a boss or dangerous multi-pack, not on the first harmless trash pull.
- Do not chain-pull through healer recovery. The 45% damage increase can turn one unfinished pack plus the next banner into a wipe.
- Finish every required boss. The final-boss bonus assumes the earlier bosses are dead, so skipping encounters can lower currency value.
- Watch the 200-Cluster cap. One full nine-dungeon circuit fits under it, but continued farming can still reach the storage limit.
- Separate Celestial Dungeons from Challenge Mode. They use the same dungeon maps but have different goals and rules. The MoP Classic Challenge Modes guide covers timed medal runs separately.
Players chasing all nine Celestial completions and the related meta progression can also use the Pandaria Celestial Hero service as the specific ExpCarry page for that goal. It is more relevant than a generic dungeon link when the objective is full nine-dungeon completion rather than repeated currency farming.
The most common mistake is treating current Celestial Dungeons like their 2025 launch version. Season 3 has much higher enemy scaling, a new currency, Siege of Orgrimmar loot, Kor'kron Banners, and extra boss abilities. Old guides can still explain the original boss scripts, but they should not be used as the final authority for current difficulty or reward planning.
Conclusion
MoP Classic Celestial Dungeons are one of the strongest catch-up systems in the current game because they combine repeatable five-player content, item level 528 Celestial gear, targetable vendor rewards, August Stone Clusters, and Legendary quest progress without a weekly currency cap. The official 435 queue requirement gets a character through the door, but Blizzard does not publish a separate "comfort" item level. Better gear, proper gems and enchants, and clean execution all improve consistency in Season 3.
For the best group, build around utility rather than a perfect damage-meter composition. One durable tank, one healer with strong emergency tools, Bloodlust, multiple interrupts, a battle resurrection, and ranged target switching will solve more problems than stacking three high-DPS specs with the same weaknesses. Use Celestial Witness deliberately, kill banners early, and respect original boss mechanics when the new Siege of Orgrimmar abilities overlap.
For farming, remember the simple numbers: 9 Clusters from the three-boss dungeons, 11 from the four-boss dungeons, 13 from Scholomance, and 93 from the nine base full-clear payouts. If all nine are completed on the same day, the first-completion reward plus the eight subsequent-completion rewards add 20 more, and one rotating daily adds another 3, for a total of 116. The storage cap is 200, so one full circuit fits comfortably below it, but longer farming sessions still require you to watch the cap.