Fate of the Vaal is a permanent Path of Exile 2 progression system that connects Ancient Beacon encounters, a dedicated Atlas Passive Tree, a persistent Temple layout, room-specific crafting, and the route to Atziri, the Red Queen. The loop begins during the campaign, but its complete form belongs to Endgame: collect Energised Crystals, use them at the Temple Console, extend a reachable layout, improve the rewards that match your goal, and decide when the Architect or Atziri is worth the resulting Destabilisation.
This is the parent guide for the whole mechanic. It explains how Beacons work, where the Atlas points come from, how to prioritize the Fate of the Vaal branch, how Temple construction affects rewards, and how the progression chain reaches Atziri. It avoids fixed profit claims because room value, item demand, and character clear speed change. The decision framework remains useful even when individual balance values move.
PoE 2 Fate of the Vaal Quick Answer
Complete six Ancient Beacons in Act 3 to open the first Vaal Ruins route, then complete the second campaign set in the Interludes to unlock the past version of the Temple and its deeper systems. In Endgame, travel northeast from the Atlas start toward Lira Vaal. Maps in that city supply Energised Crystals and Fate of the Vaal Atlas points. Spend six crystals at the Temple Console, place connected Room Cards, enter the Temple, clear every reachable priority room, and close the run only after checking which rooms will Destabilise.
| Progression stage | Main action | What it unlocks |
|---|---|---|
| Act 3 | Energise the first six Ancient Beacons | Vaal Ruins and the present-day Lost Temple |
| Interludes | Complete the second six-Beacon sequence | Atziri's Temple in the past, Xipocado, and Medallion progression |
| Early Endgame | Reach Lira Vaal and complete its maps | Fate of the Vaal Atlas points and a reliable crystal route |
| Temple construction | Spend six crystals and place connected Room Cards | New paths, reward rooms, room upgrades, and global Temple modifiers |
| Architect progression | Reach and defeat Xipocado, Royal Architect | Restricted Room choices and the Royal Access route at the required Temple level |
| Pinnacle progression | Complete the Royal Access Chamber and reach Atziri | Atziri's encounter, her Vault, and the final Atlas point milestone |
GGG's Return of the Ancients notes confirm that Fate of the Vaal is core content, place its Endgame hub in Lira Vaal, and establish the current crystal, room, Infuser, and Destabilisation rules. Guides written for the original temporary league can still describe the basic grid, but their caps, Atlas advice, and layout exploits should not be treated as current.
How Ancient Beacons Work
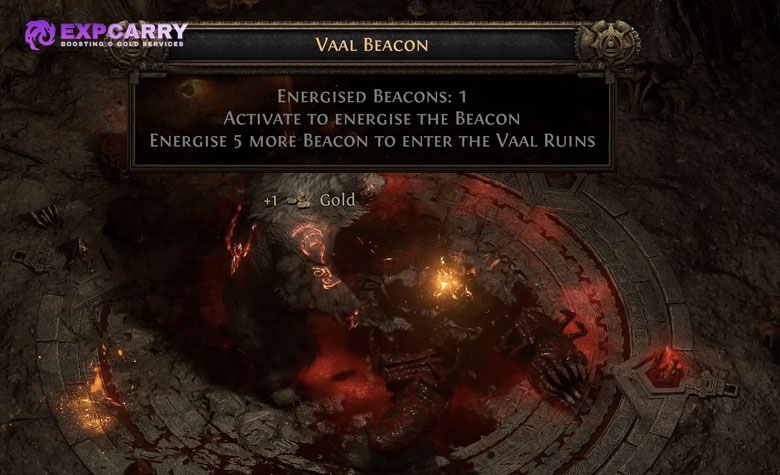
An Ancient Beacon affects nearby enemies. Kill the monsters empowered by the structure, then approach the Beacon when it is ready to complete the interaction. A Vaal Chest rises after completion, and the encounter advances the Temple resource loop. A completed Beacon is shown with a greyed-out minimap icon, which makes it easier to distinguish finished devices from encounters still waiting elsewhere in the area.
Beacon rewards can include ordinary currency, equipment, uncut gems, and Temple-related items. The exact chest quality and contents vary, so the encounter should be evaluated as both a reward event and a source of access rather than as a guaranteed currency package. More importantly, Energised Crystals collected from higher-level areas help determine the monster level of the Temple opened with them. Character level alone no longer sets Temple level.
Campaign Beacons and the two Temple timelines
The first six-Beacon sequence appears in Act 3. It opens access to the Vaal Ruins and the Lost Temple, which represents the structure in the present. This is an introduction to room placement and Temple exploration, not the complete Endgame state. The second six-Beacon sequence appears during the Interludes. Finishing it lets Doryani establish the route into the past and turns the system into Atziri's Temple, where Xipocado, Medallions, Restricted Rooms, and the Atziri chain become relevant.
Do not confuse this with Path of Exile 1's Incursion mechanic or the Temple of Atzoatl. PoE 2 uses its own characters, Room Cards, persistent grid, Destabilisation rules, currencies, and boss route. Familiarity with connecting rooms helps, but importing PoE 1 access requirements or Alva strategies creates incorrect instructions.
Endgame Beacon targeting
Ancient Beacons can appear in maps after the campaign route is established. Lira Vaal is the deterministic specialization area: its maps always provide Energised Crystals and grant points for the dedicated tree. Temple Precursor Tablets can guarantee Vaal Beacons in a map when the goal is to increase encounter frequency beyond the regional progression route.
A strong farming loop clears the entire Beacon encounter without slowing the rest of the map to a crawl. If the character needs several deaths or excessive backtracking for every activation, lower the Waystone pressure or repair the build before adding more tablets. Players who want help combining map completion, crystal collection, and a specific farming objective can compare a flexible PoE 2 farming service after defining the exact bottleneck.
Energised Crystals, Storage and Temple Level
Energised Crystals are the access resource for Temple construction. Six crystals power one Temple Console cycle, and the current default storage maximum is 60. That larger core-game cap is available without collecting the obsolete capacity-increasing Medallions described by older guides. Medallion storage is separately capped at six.
| Resource | Current role | Planning rule |
|---|---|---|
| Energised Crystals | Power the Temple Console in groups of six | Collect them in content whose area level supports the Temple target |
| Room Cards | Add Paths, reward rooms, utility rooms, or upgrade interactions | Place for reachability before theoretical value |
| Medallions | Modify room selection, protection, upgrades, or Temple conditions | Use them before the active Temple when their effect is room based |
| Temple modifiers | Change monsters or rewards across the whole Temple | Read the complete modifier panel before opening the run |
The levels of the areas that produced the six spent crystals factor into Temple monster level. This has two practical consequences. First, a high-level character cannot turn campaign crystals into a top-level Temple simply by holding them. Second, players preparing the level 75 Architect milestone should source the relevant crystal set from sufficiently advanced maps instead of mixing in low-level leftovers without checking the resulting Temple level.
Do not overcap crystal storage indefinitely. A full reserve means later crystal opportunities cannot improve the stockpile, while unused Temple cycles produce no rooms, Medallions, or rewards. The efficient rhythm is to keep enough crystals for planned construction sessions and run the Temple before the cap starts wasting further access progress. The active layout, current crystal stock, and current Medallions belong to the character, so switching characters does not transfer a finished route.
Explore services related to this guide, selected from our Path of Exile 2 catalog.
View All Path of Exile 2 Services


Lira Vaal and Fate of the Vaal Atlas Points
Lira Vaal is located northeast of the Endgame starting position. The city functions as both a visible destination and the progression zone for the Fate of the Vaal branch. Completing its eligible maps grants one point per map for the dedicated Atlas Passive Tree, while the first Atziri completion supplies the remaining boss milestone points. Following the in-game Fate of the Vaal quest makes the intended order visible.
The current dedicated tree can ultimately be completed, so early priorities are about acceleration and the next goal rather than an irreversible permanent build. Some deeper choices are gated behind Atziri progression, and the Atziri's Assets multi-choice remains the main target-selection decision after the tree fills out. Until then, spend points on the part of the loop that is actually limiting progress.
| Point source | How to earn it | Why it matters |
|---|---|---|
| Lira Vaal maps | Complete the maps inside the city region | Builds the functional core of the Temple Atlas branch |
| Atziri milestone | Complete the quest version of the pinnacle route | Awards the final six progression points and opens deeper specialization |
| Not a point source | Random Beacons outside Lira Vaal and repeated ordinary Temple runs | They provide access and rewards, but do not replace regional point objectives |
Atlas progression and Temple construction should advance together. Clearing Lira Vaal maps without spending the crystals delays room growth, while repeatedly building a low-level Temple can delay the area-level requirement for the Royal Access Chamber. A useful cadence is clear a group of suitable Lira maps, inspect the crystal reserve, build toward one reachable Temple objective, then return to mapping with the next room target already chosen.
Best Fate of the Vaal Atlas Tree Priorities
There is no universal first route because the tree supports four different aims: more valuable Beacon encounters, faster Temple development, Restricted Room farming, and repeated Atziri access. The best initial priority is the node that removes the current gate. Temple level and route stability matter before pinnacle rewards; room scaling matters after useful rooms can actually be reached.
| Goal | Priority notables | Allocation logic |
|---|---|---|
| Reach the level 75 Architect milestone | Training and Preparation, then efficient access passives on its route | Raise the Temple level ceiling first so Xipocado can offer the Royal Access Chamber |
| Develop a new Temple | Stolen Authority, room stability passives, and practical modifier effect nodes | Improve Medallion access and preserve enough useful structure to keep construction moving |
| Farm Beacons in maps | Military Reinforcements, Loyal Gatekeepers, Patrolling Legions, and Offerings to the Queen | Increase encounter activity and improve the monsters created around Beacon activation |
| Scale developed rooms | Power Relays, Efficient Arteries, Xipocado's Machinations, and Transcendent Progress | Improve room modifier value and unlock Tier 4 upgrades for specialized layouts |
| Target Restricted Rooms | Expanded Designs, Protected Treasures, Secrets of the Ancients, and Royal Prerogative | Create more usable Restricted Room opportunities and improve their reward plan |
| Farm Temple currency | Riches of the Empire and the relevant Atziri's Assets choice | Concentrate value inside the Temple and at the Vault rather than assuming Beacon chests supply it |
| Target Atziri rewards | Bloodrite Vestments and the appropriate Atziri's Assets option | Choose the boss reward family that matches the intended item or currency target |
A safe starter order
For a first Endgame Temple, take the level and access route that helps reach a valid level 75 Xipocado kill. Add Medallion and Destabilisation support while the grid is still fragile. Move into Power Relays and other room-scaling passives once the layout contains useful rooms. Allocate Transcendent Progress when Tier 4 rooms can be created deliberately rather than taking it early only because it sounds powerful.
After the first Atziri clear, specialize by reward target. Restricted Room players benefit from pairing Secrets of the Ancients with Royal Prerogative rather than judging either node in isolation. Boss farmers should choose the Atziri's Assets option by the reward family they want, while general Temple farmers can emphasize currency and room modifier effects.
Atziri's Assets offers four current targets: Designs adds a Medallion reward, Heirlooms adds a chance for another Atziri Unique, Offerings adds a Vaal Unique, and Wealth adds Temple Currency. Bloodrite Vestments separately adds a Sacrificial Regalia to the Vault. Choose by an actual item or currency objective; no option remains universally best across changing trade economies.
Offerings to the Queen is not the old currency node
Patch 0.5.3 changed Offerings to the Queen. It no longer gives additional random Temple Currency from rare Beacon chests or Beacon unique monsters. Its current effect corrupts a Rare or Unique monster in the area when Vaal Beacons activate. The same patch reduced the frequency of biome Restricted Rooms from Secrets of the Ancients so that pairing it with Royal Prerogative produces a net positive number of Restricted Room uses. The official 0.5.3 patch notes are the reference for both corrections.
This change matters for priority lists. An old guide may rank Offerings as the first Temple-currency node, but that recommendation now describes an effect the node does not have. Take it for the corrupted-monster interaction in Beacon maps, not because a retired tooltip promised additional Temple Currency.
Temple Console, Room Cards and Pathing
The Temple Console presents a persistent nine-by-nine grid, with the entrance and Atziri's Chamber outside opposite ends. Spending six Energised Crystals generates six Room Cards. Those cards can include simple Paths, ordinary rooms, reward rooms, and room types that interact with adjacent tiles. Placement previews are the authoritative check for whether a card connects, upgrades, powers, converts, or fails to interact with a neighbour.
A room is valuable only when it can be reached from the entrance during the active run. Start every construction cycle by identifying the nearest concrete objective: an important crafting device, a high-tier reward room, the Architect's Chamber, a Restricted Room, or the far side of the grid. Use Paths to secure that objective before spending the remaining cards on speculative modifiers.
| Placement decision | Correct question | Common failure |
|---|---|---|
| Place a Path | Does this create a reachable route toward the next objective? | Extending into empty space with no useful target |
| Place a reward room | Can it be reached before it Destabilises or the route changes? | Choosing theoretical value while leaving the room isolated |
| Create an adjacency | Does the preview show the intended upgrade or conversion? | Assuming every neighbouring room automatically improves the target |
| Use a Medallion | Does it solve a specific path, tier, reward, or protection problem? | Spending a rare modifier without a prepared room target |
| Open the Temple | Are the priority rooms connected and the global modifiers survivable? | Entering before reviewing the complete route and difficulty |
Why the snake strategy no longer works
Old layouts tried to make rooms impossible to delete by arranging one long dependency chain. The core-game rules explicitly remove that protection. When a room must be deleted but other connections depend on it, the room can be reduced to a simple Path instead. A narrow snake can therefore lose the valuable room even if the route remains technically connected.
Build for redundancy and useful adjacencies, not for deletion immunity. Two practical routes around a central objective can reduce the damage caused by losing one tile, but no geometry guarantees permanent preservation. Destabilisation is an intended resource cost, and the correct question is whether a room produced enough value before it disappeared.
Room Tiers, Power and Reward Planning
Most room families improve through specific adjacency, power, conversion, sacrifice, or assassination interactions. Higher tiers strengthen their Temple modifier and can improve the device or encounter inside. The normal progression reaches Tier 3; Transcendent Progress on the Fate of the Vaal Atlas Tree allows Tier 4 upgrades. Do not assume that placing several copies of the same family together always upgrades it. Use the Console preview because each family follows its own relationship rules.
| Room family | Typical purpose | Best planning use |
|---|---|---|
| Path | Connects other tiles without adding a reward modifier | Secure access to a defined target and maintain alternate routes |
| Generator | Powers compatible rooms and adds Construct pressure | Place where its reach can affect several intended upgrades |
| Smithy and Armoury families | Equipment quality, item crafting, and related Temple modifiers | Prepare an eligible item before entering the room |
| Thaumaturge and Corruption families | Gem, corruption, or advanced modification outcomes | Use only after understanding the possible loss or transformation |
| Alchemy and Synthflesh families | Soul Core, experience, or conversion-oriented interactions | Combine with the specific adjacent family shown by the preview |
| Treasure and Sacrificial families | Reward chests, Unique-item interactions, and Vaal currency | Prioritize when the target reward is worth consuming or losing the room |
| Restricted Rooms | Exclusive vaults, extraction, high-level runes, or boss access | Connect and complete them in the run for which they were selected |
Room modifiers apply across normal Temple exploration and can make unrelated encounters much harder. Increased monster Effectiveness, additional packs, stronger Rares, and Waystone modifiers can overlap. These area modifiers do not apply to Xipocado or Atziri, but the player still has to survive the route leading to them. A layout with excellent theoretical rewards is a failed plan if the character cannot safely reach its device or boss entrance.
More rooms are not automatically better than a focused layout. Central rooms can exploit Efficient Arteries when surrounded on four sides, Generators gain value when several intended targets lie in range, and reward rooms need a live route. Build clusters around known interactions and allow filler Paths to remain filler when forcing an adjacency would isolate the actual objective.
Medallions and Destabilisation
Medallions modify Temple planning by adding or rerolling Room Cards, improving a room, protecting a tile, changing Restricted Room placement, or adding danger. The current storage cap is six. Room-based Medallions must be used during the planning stage, not from inside an active Temple, and each one should be assigned to a specific problem before it is consumed.
| Medallion function | Good use | Poor use |
|---|---|---|
| Protect a room once | Preserve a critical route, high-tier device, or boss-access support tile | Protect an ordinary room with no immediate purpose |
| Upgrade a room | Finish a planned tier breakpoint before the next run | Raise a room that remains unreachable |
| Reroll Room Cards | Replace a hand that cannot reach the current objective | Reroll after already securing every needed connection |
| Add a specific card | Complete a known adjacency or reward setup | Add a valuable room without a place or path for it |
| Modify Restricted Rooms | Create another valid slot or replace a weak offered reward | Spend it before the Architect route is ready |
| Add a Waystone modifier | Increase risk when the character already clears the Temple reliably | Juice a progression run that is already near the build's limit |
What Destabilisation removes
Entering the Temple marks a selection of rooms for Destabilisation. Those rooms are removed when the Temple closes, and some reward devices destabilise their own rooms after use. Completing the Architect or Atziri route causes a larger structural cost. Accessible Restricted Rooms always destabilise when the player exits the Temple, so they should be treated as one-run opportunities rather than permanent fixtures.
Before closing, visit every reachable priority room, use every intended device, and verify that no valuable branch was missed. If a Portal is opened inside the Temple, the current system creates a corresponding portal in the parent Vaal Ruins, making re-entry more convenient. That convenience does not make Destabilisation optional; the layout changes when the Temple is closed under its rules.
How to Reach Xipocado and Atziri
Xipocado, Royal Architect occupies the Architect's Chamber on the Temple grid. Build a continuous route from the entrance to that room and defeat him in a Temple of area level 75 or higher. The level requirement is essential: defeating him below it does not grant access to the Royal Access Chamber needed for Atziri.
After a valid Architect completion, use Xipocado's Console to choose and place Restricted Room Cards. Place the Royal Access Chamber in an allowed slot, connect it to the route, enter it in a later Temple run, and complete its interaction. Then extend the path to the fixed Atziri's Chamber on the far side. Reaching Atziri's door without completing the Royal Access Chamber does not unlock the fight.
- Collect six crystals from areas that produce a Temple of at least level 75.
- Build a continuous route from the entrance to the Architect's Chamber.
- Defeat Xipocado and use his console after the valid completion.
- Place the Royal Access Chamber in one of its permitted Restricted Room positions.
- Connect, enter, and complete the Royal Access Chamber.
- Maintain or rebuild a route to Atziri's fixed chamber.
- Enter the pinnacle encounter only after reviewing boss readiness and the structural cost of the attempt.
The complete grid, Medallion list, room families, boss-access details, and closure rules are covered in the dedicated PoE 2 Temple of Atziri guide. Use this Fate of the Vaal hub for the full Beacon-to-Atlas progression, then use the Temple guide when the main decision is an individual card, room, or route.
Fate of the Vaal Rewards
The mechanic has several reward layers rather than one universal payout. Beacon chests reward mapping participation. Ordinary Temple rooms add global modifiers and room-specific devices. Restricted Rooms provide specialized vaults or access functions. Xipocado enables the Restricted Room selection, while Atziri's Vault contains boss-specific rewards and current pinnacle currency.
| Reward source | Potential value | Main limitation |
|---|---|---|
| Vaal Beacon chest | Currency, gems, equipment, and occasional Temple-related items | Contents vary and no fixed value is guaranteed |
| Ordinary Temple room | Crafting devices, chests, Soul Cores, modifiers, experience, or Vaal currency | The room must be reachable and may destabilise after use |
| Restricted Room | Special vaults, extraction, runes, Uniques, or Royal Access | An accessible Restricted Room destabilises on exit |
| Architect progression | Restricted Room choices and Medallion development | The completion destabilises a larger part of the layout |
| Atziri's Vault | Atziri-specific rewards, Temple currency, and a chance for an Orb of Sacrifice | Requires the complete Royal Access and pinnacle route |
Infusers and item preparation
The core version separates Vaal Infusers by item category. Vaal Armourer's Infusers apply to Armour, Vaal Blacksmith's Infusers to Martial Weapons, Vaal Arcanist's Infusers to Wands, Staves, and Sceptres, and Vaal Catalysing Infusers to Jewellery. Every Infuser requires an item that already has at least 20 percent Quality. Check the item category and tooltip before committing a valuable base.
Temple crafting is target driven. Bring the equipment, gem, Soul Core, Unique, or other eligible item before opening a run containing the relevant device. Entering first and deciding later risks discovering that the target is in the stash, has the wrong item class, lacks required Quality, or is too valuable for the device's possible destructive outcome.
Orbs of Sacrifice
Atziri's Vault can drop one of four Orb of Sacrifice currencies. These items upgrade a supported Corrupted Enchantment at the cost of randomly removing an Explicit Modifier. That exchange can improve a carefully chosen corrupted item, but it is not a guaranteed net upgrade. Evaluate which explicit modifier could disappear and whether the enchantment improvement justifies that risk.
The official 0.5.4 patch notes added these currencies to the Vault reward pool. Their live trade price can change quickly, so an evergreen farming plan should target the function and availability of the reward rather than promising a fixed profit per Temple.
Character Readiness for Temple and Atziri
Temple difficulty comes from the crystal-derived area level, global room modifiers, added Waystone modifiers, dense monster packs, and boss mechanics. A character ready for ordinary mapping may still fail a heavily developed Temple. Readiness means repeatable clears, not one lucky completion.
| Readiness check | Ready signal | Warning signal |
|---|---|---|
| Defences | Resistances, avoidance or mitigation, and recovery remain reliable under Temple modifiers | Ordinary packs remove most of the character's life or Energy Shield immediately |
| Clear speed | Beacon monsters and normal Temple rooms die without prolonged kiting | Every room becomes a slow single-pack fight |
| Single-target damage | Rare monsters and Temple bosses can be damaged while mechanics are respected | The fight duration causes recovery, flask, or arena control to collapse |
| Modifier tolerance | The player can identify and reject combinations the build cannot handle | Waystones and Temple modifiers are accepted without reading them |
| Crafting preparation | Eligible targets are ready before the room is opened | The device is reached without an item worth using |
| Boss attempt | The route cost and expected reward justify possible structural loss | Atziri is attempted only because the door happens to be open |
If the build fails the same check repeatedly, identify whether the problem is damage, defence, item preparation, or Atlas progression. The broad Path of Exile 2 services page is useful only after that diagnosis; choosing a specific solution is better than treating every Temple failure as a generic need for more character levels.
A build entering its first level 75 Temple should favor consistency over maximum reward modifiers. Fix uncapped resistances, weak recovery, and the lowest-value gear slot before adding avoidable danger. If the whole setup remains the limitation rather than one item, a contextual PoE 2 starter build service can be considered before committing more crystals to failed progression runs.
Efficient Fate of the Vaal Farming Loop
An efficient loop alternates mapping and construction instead of stockpiling one side forever. Maps provide crystals and Atlas progress; the Temple turns those resources into rooms, Medallions, crafting opportunities, and boss access. Each phase should begin with one measurable objective.
- Choose the next goal: Atlas points, crystals, a room upgrade, a Restricted Room, Xipocado, or Atziri.
- Run Lira Vaal maps or use Temple Precursor Tablets at a difficulty the build clears consistently.
- Collect enough suitable crystals while avoiding the storage cap.
- Open the Console and secure a route to the chosen objective before placing luxury rooms.
- Review Temple modifiers and prepare any item needed by a crafting device.
- Clear all reachable priority rooms before closing the Temple.
- Record what Destabilised and choose the next construction target immediately.
Do not measure the mechanic by one lucky Vault or one weak set of Room Cards. Review several complete cycles and count useful outputs: Atlas points gained, crystals converted, target rooms completed, valuable devices used, and progress toward the next boss. This separates a sound route from short-term drop variance.
Common Fate of the Vaal Mistakes
Most expensive mistakes come from mixing old information with the current core version or from optimizing rewards before access. The following checks prevent those failures without relying on a temporary economy ranking.
- Following the old snake strategy: required deletions can now turn valuable rooms into simple Paths.
- Using the old Offerings to the Queen tooltip: it no longer grants additional Temple Currency from Beacon rewards.
- Collecting low-level crystals for an Atziri push: Temple level factors in the source areas of the spent crystals.
- Fighting Xipocado below Temple level 75: that completion cannot provide the Royal Access Chamber.
- Reaching Atziri's door without completing Royal Access: pathing alone does not unlock the encounter.
- Placing isolated rewards: an unreachable high-tier room has no practical value.
- Saving every Medallion: a full cap can waste later drops, while unused tools do not improve the current grid.
- Using a room-based Medallion inside the active Temple: those effects now belong to the planning stage.
- Entering a Restricted Room without finishing it: accessible Restricted Rooms destabilise when the Temple is exited.
- Bringing the wrong Infuser target: every Infuser has an item category and a 20 percent Quality requirement.
- Assuming Atziri is the only value: a well-targeted crafting or vault room can justify a run before the boss route is ready.
- Forcing excessive Waystone modifiers: more theoretical reward cannot recover portals lost to an unreadable layout.
Final Verdict
Fate of the Vaal is best approached as a permanent progression loop, not a single dungeon to rush. Ancient Beacons supply access, Lira Vaal supplies dedicated Atlas points and reliable crystals, the Console converts those resources into a persistent layout, and the Temple pays out only when routes, room interactions, and character readiness align.
Start by reaching a valid level 75 Temple and building a reliable route to Xipocado. Add room scaling and Tier 4 specialization after access is stable, then choose between Restricted Rooms, Temple currency, crafting devices, or Atziri rewards. Expect Destabilisation, use Medallions to solve defined problems, and judge every boss attempt against the cost of rebuilding. That approach remains effective even when individual reward values or passive numbers change.