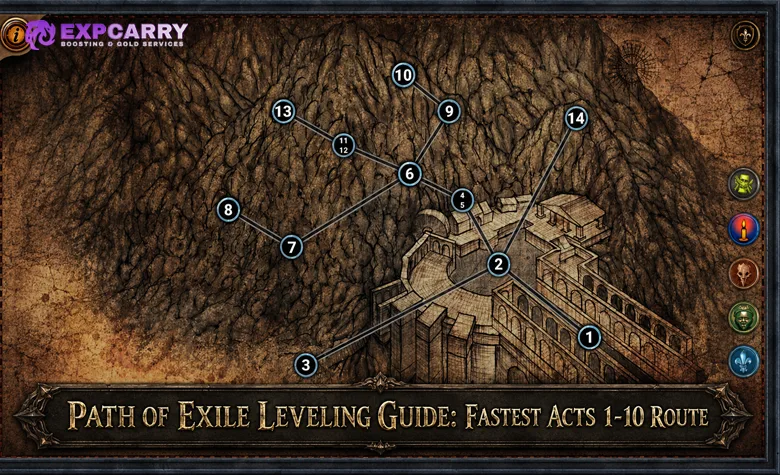
The fastest reliable route through Path of Exile Acts 1-10 is not a full-clear route. Move toward each act objective, kill compact monster packs that are already in your path, collect permanent passive points, complete the required Labyrinth Trials, and leave low-value side areas alone. Your goal is to reach Maps with a functional build, capped or nearly capped elemental resistances, and no important campaign rewards missing.
This guide follows the established ten-act campaign structure used for Path of Exile 3.29. Optional league encounters can be profitable, but they should not interrupt a speed-focused campaign unless they offer an immediate upgrade.
PoE Campaign Route at a Glance
The table below gives you the main route through every act. Use it as a quick reference while playing, then check the detailed sections for passive point quests, Trials, gearing stops, and dangerous transitions.
| Act | Main route | Important detours | Final boss |
|---|---|---|---|
| Act 1 | Coast, Mud Flats, Submerged Passage, Ledge, Prison, Ship Graveyard, Cavern of Anger | Tidal Island, Flooded Depths, Allflame, Lower Prison Trial | Merveil |
| Act 2 | Crossroads, Chamber of Sins, Western Forest, Wetlands, Vaal Ruins, Ancient Pyramid | Bandits, Golden Hand, Thaumetic Seal, two Trials | Vaal Oversoul |
| Act 3 | Crematorium, Sewers, Battlefront, Docks, Solaris, Lunaris, Imperial Gardens | Platinum Busts, three Trials, optional Library | Dominus |
| Act 4 | Dried Lake, Mines, Crystal Veins, Kaom, Daresso, Belly of the Beast, Harvest | Deshret's Spirit | Malachai |
| Act 5 | Control Blocks, Chamber of Innocence, Ruined Square, Ossuary, Cathedral Rooftop | Miasmeter and Kitava's Torments | Kitava |
| Act 6 | Coast, Mud Flats, Karui Fortress, Prison, Western Forest, Beacon, Brine King's Reef | Twilight Strand, Tukohama, Abberath, Ryslatha, Lower Prison Trial | Brine King |
| Act 7 | Crossroads, Crypt, Chamber of Sins, Ashen Fields, Northern Forest, Causeway, Vaal City | Maligaro, Gruthkul, Kishara's Star, two Trials | Arakaali |
| Act 8 | Toxic Conduits, Doedre's Cesspool, Bath House, Lunaris Temple, Quay, Solaris Temple | Yugul, Tolman, Gemling Legion, Bath House Trial | Solaris and Lunaris |
| Act 9 | Vastiri Desert, Foothills, Boiling Lake, Tunnel, Quarry, Refinery, Rotting Core | Shakari, Garukhan, Tunnel Trial | Depraved Trinity |
| Act 10 | Ravaged Square, Torched Courts, Desecrated Chambers, Canals, Feeding Trough | Vilenta, Ossuary Trial, resistance and gear check | Kitava |
Prepare a Build That Can Level Without Expensive Gear

A fast route cannot rescue a build that needs a rare unique item before it starts working. Choose a leveling skill with reliable base damage, easy support gems, and enough area coverage to clear packs while moving. Your passive tree should improve the skill you are currently using instead of rushing toward endgame nodes that provide no immediate value.
If you have not selected a starter yet, review the PoE 3.29 league starter guide before creating the character. A good starter should finish the campaign with ordinary rare gear and transition into Maps without a complete rebuild.
- Use one main clearing skill and one stronger single-target setup when needed.
- Equip a movement skill as soon as your build can use one comfortably.
- Keep a Quicksilver Flask active while crossing open areas.
- Prioritize linked sockets, life, resistances, and useful weapon modifiers.
- Replace weapons regularly if your damage depends on weapon attacks.
- Do not spend valuable currency perfecting equipment that will be replaced within one or two acts.
In PoE 3.29, gems can be placed into equipment sockets even when their colors do not match. A red, green, or blue socket grants +10% Quality when its color matches the socketed gem, but a color mismatch no longer prevents you from using a linked setup. During the campaign, correct links and useful item modifiers matter more than color optimization.
PoE 3.29 also places a Crafting Bench in every town from Act 2 onward. Use inexpensive life, resistance, attribute, or damage crafts to fix immediate weaknesses without interrupting the route for a hideout visit.
How to Stay at the Right Level While Moving Fast
You do not need to clear every zone. Kill dense groups, magic packs, rare monsters that do not require a long fight, and enemies blocking narrow passages. Ignore isolated monsters and avoid walking backward for loot that is unlikely to improve your character.
If your damage remains comfortable and you are close to the area level, keep moving. If you fall several levels behind, clear more packs in the next linear zone instead of stopping for a dedicated grind. The Ledge, Docks, Dried Lake, Blood Aqueduct, and late Act 10 zones are convenient recovery areas because their layouts are relatively direct.
- Pick up currency, useful rare bases, linked items, and equipment that matches an immediate need.
- Use a strict leveling filter to reduce time spent reading weak drops.
- Return to town when a quest already sends you there, not whenever your inventory becomes half full.
- Carry Portal Scrolls so you can turn in side objectives without running backward.
- Check vendors after gaining levels when you need movement speed boots, links, flasks, or a weapon upgrade.
Explore services related to this guide, selected from our Path of Exile catalog.
View All Path of Exile Services


Act 1 Fast Leveling Route
Kill Hillock, enter Lioneye's Watch, and move through the Coast. Take the Coast waypoint and complete Tidal Island for the Medicine Chest and an early Quicksilver Flask. This is one of the few optional-looking detours that directly improves the rest of the run.
- Cross the Mud Flats, collect all three glyphs, and open the entrance to the Submerged Passage.
- Take the Submerged Passage waypoint and enter the Flooded Depths.
- Kill the Dweller of the Deep, return to town, and collect the passive point.
- Continue through the Ledge and Climb into the Lower Prison.
- Complete the Lower Prison Trial if it has not already been unlocked in the current league.
- Kill Brutus and continue through Prisoner's Gate to the Ship Graveyard.
- Find the Allflame in the Ship Graveyard Cave, defeat Fairgraves, and claim another passive point.
- Continue through the Cavern of Wrath and Cavern of Anger to Merveil.
Cold resistance makes the Merveil fight more forgiving. Do not farm for a perfect item, but equip a Sapphire Ring or another source of cold resistance if one is readily available.
Act 2 Fast Leveling Route
Enter the Old Fields and reach the Crossroads waypoint. The Great White Beast in the Den is optional, but its Quicksilver Flask reward can be worthwhile if you want a second movement flask.
- Clear the Chamber of Sins, complete its Trial, defeat Fidelitas, and take the Baleful Gem.
- Use the Crossroads waypoint to reach the Broken Bridge and resolve Kraityn's part of Deal with the Bandits.
- Enter the Crypt through the Fellshrine Ruins, complete its Trial, and retrieve the Golden Hand for a passive point.
- Travel through the Riverways to the Western Forest.
- Resolve Alira's bandit objective, kill Captain Arteri, open the Thaumetic Seal, and find the Weaver's Chambers.
- Defeat the Weaver and collect Maligaro's Spike.
- Return to Act 1 and speak to Bestel after opening the seal to complete The Way Forward.
- Enter the Wetlands, resolve Oak's objective, remove the roots, and proceed through the Vaal Ruins.
- Cross the Northern Forest and Caverns, then defeat the Vaal Oversoul in the Ancient Pyramid.
Your bandit decision must match your build. Killing all three bandits grants one passive skill point, while helping one grants that bandit's specific bonus. Do not automatically kill all three if your build guide requires a bandit reward.
Act 3 Fast Leveling Route
Rescue Clarissa in the City of Sarn, enter town, and go directly to the Crematorium. Complete the Trial, defeat Piety, and return Tolman's Bracelet to Clarissa to open the Sewers.
- Collect all three Platinum Busts while crossing the Sewers and deliver them to Hargan for a passive point.
- Take the Marketplace waypoint and complete the Catacombs Trial if needed.
- Collect the Ribbon Spool in the Battlefront and Thaumetic Sulphite in the Docks.
- Visit Dialla in Solaris Temple and use the Infernal Talc to remove the Sewers blockage.
- Defeat General Gravicius in the Ebony Barracks.
- Kill Piety in Lunaris Temple, collect the Tower Key, and speak to Grigor in town to claim the Piety's Pets passive point.
- Enter the Imperial Gardens and complete its Trial.
- Climb the Sceptre of God and defeat Dominus.
The Library is optional. Complete it only when your build needs a gem that is not available from normal class rewards. If you can wait, clearing the Twilight Strand in Act 6 unlocks Lilly Roth's wider gem inventory.
Complete the First Labyrinth Without Losing Momentum
Once the required early Trials are complete and your character has enough damage and defenses, run the Normal Labyrinth for the first two Ascendancy points. Many builds gain more speed from their first Ascendancy than they lose by taking this detour.
Do not enter with empty flasks, uncapped basic defenses, or an unfinished main link. If the Labyrinth feels slow or dangerous, finish another act and return with better gear. Players who prefer assistance with repeated campaign progression can also review the available PoE leveling options, but the route in this guide is designed to remain fully usable without a service.
Act 4 Fast Leveling Route
Enter Highgate, travel to the Dried Lake, kill Voll, and use Deshret's Banner to open the Mines. In Mines Level 2, free Deshret's Spirit before entering the Crystal Veins. Turn in the quest for its passive point.
- Take the Crystal Veins waypoint.
- Complete the Kaom branch and collect the Eye of Fury.
- Return to the Crystal Veins, complete the Daresso branch, and collect the Eye of Desire.
- Open the route into the Belly of the Beast.
- Defeat Piety and continue into the Harvest.
- Kill Shavronne, Maligaro, and Doedre to open Malachai's encounter.
- Defeat Malachai and climb the Ascent into Act 5.
Act 4 exposes weak damage setups. Attack builds should check their weapon before entering Kaom's Dream or Daresso's Dream. Spell builds should verify that their main gem is leveled and supported by a useful linked setup.
Act 5 Fast Leveling Route
Cross the Slave Pens, kill Overseer Krow, and enter the Control Blocks. Pick up the Miasmeter before leaving the area, defeat Justicar Casticus, and deliver the item to Vilenta for a passive point.
- Move through Oriath Square and the Templar Courts to the Chamber of Innocence.
- Defeat Avarius and Innocence.
- Cross the Torched Courts and take the Ruined Square waypoint.
- Enter the Ossuary and retrieve the Sign of Purity.
- Enter the Reliquary and collect all three of Kitava's Torments for another passive point.
- Continue to the Cathedral Rooftop and defeat Kitava.
Defeating Act 5 Kitava applies the first permanent resistance penalty. Check your character sheet as soon as you reach Act 6. Repair fire, cold, and lightning resistance with new gear or basic crafting bench modifiers before rushing into later bosses.
Act 6 Fast Leveling Route
Clear the Twilight Strand if you need access to Lilly Roth's gem inventory. Then take the Coast waypoint and move through the Mud Flats into the Karui Fortress.
- Defeat Tukohama and collect The Father of War passive point reward in town.
- Cross the Ridge and Lower Prison, completing the Trial on your first character of the league.
- Climb Shavronne's Tower and defeat Shavronne and Brutus.
- Kill Abberath through the Prisoner's Gate detour and claim The Cloven One passive point.
- Travel through the Western Forest and Riverways to the Wetlands.
- Destroy Ryslatha's nests, defeat Ryslatha, and claim The Puppet Mistress passive point.
- Continue through the Southern Forest, Cavern of Anger, and Beacon.
- Light the Beacon, sail to the Brine King's Reef, and defeat the Brine King.
Fire resistance helps against Tukohama and Abberath, while cold resistance is valuable against the Brine King. Swapping one resistance ring for a boss is faster than repeatedly dying with an unsuitable setup.
Act 7 Fast Leveling Route
Reach the Crossroads through the Broken Bridge, then enter the Crypt. Complete its Trial, collect Maligaro's Map, and take it to the Chamber of Sins.
- Use the Map Device in the Chamber of Sins and defeat Maligaro.
- Complete the Chamber of Sins Level 2 Trial and open the secret passage.
- Cross the Den and Ashen Fields, then defeat Greust.
- Enter the Dread Thicket, collect the Fireflies, and defeat Gruthkul for a passive point.
- Continue through the Northern Forest to the Causeway.
- Collect Kishara's Star near the end of the Causeway and turn it in for a passive point.
- Cross the Vaal City and Temple of Decay, then defeat Arakaali.
The Master of a Million Faces reward from the Greust and Ralakesh objective also grants a passive point. Speak to the appropriate town NPC before leaving the act so the reward is not forgotten.
Run the Cruel Labyrinth Before the Final Acts
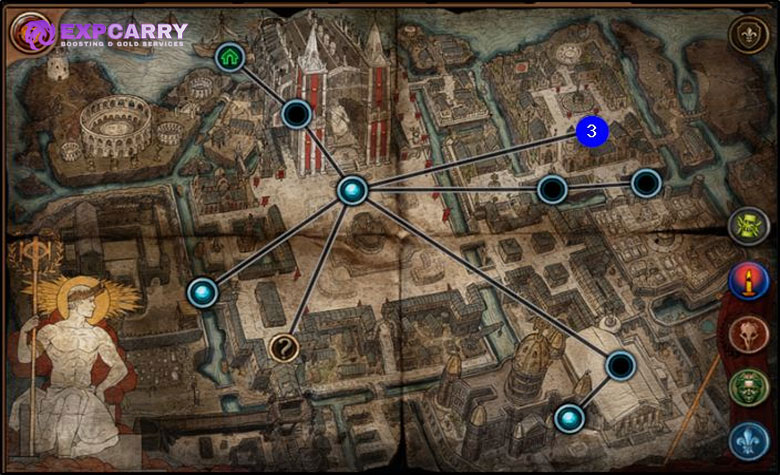
After completing the required Act 6 and Act 7 Trials, run the Cruel Labyrinth when your build is stable. The next two Ascendancy points often provide an important defensive layer, damage multiplier, or movement benefit.
Enter with updated flasks and enough life to survive traps and Izaro's attacks. You do not need perfect equipment, but a character that is already struggling against ordinary Act 7 enemies should upgrade before attempting the Labyrinth.
Act 8 Fast Leveling Route
Travel through the Toxic Conduits and defeat Doedre in the Cesspool. The act then divides into Lunaris and Solaris routes, both of which must be completed before the Harbour Bridge opens.
- Cross the Grand Promenade and enter the Bath House.
- Complete the Bath House Trial.
- Enter the High Gardens, defeat Yugul, and claim the Reflection of Terror passive point.
- Continue through the Lunaris Concourse and defeat Dusk for the Moon Orb.
- Return through the Toxic Conduits and enter the Quay.
- Collect the Ankh of Eternity, defeat Tolman, and speak to Clarissa for a passive point.
- Pass through the Grain Gate and kill the Gemling Legion for another passive point.
- Cross the Imperial Fields and Solaris Temple, then defeat Dawn for the Sun Orb.
- Return to the Lunaris Concourse, enter the Harbour Bridge, and defeat Solaris and Lunaris.
PoE 3.29 moves the Solaris Temple Level 1 waypoint closer to the Level 2 entrance. Activate it as you pass so an accidental death or disconnect does not force a long repeat run.
Act 9 Fast Leveling Route
Cross the Blood Aqueduct and enter Highgate. If your character is underleveled or missing a useful linked item, Blood Aqueduct is a convenient place to clear additional packs. Otherwise, continue immediately through the Descent into the Vastiri Desert.
- Find the Storm Blade in the Vastiri Desert and return to town for the Bottled Storm.
- Open the Oasis, defeat Shakari, and claim the Queen of the Sands passive point.
- Travel through the Foothills and defeat the Basilisk in the Boiling Lake.
- Enter the Tunnel and complete its Trial.
- Reach the Quarry and activate its waypoint.
- Defeat Garukhan at the Shrine of the Winds for The Ruler of Highgate passive point.
- Enter the Refinery, defeat General Adus, and collect the Trarthan Powder.
- Return to the Quarry and enter the Belly of the Beast.
- Defeat Doedre, Maligaro, Shavronne, and the Depraved Trinity in the Rotting Core.
Act 9 is the right time to inspect your final campaign setup. If your build is far behind its expected damage or defenses, compare it with the available Path of Exile progression options or correct the underlying gear, gem, and passive tree problems before entering Act 10.
Act 10 Fast Leveling Route
Cross the Cathedral Rooftop, defeat Plaguewing, and enter the Ravaged Square. Activate the waypoint before moving into the Torched Courts and Desecrated Chambers.
- Defeat Avarius in the Sanctum of Innocence and return to town.
- Use the Ravaged Square waypoint and enter the Control Blocks.
- Defeat Vilenta and claim the Vilenta's Vengeance passive point.
- Complete the Ossuary Trial if it is still required for your Merciless Labyrinth access.
- Return to the Ravaged Square and speak to Innocence.
- Cross the Canals and Feeding Trough.
- Complete your final resistance and flask check before entering the Altar of Hunger.
- Defeat Kitava, enter the Oriath Docks, and speak to Lani for the two passive skill points awarded by An End to Hunger.
Do not rush into the Kitava fight with broken resistances and an outdated life flask. A short gear check costs less time than repeated deaths and leaves the character in much better condition for Maps.
Mandatory Passive Point Quest Checklist
The following quests provide permanent passive points or determine your bandit reward. Complete them during the route or return for them before serious Atlas progression.
| Act | Quest |
|---|---|
| Act 1 | The Dweller of the Deep, The Marooned Mariner, The Way Forward after opening the Act 2 seal |
| Act 2 | Deal with the Bandits, Through Sacred Ground |
| Act 3 | Victario's Secrets, Piety's Pets |
| Act 4 | An Indomitable Spirit |
| Act 5 | In Service to Science, Kitava's Torments |
| Act 6 | The Father of War, The Cloven One, The Puppet Mistress |
| Act 7 | The Master of a Million Faces, Queen of Despair, Kishara's Star |
| Act 8 | Love is Dead, Reflection of Terror, The Gemling Legion |
| Act 9 | Queen of the Sands, The Ruler of Highgate |
| Act 10 | Vilenta's Vengeance, An End to Hunger |
Type /passives in chat after the campaign. The game displays the passive point quests your character has completed and helps identify rewards you forgot to collect. The campaign grants 23 passive skill points from quests, or 24 if you kill all three bandits and take Eramir's passive point.
Final Gear Check Before Maps
Act 10 Kitava applies the second resistance penalty. Your character enters Maps with a total campaign penalty of 60% to fire, cold, and lightning resistance, so equipment that looked acceptable before the fight may leave major defensive gaps afterward.
- Bring elemental resistances back toward the normal 75% cap.
- Use a current life flask with a useful recovery modifier.
- Equip a movement flask and defensive utility flasks suited to the build.
- Make sure the main skill has a functional linked setup.
- Check that attributes are high enough to level every required gem.
- Replace low-level weapons when the build scales from weapon damage.
- Complete the Merciless Labyrinth before Kitava or shortly after entering Maps.
- Use the crafting bench to repair one or two missing resistances instead of replacing an otherwise strong item.
Transition From the Campaign to Maps
After defeating Kitava and collecting Lani's reward, continue through the post-campaign sequence until you reach the Map Device and Atlas introduction. Place the provided Map into the device, complete it, and speak to Kirac when instructed.
- Run the first available low-tier Maps that your build can clear safely.
- Complete Map bonus objectives whenever the required item rarity is affordable.
- Build a small Map pool instead of repeatedly purchasing individual Maps.
- Prioritize life, capped resistances, and reliable damage before adding expensive luxury modifiers.
- Finish missing passive points and Labyrinth progression before pushing difficult Map modifiers.
If campaign completion is finished but repeated Atlas objectives are the new bottleneck, a focused PoE Atlas boost is more relevant than additional character leveling. Players progressing independently should begin with low-tier Maps and increase difficulty only when clear speed and survivability remain consistent.
Common PoE Leveling Mistakes That Waste Time
Most slow campaign runs are caused by repeated small delays rather than one difficult boss. Fixing these habits produces a more reliable improvement than searching for a perfect speedrun build.
- Clearing every monster: Fight valuable packs in your route and keep moving.
- Returning to town too often: Combine quest turn-ins, vendor checks, and gem purchases into one visit.
- Ignoring movement speed: Upgrade boots and maintain Quicksilver Flask charges.
- Overcrafting temporary gear: Use cheap fixes and save valuable currency for equipment that will last.
- Skipping passive point quests permanently: Delay a long detour if necessary, but verify everything with the /passives command.
- Entering bosses with the wrong resistance: Keep useful resistance rings or bench crafts available.
- Following an endgame passive tree too early: Allocate nodes that make the current leveling skill work.
- Starting Maps with weak defenses: Repair the Act 10 resistance penalty before adding difficult Map modifiers.
Final PoE Leveling Route Summary
The fastest practical route through Acts 1-10 is built around constant forward movement, short permanent-reward detours, timely Ascendancy upgrades, and minimal gear management. Take waypoints, complete passive point quests, run the required Trials, kill dense packs while traveling, and avoid optional content that does not improve the current character.
Before entering Maps, use the /passives command, complete the appropriate Labyrinths, repair elemental resistances, update flasks, and confirm that the main skill has a functional linked setup. These checks turn campaign completion into a clean Atlas start instead of moving the same unresolved problems into harder content.
Changelog
July 2026: Route verified for the established ten-act campaign and updated for announced Path of Exile 3.29 changes, including flexible gem socketing, crafting benches in towns from Act 2 onward, and the relocated Solaris Temple Level 1 waypoint in Act 8.