Black Temple is a 25-player level 70 raid in Shadowmoon Valley and the home of nine mandatory encounters ending with Illidan Stormrage. In Burning Crusade Classic Anniversary, it opens globally on August 27, 2026 at 3:00 p.m. PDT or 23:00 BST alongside the Battle for Mount Hyjal. The official Phase 3 announcement also confirms the Ashtongue Deathsworn reputation, the complete boss roster, and the requirement to finish the Black Temple attunement before entering.
This guide covers raid preparation, a practical composition, every boss mechanic, step-by-step tactics, all boss loot, Tier 6 tokens, notable trash drops, and profession recipes. The strategies are based on the established TBC Classic encounters and should be checked against live Anniversary tuning after the raid opens.
Black Temple Requirements and Raid Overview
| Category | Black Temple details |
|---|---|
| Level and raid size | Level 70, 25 players |
| Location | Eastern Shadowmoon Valley, Outland; the raid entrance is near coordinates 71, 46 |
| Opening date | August 27, 2026 at 3:00 p.m. PDT or 23:00 BST |
| Attunement | Required; complete the questline that ends with the Medallion of Karabor |
| Bosses | Nine encounters, all required for a full clear |
| Raid reputation | Ashtongue Deathsworn |
| Tier 6 slots | Shoulders from Mother Shahraz, legs from the Illidari Council, and chest from Illidan |
| Standard loot levels | Item level 141 boss and trash epics, item level 146 Tier 6 pieces, and item level 151 non-tier Illidan loot |
Attunement is not a short entry quest. Its later checkpoints include Al'ar in Tempest Keep and Rage Winterchill in Mount Hyjal before the final event at the temple entrance. Players who are still blocked by those raid-dependent steps can review the Black Temple Attunement Boost as an optional way to organize and complete the remaining chain.
Recommended Raid Composition and Assignments
A stable progression roster starts with three physical tanks, seven healers, and fifteen damage dealers. The exact healer count can drop after the raid becomes familiar, but early attempts benefit from extra recovery on Naj'entus, Gurtogg, Mother Shahraz, the Council, and Illidan. Composition matters less than covering the special jobs below.
- Prepare three tanks for Gurtogg's rotation and Mother Shahraz's Saber Lash.
- Assign two physical tanks with high Fire Resistance sets for the Flames of Azzinoth on Illidan.
- Assign one Warlock with a Shadow Resistance set to tank Illidan's demon form.
- Keep one Mage ready to Spellsteal Dampen Magic and tank High Nethermancer Zerevor on the Illidari Council.
- Bring dependable interrupts for Reliquary of Souls and Lady Malande.
- Use Priests, Paladins, Shamans, Druids, or other available dispellers to cover magic debuffs and emergency recovery.
- Maintain a balanced ranged group for target swaps, spread mechanics, and Illidan's airborne phase.
Make the unusual tank assignments before raid night. The two Flame tanks should approach the Fire Resistance cap after buffs, and the Warlock tank should do the same for Shadow Resistance while retaining enough health and spell hit to hold Illidan reliably. Non-tanks should also carry a Mother Shahraz Shadow Resistance set; roughly 174 resistance from gear plus Prayer of Shadow Protection is a common progression target, not an entry requirement written into the instance.
Black Temple Boss Order and Progression
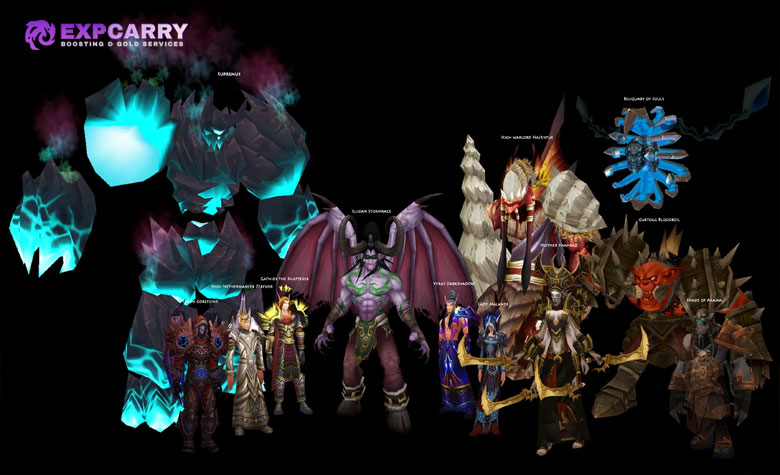
| Order | Encounter | Main progression test | Major reward |
|---|---|---|---|
| 1 | High Warlord Naj'entus | Spine handling and coordinated raid healing | Rising Tide, The Maelstrom's Fury |
| 2 | Supremus | Tank control, kiting, and ground awareness | The Brutalizer, Legionkiller |
| 3 | Shade of Akama | Add control and a short damage race | Ring of Deceitful Intent |
| 4 | Teron Gorefiend | Shadow of Death execution | Soul Cleaver |
| 5 | Reliquary of Souls | Fixate control, interrupts, and threat discipline | Torch of the Damned |
| 6 | Gurtogg Bloodboil | Three-tank rotation, Bloodboil soaks, and Fel Rage healing | Shadowmoon Insignia |
| 7 | Mother Shahraz | Shadow damage survival and Fatal Attraction movement | Tier 6 shoulder tokens |
| 8 | The Illidari Council | Four-target control and interrupt coverage | Tier 6 leg tokens, Madness of the Betrayer |
| 9 | Illidan Stormrage | Five phases and three specialized tank jobs | Tier 6 chest tokens, Warglaives of Azzinoth |
Shade of Akama, Teron Gorefiend, Reliquary of Souls, and Gurtogg Bloodboil form the middle progression block and can be approached in a different order once Supremus is dead. All four must be defeated before Mother Shahraz becomes available. The order above is a practical route because it introduces the coordination checks gradually, but a guild can move Gurtogg or Reliquary according to its strongest assignments.
Explore services related to this guide, selected from our TBC Raids catalog.
View All TBC Raids Services


High Warlord Naj'entus Strategy and Loot
Naj'entus is a raid-survival check. Spread players by more than six yards so Needle Spine does not strike several targets. Impaling Spine pins one player and continues dealing damage until another raider clicks the visible spine; the rescuer receives a Naj'entus Spine that must be kept for the next Tidal Shield.
- Spread the raid while keeping every group inside reliable healing range.
- Free each Impaling Spine target immediately and confirm that at least one spine is stored.
- When Tidal Shield appears, stop wasting damage into the immunity and top the entire raid.
- Have one assigned player throw a stored spine at the shield only after the healing caller confirms readiness.
- Use Healthstones, defensive cooldowns, or Frost protection when needed to survive the resulting Tidal Burst.
- Resume the spread formation and repeat without throwing the last available spine early.
| Loot category | Items |
|---|---|
| Armor and accessories | Ring of Calming Waves, Ring of Captured Storms, Slippers of the Seacaller, Guise of the Tidal Lurker, Mantle of Darkness, Helm of Soothing Currents, Fists of Mukoa, Boots of Oceanic Fury, Eternium Shell Bracers, Pearl Inlaid Boots, Tide-stomper's Greaves |
| Weapons | Rising Tide, The Maelstrom's Fury, Halberd of Desolation |
Supremus Strategy and Loot
Supremus alternates between a stationary tank phase and a mobile gaze phase. During the first phase, the main tank controls facing while a second durable tank remains in melee range and high on current health to absorb Hateful Strikes. Everyone moves out of Molten Flame trails instead of trying to heal through them.
- Position the main tank in front, the Hateful Strike tank nearby, and all other melee behind the boss.
- Keep the secondary tank topped because Hateful Strike favors a high-health melee threat target other than the main tank.
- When the gaze phase begins, the fixated player runs away without cutting through the raid.
- All players avoid Volcanic Geysers and keep enough distance to react if the gaze changes.
- At the return to the tank phase, stop damage briefly while the main tank rebuilds threat after the transition.
| Loot category | Items |
|---|---|
| Armor, accessories, and relic | Band of the Abyssal Lord, Choker of Endless Nightmares, Idol of the White Stag, Waistwrap of Infinity, Nether Shadow Tunic, Naturalist's Preserving Cinch, Bands of the Coming Storm, Wraps of Precise Flight, Pauldrons of Abyssal Fury |
| Weapons and shield | The Brutalizer, Syphon of the Nathrezim, Legionkiller, Felstone Bulwark |
Shade of Akama Strategy and Loot
The first part of this encounter is an add-control fight. Six Ashtongue Channelers hold the Shade in place, while waves enter from both sides of the room and Ashtongue Defenders move toward Akama. The raid must free the Shade without allowing the supporting enemies to overwhelm Akama or the healers.
- Split damage dealers between the Channelers while two side tanks collect doorway waves.
- Kill Ashtongue Spiritbinders first because their healing extends the add phase; interrupt and control other casters where possible.
- Use a separate tank or immediate focus fire on Defenders moving directly toward Akama.
- Once every Channeler dies, stop spending damage on expendable adds and attack the Shade.
- Off-tank remaining enemies while the raid burns the Shade before it defeats Akama.
| Loot category | Items |
|---|---|
| Armor and accessories | Ring of Deceitful Intent, Amice of Brilliant Light, Focused Mana Bindings, Wristbands of Divine Influence, Kilt of Immortal Nature, Shadow-walker's Cord, Shoulders of the Hidden Predator, Spiritwalker Gauntlets, Flashfire Girdle, Myrmidon's Treads, Grips of Silent Justice, Praetorian's Legguards, The Seeker's Wristguards |
| Off-hand | Blind-Seers Icon |
Teron Gorefiend Strategy and Loot
Teron is simple for most of the raid and unforgiving for each player selected by Shadow of Death. The debuff kills its target after 55 seconds and turns that player into a Vengeful Spirit. Four Shadowy Constructs then spawn and move toward the raid; the spirit player is responsible for stopping and killing them before they reach living players.
- Tank Teron facing away from the raid and place ranged players and healers together at a controlled distance.
- Dispel Incinerate quickly, give extra healing to players affected by Crushing Shadows, and stabilize the random Shadow Bolt damage from Doom Blossoms.
- A Shadow of Death target moves to the assigned far corner late in the debuff, without leaving healing range too early.
- After becoming a spirit, use Spirit Lance for focused damage and alternate Spirit Chains and Spirit Volley to slow, control, and weaken all four Constructs.
- Living ranged players continue attacking Teron; they cannot replace the ghost player's Construct control.
- Do not place Shadow of Death near the raid, because escaped Constructs can wipe the group within seconds.
| Loot category | Items |
|---|---|
| Armor, cloak, and relic | Shadowmoon Destroyer's Drape, Totem of Ancestral Guidance, Cowl of Benevolence, Robe of the Shadow Council, Botanist's Gloves of Growth, Insidious Bands, Softstep Boots of Tracking, Gauntlets of Enforcement, Girdle of Lordaeron's Fallen |
| Weapons | Soul Cleaver, Rifle of the Stoic Guardian, Twisted Blades of Zarak |
Gurtogg Bloodboil Strategy and Loot
Gurtogg combines continuous tank pressure with planned raid soaks. Acidic Wound stacks, reduces armor, and lasts long enough to require a three-tank rotation. Bloodboil targets the five farthest players every ten seconds, so uncontrolled positioning will repeatedly stack the debuff on the same people.
- Use three tanks and rotate the active target so Acidic Wound can expire; be ready for Bewildering Strike to force an immediate swap.
- Keep Gurtogg faced away from the raid because Fel-Acid Breath and Arcing Smash are frontal attacks.
- Create three groups of five Bloodboil soakers. One group moves farthest from the boss for each cast, then returns while the next group takes its turn.
- Before Fel Rage, spread enough that the chosen target can be isolated without clipping others with Fel Geyser or frontal attacks.
- All available healers focus the Fel Rage target, while that player uses personal mitigation and self-healing. Blessing of Protection is a powerful emergency option.
- Use damage cooldowns during Fel Rage because Insignificance removes threat generation from everyone except the selected target.
| Loot category | Items |
|---|---|
| Armor and accessories | Unstoppable Aggressor's Ring, Shroud of Forgiveness, Blood-cursed Shoulderpads, Garments of Temperance, Belt of Primal Majesty, Vest of Mounting Assault, Leggings of Divine Retribution, Girdle of Mighty Resolve, Girdle of Stability, Shadowmoon Insignia |
| Weapons | Messenger of Fate, Staff of Immaculate Recovery, Wand of Prismatic Focus |
Reliquary of Souls Strategy and Loot
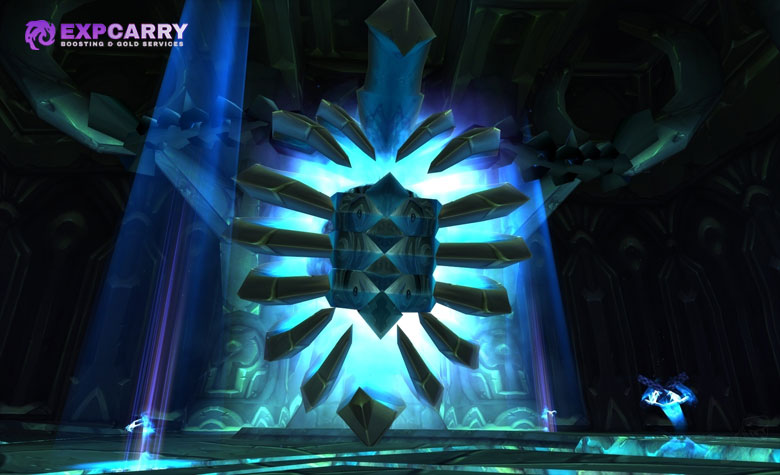
Reliquary of Souls, also named Reliquary of the Lost in some databases, is a three-phase encounter: Essence of Suffering, Essence of Desire, and Essence of Anger. The soul gauntlet before the room respawns rapidly, so the raid should move as one group, stop only to clear controlled packs, and avoid leaving totems or traps behind.
- During Essence of Suffering, healing and normal regeneration are disabled. Rotate the closest player to control Fixate, dispel Soul Drain, and use avoidance cooldowns for Enrage.
- Kill the intermission souls close to the raid so their deaths restore health and mana before the next essence.
- During Essence of Desire, every damage dealer receives half of dealt damage back. Pace burst, maintain a strict interrupt rotation on Spirit Shock, and remove or Spellsteal Rune Shield immediately.
- A Warrior tank can reflect Deaden onto the boss, but the raid must moderate damage because reflected self-damage rises at the same time.
- During Essence of Anger, establish a large tank threat lead before full damage. Avoid unnecessary taunts because Seethe increases raid threat and the boss's attack speed.
- Face Soul Scream away from the raid, keep the tank's mana or rage low before each cast, and top players marked by Spite before its delayed Nature damage.
| Loot category | Items |
|---|---|
| Armor and accessories | Translucent Spellthread Necklace, Gloves of Unfailing Faith, Elunite Empowered Bracers, Grips of Damnation, Naturewarden's Treads, The Wavemender's Mantle, Boneweave Girdle, Dreadboots of the Legion, Crown of Empowered Fate, Pendant of Titans |
| Weapons and off-hand | Naaru-Blessed Life Rod, Touch of Inspiration, Torch of the Damned |
Mother Shahraz Strategy and Loot
Mother Shahraz is the raid's primary Shadow Resistance check and the first source of Tier 6 tokens. Three tanks must stand together in front of her to split Saber Lash. Everyone else stays away from the tank group, and healers and casters remain outside the range of Silencing Shriek.
- Equip the planned Shadow Resistance set without breaking essential set bonuses or the character's ability to perform its role.
- Place three tanks together in front of Shahraz and divide the remaining raid into healing clusters around the room.
- Players linked by Fatal Attraction immediately run in different safe directions until the links break. Never cross the tank position.
- Use walls or reliable room geometry to reduce dangerous knockback travel, but do not stack so tightly that avoidable effects become harder to read.
- Casters adjust to Prismatic Shield instead of repeatedly using a damage school that is currently reduced.
- Save healing and defensive cooldowns for overlapping beams, Fatal Attraction, and the final burn below ten percent.
| Loot category | Items |
|---|---|
| Tier 6 shoulder tokens | Pauldrons of the Forgotten Conqueror, Pauldrons of the Forgotten Vanquisher, Pauldrons of the Forgotten Protector |
| Other loot | Nadina's Pendant of Purity, Tome of the Lightbringer, Leggings of Devastation, Shadowmaster's Boots, Blade of Savagery, Heartshatter Breastplate |
The Illidari Council Strategy and Loot
The Council consists of Lady Malande, High Nethermancer Zerevor, Gathios the Shatterer, and Veras Darkshadow. They share one health pool, but each requires a separate assignment. A Mage tanks Zerevor at range after stealing Dampen Magic; physical tanks control the other three, with Gathios usually serving as the raid's primary damage target.
- Use Misdirection and a rehearsed pull so every Council member reaches the correct tank without crossing the raid.
- The Mage tank steals Dampen Magic whenever needed, keeps Zerevor isolated, and prevents anyone from entering his lethal Arcane Explosion range.
- Move immediately from Flamestrike, Blizzard, and Gathios's Consecration. Spread the raid so one ground effect does not hit an entire group.
- Assign both physical and magical interrupts to Lady Malande. Her Circle of Healing and dangerous damage casts must remain covered when Blessing of Protection or Blessing of Spell Warding blocks one interrupt type.
- Stop careless damage into Malande's Reflective Shield and watch poisoned players for Veras's delayed Envenom burst.
- Pick Veras up quickly after each Vanish and keep all tanks stable; random damage can overlap a tank hit without warning.
| Loot category | Items |
|---|---|
| Tier 6 leg tokens | Leggings of the Forgotten Conqueror, Leggings of the Forgotten Vanquisher, Leggings of the Forgotten Protector |
| Other loot | Cloak of the Illidari Council, Belt of Divine Guidance, Forest Prowler's Helm, Helm of the Illidari Shatterer, Madness of the Betrayer, Veil of Turning Leaves |
Illidan Stormrage Strategy and Loot
Illidan is a five-phase encounter that checks every special assignment prepared earlier. The raid needs one physical mitigation tank capable of preventing Shear through avoidance or block, two Fire Resistance tanks for the Flames of Azzinoth, and one Shadow Resistance Warlock tank for demon form. Assign parasite positions, Flame movement paths, ranged groups, and Shadow Demon control before the pull.
- In phase one, face Illidan away from the raid, move him out of every Flame Crash, maintain a healing-reduction effect for Draw Soul, and send Parasitic Shadowfiend targets to a fixed slow zone where ranged DPS kill the spawns.
- At 65 percent, Illidan takes flight. Each Fire Resistance tank controls one Flame of Azzinoth and keeps it near its own Warglaive. Move slowly out of Blaze, face Flame Blast away, and never pull a Flame far enough to trigger Uncaged Wrath.
- During the air phase, arrange the raid in several compact groups separated from one another. Dodge Eye Blast lines, heal Dark Barrage immediately, and kill both Flames without letting distant players trigger a charge.
- When Illidan lands, resume phase-one control and spread for Agonizing Flames. Ground phase three alternates with demon phase four until he reaches 30 percent.
- In demon form, the Shadow Resistance Warlock tanks from range while every other player stays away from both Illidan and the Warlock. Spread by at least five yards for Flame Burst and kill all four Shadow Demons before they reach their stunned targets.
- Below 30 percent, Maiev joins the fight. The main tank drags Illidan over Shadow Traps, ideally during Enrage, while the raid continues handling parasites, Agonizing Flames, and demon transformations.
| Loot category | Items |
|---|---|
| Tier 6 chest tokens | Chestguard of the Forgotten Conqueror, Chestguard of the Forgotten Vanquisher, Chestguard of the Forgotten Protector |
| Weapons and shield | Shard of Azzinoth, Crystal Spire of Karabor, Zhar'doom, Greatstaff of the Devourer, Warglaive of Azzinoth main hand, Warglaive of Azzinoth off hand, Black Bow of the Betrayer, Bulwark of Azzinoth |
| Armor and accessories | Shroud of the Highborne, Stormrage Signet Ring, Cowl of the Illidari High Lord, Cursed Vision of Sargeras, Faceplate of the Impenetrable, Memento of Tyrande, The Skull of Gul'dan |
Tier 6 Tokens and Loot Priority
Black Temple supplies the shoulder, leg, and chest pieces of the original five-piece Tier 6 sets. Exchange these tokens with Tydormu at the entrance to the Battle for Mount Hyjal. Protector tokens serve Warriors, Hunters, and Shamans; Vanquisher tokens serve Rogues, Mages, and Druids; Conqueror tokens serve Paladins, Priests, and Warlocks.
| Token slot | Boss | Early distribution rule |
|---|---|---|
| Shoulders | Mother Shahraz | Complete high-impact two-piece or four-piece bonuses before assigning minor standalone upgrades |
| Legs | The Illidari Council | Favor set breakpoints that improve progression damage, healing stability, or tank survival |
| Chest | Illidan Stormrage | Compare full set value, current item, and future off-piece plans rather than awarding only by item level |
For non-tier items, publish priority rules before the first clear. Protect progression with key tank and healer upgrades, complete important hit or survivability thresholds, and then reward the largest sustained raid gain. Warglaives of Azzinoth are class-restricted to Warriors and Rogues in TBC and should have a declared recipient order before either half drops. The Wowhead Black Temple loot database is useful for checking full item tooltips, sockets, stats, and drop records, while the boss tables above provide the complete expected Anniversary boss pool in one place.
Black Temple Trash Loot and Profession Recipes
Trash is not merely travel time. It provides Ashtongue Deathsworn reputation, bind-on-pickup epics, Hearts of Darkness used for Shadow Resistance crafting, rare epic gems, and Phase 3 profession recipes. Keep master-loot rules active until every corpse is checked, and do not reset valuable sections before the group has finished looting.
| Category | Available drops |
|---|---|
| Trash epics | Band of Devastation, Ring of Ancient Knowledge, Blessed Band of Karabor, Swiftsteel Bludgeon, Girdle of the Lightbearer, Pillager's Gauntlets, Treads of the Den Mother, Illidari Runeshield, Shroud of the Final Stand |
| Blacksmithing plans | Plans: Dawnsteel Bracers, Plans: Swiftsteel Bracers |
| Leatherworking patterns | Pattern: Bindings of Lightning Reflexes, Pattern: Bracers of Renewed Life, Pattern: Living Earth Bindings, Pattern: Swiftstrike Bracers |
| Tailoring patterns | Pattern: Bracers of Nimble Thought, Pattern: Swiftheal Wraps |
Many recipe drops can come from bosses as well as eligible trash, so profession ownership should be decided before the run. Prioritize characters who can craft for the guild immediately and who are likely to remain available throughout the phase. Record recipes already learned to prevent duplicate plans from being assigned blindly.
Weekly Black Temple Clear Checklist
- Confirm every raider can enter before forming the group and replace blocked characters early.
- Inspect Mother Shahraz Shadow Resistance sets and the special Fire and Shadow Resistance tank sets for Illidan.
- Assign Naj'entus spine throwers, Gurtogg soak groups, Reliquary interrupts, Council tanks, and Teron ghost positions.
- Set loot rules for Tier 6 tokens, Warglaives, profession recipes, Hearts of Darkness, and trash epics.
- Bring full consumables, repair before entering, and carry enough resistance consumables for repeated progression pulls.
- Review only the next encounter before pulling instead of overwhelming the raid with every later mechanic at once.
- Log deaths and failed assignments after each attempt, then change one responsible variable before the next pull.
Guilds that want a scheduled clear while preserving the option to participate can compare the available formats on the Black Temple raid service. It is most relevant when the goal is a full clear, specific boss access, Tier 6 opportunities, or repeated Illidan kills rather than attunement alone.
Common Black Temple Mistakes
- Throwing the last Naj'entus Spine before Tidal Shield or breaking the shield before the raid is healthy.
- Standing near Supremus while fixated or resuming damage before threat is stable after the gaze phase.
- Allowing Spiritbinders to heal Shade of Akama adds while Defenders reach Akama unchecked.
- Assigning Teron ghost practice verbally without confirming that every raider understands the spirit abilities.
- Letting the same five players absorb consecutive Bloodboils or failing to isolate the Fel Rage target.
- Missing Spirit Shock interrupts or leaving Rune Shield active during Essence of Desire.
- Entering Mother Shahraz progression without resistance gear, three aligned tanks, and predetermined Fatal Attraction paths.
- Using only one interrupt type on Lady Malande when Gathios can grant physical or magical immunity.
- Moving a Flame of Azzinoth too far from its Warglaive or stacking players during Illidan's demon form.
- Distributing Tier 6 by item level alone without considering set bonuses and the raid's progression needs.
Final Verdict
Black Temple is cleared through assignment discipline more than raw equipment. Naj'entus tests coordinated recovery, Teron tests individual execution, Gurtogg and Mother Shahraz test planned damage control, the Council tests simultaneous roles, and Illidan combines specialized tanks with five phases of positioning. Complete attunement before raid night, prepare resistance sets and loot rules in advance, and rehearse the few mechanics that can wipe the group through one player's error. With those systems in place, every weekly clear produces Tier 6 progress, Ashtongue reputation, valuable crafting materials, and another chance at Illidan's defining weapons and trinkets.