TBC Classic Tier 4 Mastery is not only about learning Karazhan, Gruul's Lair, and Magtheridon's Lair for the first time. On Burning Crusade Classic Anniversary realms, these raids remain an efficient weekly source of gear for new level 70 characters, alts, returning players, and established raiders who still need a specific weapon, trinket, set bonus, or off-spec item. Tier 5 progression does not make Tier 4 irrelevant, and the arrival of Tier 6 turns the older raids into a catch-up layer rather than removing their value.
The objective is to clear all three raids with repeatable assignments and as little wasted time as possible. Karazhan is the ten-player gear engine, Gruul offers two short encounters with valuable Tier 4 tokens and long-lasting drops, and Magtheridon provides the chest token through one coordination-focused fight. This guide covers current Anniversary rules, alt and catch-up priorities, role assignments, positioning, Bloodlust timing, Magtheridon cube execution, and a weekly plan that fits Tier 4 around Tier 5 and Tier 6 lockouts.
Why Tier 4 still matters for alts and catch-up
Tier 4 now serves two different audiences. A fresh level 70 uses it to replace weak dungeon and leveling gear before or alongside Tier 5. An established main returns only for items that remain competitive or complete a useful set bonus. The correct approach is therefore targeted rather than nostalgic: identify the slots that can realistically improve, run the raids with the highest upgrade density, and stop spending an entire evening on content that no longer advances the character.
Anniversary rules make the raids especially alt-friendly. Once the first character on a Battle.net account completes a raid attunement, that raid is unlocked for the other characters on the same account. Karazhan access therefore requires the full chain once, not once per alt. Gruul's Lair and Magtheridon's Lair do not require separate entry attunements, which allows a new alt to enter those weekly lockouts as soon as the roster accepts its gear and role.
| Raid | Catch-up value | Tier 4 rewards | Best reason to return |
|---|---|---|---|
| Karazhan | Highest number of possible upgrades for a fresh character in one ten-player lockout | Glove and helm tokens | Multiple weak slots, set bonuses, weapons, trinkets, rings, and off-spec gear |
| Gruul's Lair | Very high reward for a short 25-player raid | Shoulder tokens from High King Maulgar and leg tokens from Gruul | Tier tokens, Dragonspine Trophy, weapons, and fast alt gearing |
| Magtheridon's Lair | One boss and a concentrated Tier 4 reward | Chest tokens | Completing a set bonus, obtaining a targeted item, or filling a weekly raid bundle |
Phase 2 increased the catch-up value of the 25-player raids. High King Maulgar now drops three shoulder tokens, Gruul drops three leg tokens, and Magtheridon drops three chest tokens. Tier 4 armor tokens can also be exchanged for previous-season Gladiator armor, giving PvP alts another reason to join these clears. Karazhan did not receive the same three-token change, but its large boss count and broad loot table still make it the strongest Tier 4 starting point for a character with many weak slots.
Tier 4 should support current progression rather than replace it. Protect Tier 5 and Tier 6 lockouts first when they contain meaningful upgrades, then place Karazhan, Gruul, and Magtheridon around them. Continue with the Tier 5 raid guides for Serpentshrine Cavern and Tempest Keep, and use the Tier 6 progression guide when preparing for Mount Hyjal and Black Temple.
Current Anniversary rules for Tier 4 raids
Anniversary raids use several rules that change how a modern roster should plan its night. Karazhan, Gruul, and Magtheridon are available in their post-nerf state. Heroism and Bloodlust affect the raid rather than one party, apply a ten-minute Sated or Exhaustion debuff, and reset after a boss kill or wipe. Raid leaders therefore do not need to rotate Shamans between groups or save Bloodlust for the final boss. Use it on each boss when it creates a safe high-uptime damage window.
- Raid attunements become account-wide after the first character completes them.
- Karazhan remains a ten-player raid with a weekly lockout.
- Gruul's Lair and Magtheridon's Lair remain 25-player weekly raids.
- Tier 4 raids use post-nerf encounter tuning on Anniversary realms.
- Bloodlust and Heroism are raid-wide and reset with Sated or Exhaustion after a boss kill or wipe.
- Maulgar, Gruul, and Magtheridon each drop three relevant Tier 4 tokens in the current progression stage.
Post-nerf does not mean assignment-free. Most remaining wipes are caused by broken crowd control on High King Maulgar, poor spacing during Gruul's Ground Slam and Shatter sequence, missed Dark Mending interrupts, or failed Manticron Cube channels. Gear makes recovery easier, but it does not replace the few mechanics that can still kill an otherwise strong raid.
Tier 4 preparation and roster planning
Preparation should match the purpose of the run. A progression group needs conservative healing, clear backups, and time for short explanations. A catch-up group with experienced mains can run fewer healers and distribute loot toward alts or weak roster roles. A farm group should optimize travel, summons, loot decisions, and pull pacing before trying to save seconds with risky trash pulls.
Build assignments before the first pull. Karazhan needs a route, interrupt coverage, dispels, crowd control, and beam assignments for Netherspite. Gruul's Lair needs a tank or control plan for every member of Maulgar's council and a clear spread rule for Gruul. Magtheridon needs Channeler tank assignments, interrupt groups, Burning Abyssal control, five primary cube clickers, and named backups.
| Preparation area | Progression group | Alt and catch-up group | Farm group |
|---|---|---|---|
| Roster | Use stable tanks and enough healers to survive mistakes | Place experienced mains in the roles that control mechanics | Reduce support only after execution is consistently clean |
| Assignments | Explain every critical job and name backups | Keep the same strategy used by the main raid | Publish one reusable assignment sheet |
| Loot plan | Prioritize upgrades that unlock reliable clears | Target missing set bonuses and the weakest slots | Confirm reservations and off-spec rules before zoning in |
| Consumables | Bring full raid consumables and resistance items where needed | Enchant and gem stable upgrades rather than temporary pieces | Carry repair bots, reagents, food, and recovery supplies |
Do not force an alt to complete an outdated pre-raid BiS list before joining Tier 4. The character needs enough health, threat, healing, hit, or defensive stability to perform its role, not a perfect collection of dungeon items. An experienced player in a mixed catch-up set is often more useful than a fully enchanted character that does not understand assignments.
Explore services related to this guide, selected from our WoW TBC Anniversary catalog.
View All WoW TBC Anniversary Services


Karazhan mastery
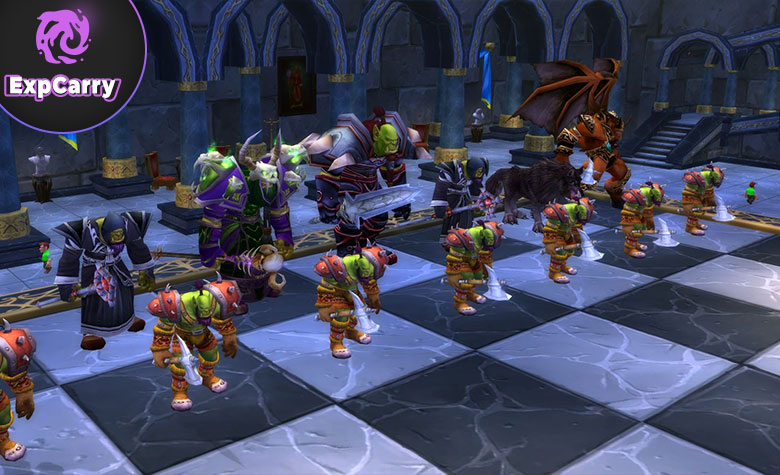
Karazhan is the most flexible Tier 4 raid because it combines a manageable ten-player roster with a large number of bosses and equipment slots. It is usually the first raid to schedule for a fresh alt, but it is also the easiest Tier 4 raid to overfarm. Before the run, list the bosses that still offer upgrades and decide whether the group needs a full clear, a targeted route, Nightbane, or only the mandatory progression path.
A balanced learning roster normally uses two tanks, two or three healers, and the remaining slots as damage dealers with reliable interrupts, dispels, and crowd control. Experienced groups can adjust this, but every composition still needs answers for Moroes guests, Maiden dispels, Opera mechanics, Netherspite beams, and Nightbane's air phase. The most important Karazhan speed upgrade is not additional damage. It is moving from one controlled pull to the next without unnecessary deaths or long recovery pauses.
Karazhan route and trash pacing
Use one default route until the group understands every transition. Mark dangerous targets before the pull, assign interrupts instead of asking everyone to interrupt, and let healers call for mana before the tank enters the next pack. Crowd control remains efficient when it prevents a death or a long recovery, especially in groups carrying several undergeared alts. Skip optional trash or bosses only when the saved time is more valuable than their remaining loot.
Keep communication short. A tank should call the next pull, the raid leader should identify the dangerous target, and assigned players should report if an interrupt, dispel, or crowd-control effect is unavailable. When a wipe happens, state the first failure that caused the collapse and pull again after correcting it. Long arguments cost more time than most trash packs.
Karazhan boss execution
Attumen checks clean tank control and threat during the transition. Moroes is won before the pull through guest marks, crowd control, Garrote recovery, and interrupts. Maiden requires the raid to spread, cleanse Holy Fire quickly, and coordinate healing through Repentance. Each Opera event has a different plan, so identify the active event and give the relevant positioning and target priorities before starting.
The Curator rewards disciplined damage during Evocation without allowing Astral Flares to overwhelm the group. Shade of Aran punishes movement errors, missed interrupts, and players who fail to react to Flame Wreath or Blizzard. Terestian Illhoof requires fast Demon Chain damage and control of the imp pressure. Netherspite becomes predictable when red, green, and blue beam assignments include both primary players and backups.
Prince Malchezaar requires stable threat, ranged spacing, and immediate movement when an Infernal blocks the current position. Do not chase a perfect position through unsafe ground; move as a group to the next usable area. Nightbane tests fear preparation, tank recovery after air phases, add control, and healer range. Because Nightbane remains optional for the basic clear, schedule it when the group still needs its loot or when the encounter is part of the roster's progression goals.
Karazhan value for an alt
An alt should prioritize bosses with several upgrades rather than chasing one rare item through endless full clears. Helm and glove tokens are obvious targets, but trinkets, rings, weapons, and healer or tank pieces can produce a larger immediate improvement. Reserve expensive gems and enchants for items likely to survive into Tier 5; use affordable temporary enhancements when a slot has an accessible replacement.
If multiple guild Karazhan teams exist, use the same route, marks, and assignment language in every group. This allows an experienced main to lead or substitute without teaching a new strategy. It also makes the raid a training environment for future Tier 5 roles instead of an isolated alt run with lower standards.
Gruul's Lair mastery
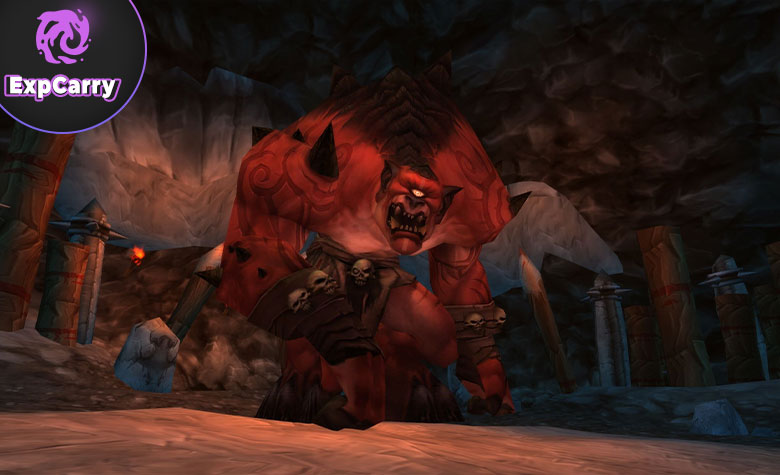
Gruul's Lair is one of the highest-value catch-up lockouts because it contains only two encounters and now awards three Tier 4 shoulder tokens from High King Maulgar and three leg tokens from Gruul. The raid is short enough to place before or after another 25-player raid, but that convenience depends on arriving with assignments already prepared.
High King Maulgar assignments
Maulgar's council is an assignment encounter. Krosh Firehand is normally handled by a Mage who steals Spell Shield and tanks from range. Olm the Summoner can be controlled with an enslaved Felhunter while his summons are managed. Kiggler the Crazed needs a reliable ranged-tank solution and space away from the rest of the raid. Blindeye the Seer must be interrupted and killed through his healing and shield mechanics. Maulgar remains controlled separately until the dangerous council members are dead.
Write the tank, healer, interrupt, and backup names beside every target. Avoid uncontrolled cleave during the opening because moving threats and overlapping abilities are more dangerous than a slightly slower kill order. When Maulgar reaches his later behavior change, maintain tank coverage and give melee room to react instead of collapsing around him.
Gruul positioning and Shatter
Gruul grows stronger over time, but most deaths come from the Ground Slam sequence rather than the damage increase alone. After Ground Slam, Gronn Lord's Grasp progressively slows players until they become Stoned, and Shatter damage increases when Stoned players are close to each other. Players must create distance from nearby allies before they lose movement, not attempt to return to a favorite marker through the raid.
After Shatter, healers stabilize the lowest players while the raid rebuilds its normal formation. Tanks keep Gruul faced away from the group and manage threat through movement disruptions. Use defensive and healing cooldowns later as Growth stacks increase. Bloodlust can be used on the pull for a practiced group or after the first clean Shatter for a learning group that needs to prove its spacing before committing offensive cooldowns.
| Encounter | Primary assignment | Common failure | Mastery rule |
|---|---|---|---|
| High King Maulgar | Separate tank and control plan for every council member | Healing casts, broken control, overlapping enemies, or missing tank coverage | Do not pull until every target has a named owner and backup |
| Gruul the Dragonkiller | Tank facing, spread discipline, Shatter recovery, and late cooldowns | Players create distance too late or rebuild positions through other players | Move away from the nearest player first and restore formation after Shatter |
Magtheridon's Lair mastery
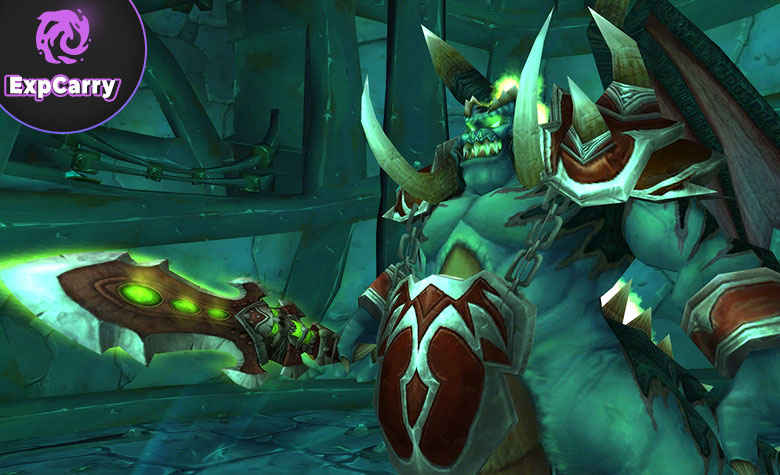
Magtheridon is a one-boss catch-up raid with three chest tokens in the current Anniversary stage. Gear shortens the fight, but the raid still succeeds through interrupt discipline, controlled Channeler positioning, and reliable Manticron Cube channels. The post-nerf Anniversary version is more forgiving than the original progression encounter, yet a missed Blast Nova stop can still destroy an otherwise clean pull.
Hellfire Channeler control
Five Hellfire Channelers begin active while Magtheridon remains imprisoned. Assign tanks before the pull and keep Channelers separated so their pressure does not overlap. Every Dark Mending cast must be interrupted, and interrupt coverage should remain stable as the kill target changes. Channelers gain power when another Channeler dies, so the final targets place the greatest pressure on their tanks and healers.
Burning Abyssals should be controlled immediately with Banish, Fear, roots, or other planned tools. Damage dealers follow one target order instead of spreading damage randomly, and the main tank prepares to collect Magtheridon when he becomes active. A clean opening leaves enough players alive and enough healer mana available to make the cube portion routine.
Manticron Cube execution
Blast Nova is interrupted when five different players channel the five Manticron Cubes at the same time. Assign one primary clicker to each cube, position them before the cast, and name at least one backup for every side of the room. Players click once when Blast Nova begins and continue the channel without moving or clicking again.
Because Anniversary Tier 4 uses the post-nerf encounter state, Mind Exhaustion is short enough that one primary five-player team can normally handle each Blast Nova. A second full rotation is not mandatory, but backups remain essential when a clicker dies, is displaced, receives a dangerous ground effect, or fails to start the channel. The raid leader should call the cast early while allowing the assigned clickers to react to the actual Blast Nova bar.
Keep cube paths clear and do not stack players directly on a cube while waiting. Quake can interrupt casts and move players, so healers prepare instant effects and clickers return to position promptly. At 30 percent health, the room collapse deals heavy raid damage and introduces lethal falling debris. Take a clean Blast Nova first when the timers are close, stabilize the raid, and then push through the transition.
Magtheridon Bloodlust timing
Bloodlust does not repair a failed cube plan. Use it when Magtheridon is active, remaining Channelers are dead, the tank has stable threat, and all cube clickers are in position. A practiced raid can align offensive cooldowns with the damage amplification created by the cube channels, while a learning group should prioritize a clean Nova stop over perfect damage timing.
Do not push the 30 percent collapse during a dangerous overlap simply to preserve Bloodlust uptime. The fight is already short in current gear, and keeping the click team alive is more valuable than gaining a few additional seconds of burst.
Raid-wide Bloodlust planning
Raid-wide Bloodlust and Heroism remove the old need to move Shamans between parties for repeated group buffs. On Anniversary realms, the ability and Sated or Exhaustion reset when a boss encounter ends in a kill or wipe. The practical result is simple: use Bloodlust on every boss where it is available, but place it at a moment when the raid can attack safely.
| Raid | Recommended timing | Delay it when |
|---|---|---|
| Karazhan | Use on each boss during the longest stable damage window | The pull begins with forced movement, target immunity, or an assignment check |
| High King Maulgar | After the opening control is stable and the first kill target is positioned | Council members are moving or a tank has not established control |
| Gruul | On the pull for experienced groups or after a clean Shatter for learners | The group is still rebuilding spacing or recovering from deaths |
| Magtheridon | After Channelers die and Magtheridon is stable with cube players ready | A Blast Nova or the 30 percent collapse will disrupt the raid immediately |
Standardize the timing so players align trinkets, consumables, and personal cooldowns without a long discussion on every pull. Since the reset occurs after a kill or wipe, saving Bloodlust for a later boss provides no benefit. The only reason to delay it within an encounter is to avoid losing uptime to movement, immunity, target changes, or a dangerous mechanic.
Weekly Tier 4 plan for mains and alts
A weekly schedule should protect the highest current raid tier first. Tier 5 and Tier 6 lockouts contain the largest upgrades and attunement checkpoints, so do not miss them to complete a low-value Karazhan run. Tier 4 fits around those raids as a short targeted catch-up system.
| Character type | First priority | Tier 4 plan | Stop condition |
|---|---|---|---|
| Progression main | Current Tier 5 or Tier 6 lockouts and required attunement bosses | Run only the Tier 4 bosses with lasting upgrades | No realistic main-spec or required off-spec upgrades remain |
| Fresh level 70 | Remove critical gear and access problems | Full Karazhan plus Gruul and Magtheridon when the roster accepts the character | The character can contribute reliably in Tier 5 |
| Established alt | Use account-wide access and scheduled raid groups | Prioritize Tier tokens, weapons, trinkets, and several-upgrade lockouts | Only one low-chance sidegrade remains |
| PvP alt | Build a playable Honor and Arena baseline | Target Tier 4 tokens that can complete PvE pieces or previous-season Gladiator armor | The relevant armor slots are filled |
Combine Gruul and Magtheridon into one 25-player session whenever possible. Schedule Karazhan separately with a fixed ten-player group or a targeted alt team. If roster gaps repeatedly prevent a planned catch-up lockout, ExpCarry's TBC raid bundle groups the relevant weekly raids into one progression route. Characters focused specifically on completing set bonuses can also compare the remaining slots through the TBC tier set service instead of repeating unrelated bosses.
Common Tier 4 mistakes
- Do not describe Tier 4 as obsolete simply because Tier 5 is active or Tier 6 is approaching.
- Do not require a perfect pre-raid BiS set before allowing a capable alt into catch-up raids.
- Do not prioritize a full Karazhan clear over current-tier raid lockouts when only one minor upgrade remains.
- Do not pull High King Maulgar without a named owner and backup for every council assignment.
- Do not run toward a preferred Gruul marker when creating distance from nearby players is safer.
- Do not use an outdated mandatory two-team cube rotation for post-nerf Magtheridon, but always assign backups.
- Do not save Bloodlust for a later boss because the ability and debuff reset after a kill or wipe.
- Do not spend expensive gems and enchants on temporary Tier 4 items without checking attainable Tier 5 and Tier 6 replacements.
Conclusion
Tier 4 Mastery means turning Karazhan, Gruul's Lair, and Magtheridon's Lair into a reliable catch-up system instead of treating them as launch-only content. Karazhan offers the broadest upgrade pool for a fresh character, Gruul provides exceptional value through two short encounters and increased token drops, and Magtheridon concentrates chest tokens into one coordination check.
For mains, run only the bosses that still provide lasting upgrades. For new level 70 characters and alts, use account-wide attunements, full Karazhan clears, increased 25-player token drops, and Tier 4 token exchanges to reach Tier 5 faster. Protect current-tier lockouts first, keep assignments consistent, use raid-wide Bloodlust on every appropriate boss, and treat Tier 4 as the bridge into Serpentshrine Cavern, Tempest Keep, Mount Hyjal, and Black Temple.