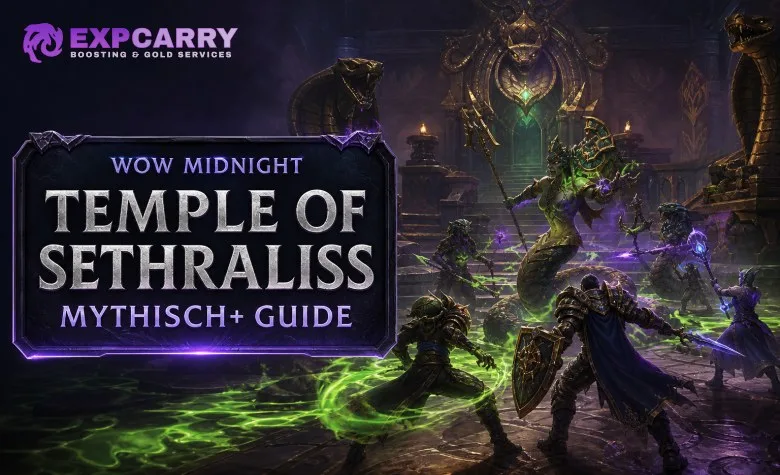
Temple of Sethraliss returns to World of Warcraft Mythic+ in Midnight Season 2 as one of the legacy Battle for Azeroth dungeons in the seasonal rotation. The dungeon has a 33-minute timer, four bosses, several high-priority interrupts and dispels, and multiple mechanics where one missed assignment can cost more time than an aggressive pull saves.
This Temple of Sethraliss Mythic+ guide covers the current Season 2 boss mechanics, dangerous trash, interrupts, dispels, the Eye of Sethraliss event, loot, the +10 dungeon teleport, and the most important mistakes to avoid. If you need the dungeon for score, Great Vault progress, a specific loot table, or the portal, you can also configure a specific Temple of Sethraliss Mythic+ run with the required key level and completion type.
Temple of Sethraliss Mythic+ Quick Facts
| Category | Midnight Season 2 Information |
|---|---|
| Location | Vol'dun, Zandalar |
| Dungeon timer | 33 minutes |
| Bosses | Adderis and Aspix, Merektha, Galvazzt, Avatar of Sethraliss |
| Major damage types | Nature, Physical, Shadow, Poison |
| Most valuable utility | Interrupts, Poison dispel, Magic dispel, Curse dispel, offensive purge and crowd control |
| Important route feature | The dungeon generally requires additional trash beyond simply following the shortest path between bosses |
| Portal requirement | Complete Temple of Sethraliss on Mythic+ +10 or higher within the timer |
How to Get to Temple of Sethraliss
Temple of Sethraliss is located in northern Vol'dun. The dungeon entrance is approximately at:
/way #864 51.9 26.7 Temple of Sethraliss Entrance
During Midnight Season 2, the convenient route is the Timeways portal in Silvermoon City at approximately /way #2393 42.4 58.3. The Temple of Sethraliss portal is located on the right side of the Timeways portal area.
Players who complete a +10 or higher Temple of Sethraliss key within the timer unlock Path of the Sacred Temple, allowing direct teleportation to the dungeon entrance. See our Keystone Hero dungeon portals guide for the full Season 2 teleport list.
Best Utility for Temple of Sethraliss
Temple of Sethraliss is not a dungeon where raw DPS alone solves every pull. A group that covers the correct interrupts, dispels and stops can remove a large amount of avoidable damage and make the route substantially more consistent.
| Ability | Enemy | What to Do |
|---|---|---|
| Poisoned Cheap Shot | Shrouded Fang | Interrupt it. Use a Poison dispel if the cast succeeds. |
| Addle Mind | Faithless Subjugator | High-priority interrupt. A Curse dispel can remove the effect if missed. |
| Cytotoxin | Poisonous Viper | Use a Poison dispel or defensive if removal is unavailable. |
| Poison Spit | Merektha / Toxic Viper | Interrupt whenever possible. Dispel the Poison DoT after a missed cast. |
| Imbued Conduction | Imbued Stormcaller | Magic dispel before expiration to prevent the stun. |
| Accumulate Charge | Agitated Nimbus | Use an offensive purge to reduce the danger of Release Charge. |
| Essence Disruption | Temple Disruptor | Interrupt or crowd control immediately during the Eye event. |
| Flame Shock | Twisted Hexxer | Maintain an interrupt rotation, especially during the final section. |
Best practical composition rule: bring reliable short-cooldown interrupts plus at least one useful dispel profile. Poison removal is particularly valuable before and during Merektha, while a purge becomes useful in the Galvazzt section.
Explore services related to this guide, selected from our Mythic Dungeons catalog.
View All Mythic Dungeons Services

Temple of Sethraliss Trash Guide
Opening Packs Before Adderis and Aspix
The first section immediately tests interrupt discipline and positioning. Avoid turning several dangerous mobs into one oversized pull unless your group has planned stops available.
- Storm Adept: interrupt Lightning Bolt to reduce unnecessary single-target pressure.
- Sandswept Hunter: stop Arrow Barrage and avoid Sandburst Arrow impact zones.
- Barbed Krolusk: Serrated Charge can create dangerous bleed pressure, particularly when several Krolusks are active.
- Shrouded Fang: prioritize Poisoned Cheap Shot. If it goes through, remove the Poison effect quickly.
- Sandfury Stonefist: cannot simply be controlled like normal caster trash. Tanks should prepare for its heavier melee and tank-targeted abilities.
Do not spend every interrupt on basic filler casts if a Shrouded Fang is about to use its dangerous control effect. Temple rewards interrupt prioritization, not simply the highest number of interrupts on the meter.
Adderis and Aspix Mythic+ Strategy
Adderis and Aspix have been substantially changed for Midnight Season 2. The central mechanic is Storm Blessed: the blessing moves between the two bosses and makes its current target immune to damage. DPS must swap immediately instead of tunneling the same boss.
Storm Blessed — Swap Targets Immediately
- Watch which boss receives Storm Blessed.
- Stop wasting cooldowns into the immune target.
- Keep both bosses positioned so melee can swap without crossing unnecessary hazards.
- When one boss dies, the survivor enters Frenzy and uses abilities more aggressively.
Tempest Winds — Place the Zones Away
Tempest Winds targets players and leaves persistent zones that silence and pacify anyone who touches them. Drop these toward unused sections of the arena rather than through the center of the group's future movement path.
At higher keys, poor Tempest Winds placement can make the following knockback and soak sequence significantly harder even if the initial hit itself is survived.
Gale Force — Spread and Control the Knockback
Gale Force hits players and pushes them backwards. Position so the knockback does not send you into Tempest Winds zones or out of position for the next mechanic.
- Spread before the impact.
- Use walls or safe arena geometry to shorten the knockback where practical.
- Do not get pushed to the opposite side of the room because another mechanic follows quickly.
Thunder and Lightning — Stack, Soak, Then Move
Thunder and Lightning begins with damage shared between players in the soak area. Stack for the first portion, then move away from the follow-up danger instead of remaining grouped.
Tank: prepare a defensive for Adderis' Overload window, which significantly increases his melee pressure and adds Nature damage to his attacks.
Healer: Gale Force into Thunder and Lightning is one of the combinations most likely to punish players who were knocked out of position.
DPS: target swapping is mandatory. Losing several seconds of damage into Storm Blessed is more costly than a minor rotational delay during the swap.
Trash Before Merektha
The path to Merektha includes dangerous bleeds, Poison effects and enemies that generate additional mobs.
- Sand-Sworn Rider: Swarming Krolusks creates additional enemies capable of applying Serrated Charge. Avoid oversized pulls unless defensive and healing cooldowns are ready.
- Poisonous Viper: remove Cytotoxin with a Poison dispel whenever possible.
- Lightning Serpent: tanks should respect the increased pressure from Serpent's Stormcall.
- Dutiful Tamer: additional Krolusks increase random bleed pressure.
- Krolusk Matriarch: avoid frontal attacks and keep its facing predictable.
- Brood Tender: use spare interrupts on Venom Bolt.
- Faithless Subjugator: Addle Mind is a high-priority interrupt; Curse removal can recover a missed cast.
Merektha Mythic+ Strategy
Merektha combines tank damage, targeted lightning, crowd-control mechanics, spawned snakes and a Burrow phase. The fight becomes much easier when the group deliberately controls where puddles are created.
Lightning Bite
Merektha's Lightning Bite is a significant tank hit. Tanks should plan a defensive for each dangerous cast rather than forcing the healer to recover from an unexpected spike.
A Knot of Snakes — Group for AoE Crowd Control
A Knot of Snakes incapacitates targeted players until the snakes are destroyed or crowd controlled.
Targeted players should move close to melee whenever possible so one AoE stun, knock, fear or other appropriate stop can break multiple knots quickly. Cleave the released snakes immediately instead of allowing them to spread around the arena.
Thunder Spit — Move Along the Edge
Thunder Spit repeatedly strikes the targeted player's position and leaves Lingering Storm zones. Keep moving and place the sequence toward the outer part of the arena.
Crossing through the center with Thunder Spit consumes valuable space and can make the later Burrow phase considerably more dangerous.
Serpentstorm and the Add Phase
Serpentstorm deals heavy group damage and knocks players back. Check your position before the cast so the knockback does not send you into existing lightning pools.
When Merektha reaches full energy, Toxic Vipers and a Storm Serpent enter the fight while Merektha uses Burrow. During this section:
- Interrupt Poison Spit from Toxic Vipers.
- Dispel dangerous Poison effects.
- Tank the Storm Serpent near existing hazards or the edge when possible.
- Avoid Merektha's path while she travels underground.
- Use defensives if Burrow damage overlaps with add damage or Poison DoTs.
Trash Before Galvazzt
The Galvazzt section adds dispel and purge checks to the dungeon's utility requirements.
- Agitated Nimbus: purge Accumulate Charge. Leaving several stacks active makes Release Charge considerably more dangerous.
- Imbued Stormcaller: dispel Imbued Conduction before it expires and interrupts Lightning Bolt whenever possible.
- Static Anomaly: spread loosely so Spark Step does not clip multiple players. Tanks should account for its additional magic damage.
The Loose Spark gauntlets are primarily an execution check. Dodge the moving lightning patterns instead of attempting to gain a few seconds by walking through avoidable stuns.
Galvazzt Mythic+ Strategy
Galvazzt is the dungeon's major coordination check. The fight revolves around Lightning Spires that attempt to transfer energy into the boss.
Block Every Lightning Spire Beam
Lightning Spires spawn in sets around the arena. A player must stand between each active spire and Galvazzt to block its beam. If beams reach the boss, Galvazzt gains energy.
Use non-tanks for normal beam assignments. Players blocking a beam receive Galvanized, which deals continuous Nature damage and greatly increases Physical damage taken. This is particularly dangerous for the tank.
- Assign players to beams immediately instead of having everyone chase the same spire.
- Rotate personal defensives between beam sets.
- Healers should plan cooldowns around repeated Galvanized damage.
- Do not abandon an active beam simply to maintain DPS uptime.
Do Not Let Galvazzt Reach Full Energy
At full energy, Galvazzt uses Consume Charge, dealing heavy group damage, reducing player damage and increasing the danger of subsequent cycles. Preventing energy gain is therefore a direct timer mechanic as well as a survival mechanic.
Move the Boss Out of Induction Fields
Induction leaves a damaging field under the boss. The tank should reposition Galvazzt enough to preserve safe beam angles without dragging the encounter around the entire room.
Eye of Sethraliss Event
Before the final boss, the group must energize two Eyes of Sethraliss. Activating an Eye causes the player interacting with it to take ticking damage while the objective fills and additional enemies spawn.
The most important enemy during this event is the Temple Disruptor. Its Essence Disruption channel interferes with the active Eye, so interrupt or crowd control it immediately.
| Enemy | Priority |
|---|---|
| Temple Disruptor | Stop Essence Disruption immediately so Eye progress is not delayed. |
| Orb Watcher | Tank defensively through Venomous Slash; healer prepares for Caustic Stomp and its DoT. |
| Twisted Hexxer | Interrupt Flame Shock and place Latent Hex away from the group. |
This event is one of the easiest places to lose unnecessary time. The objective is not simply to kill everything as quickly as possible; it is to keep the Eye progressing while controlling the mobs that can interrupt that progress.
Avatar of Sethraliss Mythic+ Strategy
The final encounter is completely different from a normal boss burn. You win by fully restoring the Avatar of Sethraliss, while enemy waves attempt to prevent or reduce that healing.
Stage One — Kill Essence Defilers
Essence Defilers channel Defiling Taint, which prevents external healing from reaching the Avatar. They are therefore priority targets.
Do not waste healer globals trying to brute-force the Avatar while Defiling Taint is active. Remove the source of the healing block first.
Corrupted Guardians and Corrupted Lifeforce
Corrupted Guardians are dangerous tank targets and should be focused quickly. When one dies, it creates an explosion around its location and leaves several Corrupted Lifeforce orbs.
These orbs must be soaked before they expire. Cleansing them allows the Avatar to consume the Lifeforce and restore health.
DPS should normally handle the soaks. The resulting Corruption debuff deals damage, reduces healing done and massively increases Physical damage taken. The healer is therefore a poor default choice, and the tank should only take a soak when defensives and incoming tank damage make it safe.
Twisted Hexxers
- Interrupt Flame Shock.
- If targeted by Latent Hex, move away from the group.
- The effect leaves a Hex Muck zone capable of transforming players who stand inside it.
- Place these zones toward the edge so the arena remains usable during later waves.
Stage Two — Protect the Healer and Restore the Avatar
Once the Essence Defiler is dead, the healer can focus on restoring the Avatar. At the same time, waves of Faithless Tormentors fixate toward the healer and apply Shadowlash when they connect, progressively reducing healing output.
This is a group-control phase:
- Healer: kite the Tormentors while keeping maximum possible healing on the Avatar.
- Tank: help control the wave without exposing yourself to unnecessary Physical damage after a Corrupted Lifeforce soak.
- DPS: AoE and crowd control Tormentors aggressively.
- Tormentors brought below their execute threshold are consumed by the Avatar through Siphon the Weak, contributing additional restoration.
The encounter ends once the Avatar reaches full health. Treat your healer's uptime as part of the group's DPS requirement: every Tormentor allowed to repeatedly hit the healer extends the encounter.
Temple of Sethraliss Loot in Midnight Season 2
Temple of Sethraliss contains armor, weapons, rings and several returning trinkets. Because Mythic+ loot scales through the seasonal upgrade system, the best item depends on your specialization rather than simply the original Battle for Azeroth version of the item.
Notable returning trinkets include:
| Item | Primary Stat | Source |
|---|---|---|
| Merektha's Fang | Strength | Merektha |
| Tiny Electromental in a Jar | Agility | Galvazzt |
| Sethraliss' Defiled Relic | Intellect | Avatar of Sethraliss |
For the complete Season 2 reward breakpoints, upgrade tracks and Great Vault values, use our Midnight Season 2 Mythic+ loot table.
What Does a +10 Temple of Sethraliss Reward?
At the current Midnight Season 2 reward structure, +10 is the normal gear-reward breakpoint:
- End-of-dungeon: item level 311, Hero 3/6.
- Great Vault: item level 318, Myth 1/6.
- Mistcrests: Myth-tier Mistcrests are available from the relevant high-key range.
- Portal: timing Temple of Sethraliss on +10 or higher unlocks its permanent dungeon teleport.
Keys above +10 remain important for rating and high-key achievements, but the standard end-of-run and Great Vault item-level caps do not continue increasing every level. If score is your main goal, our Mythic+ rating guide explains why improving a weak dungeon score is often more efficient than repeatedly pushing your strongest dungeon.
How to Time Temple of Sethraliss
The 33-minute timer is not primarily lost to one long boss fight. Most failed runs accumulate time through repeated small mistakes: missed interrupts, inefficient Eye progress, poor puddle placement, deaths during Galvazzt beams and incorrect target swapping on Adderis and Aspix.
- Plan enemy forces: do not assume the shortest visual path provides all required trash percentage.
- Protect high-priority interrupts: Poisoned Cheap Shot, Addle Mind, Poison Spit, Essence Disruption and Flame Shock matter more than random filler casts.
- Preserve arena space: bad Tempest Winds, Thunder Spit and Latent Hex placement creates future problems.
- Assign Galvazzt beams before the pull: five players improvising simultaneously is worse than three players following clear assignments.
- Keep Eye progress active: stop Temple Disruptors rather than padding damage on lower-priority targets.
- Use DPS for Avatar soaks: avoid unnecessarily crippling healer throughput with Corruption.
- Use defensives proactively: the dungeon contains predictable damage patterns. A defensive used before the hit is more valuable than one pressed at 10% health.
Most Common Temple of Sethraliss Mythic+ Mistakes
- Continuing to attack the Storm Blessed boss.
- Dropping Tempest Winds through the middle of the Adderis and Aspix arena.
- Getting knocked away before the Thunder and Lightning soak.
- Spreading during A Knot of Snakes instead of enabling fast AoE crowd control.
- Leaving Thunder Spit puddles across the center of Merektha's room.
- Missing Poison Spit interrupts during Merektha's add phase.
- Allowing Galvazzt's Lightning Spires to feed energy into the boss.
- Using the tank as a normal Galvazzt beam soaker.
- Missing Essence Disruption during the Eye of Sethraliss event.
- Letting Corrupted Lifeforce expire on Avatar of Sethraliss.
- Allowing Faithless Tormentors to repeatedly reach the healer.
Temple of Sethraliss Mythic+ FAQ
What is the Temple of Sethraliss Mythic+ timer?
The Midnight Season 2 Temple of Sethraliss timer is 33 minutes.
How many bosses are in Temple of Sethraliss?
There are four boss encounters: Adderis and Aspix, Merektha, Galvazzt, and Avatar of Sethraliss.
What dispels are useful in Temple of Sethraliss?
Poison dispels are particularly valuable for Poisoned Cheap Shot, Cytotoxin and failed Poison Spit casts. Magic dispels help with Imbued Conduction, Curse removal can recover a missed Addle Mind, and offensive purges are useful against Accumulate Charge.
How do you unlock the Temple of Sethraliss teleport?
Complete Temple of Sethraliss on Mythic+ +10 or higher within the timer to unlock Path of the Sacred Temple. If Temple is one of your missing portals, a specific timed key can be selected through ExpCarry's WoW Mythic+ services.
Is Temple of Sethraliss good for targeted loot farming?
It can be, particularly when your specialization needs one of its weapons, armor pieces or returning trinkets. For targeted farming, check your specialization's current simulations or BiS recommendations first, then repeat the specific dungeon rather than assuming every returning item is automatically strong in Season 2.