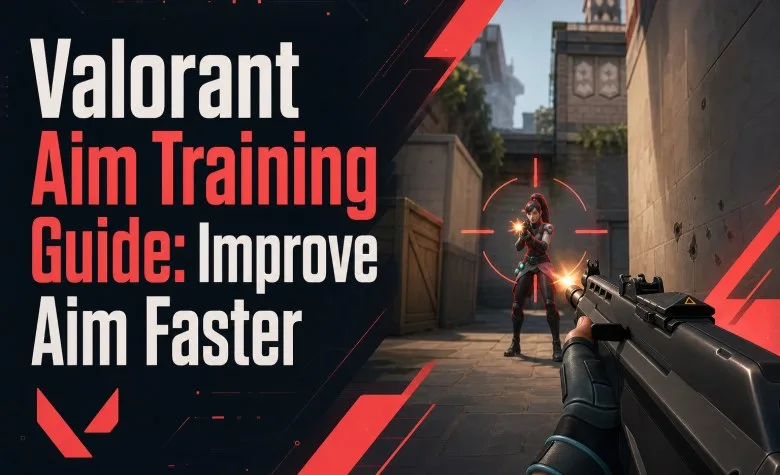
The fastest way to improve your aim in VALORANT is not to grind flicks for hours. Build the mechanics that reduce how much aiming you need to do in the first place: keep your crosshair at likely head height, stop before accurate rifle shots, pre-aim common angles, make small corrections instead of huge flicks and practice real peeks against moving opponents.
For most players, a focused 15–25 minute routine before Ranked is enough. Use the Range to isolate movement and first-shot accuracy, then use Deathmatch to apply those mechanics against real players. Do not judge the session by bot score or Deathmatch K/D — judge whether your first bullet, movement timing and crosshair placement are becoming cleaner.
| Skill | Main problem | Best practice |
|---|---|---|
| Crosshair placement | Crosshair starts too far from the enemy | Pre-aim likely head positions |
| Movement | Shooting before becoming accurate | Move → stop → shoot → move |
| Micro-adjustments | Overflicking past targets | Use smaller corrections after good pre-aim |
| Peeking | Exposing yourself to several angles | Clear one dangerous angle at a time |
| First bullet | Immediate panic spray | Prioritize a clean first shot or short burst |
| Deathmatch | Playing only for kills | Train one mechanic per match |
What Actually Makes Good Aim in Valorant?
Good aim is a combination of several mechanics rather than raw mouse speed.
The most important components are:
- Crosshair placement: having your crosshair near the target before contact.
- Movement timing: becoming accurate before firing.
- Pre-aim: preparing for the angle an opponent is likely to occupy.
- Micro-adjustment: correcting a small remaining distance onto the target.
- Target acquisition: identifying the correct target quickly.
- Peeking: exposing yourself in a way that creates a favorable duel.
- Shot discipline: choosing between tapping, bursting and committing to a spray.
Flicking is part of aiming, but it should usually be your backup. If every duel requires a large flick, the problem often begins before the opponent appears.
1. Fix Crosshair Placement First
Crosshair placement has one of the highest returns of any VALORANT mechanic because it reduces the distance your mouse needs to travel after contact.
The basic rule is:
Keep the crosshair where the next enemy's head is most likely to appear.
That means:
- keep it around head height while moving;
- adjust for stairs and elevation;
- aim toward the next dangerous corner rather than the center of an empty corridor;
- reset to head height immediately after every kill;
- do not stare at the floor while rotating.
Head height is not one fixed vertical position on your monitor. Map elevation changes it constantly. Use boxes, doors, wall textures and other environment geometry as visual references.
2. Pre-Aim Instead of Reacting With Huge Flicks
Pre-aiming means placing your crosshair on a likely enemy position before fully exposing yourself to it.
Imagine clearing three common defensive positions.
A weak approach is:
Walk into the open → see defender → flick toward them.
A stronger approach is:
Pre-aim first position → clear it → move crosshair to second position → expose second angle → repeat.
The second method requires less reaction and less mouse movement.
This is why map knowledge directly improves aim. If you already understand where defenders commonly stand, your crosshair can arrive before the opponent appears.
Explore services related to this guide, selected from our Valorant catalog.
View All Valorant Services
3. Stop Before You Shoot
One of the most common causes of missed rifle shots is firing while your movement speed is still too high.
Build this rhythm:
Move → stop → shoot → move again.
Practice it slowly first. Speed comes later.
Do not train yourself to stand still for several seconds. The stop only needs to be long enough for an accurate shot or controlled burst.
After shooting, move again unless the situation requires committing to the spray.
Do You Need to Counter-Strafe in Valorant?
Not in the same way as Counter-Strike.
VALORANT slows your character very quickly when you release a movement key. Tapping the opposite direction can marginally shorten the transition and can create a useful rhythm, but it is not a mandatory beginner mechanic.
Start with:
A → release → shoot
and:
D → release → shoot.
Once this timing is clean, you can experiment with:
A → brief D input → shoot
or the reverse direction.
The important part is reaching an accurate movement state before the bullet, not performing a specific keyboard ritual.
4. Train Micro-Adjustments, Not Only Flicks
A micro-adjustment is the small correction between your prepared crosshair position and the enemy's actual head position.
This is one of the most important forms of mouse control in VALORANT.
For example:
- your crosshair is already at head height;
- the opponent swings slightly wider than expected;
- you correct a few pixels horizontally;
- you fire.
That is usually more repeatable than trying to develop increasingly dramatic flicks.
When practicing bots, prioritize clean, controlled transitions. Speed up only when accuracy remains stable.
5. Learn How Far From a Corner to Hold Your Crosshair
Aiming directly against the edge of a corner is not always correct.
The correct distance depends on how quickly you expect the opponent to appear.
| Expected peek | Crosshair placement |
|---|---|
| Slow walk / cautious clear | Closer to the edge |
| Normal strafe | Slightly farther from the edge |
| Wide swing | Farther away to reduce required correction |
| Very close opponent | Allow more space because apparent movement is faster |
| Distant opponent | Hold tighter because apparent movement is slower |
If opponents constantly fly past your crosshair, you may be holding too tightly to the corner.
If you always need to flick backward toward the corner, you may be holding too far away.
6. Clear One Angle at a Time
One of the biggest peeking mistakes is exposing yourself to two or three defenders simultaneously.
Instead, use cover and movement to isolate one likely angle.
Think:
Which enemy can see me first?
Clear that position before exposing the next one.
This technique is often described as slicing the angle or slicing the pie. It turns a dangerous multi-angle entry into several smaller individual checks.
7. Learn the Main Types of Peeks
Standard Peek
A normal sideways strafe used to clear an angle while maintaining enough control to stop and fire.
This should be your default.
Wide Swing
You move farther beyond the edge than the opponent may expect.
Useful when:
- you expect the enemy to be holding tightly against the corner;
- a teammate can trade you;
- you need to break predictable timing.
Do not wide swing every duel. It exposes you to additional positions.
Jiggle Peek
A short exposure followed by an immediate return to cover.
Use it primarily to:
- collect information;
- bait an Operator shot;
- confirm whether an angle is occupied;
- force a defender to reveal their position.
Do not turn every jiggle into a shooting attempt.
Jump Spot
A movement used primarily for information rather than for taking an accurate gunfight.
It can expose a small or unpredictable part of your model while letting you return behind cover.
The goal is information, not a mid-air kill.
8. Understand Peeker's Advantage Without Blaming Every Death on It
VALORANT, like every online shooter, has some level of peeker's advantage because information must travel between two clients and the server.
That means the player moving around a corner can sometimes see the defender slightly before the defender's client shows the peeker.
However, this does not mean every aggressive peek automatically wins.
You can reduce the practical impact by:
- avoiding completely predictable static positions;
- changing the distance you hold from corners;
- using utility before fights;
- repositioning after being spotted;
- maintaining stable FPS and network performance.
Sometimes a player also appears to be running while killing you even though they had already stopped accurately on their own client. Network interpolation can make movement appear slightly behind the actual shooting state.
9. Tap, Burst or Spray?
Your shot choice should change with distance and the situation.
| Situation | Recommended approach |
|---|---|
| Long-range rifle duel | Single shots or controlled short bursts |
| Medium-range duel | Short bursts with movement resets |
| Close-range committed fight | Controlled spray can be appropriate |
| Enemy unaware | Take extra time for the first accurate shot |
| Multiple enemies | Prefer controlled transitions instead of holding a random spray |
The mistake is not spraying itself. The mistake is automatically spraying every encounter before confirming whether the first bullets connected.
10. Do Not Crouch Automatically
Crouching is useful, but automatic crouching creates problems.
If you immediately crouch in every duel:
- you commit to the fight;
- repositioning becomes harder;
- your movement becomes predictable;
- lower-ranked opponents aiming at chest level can accidentally hit your head.
Use crouching deliberately after deciding to commit to a spray or to change your head level.
Do not make it the automatic first input after seeing an enemy.
11. Use Deathmatch Correctly
Deathmatch is useful because it gives you many real engagements quickly, but only if you train intentionally.
A poor Deathmatch goal is:
“I must finish first.”
A useful goal is:
“For this match, every corner starts at head height and every rifle shot begins after a clean stop.”
Use one training focus per Deathmatch.
| Deathmatch | Focus |
|---|---|
| DM 1 | Crosshair placement only |
| DM 2 | Move → stop → burst |
| DM 3 | Pre-aim and angle isolation |
| DM 4 | Normal gameplay combining everything |
You do not need four Deathmatches before every Ranked session. Use this as a training progression across different days.
12. Do Not Camp in Deathmatch
If your aim-training goal is improving real duel mechanics, move around the map.
Holding one strong angle for the entire match may increase your Deathmatch score but gives you fewer repetitions of:
- clearing corners;
- crosshair repositioning;
- stopping before shots;
- adjusting to different distances;
- taking unfamiliar fights.
Deathmatch is practice. Do not optimize practice for the scoreboard.
15-Minute Valorant Warm-Up Before Ranked
This is our practical warm-up recommendation, not an official Riot requirement.
| Time | Drill | Focus |
|---|---|---|
| 3 min | Stationary Range bots | Head-height placement and clean first bullets |
| 3 min | Strafe → stop → single shot | Movement accuracy timing |
| 3 min | Moving/strafe bots | Micro-adjustments and tracking before firing |
| 6–10 min | One Deathmatch | Crosshair placement and realistic peeks |
The purpose is to make your mechanics feel normal before Competitive. It is not supposed to exhaust your hand.
30-Minute Aim Improvement Routine
If you are actively trying to improve rather than only warm up:
| Time | Exercise |
|---|---|
| 5 min | Slow controlled bot headshots |
| 5 min | A/D movement with stop-and-shoot timing |
| 5 min | Moving bots and micro-corrections |
| 10 min | Deathmatch with one specific mechanic |
| 5 min | Custom map pre-aim route on one active map |
Do this consistently rather than doubling the routine after one bad Ranked session.
How to Practice Crosshair Placement on Real Maps
The Range cannot teach every elevation and corner.
Open a custom game on one map from the current Competitive map pool and walk through a normal attack route.
At every corner:
- identify the most likely enemy position;
- place the crosshair at expected head height;
- strafe until the angle becomes visible;
- move the crosshair to the next position before exposing it;
- repeat through the entire site.
This connects aim with actual map geometry.
Should You Use Aim Lab or KovaaK's?
Third-party aim trainers can be useful for raw mouse control, especially:
- micro-corrections;
- target switching;
- smooth tracking;
- reaction drills.
But they cannot fully reproduce VALORANT movement, recoil, map geometry, peeking or duel timing.
Use an aim trainer as a supplement, not a replacement for the Range and Deathmatch.
A good split for most players is to spend more training time inside VALORANT than outside it.
Should You Train With Vandal or Phantom?
Train primarily with the rifle you actually use in Ranked.
If you normally buy Vandal, most practice should use Vandal. If you prefer Phantom, practice Phantom.
You can occasionally use Sheriff or Guardian to force first-shot discipline, but do not spend all your practice on a weapon you rarely use in Competitive.
Should You Practice With Sheriff?
Yes, in moderation.
Sheriff practice punishes careless body spraying and encourages:
- head-height crosshair placement;
- deliberate first shots;
- controlled movement;
- patience before clicking.
But Sheriff-only practice can also create habits that do not perfectly transfer to rifles. Return to your main Ranked weapon before ending the warm-up.
How to Know Why You Missed
After a lost duel, classify the mistake instead of simply thinking “bad aim.”
| Miss pattern | Likely issue |
|---|---|
| Bullet misses while crosshair looked correct | You may have fired before movement accuracy reset |
| You flick upward every fight | Crosshair placement is too low |
| You constantly flick past targets | Sensitivity may be high or you are over-correcting |
| Enemy runs past your held angle | You may be holding too close to the corner |
| You die to another defender while aiming correctly | You exposed multiple angles |
| First bullets miss and you panic spray | Shot discipline problem |
This diagnosis makes training much more efficient because each problem has a different solution.
Is Headshot Percentage a Good Aim Metric?
Headshot percentage is useful, but it should not be your only aim metric.
It changes based on:
- weapon choice;
- Agent role;
- fight distance;
- spraying frequency;
- opponent movement;
- your playstyle.
A player with lower HS% can still win more useful fights and create more round impact.
Use headshot percentage to identify trends, not as a score you must maximize at the expense of winning.
Aim Training by Rank
| Rank | Main aim priority |
|---|---|
| Iron–Bronze | Stop before shooting and keep crosshair off the floor |
| Silver–Gold | Head-height pre-aim, burst discipline and angle isolation |
| Platinum–Diamond | Micro-adjustments, peek spacing and first-bullet timing |
| Ascendant | Angle-specific preparation, duel selection and consistency |
| Immortal–Radiant | Small timing errors, movement efficiency and opponent-specific adaptation |
Do Not Change Sensitivity While Training Aim
If your sensitivity is within a controllable range, keep it stable while learning mechanics.
Changing it every session makes it difficult to determine whether your movement and crosshair habits are actually improving.
For sensitivity and eDPI recommendations, use our best VALORANT settings guide.
Do Not Keep Changing Crosshair Either
A clean crosshair helps, but changing the visual reference constantly can make practice less consistent.
Choose one small visible profile and keep it for several sessions.
Our VALORANT crosshair codes guide includes several practical presets.
Common Valorant Aim Training Mistakes
| Mistake | Why it slows improvement |
|---|---|
| Only practicing flicks | Most real duels should begin with better crosshair placement |
| Trying to shoot bots as fast as possible | Speed hides poor technique |
| Playing Deathmatch only for K/D | You optimize the score instead of the target mechanic |
| Changing sensitivity constantly | Makes improvement difficult to evaluate |
| Shooting while moving | Creates unnecessary first-shot inaccuracy |
| Automatic crouching | Commits you to fights and reduces movement options |
| Long warm-up before every Ranked session | You can become mentally or physically tired before the real matches |
Valorant Aim Training FAQ
What is the fastest way to improve aim in Valorant?
Prioritize crosshair placement, stop-shoot timing, pre-aim and controlled micro-adjustments. Practice them in the Range, then apply one mechanic at a time in Deathmatch.
How long should I train aim before Ranked?
For most players, around 15–20 focused minutes is enough for a warm-up. Longer training sessions are better separated from important Ranked games.
Is Deathmatch good for aim training?
Yes, especially for crosshair placement, movement timing and real map angles. Ignore the scoreboard and train a specific mechanic.
Is counter-strafing necessary in Valorant?
No. Releasing your movement key already decelerates you quickly. An opposite-direction tap can provide a small timing advantage, but clean stop-and-shoot fundamentals matter much more.
Should I aim for the head all the time?
Your crosshair should usually be prepared around expected head height with rifles, but the correct shot still depends on weapon, distance, enemy position and situation.
Should I use Aim Lab?
It can improve raw mouse control, but it should supplement rather than replace VALORANT-specific Range, Deathmatch and map practice.
Should I practice Vandal or Phantom?
Practice primarily with whichever rifle you actually use most in Ranked.
Why do my bullets miss even when my crosshair is on the enemy?
A common cause is firing before your movement has entered an accurate state. Practice separating movement from the moment you fire.
Final Valorant Aim Routine
If you want one routine to keep:
- 3 minutes: controlled headshots on stationary bots;
- 3 minutes: A/D movement → stop → shoot;
- 3 minutes: moving targets and micro-adjustments;
- one Deathmatch: crosshair placement and real peeks;
- then Ranked: stop thinking about drills and play the game.
Do not chase perfect bot scores. The goal is to make good mechanics automatic enough that your attention during Ranked can move to positioning, utility, teammates and the round itself.
For the broader climb strategy, continue with our guide to ranking up faster in VALORANT.