
Dreamrift is a one-boss raid, but that does not make it simple. Chimaerus the Undreamt God is built around repeated coordination checks: split the raid correctly, rotate Alndust Upheaval cleanly, break add shields on time, clear puddles with disciplined dispels, and never let the room stay messy before Consume or Ravenous Dive. Once your raid loses control of the board state, the fight stops feeling manageable very fast.
The biggest trap is underestimating the format. Because Dreamrift is compact, weak groups treat it like a fast loot stop and start playing loose. That is exactly how they delay swaps, mishandle Miasma, miss intermission interrupts, and feed value into the boss through bad add control. Chimaerus is not mechanically bloated, but it is ruthless about punishing sloppy execution.
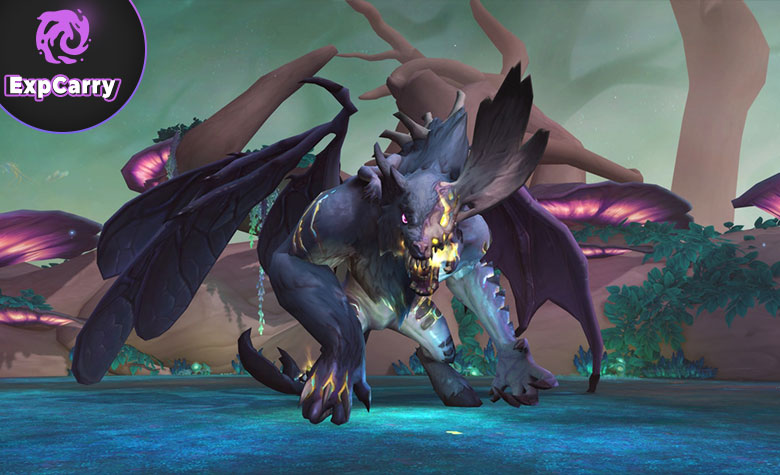
Dreamrift Boss Overview
Dreamrift revolves around one encounter, so the raid overview needs to be direct. The structure is simple on paper, but the boss asks for constant control over add timing, split-group movement, and room cleanup. That is why even a short one-boss raid still needs a proper plan before pull.
| Boss | Raid | Recommended setup | Fight style |
|---|---|---|---|
| Chimaerus the Undreamt God | Dreamrift | 2 Tanks, 4 Healers, 14 DPS | Single-target boss with split-group handling, heavy add pressure, and frequent target swaps |
The encounter is a repeating cycle. One group soaks Alndust Upheaval, gains Alnsight, and handles the Rift side. The other group stays on the boss at first, then swaps once Alnshroud is broken and the adds become proper targets for them. Around that loop, the raid manages Miasma dispels, raid damage, frontal dodges, interrupt assignments, and an intermission that punishes any leftover mess. That is the whole logic of the fight. If your raid keeps each cycle clean, Chimaerus feels controlled. If it does not, the fight snowballs.
Chimaerus Abilities That Matter on Heroic
You do not need an inflated spell encyclopedia to clear Heroic Dreamrift. What matters is understanding which mechanics actually decide whether the pull stays stable or collapses. The table below keeps the focus on the abilities that shape positioning, add control, dispels, intermission cleanup, and the boss reset cycle.
| Ability | What it does | What your raid does |
|---|---|---|
| Alndust Upheaval | Heavy Nature damage on the active tank, split among players in the circle. Players hit gain Alnsight for 40 seconds. | Use two fixed soak groups and rotate them correctly. Place the circle off to the side and let only the assigned group soak. |
| Alnsight | Lets affected players damage Manifestations in the Rift side of the fight. | The soaked group follows its tank, opens on the Colossal Horror, and lets smaller adds group for efficient cleave. |
| Rift Vulnerability | When Alnsight expires, affected players take heavy damage from future Upheavals for 1.5 minutes. | Do not let the same soak group take the next Upheaval. |
| Rift Emergence | Spawns Manifestations and applies Rift Sickness to the raid. Adds also gain Alnshroud. | Heal through the absorb, then break Alnshroud quickly so the normal group can swap. |
| Alnshroud | Absorb shield on Manifestations that blocks proper damage contribution from the normal side. | Break it first. That is the real swap trigger for non-Alnsight players. |
| Consuming Miasma | Dispellable circle that deals periodic damage and clears puddles when removed inside them. | Move to a puddle, call for dispel, and remove it away from the raid. |
| Caustic Phlegm | Raid-wide 12-second damage-over-time effect. | Respect overlap moments and stop feeding healers avoidable damage before it lands. |
| Rending Tear | Frontal cone aimed at a random player that deals heavy damage and applies a bleed. | Keep the boss controlled and step out immediately when targeted. |
| Fearsome Cry | Haunting Essence cast that fears players. | Interrupt it fast or dispel the fear if it gets through. |
| Essence Bolt | Interruptible single-target cast from Haunting Essence. | Kick it consistently so intermission damage does not stack for free. |
| Consume | At 100 energy, the boss eats all remaining Manifestations, knocks the raid back, and starts intermission. | Enter this cast with the room as clean as possible. |
| Corrupted Devastation | Intermission fly-through line attack that deals massive damage, stuns on contact, spawns Manifestations, and leaves puddles. | Dodge the path, avoid the puddles, and keep cleaning the room. |
| Rift Shroud | Chimaerus takes 99% reduced damage in intermission. | Do not tunnel the boss. This phase is about cleanup and survival. |
| Ravenous Dive | Intermission-ending slam that consumes remaining Manifestations and resets the cycle. | Kill everything before it lands. |
| Insatiable | If a Manifestation reaches the boss, Chimaerus deals raid damage, heals from the add, and gains a large damage buff. | Do not let adds touch the boss at any point. |
Dreamrift Fight Plan by Phase
Chimaerus becomes much easier once you stop reading the encounter as random pressure and start seeing it as a fixed loop. Every cycle asks the same questions: did the right group soak, did the Alnsight side control the pack, did the raid break shields in time, did Miasma remove puddles safely, and did the room stay clean before the reset point. The sections below break that loop into the three parts that actually matter during progression.
Split Setup, Alndust Rotation, and Add Priority
Before the pull, split the raid into two fixed groups. A standard Heroic layout is one tank, two healers, and seven DPS per side. This matters because the first Alndust Upheaval comes early, and any hesitation there usually means the pull starts dirty. Put each soak off to the side and make sure only the assigned group takes it.
The soaked players gain Alnsight and move with their tank into the Rift side of the encounter. Their first job is not random pad damage. It is controlled damage into the Colossal Horror while smaller Manifestations are grouped for cleave. At the same time, the normal group stays on the boss, stabilizes the room, and prepares to swap once Alnshroud is broken. That timing matters. The normal group should not keep tunneling boss while adds sit alive too long, and it also should not pretend the swap window is just "whenever." Alnshroud is the gating mechanic. Once that shield is dealt with, the swap needs to happen immediately.
This is also where the true wipe logic of the fight starts. If Manifestations live too long, they either reach the boss and trigger Insatiable or survive long enough to get eaten later by Consume or Ravenous Dive. Both outcomes are bad. Dreamrift is not a boss damage check dressed up as a raid. It is an add control fight that happens to have a boss in the middle.
Miasma, Positioning, and Raid Damage Pressure
Once the split plan is stable, the next layer of the fight is room management. This is where a lot of pulls start falling apart, not because the mechanics are mysterious, but because players get lazy with movement and dispels. Chimaerus punishes that laziness immediately by turning one bad decision into worse positioning, extra raid damage, and less space for the rest of the phase.
Consuming Miasma is one of the mechanics that separates disciplined groups from garbage pulls. Players with the debuff need to move to an existing puddle and get dispelled there. The circle only needs to clip the puddle to remove it, so there is no excuse for detonating it inside the raid. If your group panic-dispels in the stack, it creates free damage and worse room control for later mechanics.
Positioning mistakes stack on top of that problem. Rending Tear is still a real punish mechanic even though it is simple. Tanks need to keep the boss stable, and anyone targeted has to move out immediately instead of making healers fix avoidable damage. Caustic Phlegm adds another layer of pressure because it punishes raids that were already lazy before it lands. If players keep eating unnecessary damage from bad movement, weak Miasma handling, or slow swaps, then Phlegm turns an orderly healing profile into triage.
The same principle applies to Rift Sickness after Rift Emergence. Your healers are already dealing with split coverage, dispels, and periodic raid damage. If the rest of the raid is also feeding them preventable damage, the fight starts feeling harder than it actually is. Chimaerus does not need ten mechanics to kill a group. It just needs your raid to fail the same few jobs repeatedly.
Consume, Intermission, and Ravenous Dive
The last part of the cycle is the reset section, and this is where Dreamrift exposes whether your raid actually kept control of the pull or just survived it. Everything you mishandled earlier shows up here as extra movement pressure, leftover adds, worse puddle placement, and more healing stress. If the room was already messy before Consume, intermission will punish you for it.
At 100 energy, Chimaerus casts Consume. This is the point where the encounter judges the quality of your phase. Any remaining Manifestations are eaten, the raid gets knocked back, and the fight shifts into intermission. The knockback is not the important part. The important part is whether your raid arrives here with a clean room or with unresolved add pressure and bad puddle placement. If the board is still dirty, the intermission becomes much harder than it needs to be.
During intermission, boss damage is mostly meaningless because Rift Shroud reduces incoming damage to Chimaerus by 99%. This is a cleanup phase. Corrupted Devastation sends the boss through the room in line attacks that deal massive damage, stun on contact, spawn more Manifestations, and leave puddles behind. Everyone needs to move with purpose instead of panicking into random corners. At the same time, Haunting Essence starts casting Fearsome Cry and Essence Bolt, which must be interrupted consistently. If Fearsome Cry slips through, healers need to dispel it quickly.
Every remaining add must die before Ravenous Dive. That is the hard reset check. If the intermission ends with loose adds, the boss gets value again and the next cycle starts from a worse state. Good raids-service">raids make this whole section look controlled because they enter it clean. Bad raids make it look chaotic because they spent the first half of the cycle creating problems they now have to survive.
Role Strategy for Tanks, Healers, and DPS
Once the phase loop is clear, role execution becomes much easier to read. Tanks control movement and pack shape, healers control dispels and recovery windows, and DPS decide whether add pressure dies on time or turns into boss value. The goal here is not to repeat the whole guide three times, but to make each role's actual responsibility obvious.
Tank Strategy
Tanks are anchors for the split structure, not just threat holders. Before pull, each side needs to know which tank it follows after Alndust Upheaval. Once the soak happens, the Alnsight tank defines the path, positions the Colossal Horror, and keeps smaller adds stackable for cleave. On top of that, tanks control whether the room stays readable by placing Upheaval correctly and keeping Rending Tear from clipping the raid. Passive tanking makes this fight messy. Clear tank movement makes it much easier for everyone else to execute.
Healer Strategy
Healers carry a lot of the stability in Dreamrift. You are dealing with split-group coverage, Rift Sickness, Miasma dispels, Caustic Phlegm, bad movement, and intermission cleanup pressure. The most important discipline point is still Consuming Miasma: players move first, then get dispelled in a puddle, never the other way around. Around Consume, Corrupted Devastation, and Ravenous Dive, health bars can collapse fast if the raid was already careless. This is not a pure throughput fight. It is a fight where awareness and timing matter just as much as output.
DPS Strategy
DPS players decide whether the fight stays under control or turns stupid. The Alnsight group should open on the Colossal Horror, keep small adds grouped, and use efficient cleave instead of random spread damage. The normal group needs to respect the Alnshroud timing and swap the moment those adds become real targets. In intermission, interrupts are not optional decoration. Fearsome Cry and Essence Bolt need assigned kicks, and everyone still has to avoid Corrupted Devastation and respect positioning. Doing damage is not a defense if you are also helping cause the wipe.
Common Wipe Reasons in Dreamrift
Even though Chimaerus is a one-boss encounter, wipe reasons are very consistent from pull to pull. Groups usually do not die to obscure edge cases. They die to the same repeat mistakes: wrong soaks, slow swaps, bad dispels, missed interrupts, or leftover adds feeding the boss at the wrong time. That makes the fight easier to learn, but only if the guide spells those failures out clearly.
| Mistake | Why it wipes raids |
|---|---|
| Wrong soak group takes Alndust Upheaval | Rift Vulnerability breaks the next rotation and destabilizes the split plan |
| Normal group delays add swap after Alnshroud breaks | Add pressure stays alive too long and pushes the fight toward Insatiable or Consume failure |
| Miasma dispelled inside the raid | Unnecessary splash damage and worse puddle control make later movement much harder |
| Adds reach the boss | Insatiable deals raid damage, heals the boss, and massively buffs boss damage |
| Leftover adds survive into Consume or Ravenous Dive | The boss still gets value from failed cleanup even if the adds never touched him directly |
| Missed Fearsome Cry or Essence Bolt interrupts | Intermission pressure stacks on top of movement and healing load |
| Players eat Rending Tear or Corrupted Devastation | Healers get overloaded by damage that should never have happened |
Quick Heroic Kill Plan
If someone needs the fight reduced to a clean execution list, this is the short version. The detailed sections above explain why each part matters, but the kill itself still comes down to a few repeated priorities. When raids fail Dreamrift, it is usually because they lose one of these priorities and then never recover the cycle.
Split the raid into two fixed groups before pull and use Hero on pull. Put each Alndust Upheaval soak off to the side and rotate groups correctly so Rift Vulnerability never breaks your assignment plan. The Alnsight group follows its tank, starts on the Colossal Horror, and stacks smaller adds for cleave. The normal group starts on the boss, handles Miasma correctly, and swaps as soon as Alnshroud is broken enough for adds to become real targets.
Dispel Consuming Miasma only in puddles and away from the raid. Respect Caustic Phlegm overlaps. Dodge Rending Tear and Corrupted Devastation. Interrupt Fearsome Cry and Essence Bolt in intermission. Kill every add before Ravenous Dive. Above all, never let the room stay dirty long enough for the boss to profit from it.
Conclusion
Dreamrift works because it is concentrated. Chimaerus is the whole raid, and the fight is built around repeated execution rather than fake complexity. Every important mechanic points back to the same priorities: rotate Alndust Upheaval properly, break Alnshroud on time, control add packs, handle Miasma with discipline, and clean the room before each reset point. Raids that do those things make the encounter look stable. Raids that do not make it look far more chaotic than it really is.The cleanest way to understand Heroic Chimaerus is as a board-state fight. You are not just damaging a boss. You are constantly managing what is alive, what is shielded, where puddles are, who has Alnsight, who can soak next, and whether the room will still be playable after the next transition. Once your raid sees the fight that way, the cycle becomes much easier to control.If you want a reliable clear, stop treating Dreamrift like a short side raid and treat it like what it actually is: a compact coordination check with no spare room for lazy mistakes. One boss, one room, no excuses.


