This AION 2 Gladiator guide gives you five playable build templates: boss DPS, AoE and solo farming, defensive off-tank, Arena bruiser and Abyss frontline. Each includes skill priorities, a practical Stigma core, stats, Arcana, Pantheon and pet direction. The detailed skill choices are based on the Korean/Taiwanese Gladiator (검성), with the August and September 2026 KR class changes taken into account and Global playtest skill data checked through build 1.0.21.0 (September 26). Global Advanced Access starts September 30 and free-to-play begins October 5, 2026. This is a pre-launch Global class guide: Later KR skill interactions and Global test-client localization are useful starting points, but the Global retail tooltips, available Stigma slots, cards and equipment decide which parts can be copied exactly.
Short answer: For a Korean-style boss build, invest in Overhead Slam, Rending Blow and Ruinous Blow, prioritize Experienced Counterstrike and Murderous Burst, and balance Smite with Frontal Damage Boost. For PvP, add Blade Toss, dependable gap closing, Accuracy, HP and a manually controlled escape from crowd control. Keep major buffs outside an automatic damage queue.
| Build | Main purpose | Skills and utility | Priority stats |
|---|---|---|---|
| Boss DPS | Expedition, Transcendence, Sanctuary | Overhead / Rending / Ruinous; Lunge Stance and controlled burst | Accuracy to hit, Attack, Smite, Frontal Damage |
| AoE / solo | Field packs and repeatable clears | Leaping Slam pull/reset, Crushing Wave, Rending, Lifestealing Blade | Attack, sustain, enough defenses for uninterrupted pulls |
| Defensive off-tank | Survival and emergency frontline duty | Focused Block, Armor of Balance, Wave Armor, Lifestealing Blade | HP, Damage Tolerance, practical Accuracy and Attack |
| Arena bruiser | Duels and small fights | Blade Toss, Leaping Slam, Ankle Slice, Overhead and Defiance | Accuracy, PvP Damage, HP, control survival |
| Abyss frontline | Organized group PvP | Protection, coordinated AoE, healer pressure, disengage | PvP Damage Tolerance, HP, Accuracy, then offense |
How Gladiator Works in AION 2
Gladiator is a Greatsword frontline damage dealer, not a copy of an old AION 1 polearm build. Its ordinary attacks and skill chains provide close-range cleave; its stronger attacks reward staying on a target and keeping their enabling effects active. Lifesteal, parry and protective abilities let it survive pressure, but these tools do not make every DPS configuration a substitute for a dedicated Templar. The central practical constraint is melee uptime: a theoretically stronger damage setup loses value if you cannot hit the boss or reach an opponent.
There are four different things to progress. Active skills unlock their own specialties. Passive skills improve damage or survival without occupying your ordinary attack sequence. Stigmas are a separate, limited equipped selection. Arcana, gear and Daevanion can supply further skill levels and stats. Do not confuse a passive bonus with an active specialty or a skill's place on your hotbar with a Stigma slot.
Best Gladiator Skills and Korean Specialties
The later KR/TW layout and September Global playtest data show options unlocking with skill investment: the first specialty selection appears at skill level 8, the second at 12 and the third at 20. Option #5 becomes eligible before all three can be equipped together. The notation 3/4/5 refers to option numbers within one skill, not to three character levels. The table describes their effects so that a reader can check Global even if option order or wording changes in the retail build.
| Skill | PvE target | What the choice actually does | Useful swap |
|---|---|---|---|
| Overhead Slam (내려찍기) | 3/4/5 at skill 20 | #3 adds Upward Strike chain; #4 guarantees a Critical Hit on contact; #5 removes the cooldown. | #1 lifesteal (reduced in the August 26 KR rebalance) or #2 area conversion when sustain/cleave matters more than the full boss combination. |
| Rending Blow (절단의 맹타) | 3/4/5 at skill 20 | #3 allows movement, #4 increases damage when fewer targets are struck, #5 restores MP after a critical hit. | #1 lowers MP consumption before #5 is available; #2 adds Block while the skill is used. |
| Ruinous Blow (파멸의 맹타) | 1/4/5 or 3/4/5 | In the post-August 19 KR layout this is an immediate AoE attack, not an old charged attack: #1 adds skill speed; #3 adds skill-critical support; #4 adds damage on hit; #5 bypasses Block/Evasion and applies Multi-Hit. | #2 extends range. Choose #1 against a comfortable boss target; test #3 when your actual skill-critical profile benefits. |
| Leaping Slam (도약 찍기) | #1 for boss entry | #1 grants brief Prepare for Battle; #3 resets the cooldown on a kill; #5 turns it into a pulling AoE. | #4 offers short defensive tolerance when jumping into danger; #2 supports the Ankle Slice follow-up. |
| Crushing Wave (분쇄파동) | Secondary boss button | Regional choices include HP absorb, MP on critical, bonus damage with more targets, cooldown reset on critical and a pulling effect. | For farming, prefer damage-by-target-count and suitable recovery/pull choices rather than copying a boss setup. |
| Keen Strike (예리한 일격) | Resource-supporting filler | Provides MP recovery and feeds its attack chain; specialties can improve MP return, lifesteal or Ruinous cooldown interaction. | Use sustain choices when resource starvation interrupts damage. |
Investment order: build a functioning Overhead package first, then finish the next useful breakpoint on Rending or Ruinous. A July Korean high-end Arcana discussion centered its offensive setup on bringing all three to skill level 20, but this is a mature regional goal, not a required starting Global purchase. A player with a good skill-level roll on a card or ring may reach one breakpoint earlier than another player. Avoid spreading bonuses across many secondary attacks while none of the core three unlocks the specialty you actually want.
Version check before copying a rotation: August 12 moved the Rending/Smashing Blow chain cancel point from the first to the second hit, lengthened Ruinous Blow's base cooldown and changed specialty #4. August 19 then removed Ruinous Blow's charge mechanic, made it a regular AoE attack, changed #3 to skill-critical support and revised Overhead's two-hit motion and follow-up. August 26 adjusted animation-cancel timing and Gladiator damage coefficients. A pre-August charge guide or first-hit cancel macro is obsolete for later KR. Compare the August 12 translated notes with the August 19 update and the live client.
Which Gladiator Passives to Upgrade
For sustained boss damage, an established Korean order is Experienced Counterstrike (노련한 반격) and Murderous Burst (살기 파열), followed by Impact Accuracy, Attack Preparation and Identify Weakness as their next useful levels become available. Experienced Counterstrike's value depends partly on how often you actually hit from the front and receive its relevant block-related benefit; Murderous Burst does not require the same positional assumptions. This is a priority framework, not a claim that every additional level has identical value in every party.
Do not quote July's passive coefficients as current. On August 26 KR, Experienced Counterstrike's PvE amplification at its cited level-10/20/30 milestones changed from 17/24/31% to 9/13/17% (with corresponding PvP reductions); Keen Strike's chain and Ruinous Blow received PvE damage adjustments. On September 2, NC also fixed Experienced Counterstrike and Murderous Burst not applying correctly under lower-level Wave Armor buffs and Protection Armor under lower-level Armor of Balance. These are KR-version notes, not guaranteed Global launch values. A defensive or PvP preset may prioritize survival instead of the complete boss-passive sequence.
Build 1: Gladiator PvE Boss DPS
This build is for fights where you can maintain contact, use Overhead reliably and save burst for an actual vulnerable period. Overhead is a conditional skill: it normally follows Knockdown or can trigger against an incapacitation-immune target; Rage Burst provides another way to prepare the damage window. It is not a button that should be assumed available on every cooldown. The setup focuses on the three attacks above instead of stacking every AoE skill just because Gladiator has wide swings.
Skills: Overhead 3/4/5, Rending 3/4/5 and Ruinous 1/4/5 are the mature-KR targets. Use Leaping Slam's Prepare for Battle option when it helps regain melee range. Keep Keen Strike for MP support and Crushing Wave as an additional damage/Stagger tool. First Stigma core: Lunge Stance (also translated Assault Stance), Rage Burst, Zikel's Blessing and Wave Armor. Focused Block or Lifestealing Blade is a defensive/recovery alternative if a mechanic requires it. The number of simultaneously equipped Stigmas depends on your Global unlocks; this is a prioritization list, not a screenshot of guaranteed starting slots.
Boss rotation priority: establish the available Prepare for Battle buff with Leaping Slam or the post-August instant Ruinous; approach the boss from the position your Frontal Damage investment requires; apply Zikel's Blessing and Lunge Stance when you can spend their useful duration; use Rage Burst to enable an Overhead window; execute Overhead and its follow-up when available; weave Rending to maintain damage and MP; reapply Ruinous and use Keen Strike in gaps. Hold defensive skills for actual mechanics. If the boss becomes untargetable, preserve the high-value burst instead of spending it into an empty phase.
Gear and systems: enough Accuracy for the current boss, then an appropriate Greatsword and offensive rolls in Attack, Smite, Frontal Damage Boost and Weapon Damage Boost. For Arcana, prioritize the skill levels that complete your Overhead/Rending/Ruinous specialties before pursuing a late regional set. Pantheon Destruction, Wisdom and Time support the same offensive direction; choose relevant pet Genus Insight rolls rather than a pet skin by name.
Explore services related to this guide, selected from our Aion 2 catalog.
View All Aion 2 ServicesGladiator Boss Guide: Mechanics, Skills and Loot

These examples are from the later KR/TW Chapter 1 expedition pool, not a promise that either dungeon or its equipment is available in Global on launch day. The names below identify the three principal bosses of each instance. A boss's skill names and encounter cues are given only where supported by the available guide or regional patch notes; unnamed attacks are not assigned invented names. Loot means a possible instance or boss reward at the applicable difficulty, not a guaranteed personal drop. Mid-boss, final-boss and ceiling-reward pools differ.
Citadel of the Fallen Daeva
| Boss | Skills and mechanics | What Gladiator should do | Possible loot |
|---|---|---|---|
| Willful Turgen | Summoned Swords inflict direct damage and a damaging-over-time zone. A red tracking-arrow attack can destroy the swords when directed into them; the boss also uses ordinary telegraphed AoE. | Stay outside sword zones; help aim the red arrow into an existing sword, move from the AoE and use Focused Block only for a hit you cannot safely evade. | Mid-boss reward pool: Kina, possible Balaur's Essence, common equipment such as Earth Greatsword at relevant difficulty, and instance materials. |
| Forbidden Hexbeast Griosa | Poison Pools appear under party members; a subsequent wide Slice AoE can remove the pools. Damage Share Explosion requires players to group up; Arrow Totems apply additional ranged pressure. | Stack pool placements with the party, leave immediately, position the boss's slice through the pools and rejoin the group for the shared hit. Delay burst while repositioning. | Mid-boss pool: Kina, possible Balaur's Essence, Earth-series gear and difficulty-dependent instance materials. |
| Basilus the False | Golden/Dark aura assignment controls which shield to destroy and which slice of the arena is safe. Fear Ghosts cross the field. Golden Circles require players to occupy them, except the eye-marked player, who stays out and draws the boss away. | Break only your color's shield, take the matching safe zone, avoid ghosts or manually use Defiance after Fear. Soak the assigned circle unless you carry the eye mark; save melee burst for an accessible phase. | Final-boss reward pool: Dramata armor/jewelry, possible higher-grade Basilus equipment, Artwork Scrap: Citadel of the Fallen Daeva on listed difficulties, Kina and materials. Gear Change Voucher belongs to a specified ceiling-reward pool, not a guaranteed boss drop. |
Consumed Deus Research Base
| Boss | Skills and mechanics | What Gladiator should do | Possible loot |
|---|---|---|---|
| Overseer Gromkas | The August 19 patch explicitly widened this boss's combat-reset distance. A complete named attack list was not independently verified; do not mistake generic melee telegraphs for confirmed named skills. | Keep the boss within the encounter area, step out of visible attack indicators, and hold a defensive reaction for the next clearly telegraphed strike. | Mid-boss instance pool: Kina, common equipment and materials; Atiel-series unique items are listed among the appropriate higher-difficulty shared instance/boss pools, not as guaranteed rewards. |
| Lab Director Zylus | An identified attack applies Electrocution; its August 19 fix corrected Electrocution persisting even when the attack was successfully defended with Focused Block or Evasion Stance. Other specific skill names were not verified. | Time Focused Block against the indicated hit or leave the attack path, then maintain a clean melee position; do not macro your defensive button into a damage sequence. | Mid-boss instance pool: Kina, equipment and materials, with difficulty-dependent chances for Atiel-series rewards in the regional data. |
| Prideful Atiel | Documented patterns include Mortal's Shackles, Ring of Fate, Earth Collapse, a cross-shaped explosion, a grab and a binding charge. The August 19 notes corrected several overlapping or mistimed interactions. | Respect the Ring of Fate and ground indicators, avoid the cross explosion, hold Defiance for applicable control, and do not assume a grab or bind can be bypassed by a damage macro. | Final-boss pool: Apex armor/accessories, Atiel jewelry and, in the relevant high-tier unique/ceiling pools, Atiel Claymore (Greatsword for Gladiator). Hard-mode material pools include Sync Stone Fragments, Yustiel's Trace fragments and possible Philosopher's Stones; the Gear Change Voucher is a ceiling-reward option. |
Loot verification: Check the live regional Citadel drop table, Consumed Deus drop table and Atiel Claymore entry for grade, difficulty and availability. The Citadel encounter guide describes its three fights; the August 19 regional update documents the confirmed Deus boss interactions. Do not confuse Consumed Deus Research Base with the older Deus Research Base; their boss lists are different.
Build 2: Gladiator AoE and Solo Farming

The efficient solo build is not automatically the highest dummy-DPS build. It needs enough area coverage and recovery to finish several pulls without downtime. Keep the main damage package, then switch the specialties that only make sense when targets come in groups.
Skills: Leaping Slam with kill-reset (#3) and pull/AoE (#5) where unlocked, Crushing Wave's multi-target option, Rending cleave and Ruinous. Use Overhead's AoE or lifesteal alternative when those solve an actual farming problem. Stigmas: Lunge Stance, Lifestealing Blade, Wave Armor and Rage Burst form a useful offensive/sustain selection; Armor of Balance replaces a damage choice if crowd control is repeatedly interrupting the route.
Pack loop: group enemies within your survivable pull size, enter with the gap closer, align them in a consistent attack arc, use Rending/Crushing Wave/Ruinous, finish with the available follow-ups, and use the Leaping reset only after a kill actually triggers it. Save Lifestealing Blade for a pack where its heal changes the next pull. If you need to rest after every group, reduce the route's difficulty or add survivability; no assumed Global gold-per-hour number compensates for repeated deaths.
Keep a pet or Arcana piece with useful sustain while the character is developing. A lower theoretical damage card that preserves a core skill level or removes an MP bottleneck can be more useful for solo farming than a later KR set you cannot complete.
Build 3: Defensive Gladiator and PvE Off-Tank
This is a survival variant for taking temporary pressure, helping a learning group or staying alive in hard solo encounters. It is not evidence that a Gladiator can ignore a dungeon's intended tank mechanics.
Stigmas: Focused Block, Armor of Balance, Wave Armor and Lifestealing Blade. Keep Lunge Stance or another damage tool as an available swap when the encounter does not require all four defensive functions. Skills: preserve Rending's repeatable cleave, use Keen Strike when MP return matters, and leave Defiance on a manual key for threatening control. Use Focused Block for a predictable hit, Armor of Balance for the period where impact-type control threatens the character, and lifesteal after damage rather than at full HP.
Stats: HP, Damage Tolerance and useful defensive lines until incoming damage is manageable, then enough Accuracy and Attack to sustain enmity and useful damage. Systems: Pantheon Life/Justice can replace part of a full-offense focus; defensive pet or Arcana rolls are valuable if they solve the survival problem. Do not chase an unverified universal Block percentage or KR endgame entry threshold for Global.
Build 4: Gladiator Arena and Small-Scale PvP
PvP first requires contact and a reliable hit, then burst. A boss-only Gladiator with no gap control, too little Accuracy or no answer to enemy crowd control can lose even with higher theoretical damage. Blade Toss is a Gladiator Stigma skill; some databases place Stigmas under a broader DP classification, which does not make it a regular active skill. Equipping it for PvP competes with your other selected Stigmas. Its first regional specialty further improves the healing-reduction effect. Its healing-reduction effect was raised in the August KR skill adjustment, but Arena/Abyss apply a separate mode-wide healing-reduction rule. Do not present the full tooltip percentage as the guaranteed final Arena effect.
Attack sequence: use Blade Toss when you need ranged healing pressure; approach with Leaping Slam or Rush Strike; control an escape opportunity using Ankle Slice/Mocking Blade where the target is susceptible; use Rage Burst into Overhead only when the opponent cannot immediately disengage; follow with Rending and Ruinous while contact lasts. Forced Restraint is an alternative against a key caster when equipped and available. Avoid spending both gap closers before the target uses an escape. Since the September 16 KR fix, Leaping Slam and Ruinous Blow cannot be activated while Rooted, nor can Ankle Slice with specialty #3: break Root first rather than queueing an unavailable attack.
Stigma direction: for healer pressure, start with Blade Toss, Armor of Balance, Tenaciousness (also translated Tenacity) and Lunge Stance. If the opponent does not depend on healing, replace Blade Toss with Rage Burst for burst or Forced Restraint for control; if surviving the first counterattack is the problem, preserve Armor of Balance and Tenaciousness. Do not imply that a fifth offensive Stigma is automatically equipped in Global. Keep Defiance and other reactions outside the macro. Stats: Accuracy first if attacks miss, then enough HP and PvP Damage Tolerance to survive a counterattack, followed by PvP Damage Boost, Attack and useful Combat Speed. Pantheon Freedom becomes more relevant when Accuracy is the actual bottleneck; Destruction/Time and Life/Justice are offense/survival alternatives.
Build 5: Gladiator Abyss and Group PvP
Large battles reward coordinated entrance and exit timing rather than chaining every Arena ability into the first enemy in view. The goal is to help the frontline reach a designated target, apply healing pressure or AoE, survive the counter-engage, and leave room for the next push.
Core: Armor of Balance, Tenaciousness, Wave Armor and Lunge Stance as the protection/engagement direction. For a dedicated anti-healer role, equip Blade Toss in place of the least useful support slot; for a coordinated burst party, exchange one slot for Rage Burst. Blade Toss must be selected as a Stigma before it can be used. Follow allied control with Leaping Slam and group-safe cleave, and keep a retreat option; do not assume Leaping Slam works while Rooted in the updated KR ruleset. Stats: HP and PvP Damage Tolerance when focused down, Accuracy for the intended target group, then Attack/Smite/Combat Speed. Keep a second defensive pet or Pantheon selection if supported by your current client.
Do not import Korean equipment set names or Abyss stat thresholds without seeing the Global shop and current PvP modes. Even in Korea, a duel configuration and a coordinated siege configuration are different character jobs.
Gladiator Stigma Loadouts and Upgrade Priorities
A Stigma selection must fit the slots actually unlocked. NC expanded the Korean equipped Stigma maximum to five in March and later to six with Chapter 1, while Stigma skill levels progressed separately. Neither a mature KR character screenshot nor those regional caps verifies the starting Global capacity. The following matrix gives a selection priority, with alternatives only if the skill is present in the current client.
| Content | Four abilities to consider first | When to swap |
|---|---|---|
| Boss DPS | Lunge Stance; Rage Burst; Zikel's Blessing; Wave Armor | Focused Block for a mandatory defense, Lifestealing Blade for recovery, Armor of Balance if control interrupts the fight. |
| AoE / solo | Lunge Stance; Lifestealing Blade; Wave Armor; Rage Burst | Armor of Balance for dangerous packs. |
| Off-tank | Focused Block; Armor of Balance; Wave Armor; Lifestealing Blade | Recover one offensive slot when incoming damage becomes manageable. |
| Arena | Blade Toss; Armor of Balance; Tenaciousness; Lunge Stance | Swap Blade Toss for Rage Burst against a target without important healing, or trade Lunge for Forced Restraint when the control opportunity matters more than damage. |
| Abyss | Armor of Balance; Tenaciousness; Wave Armor; Lunge Stance | Equip Blade Toss instead of one situational protection/buff slot for anti-healer duty, or Rage Burst for coordinated dive damage. |
Upgrade logic: buy the next specialty that changes how the loadout works, not a level simply because its name appears in a top player's build. Lunge Stance's offensive speed/cooldown interaction and Rage Burst's Overhead trigger are useful in several configurations; defensive Stigmas rise in value when they allow you to stay in melee. Korean community Stigma experiments disagree about Lifestealing Blade versus Wave Armor in a fully developed group-DPS build, so present both as encounter-dependent choices rather than inventing an uncontested final ranking. Fracturing Rush (called Crushing Rush or Crushing Charge in some March patch translations) is a later KR Stigma; verify its Global availability before adding it to a build.
Gladiator Macros Based on Korean Skill Macro Practice
The Korean Inven post "Macro Setup Update" from August 26 documents the author using the game's own Skill Macro on Y and a separate burst line on T. The author also discusses a basic-attack auxiliary binding and warns that holding an attack input while activating buffs can lose hits in that personal setup. The text does not expose every move order from the embedded screenshots. Therefore the layouts below are clearly labeled our configurable templates inspired by that split-control approach, not a verbatim transcription of the Korean player's exact macro.
| Template | Suggested in-game Skill Macro queue | Keep under manual control |
|---|---|---|
| Y: simple PvE filler | Rending Blow → Keen Strike → Crushing Wave when usable | Ruinous, Overhead, movement, long buffs and emergency defense. |
| Y: boss sustained priority | Overhead Slam when enabled → Rending Blow → Keen Strike | T burst line: Ruinous/Prepare for Battle, Lunge Stance, Rage Burst and Zikel's Blessing at the right phase. |
| Y: short AoE circuit | Rending Blow → Crushing Wave → Keen Strike | Leaping Slam pull/reset, Ruinous, Lifestealing Blade and emergency skills. |
| PvP: no fixed opener macro | Use a short optional filler queue only after a target is held in place. | Blade Toss, both gap closers, Forced Restraint, Defiance, defensive Stigmas and burst. |
How to test: open the built-in Skill Macro menu, assign the learned actions in your preferred priority order and place the macro on an available hotkey. First try two skills on a training target; then add a third and compare complete attack cycles. Test with your real ping and frames, because a fixed delay from another player's PC is not a universal setting. If the system does not queue a conditional skill properly, move it back to a manual button. Keep Rage Burst and Zikel's Blessing manual for bosses; a macro cannot decide whether the boss is invulnerable. After the August 12 regional adjustment, do not cancel Rending after hit one; August 26 further revised minimum animation-cancel timing. Verify the actual second-hit timing, current skill behavior and client restrictions instead of copying old mouse scripts.
These are gameplay-control examples, not literal chat commands or third-party mouse scripts. An external timed autoclicker is not necessary to use the game's Skill Macro, and a screenshot of another player's hotbar is not proof of higher DPS on every machine. The separate Gladiator PvE rotation page planned in the editorial schedule can later cover encounter-specific animation and log testing without making this main class guide a single-macro article.
Best Gladiator Stats, Gear, Manastones and Soul Binding
Prioritize the stat that is currently preventing the build from working. A miss is more costly than a small marginal damage bonus, while stacking only defensive rolls will make otherwise safe PvE unnecessarily slow. For a high-uptime boss Gladiator, Korean testers repeatedly compare Smite (강타) with Frontal Damage Boost (전방 피해 증폭) rather than treating every point of Critical Hit as equally useful.
| Stat group | Boss PvE | AoE / solo | Arena / Abyss |
|---|---|---|---|
| Accuracy / Precision | Enough for reliable hits on the target. | Meet the route's actual needs. | Raise it when Evasion or misses break your kill window. |
| Attack / Might | Core offense; prioritize a useful Greatsword. | Shorter pack clears. | After adequate hit chance and durability. |
| Smite | Important offensive roll; compare with your existing multipliers. | Useful on consistently landing attacks. | Offense after survival/hit reliability. |
| Frontal Damage Boost | Valuable only to the extent that your real positioning triggers it. | Good against enemies you hold facing you. | More variable against moving opponents. |
| Weapon Damage / Combat Speed | Useful weapon scaling and melee uptime. | Smoother clear cycle. | Useful once you can remain on a target. |
| Critical Hit / Critical Damage | Compare against Overhead's guaranteed-crit specialty and other attacks. | Can help secondary skills, not a substitute for MP sustain. | Supplementary pressure, not a solution to misses. |
| HP / defensive tolerance | Enough to survive unavoidable mechanics. | Reduces downtime and deaths. | A major requirement for bruiser and group frontline builds. |
Do not publish a fixed Global minimum Accuracy, Smite target or guaranteed 5:5 ratio. The July KR Chapter 1 Gladiator analysis measured strong Frontal Damage value for its author's equipment and encounter assumptions; later players continued to compare mixed rolls. Your real front-facing uptime, party buffs and current gear change the result. For Manastones and Soul Binding, improve a piece you intend to keep, select relevant available offensive or defensive rolls, and read the exact transfer preview before assuming an investment will carry over. The existing AION 2 Gear Progression guide covers those systems beyond this class-specific priority.
Gladiator Arcana Builds and Skill-Level Rolls
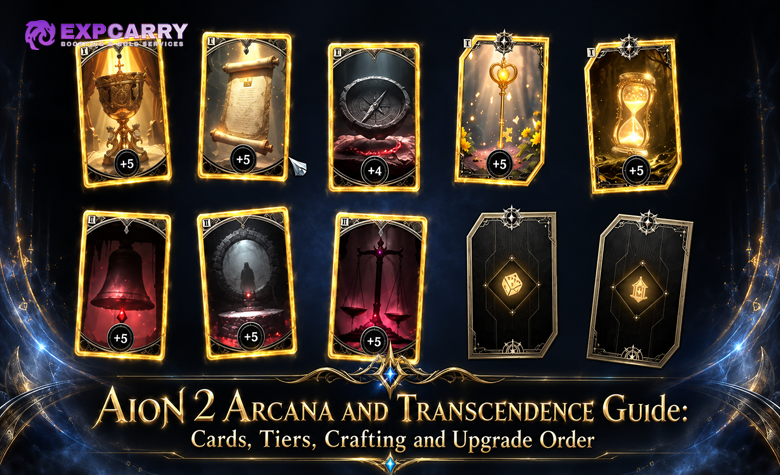
Arcana contributes skill levels and set bonuses, so a usable card can finish a decisive specialty even when it is not the rarest card in your inventory. Start with the card parts actually shown on Global. Do not force a later Korean board onto a smaller early card system.
Entry-level approach: fill every available part with cards that advance Overhead, Rending or Ruinous toward their next threshold. Then compare a completed offensive set against a higher-grade isolated card. Do not extract the only card that also supports your alternate PvP or survival preset. Upgrade materials differ by Arcana generation, so rely on the current crafting preview rather than a universal KR recipe.
Late Korean boss example: a July 20 Gladiator post describes four Guardian and four Punishment set pieces across an expanded board. Its first shopping targets are Compass with Rending levels and Parchment with both Overhead and Ruinous; Chalice then covers whichever core level is still missing. The remaining parts support offensive passives such as Experienced Counterstrike and Murderous Burst. It is a specific author's mature KR PvE configuration, not proof of the best Global day-one set or an Arena Arcana recommendation. Read the original KR setup discussion for context and the published Arcana guide for the broader system.
PvP Arcana alternative: keep enough main-skill levels for a functional damage window, but compare defensive rolls and whichever current set effect improves survival or a reliable engagement. A full boss-damage set is not automatically stronger against players. A card containing an important utility skill level may be worth retaining even if it is worse for one-target PvE.
Gladiator Pantheon: Which Statues and God Stats to Place
Pantheon is collection progression through Statues, Colossi and Artwork, not another armor slot. Use the God stats granted by an available collectible to complete the gaps in your character. The regional database groups Destruction with Attack Increase, Wisdom with Smite, Time with Combat Speed, Freedom with Accuracy/Evasion, Life with HP and Justice with Defense.
For a boss setup, the offensive starting combination is Destruction + Wisdom + Time, adjusted for your actual existing Smite and speed. For an Arena setup struggling to connect, move attention to Freedom before adding another small damage roll. Off-tank and Abyss characters may obtain more useful session-wide value from Life and Justice if extra HP or Defense prevents deaths.
Later KR collectible examples include Ascended Atheron, Tyrant Tassin and Kaisinel's Illusion for the Destruction/Time/Wisdom direction. Guardian Lord Nahma, Kromede's Desire and Zikel's Apparition illustrate the Destruction/Time/Justice direction. Exact collectible values can change between regional patches; Guardian Lord Nahma's God-stat values, for example, were raised in the July KR updates. These are not guaranteed Global launch drops. Place accessible smaller Artwork and Statues that advance your chosen God stats instead of waiting for a late Colossus. Source: the regional Pantheon collectible database.
Best Gladiator Pets, Genus Insight and Wings
Do not select a combat pet by its shop illustration alone. A named cosmetic reward, an auto-loot function and the separate Genus Insight stat system are different things. For KR-style sustained PvE, compare rolls offering Smite, Frontal Damage, Attack and the available Attack variants. A mixed Smite/Frontal arrangement is a reasonable testing baseline; use the current client to see which Genus slots can actually roll each stat before spending resources.
For PvP, an alternative preset can retain Accuracy, HP or useful defense if those rolls are supported by the live pool. For farming, a slightly less aggressive board that avoids recovery downtime can beat a boss-only setup over a complete circuit. Wing visuals also do not prove a particular stat package: compare the real offensive or survival lines and any collection bonuses, not a skin name. Korean discussions refer to pet-board slot patterns that may not exist unchanged at Global opening, so no universal slot-number prescription is given here.
Gladiator Leveling and Daevanion Upgrade Order
A new Gladiator should first make its core loop reliable, not aim immediately for the item levels and skill ceilings of a July Chapter 1 KR veteran. NC raised the Korean level cap to 50 and its regional Stigma maximum to 25; neither figure should be pasted into a Global launch build without the actual client.
- Build the weapon and core attack loop: maintain Keen Strike's resource support and develop Overhead/Rending when available. Choose a manageable pull size.
- Unlock the next meaningful skill specialties: reach one useful Overhead or Rending breakpoint rather than adding a few levels everywhere.
- Add a coherent Stigma core: use Lunge Stance and relevant offensive tools for boss damage, but substitute Lifestealing Blade or Armor of Balance if that is what makes clears stable.
- Use Daevanion for needed skill levels: target bonuses that finish Overhead/Rending/Ruinous specialties first; use offensive or defensive nodes based on the preset. Do not copy a complete Chapter 1 board into Global if that part is not unlocked.
- Fill Arcana and Pantheon: seek usable skill rolls, then set bonuses; place accessible God-stat collectibles.
- Improve keeper gear: Greatsword and required Accuracy come before expensive perfection of a temporary item. Add sensible Manastones, Soul Binding, pet Genus and wings only after checking replacement risk.
- Separate PvE and PvP loadouts: keep a boss preset and a survival/control preset once the current interface supports them; do not assume later KR preset QoL is available on day one.
The Stigma and Daevanion guide explains the progression systems separately. This Gladiator page concentrates on which resulting bonuses help the class.
Gladiator Mistakes to Avoid
Most significant performance losses come from a broken skill sequence, misclassified abilities or gearing for the wrong kind of combat. Check the following before spending rare resources.
- Using a pre-August charged Ruinous tutorial or first-hit Rending cancel video as a later KR rotation.
- Using Blade Toss in a PvP opener without actually equipping its Stigma or without freeing a slot in the current Global loadout.
- Applying Blade Toss's ordinary healing-reduction tooltip directly to Arena/Abyss without the mode modifier.
- Assuming level-20 skill specialties, Korean Stigma slots or eight-card Arcana are all available at Global character creation.
- Stacking Critical Hit without accounting for Overhead's guaranteed-crit specialty and your other attacks.
- Stacking Frontal Damage while failing to attack from the required direction.
- Copying a macro screenshot without checking the version, actual ability order, ping and whether conditional skills can activate.
- Letting a macro spend burst or defensive cooldowns before a boss phase or PvP counter-control.
- Destroying an Arcana card or rerolling a pet without checking the alternate build it supports.
- Treating a Pantheon collectible, cosmetic pet or late KR dungeon drop as guaranteed Global day-one loot.
- Trying to trigger Leaping Slam, Ruinous Blow or Ankle Slice (#3) while Rooted under the September 16 KR rules.
AION 2 Gladiator FAQ
The following cover two additional character-planning questions not resolved by the build tables.
Do Elyos and Asmodian Gladiators need different skill rotations?
The researched class data does not establish a separate faction-exclusive Overhead or Rending tree. Regions, faction access and item availability can differ, but do not invent two core rotations solely because the characters belong to different factions.
Can I save a separate Korean-style boss and PvP skill-level preset?
The September 9 Korean update introduced additional per-preset skill-level controls. That does not establish the exact feature set of the Global release interface. If the Global client lets you save skill and Stigma presets, keep an offensive setup and a control/survival setup; otherwise write down the changes before resetting points.
Conclusion
Gladiator's practical core is Overhead Slam, Rending Blow and Ruinous Blow supported by suitable resource management and timed buffs. Solo and off-tank builds exchange some offense for recovery; PvP exchanges boss-only damage for Accuracy, access, protection and coordinated pressure. The regional boss tables help prepare for later expeditions; they do not promise Global launch loot. Use Korean builds to understand the synergies, then let live Global tooltips and accessible content determine your final specialties, Arcana, Pantheon and pet rolls.