The best PoE 2 mapping build is the one that clears ordinary packs without stopping, reaches the next pack quickly, survives the modifiers you actually run, and still removes rares and map bosses without turning every map into a bossing session. For most players, Ice Shot Deadeye is the strongest pure-speed choice, Twister Spirit Walker is the best density and arena specialist, and Falling Thunder Martial Artist offers the best fast-melee profile. Poisonburst Arrow Pathfinder and Shield Wall Titan are more practical when cost or consistency matters more than the absolute ceiling.
This ranking was checked on August 13, 2026 for the live Runes of Aldur league and Early Access patch 0.5.4f. The latest official 0.5.4f patch notes contain targeting, dodge-roll, shapeshift, and crash fixes rather than a new build-balance pass, so the 0.5-era mapping evidence remains applicable. This is a dated editorial ranking, not a permanent claim: economy, newly discovered interactions, and later balance changes can move a build without changing its basic playstyle.
Best PoE 2 Mapping Builds at a Glance
The table ranks complete mapping profiles rather than isolated damage screenshots. The order assumes solo Softcore Trade mapping across mixed Atlas content, with a working but not mirror-tier character. A lower-ranked specialist can beat the top choice in its preferred layout or mechanic. Players comparing a broader set of endgame systems can use the PoE 2 guides hub without treating this list as a universal class tier list.
| Rank | Build | Mapping profile | Clear | Mobility | Defence | Relative cost | Best fit |
|---|---|---|---|---|---|---|---|
| 1 | Ice Shot Deadeye | Pure ranged speed | Exceptional | Exceptional | Moderate | Low entry, high ceiling | Open maps, Breach, Delirium, Abyss |
| 2 | Twister Spirit Walker | Wide freeze and density control | Exceptional | High | High when complete | Low entry, gear-heavy scaling | Ritual, Breach, dense arenas |
| 3 | Falling Thunder Martial Artist | Mobile melee with radial clear | Excellent | High | Moderate | Low to high | General Atlas, Abyss, compact density |
| 4 | Poisonburst Arrow Pathfinder | Budget ranged all-rounder | Excellent | High | High | Low to medium | Expedition, progression, mixed farming |
| 5 | Galvanic Shards Tactician | Premium crossbow blaster | Exceptional | High | Moderate before investment | High | Expedition, Breach, high-density maps |
| 6 | Minion Cull Warper Witchhunter | Warping minion autobomber | Exceptional | Exceptional | Specialized | Premium | Delirium, fast map loops, dense packs |
| 7 | Spark CoC Comet Pathfinder | Mana-stacking caster | Excellent | High while casting | High after transition | High | Indoor maps, Ritual, boss-inclusive loops |
| 8 | Shield Wall Avatar of Fire Titan | Defensive AoE mapper | Good | Moderate | Exceptional | Low to high | Dangerous maps, Simulacrum, safe progression |
Live Methodology and Ranking Assumptions
The evaluation uses six criteria: time needed to remove normal and magic packs, movement uptime between packs, effective screen coverage, defence and recovery under map pressure, cost before the build feels functional, and suitability for current Atlas mechanics. Boss damage matters only to the point that a rare, mechanic boss, or map boss does not erase the time saved while clearing. Pinnacle burst alone does not improve a mapping rank.
Evidence quality is strongest when three signals agree: the interaction still exists under current official notes, developed characters are visible in the live Runes of Aldur ladder or current build snapshots, and an updated build guide documents an early-Atlas or endgame transition. Public ladder data has selection bias because it favors developed characters and does not measure map time. Creator guides also use different gear and layouts. The ranking therefore uses qualitative bands instead of pretending that unrelated showcase runs form a controlled benchmark.
Cost is also qualitative. Low entry means the archetype can begin Atlas progression with ordinary rares or accessible enabling pieces. High means several item, Spirit, critical, or resource thresholds must work together. Premium means the advertised mapping behavior depends on specialized uniques, jewels, corruptions, or a finished synergy package. No fixed Divine Orb price is used because those costs move with league supply and demand.
What Makes a Mapping Build Truly Good
Clear speed begins with damage, but it is usually capped by coverage and action economy. A skill that deletes one target can still map slowly if it must be aimed at every pack. The strongest mappers propagate damage, create projectiles or explosions across a broad area, or cover several approach angles with one action. Immediate damage is favored in weak content, while poison, minions, and persistent spells become more competitive as monster durability rises.
Mobility must work during the real combat loop. Movement speed displayed in a hideout is less useful if the character must stop to reload, rebuild charges, summon replacements, or channel at every group. Defence is equally practical: evasion, armour, ward, mana protection, recovery, crowd control, and range are valuable only when they preserve forward movement. A new player who still needs the foundations can first review the PoE 2 class and progression guide. Players who prefer assistance assembling a coherent early setup can consider a contextual PoE 2 starter build setup option, but the tier list does not require any service to be useful.
Finally, a mapper needs a failure budget. Dying, reopening a map, recovering from a bad position, and leaving valuable rares alive can cancel a nominal clear-speed advantage. Choose the fastest build that stays stable under your intended modifiers, not the fastest showcase made with gear you do not own.
Explore services related to this guide, selected from our Path of Exile 2 catalog.
View All Path of Exile 2 Services


1. Ice Shot Deadeye
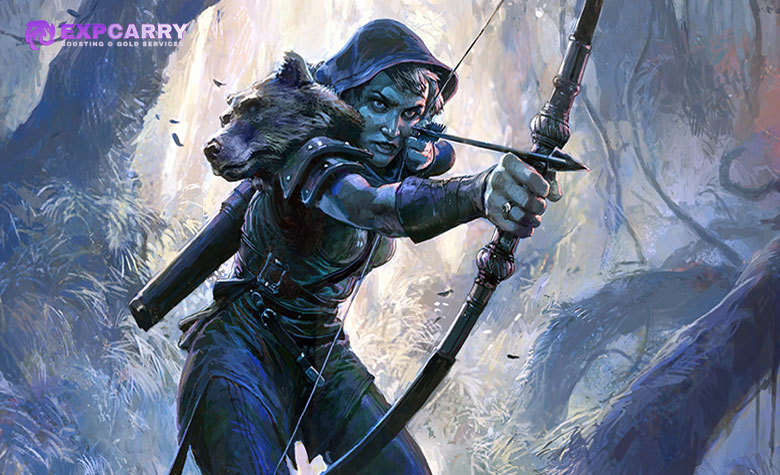
Ice Shot Deadeye takes first place for players who want the shortest possible gap between seeing a pack and moving past it. Wide projectile coverage and freeze provide both clear and a form of proactive safety, while Deadeye supports a fast ranged route through open layouts. Current developed characters and an updated 0.5 endgame guide both support the archetype as a live build rather than a pre-release projection.
The mapping loop is simple: fire into the pack, let projectile coverage catch adjacent enemies, and keep moving. Snipe supplies a separate single-target answer during early and mid investment, so the build does not have to force its clear skill to solve every map boss. At sufficiently developed gear, the distinction can narrow, but a buyer should not assume a showcase one-button version is the entry version.
- Best qualities: immediate clear, excellent open-map movement, freeze, long reach, and a direct upgrade path.
- Main risks: weaker forgiveness when evasion fails, reliance on a current bow and projectile scaling, and a noticeable rare or boss slowdown before the single-target package is ready.
- Best Atlas fit: Breach, Delirium paths, Abyss movement, and maps where projectiles can travel without repeatedly colliding with corners.
- Avoid if: you dislike aiming a bow, want to face-tank, or cannot keep defences current while upgrading damage.
Ice Shot is the default recommendation for pure mapping speed, not the automatic recommendation for Hardcore, confined arenas, or the smallest budget. If deaths interrupt the route, Twister, Poisonburst, or Titan can produce a better real session despite a lower theoretical pace.
2. Twister Spirit Walker
Twister Spirit Walker is the strongest density specialist in this ranking. Current 0.5 versions combine Twister with Spirit Walker scaling to deliver very wide freeze and clear, and the documented strengths specifically include multi-screen coverage and exceptional performance in arena zones such as Ritual. It gives up some simplicity to cover space that a direct projectile build may need several attacks to reach.
The build can start on a reasonable foundation and scale far beyond it, but those two stages should not be confused. Its developed variants become unique-heavy and gear-dependent, and the optimal rotation uses multiple buttons plus weapon-swap mobility technology. That creates transition points where copying only the final passive tree or one item can make the character feel worse rather than better.
- Best qualities: broad area control, freeze, strong density conversion, and a route from early Atlas into expensive scaling.
- Main risks: more inputs than a one-button bow build, several gear transitions, and a need to understand which item enables which part of the loop.
- Best Atlas fit: Ritual circles, Breach density, compact encounters, and other mechanics that bring monsters into overlapping coverage.
- Avoid if: you want a mechanically minimal build or plan to copy an endgame loadout one slot at a time.
Twister can beat Ice Shot whenever the map is dense enough that persistent wide coverage matters more than straight-line travel. Ice Shot remains ahead for uncomplicated open-map speed; Twister is better when the content itself keeps spawning around the player.
3. Falling Thunder Martial Artist
Falling Thunder Martial Artist is the best fast-melee mapping profile because it reduces the usual melee coverage problem. A current league-start-to-endgame version uses Shattering Palm to build the required charge loop, then spends charges on Falling Thunder with radial projectile coverage. The result is not a traditional single-target strike character chasing one monster at a time.
Its advantage is rhythm. Shattering Palm closes distance and restores the resource used by Falling Thunder, while the payoff clears around the character. That feels excellent in compact maps, Abyss movement, and dense general Atlas routes. The price is exposure: the character still enters close range and must maintain the charge sequence. Losing the rhythm against sparse packs or dangerous ground effects can leave the build less comfortable than a ranged mapper.
- Best qualities: active mobility, satisfying radial clear, league-start variants, freeze or shatter control, and strong scaling.
- Main risks: melee positioning, charge maintenance, more execution than Ice Shot, and defensive pressure when entering a pack.
- Best Atlas fit: general mapping, Abyss, dense corridors, and players who value movement skills as part of damage.
- Avoid if: you want to attack safely from the edge of the screen or dislike alternating setup and payoff skills.
This is the highest-ranked choice for a player who wants speed without playing a conventional bow or caster. It should be evaluated by whether the loop stays smooth in imperfect packs, not by the size of one fully charged hit.
4. Poisonburst Arrow Pathfinder
Poisonburst Arrow Pathfinder is the most practical budget all-rounder on the list. The current endgame archetype has an updated league-startable route, broad poison scaling, strong clear, and a defensive Pathfinder profile. It does not need the same finished critical or stacking package as the premium builds below before it can begin useful mapping.
Poison rewards sustained uptime and can continue dealing damage while the character repositions. Herald of Plague helps translate applied poison into pack clear, while bow range reduces the need to enter every danger zone. The tradeoff is damage latency: in trivial content, an immediate-hit build may already be at the next pack while poison finishes. Against durable rares or dense mechanics, that continuing damage becomes a benefit.
- Best qualities: accessible entry, strong mobility, ranged uptime, useful defence, and a clear progression path.
- Main risks: delayed kills, poison-duration and application details, and severe punishment from content modifiers that counter the build's damage plan.
- Best Atlas fit: Expedition, mixed Atlas progression, durable density, and players who want one character for mapping plus respectable single target.
- Avoid if: you only run low-durability speed content and care more about instant pack deletion than consistency.
For Expedition, the recommendation is conditional rather than automatic. Range and damage uptime are useful, but every Remnant must still be read before detonation; no tier-list position overrides an immunity or a modifier that disables the character's core damage or defence. If the goal is sustained map farming rather than self-directed setup, an hourly PoE 2 mapping and farming option is the relevant commercial bridge at this stage of progression.
5. Galvanic Shards Tactician
Galvanic Shards Tactician is a high-investment crossbow blaster with exceptional clear and speed once its buff stack, Spirit reservations, recovery, and weapon interactions are complete. A current 0.5 version uses Tactician reservation efficiency to fit a dense persistent-buff package and pushes Galvanic Shards plus Herald of Thunder past the threshold needed to erase packs quickly.
This is not the build to assemble from the skill name alone. The developed critical setup relies on a specific crossbow interaction, Runeforging, balanced damage for Trinity, sufficient Spirit, and recovery that offsets Berserk's cost. The documented version also warns that defence is weak without investment. Those dependencies explain why the build ranks below cheaper archetypes despite a higher completed ceiling.
- Best qualities: superb pack clear, high speed, strong single target after completion, and excellent Expedition specialization.
- Main risks: expensive transition, several simultaneous stat checks, weaker defence before upgrades, and crossbow management.
- Best Atlas fit: juiced Expedition, Breach, and dense maps where chain effects and projectile coverage find many targets.
- Avoid if: you expect the ranked endgame behavior from starter gear, cannot buy all enabling pieces together, or want a forgiving defensive baseline.
Patch 0.5.4 expanded Expedition customization and introduced additional Runes of Aldur Atlas support, as recorded in the official 0.5.4 notes. That makes the build's specialist use case relevant, but it does not lower the activation cost. Treat it as a planned destination build.
6. Minion Cull Warper Witchhunter

Minion Cull Warper Witchhunter is the most specialized speed mapper in the ranking. Instead of following minions through the map, the character uses Lightning Warp as movement and pack interaction while Wardbound Minions, automatic effects, and Witchhunter explosions continue the kill chain. Mobility and clear happen through the same button, which is why a finished version can move at an extreme pace.
The culling behavior depends on named item interactions and a specialized jewel, while Sorcery Ward adds a defensive resource that is harder to read than a conventional life or energy-shield bar. The current guide also identifies damage over time as a weakness. This is therefore a poor generic minion recommendation even though it is an outstanding developed mapper.
- Best qualities: no-cooldown warp movement, automated damage, explosions, and elite speed among minion archetypes.
- Main risks: premium required pieces, unusual defensive feedback, damage-over-time vulnerability, and a setup that is easy to copy incorrectly.
- Best Atlas fit: Delirium paths, repeated fast layouts, and dense farming where normal and magic packs dominate elapsed time.
- Avoid if: you want a traditional summoner, need SSF-friendly gearing, or are still learning how weapon sets and Ward interact.
Do not buy one culling item and expect the final behavior. Confirm the minion source, Ward generation and spending, Warp links, attributes, Spirit, recovery, and defensive coverage as one package. The build earns its place through completed synergy, not through a universally powerful base skill.
7. Spark CoC Comet Pathfinder
Spark Cast on Critical Comet Pathfinder is the premium caster choice for players who want one-button mapping without giving up a dedicated rare and boss payoff. Spark fills rooms and enclosed paths, critical hits trigger Comet for durable targets, and Pathfinder mobility allows casting while maintaining movement. The result is particularly effective when geometry keeps Spark projectiles in contact with enemies.
The full mana stack is both offence and defence. That makes the transition binary: insufficient mana, regeneration, Spirit, critical consistency, or damage-taken-from-mana coverage can break several systems at once. The current build documentation explicitly separates early maps from the Cast on Critical endgame transition because the earlier stage can feel weak. Respect that warning even if all final items are visible in a planner.
- Best qualities: room coverage, mobile casting, strong recovery after completion, low-button play, and good map-boss continuity.
- Main risks: synchronized mana and Spirit thresholds, a poor partial transition, critical dependence, and a high finished cost.
- Best Atlas fit: indoor layouts, Ritual, boss-inclusive map loops, and dense paths where Spark can repeatedly contact targets.
- Avoid if: you want a cheap first mapper or cannot verify the complete resource and defensive package before swapping.
Plan the passive route before purchasing gear because the mana defence is not supplied by one item. The PoE 2 passive tree and respec guide explains how to separate mandatory destinations from optional damage so a transition does not spend points on bonuses that function only after the rest of the engine is active.
8. Shield Wall Avatar of Fire Titan
Shield Wall Avatar of Fire Titan is included because a best-mapping list needs a defensive benchmark, not only speed builds. Current 0.5 versions improve clear with area investment, skill speed, Resonating Shield, and preloaded Fortifying Cry waves. Shield Wall can cover a large part of the visible area, while Leap Slam keeps the character moving between groups.
Titan trades route speed for stability. It is much less likely than a fragile projectile mapper to lose a difficult map to one failed defensive roll, and its clear and single target can share a coherent Shield Wall and Ignite foundation. It also uses several shouts and setup actions, so it is not a one-button build and does not match the fastest ranged characters in empty travel sections.
- Best qualities: exceptional toughness, broad Shield Wall coverage, safe rare handling, bossing crossover, and budget alternatives.
- Main risks: moderate traversal, multiple buttons, slower low-density routes, and expensive maximum skill-level upgrades.
- Best Atlas fit: dangerous modifier stacks, Simulacrum, difficult rares, and progression where preserving portals matters.
- Avoid if: your only metric is open-map completion speed and you dislike warcry management.
The Titan often produces better realized progress than its eighth-place position suggests. A player who frequently dies on a top-speed build may gain more experience, retain more maps, and finish more mechanics by choosing the slower defensive profile.
Best Build for Each Atlas Strategy
Patch 0.5 reorganized the endgame around mechanic hubs and revised trees for content such as Breach and Ritual, as documented in the official 0.5.0 notes. The correct mapper should match how that content delivers enemies. Open travel favors immediate projectiles; arenas favor persistent coverage; heavily modified encounters value recovery and stable damage uptime.
| Atlas strategy | Primary choice | Alternative | Why it fits | What can go wrong |
|---|---|---|---|---|
| Breach | Ice Shot Deadeye | Twister Spirit Walker | Fast expansion, wide clear, and immediate response to new packs | Falling behind the encounter when rare damage or defence is incomplete |
| Ritual | Twister Spirit Walker | Spark CoC Pathfinder | Persistent arena coverage and control around repeated spawns | Ground effects and overlapping attacks punish stationary casting or setup |
| Delirium | Minion Cull Warper | Ice Shot Deadeye | Movement and clear remain part of the same forward route | Insufficient rare damage, recovery, or visibility turns speed into deaths |
| Expedition | Poisonburst Pathfinder | Galvanic Shards Tactician | Ranged uptime and strong damage into durable packs | A Remnant immunity or defensive counter can invalidate the build |
| Abyss | Falling Thunder Martial Artist | Ice Shot Deadeye | High movement uptime follows the encounter while radial or projectile clear reaches side packs | Backtracking or losing charges breaks the pace |
| Simulacrum | Shield Wall Titan | Twister Spirit Walker | Toughness, recovery, and repeated area damage matter more than empty-map travel | Weak sustain or poor crowd control compounds across dense waves |
| Indoor and corridor maps | Spark CoC Pathfinder | Twister Spirit Walker | Walls and compact paths improve persistent projectile contact and area overlap | Open rooms reduce the geometry advantage |
| Mixed Atlas progression | Poisonburst Pathfinder | Shield Wall Titan | Accessible scaling and defensive consistency handle uncertain content | Over-investing in one mechanic before the character is ready |
These pairings are build recommendations, not profit rankings. Strategy value changes with input prices, reward demand, Atlas points, and liquidation. Use the PoE 2 Atlas passive tree guide to specialize only after the character clears the base encounter reliably, and use a dated PoE 2 farming-profit method rather than assuming the fastest build automatically produces the most sellable value.
Budget, Upgrade Cost, and Transition Rules
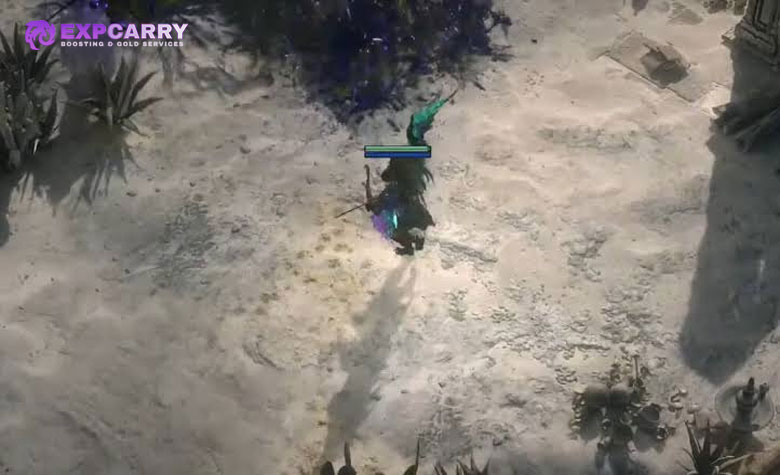
A build's advertised cost is less useful than its activation cost. Activation cost is the complete set of items, gems, attributes, Spirit, passives, recovery, and defensive caps required for the intended loop to function. Ice Shot, Poisonburst, Martial Artist, Twister, and Shield Wall have documented early routes. Galvanic Tactician, Minion Cull Warper, and Spark CoC should be treated as destination setups whose enabling package is acquired before the swap.
| Cost band | Builds | Safe purchase order | Transition stop rule |
|---|---|---|---|
| Low entry | Poisonburst, Ice Shot early, Martial Artist early, Shield Wall early | Main weapon or skill source, compatible supports, resistances, recovery, then speed | Do not add harder modifiers until ordinary rares and map bosses are stable |
| Low to scaling | Twister | Functional early loop first, then each unique-backed transition as a complete package | Stay on the previous variant if a new item removes defence or breaks rotation |
| High | Galvanic Shards Tactician, Spark CoC | Buy every enabling item and solve resources before respeccing | Do not transition when one reservation, recovery, critical, or defensive threshold is missing |
| Premium specialist | Minion Cull Warper | Secure required culling, jewel, Warp, Ward, minion, attribute, and Spirit interactions together | Keep the previous minion build until the complete mapping loop can be tested |
Market prices are deliberately absent. Check live trade for the exact rolls a guide requires, not merely the item name, and compare the total package with the cost of improving the character already owned. Players reviewing all currently offered progression routes can use the PoE 2 service category as the final commercial link; it belongs here because this is where the player decides between self-farming, build setup, and broader progression support.
Map Modifier and Readiness Checklist
A mapper is ready for a strategy when it can finish the base encounter consistently before additional reward pressure is added. Start with ordinary maps, observe pack clear, rare time, recovery, resource stability, and boss time, then add one difficulty source at a time. A high tier on this page does not make an incomplete character ready for heavily modified content.
- Damage check: normal and magic packs disappear in one short action cycle, while rares do not force repeated retreats.
- Coverage check: stragglers are rare enough that backtracking does not define the route.
- Movement check: the build can travel without constantly losing charges, buffs, minions, ammunition, or casting uptime.
- Defence check: the character survives one ordinary positioning mistake and can recover before the next hit.
- Resource check: mana, Spirit, rage, charges, Ward, flasks, and recovery remain stable during a full encounter rather than a hideout test.
- Single-target check: the map boss and mechanic rares do not consume the time or portals saved by fast pack clear.
- Modifier check: read every Waystone, Remnant, and mechanic modifier for damage immunities, recovery penalties, ailment counters, and defensive combinations that can disable the build.
Build-specific caution matters. Poison must not enter content that invalidates its damage plan. Mana stackers must protect both resource sustain and their defensive conversion. Berserk-based Tactician variants need the recovery assumed by the guide. Warp builds must respect damage over time. Freeze-based builds need a plan for targets that are not controlled quickly. Titan can accept more direct pressure, but slower movement makes persistent ground danger and time-sensitive encounters more demanding.
Alternatives That Can Beat the Ranking for You
The top eight cover the clearest current profiles, but they are not the only functional mappers. An alternative can be better when it reuses an existing character, matches the player's preferred inputs, or avoids an expensive transition. The table lists current 0.5 archetypes that have credible mapping routes but overlap with, or are narrower than, a higher-ranked profile.
| Alternative | Reason to choose it | Why it is not in the top eight |
|---|---|---|
| Mirage Lightning Arrow Deadeye | Smooth bow progression, familiar ranged loop, and a developed early-endgame route | Ice Shot currently offers the more compelling combined clear and Snipe profile for this ranking |
| Explosive Shot Gemling or Witchhunter | Simple pack clear with grenade support for enemies that survive the first attack | Its best version depends strongly on the chosen Ascendancy, weapon setup, and single-target package |
| Ball Lightning and Volcano Blood Mage | Strong persistent damage in juiced maps, Ritual, Expedition, and other dense encounters | Traversal and setup are less universal than the top arena and ranged choices |
| Pure Minion Infernalist | Accessible, low-stress progression with minions handling much of the targeting | Minion movement and targeting in tight spaces reduce route speed compared with Cull Warper |
Keeping a working alternative is often cheaper than rerolling into the nominal number one. Compare the cost of the next meaningful upgrade, the amount of passive-tree surgery, the need to level replacement gems, and whether the new playstyle solves the actual Atlas problem. Do not reroll merely because another build has a higher finished ceiling.
Common Mapping Build Selection Mistakes
The most expensive mistake is copying a late-endgame snapshot while owning only the visible unique item. Finished builds often rely on hidden thresholds from item rolls, quality, supports, runes, attributes, weapon-set passives, Spirit, or recovery. When several systems are changed together, the player cannot identify which missing piece caused the failure.
- Ranking builds by boss damage while ignoring pack coverage and movement downtime.
- Calling a build cheap because one enabling unique is inexpensive while the remaining rolls are not.
- Using live ladder presence as proof that a build is beginner-friendly or easy to assemble.
- Specializing the Atlas before confirming that the character handles the unmodified encounter.
- Adding damage after deaths, resource failure, or backtracking has already become the main time loss.
- Following an outdated planner without checking the current skill, support, item, and Ascendancy wording.
- Measuring only successful showcase maps and excluding deaths, setup, stash time, and failed encounters.
Correct the process by changing one layer at a time. Establish the damage engine, cap the practical defences required by the route, stabilize resources, then buy speed. If an upgrade does not reduce map time or failure rate in a repeatable sample, it is not yet a mapping upgrade.
Live Maintenance and Changelog
This page owns a volatile decision intent, so its order must be reviewed after balance patches rather than left as an evergreen claim. A small bug-fix patch does not automatically invalidate every build, but any change to skill behavior, supports, Ascendancies, Spirit reservation, major uniques, Runeforging, monster durability, or Atlas mechanics can change activation cost or strategy fit.
- August 13, 2026: verified the live client state against official patch 0.5.4f, rechecked the 0.5.4 and 0.5.0 endgame changes, reviewed current Runes of Aldur ladder examples, and compared updated 0.5 build variants.
- Next required review: repeat the official patch check first, then validate live representation, updated build transitions, and current trade availability before moving any rank.
The ranking should change only when evidence changes. A viral clear clip can justify investigation, but not a new placement by itself. The minimum useful update verifies that the shown gear exists in the live league, the interaction is intentional or at least still functional, the build survives ordinary mapping conditions, and the setup has a reproducible transition.
Final Verdict
Ice Shot Deadeye is the best pure mapping recommendation for speed-focused players, while Twister Spirit Walker leads dense arena content and Falling Thunder Martial Artist is the strongest fast-melee choice. Poisonburst Arrow Pathfinder offers the best balance of entry cost, mobility, defence, and broad Atlas use. Galvanic Shards Tactician, Minion Cull Warper, and Spark CoC Comet can exceed the practical ceiling of cheaper builds, but only after their complete enabling packages are assembled.
Choose by the content that fills most of the session. Open maps reward Ice Shot, repeated arenas reward Twister or Spark, Expedition favors prepared ranged uptime, and dangerous progression rewards Poisonburst or Shield Wall consistency. The correct build is the fastest one that remains functional under your modifiers, budget, and execution - not the highest rank copied without its assumptions.