This PoE 3.29 Shield Crush Juggernaut is a physical melee build that converts the defensive values of an equipped shield into attack damage. It can begin using Shield Crush in Act 1, does not need a high physical DPS weapon, and develops into a durable character supported by Armour, Endurance Charges, Fortification, Block, and Life recovery.
The league-start version uses a rare Armour or Evasion shield, Resolute Technique, physical hit damage, and Impale. Critical-strike, charge-stacking, and Armour-stacking equipment belongs to later progression and is not required to enter Maps. This separation keeps the Shield Crush league starter build practical in a fresh economy without presenting its expensive final version as a budget setup.
PoE 3.29 verification: This guide was checked against the final Path of Exile 3.29 patch notes on July 24, 2026. The patch notes contain no direct balance change to Shield Crush or the Juggernaut Ascendancy. The build therefore retains its established mechanics, but it must account for the confirmed socket, Mana Cost Efficiency, corruption, and Synthesised item changes introduced in 3.29. League-specific Foulborn equipment and launch-week prices remain optional variables rather than requirements.
PoE 3.29 Shield Crush Juggernaut Build Overview
The following overview defines the recommended non-critical league-start version, its main defensive layers, suitable content, and the expensive upgrade paths that become available later.
| Category | Build Plan |
|---|---|
| Class | Marauder |
| Ascendancy | Juggernaut |
| Main Skill | Shield Crush |
| Damage Type | Physical hit damage with Impale |
| League-Start Style | Non-critical Resolute Technique |
| Endgame Options | Critical strikes, Endurance Charge stacking, or Armour stacking |
| Required Equipment | A shield with high Armour, Evasion, or both |
| Main Defenses | Armour, Endurance Charges, Fortification, Block, Life recovery, and Molten Shell |
| Strong Content | Campaign, Atlas progression, Delve, compact Maps, Ritual-style encounters, and planned boss fights |
| Main Limitations | Short range, average coverage, damage over time, and dependence on regular shield upgrades |
This is a defensive progression build rather than a claim that Shield Crush is the highest-damage skill in patch 3.29. It is best suited to players who value predictable upgrades and close-range durability more than maximum map-clearing speed.
Strengths
Shield Crush Juggernaut combines an inexpensive entry point with a clear upgrade path that improves offense and defense through the same equipment slot.
- Shield Crush is available to Marauder after completing Enemy at the Gate in Act 1.
- No mandatory Unique Item is needed for the campaign or initial Atlas progression.
- Damage comes primarily from the shield, so the build does not need regular weapon DPS upgrades.
- Juggernaut supplies Endurance Charges, Armour scaling, stun protection, and consistent movement.
- Two overlapping Shield Crush waves can hit the same enemy and improve single-target damage.
- Rare shields provide an understandable progression path through their displayed defensive values.
- The build can combine Armour, Block, Fortification, and recovery instead of relying on one defensive layer.
- Several specialised endgame versions are available after the basic character is complete.
Weaknesses
The build remains a short-range melee character, and its practical performance depends on positioning, shield upgrades, and protection against damage types that Armour does not solve.
- Shield Crush attacks only in front of the character and covers less space than projectile or screen-wide skills.
- Single-target damage falls when the player stands at the wrong distance and misses the two-wave overlap.
- An outdated shield becomes both an outdated offensive item and a weaker defensive item.
- Armour and Block mainly protect against hits and do not automatically solve damaging ground or other degeneration effects.
- Resolute Technique has a lower damage ceiling than a properly equipped critical-strike version.
- Physical Reflect Maps are unsafe without confirmed reflected damage immunity.
- Widely dispersed encounters such as Legion are not the build’s strongest content.
How Shield Crush Damage and Combat Work
Understanding which item supplies Shield Crush damage is essential because conventional weapon comparisons do not work for this skill. Positioning is equally important because a correctly placed attack can connect with two waves instead of one.
Shield Crush swipes the equipped shield and creates three physical damage waves in front of the character. An enemy standing where two waves overlap can be struck twice by one attack. This overlap is especially important against bosses because losing the second hit removes a substantial part of the build’s practical single-target damage.
The skill has its own base attack time and receives base off-hand physical damage as the gem levels. It also gains added physical damage for every 15 Armour or Evasion Rating on the shield. A hybrid shield can contribute through both relevant defense values, while Energy Shield by itself does not provide Shield Crush’s added physical damage.
The main-hand weapon’s local physical damage and local Attack Speed do not scale Shield Crush. Treat the weapon as a utility slot and look for modifiers that apply globally, including global Attack Damage, useful global Attack Speed, Critical Strike Multiplier, Fortification utility, or Armour-stacking interactions. A weapon with high displayed physical DPS can still provide almost no damage to Shield Crush.
Correct Positioning and Play Style
The mapping pattern is simple, but boss damage requires deliberate spacing. Use Sand Stance for comfortable coverage and move closer when fighting a durable target that needs both overlapping waves.
- Activate Blood Rage at the beginning of a Map when its Life degeneration is comfortable.
- Use Shield Charge to travel between packs and establish Fortification if it comes from a linked support or passive interaction.
- Aim Shield Crush through the centre of the pack instead of attacking its nearest edge.
- Use Enduring Cry when Endurance Charges or emergency regeneration are required.
- Apply Vulnerability to bosses in the non-critical version or Assassin’s Mark after completing the critical transition.
- Adjust the distance from the boss until two waves consistently connect.
- Activate Vaal Molten Shell before a predictable dangerous sequence instead of waiting until most Life has already been lost.
Do not hold Shield Crush continuously during telegraphed boss attacks. Multistrike improves speed and damage but commits the character to repeated attacks, so interrupt the offensive rhythm when repositioning is more important.
PoE 3.29 Socket Changes
Patch 3.29 substantially reduces the socket-colour restrictions that previously complicated mixed Strength and Dexterity gem setups.
Any gem can now be placed in any equipment socket even when its colour does not match. Equipment sockets are white by default, while a gem placed in a matching red, green, or blue socket gains +10% Quality. Links are therefore the first campaign priority, and coloured sockets become an optimisation rather than a requirement.
Shield Crush is a red gem, while several useful supports are green. A valuable five-link or six-link should no longer be rejected because of inconvenient colours. Further details about choosing equipment under the new system are available in the PoE 3.29 socket and base guide.
Shield Crush Gems, Ascendancy, and Passive Tree
This section combines the complete character framework: campaign links, the pure physical map transition, utility gems, Juggernaut Ascendancy order, passive priorities, Bandits, and Pantheon choices.
Campaign and Endgame Gem Links
Do not use Brutality while Added Fire Damage, Herald of Ash, or elemental damage from equipment still provides a meaningful part of the campaign damage. Brutality prevents the supported skill from dealing elemental and chaos damage, so it belongs to the later pure physical transition.
| Stage | Recommended Links |
|---|---|
| Early Three-Link | Shield Crush – Chance to Bleed Support – Ruthless Support |
| Campaign Four-Link | Shield Crush – Melee Physical Damage Support – Faster Attacks Support – Added Fire Damage Support |
| Physical Map Four-Link | Shield Crush – Melee Physical Damage Support – Brutality Support – Multistrike Support |
| Physical Five-Link | Add Impale Support |
| Recommended Six-Link | Add Faster Attacks Support |
Pulverise Support can replace Faster Attacks when larger area and heavier individual hits are preferred. Fortify Support can use the flexible link until Fortification is obtained reliably from the passive tree or another source.
Endurance Charge on Melee Stun Support becomes a strong endgame option after the character has accumulated several maximum Endurance Charges. Its more damage multiplier applies per Endurance Charge even when a boss cannot be stunned. Compare it against Impale Support or the flexible sixth link in Path of Building using the real character configuration.
Greater Multistrike Support is an aspirational replacement for regular Multistrike, not part of the league-start budget. Do not include it in an early shopping list unless its live 3.29 price is already affordable.
Auras and Utility Gems
The campaign uses inexpensive Herald and Stance reservations, while the map version gradually introduces Determination and Pride after obtaining enough Reservation Efficiency and Mana sustain.
- Campaign reservation: Blood and Sand, Herald of Ash, and Herald of Purity provide area, physical damage, and added fire damage.
- Map reservation: Determination is the first defensive priority, followed by Pride when the character can support both auras.
- Final reservation: Determination, Pride, and Flesh and Stone require significant Reservation Efficiency and should not be activated together prematurely.
- Accuracy: Precision is unnecessary while using Resolute Technique. Add it only after converting to critical strikes.
- Movement: Shield Charge – Faster Attacks Support – Lifetap Support.
- Gap crossing: Frostblink – Lifetap Support crosses terrain that Shield Charge cannot pass.
- Defense: Vaal Molten Shell can be activated manually or linked to a correctly levelled Cast when Damage Taken Support.
- Recovery: Enduring Cry – Lifetap Support supplies Endurance Charges and Life Regeneration without depending on available Mana.
- Mapping utility: Blood Rage provides Attack Speed and Frenzy Charges but should be disabled when its degeneration exceeds current recovery.
- Boss curse: Vulnerability supports the physical Resolute Technique version, while Assassin’s Mark belongs to the critical version.
Keep enough unreserved Mana to begin attacking before Mana Leech becomes active. Lifetap on Shield Charge does not solve Shield Crush’s cost. One Mana Leech source, increased Mana Cost Efficiency, or a temporary Lifetap Support in the main links can prevent attacks from stopping during bosses.
Patch 3.29 removed several old reduced Mana Cost options. Rings now use Mana with increased Mana Cost Efficiency, and the former Searing Exarch reduced Attack Cost helmet implicit has been replaced by Mana Cost Efficiency. Avoid outdated gear searches that require the removed modifiers.
Juggernaut Ascendancy Order
The recommended order first establishes Endurance Charge generation, then adds charge-based damage and area before completing movement and Armour defenses.
- Unflinching: Take it after the Normal Labyrinth for another maximum Endurance Charge and dependable charge generation after being hit.
- Unyielding: Take it after the Cruel Labyrinth for increased damage and Area of Effect per Endurance Charge.
- Unstoppable: Take it after the Merciless Labyrinth for stun immunity and protection against effects that reduce Action Speed or Movement Speed below their base values.
- Unbreakable: Take it after the Eternal Labyrinth to double the Armour supplied by the equipped Body Armour and apply part of Armour to Chaos Damage taken from hits.
Unstoppable can be taken before Unyielding if slows and stuns are causing more problems than damage. Untiring is an alternative recovery option, but the standard version receives more consistent defensive value from Unbreakable after equipping a strong Armour body armour. Specialised endgame setups can obtain additional Ascendancy notables through Forbidden Flame and Forbidden Flesh.
Passive Tree Priorities
The passive tree should support generic shield attacks instead of investing in the local damage of the equipped main-hand weapon.
- Take Maximum Life, generic Physical Damage, Attack Speed, and shield attack nodes near the Marauder and Duelist areas.
- Allocate Resolute Technique during leveling so Shield Crush cannot miss.
- Stop investing in accuracy and Critical Strike modifiers while Resolute Technique remains allocated.
- Add Armour, Endurance Charges, and efficient Shield Masteries.
- Build Impale chance and effect for the physical map version.
- Obtain Fortification through passives, a mastery, or Fortify Support.
- Add Mana Leech or Mana Cost Efficiency before increasing reservation further.
- Invest in Block when the selected shield and passive route provide enough combined value.
- Finish with additional Life, Chaos Resistance, ailment protection, Jewel Sockets, and Reservation Efficiency.
Relevant damage categories include generic Attack Damage, Physical Damage, Melee Damage, Area Damage, off-hand damage, and damage while holding a shield. Weapon-specific physical clusters usually do not improve Shield Crush unless they also contain a separate modifier that applies globally.
Bandits and Pantheon
These choices prioritise passive flexibility during final progression while allowing the Pantheon to change according to the content being played.
Bandits: Kill Alira, Kraityn, and Oak for Eramir’s Passive Skill Point in the final setup. The point can complete a Life, shield, reservation, Impale, or Jewel Socket route. Players considering a temporary campaign reward should check the replacement cost in the PoE Bandits guide.
Major Pantheon: Soul of Lunaris is the general mapping option, while Soul of Solaris is useful for encounters focused on one boss.
Minor Pantheon: Soul of Tukohama complements periods spent attacking in place. Soul of Shakari is useful when poison is the larger weakness, while Soul of Abberath helps in content with persistent burning ground.
Explore services related to this guide, selected from our Path of Exile catalog.
View All Path of Exile Services


Shield Crush Leveling from Act 1 to Maps
Leveling revolves around one repeating priority: keep the shield appropriate for the current area while solving Life, resistances, links, and Mana sustain on the remaining equipment.
Act 1 and Early Shield Progression
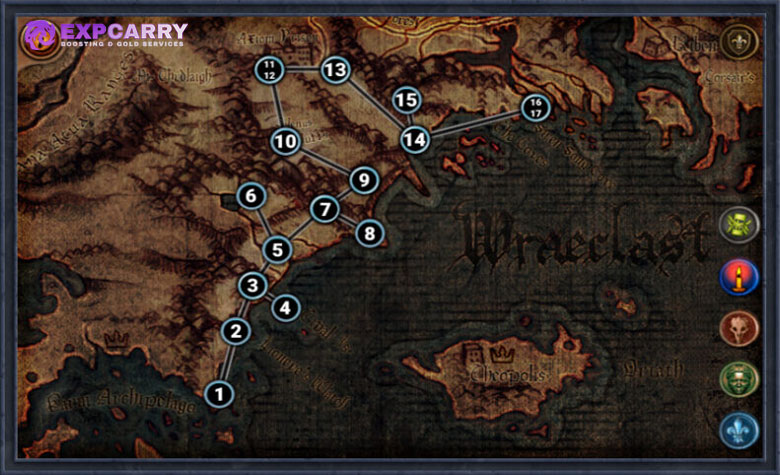
Complete Enemy at the Gate and take Shield Crush as the Marauder quest reward. The gem begins at level 1, so the build does not require a temporary leveling skill.
Equip the shield with the highest useful Armour, Evasion, or combined Armour and Evasion available. Inspect current-level shield bases regularly because the displayed defensive values contribute directly to damage. A weak rare shield can be worse than a well-rolled Magic shield with higher local defenses.
Use Shield Charge for long corridors and keep Frostblink for ledges, terrain, and emergency movement. Boots with Movement Speed normally improve campaign performance more than a minor damage modifier on the main-hand weapon.
Acts 2 to 5
Add the first reservation skills gradually and begin building the passive foundation for accuracy-free physical attacks.
Use Blood and Sand, Herald of Ash, and Herald of Purity as available Mana allows. Sand Stance provides comfortable campaign coverage, while Blood Stance can be used against a durable target when more close-range damage is needed.
Complete the Normal Labyrinth and allocate Unflinching. Take Resolute Technique when missed attacks become noticeable, then stop spending points or equipment modifiers on accuracy and Critical Strike Chance.
Continue replacing the shield whenever a new option creates a meaningful increase in its displayed Armour or Evasion. Life and elemental resistances remain more important than small offensive modifiers on the helmet, gloves, boots, rings, and belt.
Acts 6 to 10
The second half of the campaign introduces resistance penalties, the pure physical gem transition, and the remaining campaign Labyrinths.
Repair Fire, Cold, and Lightning Resistance immediately after receiving the first campaign penalty. Complete the Cruel and Merciless Labyrinths when the character can do so safely, then allocate Unyielding and Unstoppable in the chosen order.
Transition toward Brutality, Multistrike, and the physical supports when those gems become available and the elemental campaign damage is no longer required. Remove Added Fire Damage and do not count the added fire component of Herald of Ash after linking Brutality.
Before fighting Act 10 Kitava, prepare equipment that can compensate for the final resistance penalty. Enter Maps with capped elemental resistances, a current shield, a functional four-link, corrected flasks, enough Life, and a reliable Mana solution.
Early Atlas Checklist
Complete these upgrades before spending most of the league-start currency on critical-strike or charge-stacking equipment.
- Cap Fire, Cold, and Lightning Resistance after the campaign penalty.
- Replace the campaign shield with a stronger rare Armour or Armour/Evasion base.
- Obtain a five-link before purchasing small luxury damage upgrades.
- Add Determination and confirm that Molten Shell benefits from a meaningful Armour total.
- Establish reliable Fortification and Endurance Charge generation.
- Add Chaos Resistance without breaking the elemental resistance cap.
- Fix Freeze, Shock, Bleeding, and Corrupted Blood through flasks, passives, or equipment.
- Use Mana Leech or increased Mana Cost Efficiency before adding Pride.
- Complete the Eternal Labyrinth after obtaining a body armour that provides useful Armour for Unbreakable.
Shield, Equipment, and Endgame Upgrade Path
The shield is the central upgrade slot, while the rest of the equipment must preserve Life, resistances, recovery, attributes, and Armour. Expensive transformations should begin only after this foundation is stable.
Shield Upgrade Path
Compare shields through their final displayed Armour and Evasion values rather than rarity, item level, or irrelevant modifiers.
| Stage | Shield Target | What to Avoid |
|---|---|---|
| Campaign | Current-level Armour, Evasion, or hybrid base with improved local defenses | Keeping an old shield only because it has resistances or convenient links |
| Early Maps | Rare shield with strong flat and percentage Armour or Evasion modifiers | Paying for Energy Shield that does not support the non-critical damage plan |
| Midgame Rare | High-quality endgame base with several strong local defensive modifiers | Judging the shield by item level instead of its completed defense values |
| Critical Transition | Emperor’s Vigilance with Seething Fury, or a carefully planned rare alternative | Removing Resolute Technique before solving accuracy and Critical Strike Chance |
| Armour Stacking | Specialised shield, Replica Dreamfeather, and equipment that scales total Armour | Buying one Armour-stacking item without rebuilding the rest of the character |
A rare shield is the safest league-start choice because it can be upgraded in manageable steps. Improve the quality of a suitable base and use Essences or other available crafting methods to obtain strong local Armour or Evasion prefixes. Stop when the result is already a substantial upgrade rather than spending the entire budget chasing perfect modifiers.
Emperor’s Vigilance is a recognised critical-strike transition. Its Armour contributes to Shield Crush damage, while its Energy Shield can be converted into off-hand Critical Strike Chance and Critical Strike Multiplier through Seething Fury. The shield grants Glancing Blows, so blocked hits still deal part of their damage and require sufficient recovery.
Do not make Foulborn Emperor’s Vigilance a league-start requirement. The availability, modifiers, and price of useful Foulborn equipment depend on the live 3.29 economy. A regular rare shield or standard Emperor’s Vigilance must remain capable of supporting progression.
Equipment Priorities by Slot
Every item should solve required defenses and attributes before adding specialised damage modifiers.
| Slot | League-Start Priorities | Endgame Direction |
|---|---|---|
| Main-Hand Weapon | Useful global modifiers and attributes | Global Critical Strike modifiers, Fortification utility, or Replica Dreamfeather |
| Shield | Maximum practical Armour or Evasion | Premium rare, Emperor’s Vigilance, or specialised Foulborn alternative |
| Helmet | Life, resistances, Armour, and attributes | Mana Cost Efficiency, Reservation Efficiency, Chaos Resistance, and useful implicits |
| Body Armour | Links, Life, resistances, and Armour | High Armour because Unbreakable doubles this slot’s Armour contribution |
| Gloves | Life, resistances, and Attack Speed | Additional damage, Impale utility, Rage generation, or defensive implicits |
| Boots | Movement Speed, Life, and resistances | Ailment avoidance, Chaos Resistance, and stronger movement modifiers |
| Amulet | Life, attributes, and resistances | Physical damage, Critical Strike Multiplier, reservation, or a defensive anointment |
| Rings | Life, resistances, attributes, and Mana support | Mana Cost Efficiency, added physical damage, accuracy for crit, and charge corruption implicits |
| Belt | Life, resistances, and Armour | Recovery, flask modifiers, attributes, or a complete charge-stacking interaction |
Do not copy an endgame equipment list without its passive tree, accuracy, gem links, reservation, and resistance plan. A custom Shield Crush build only works when its upgrades form one compatible system instead of a collection of individually powerful items.
Important PoE 3.29 Endgame Changes
Several confirmed item changes directly affect older charge-stacking and Mana-sustain recommendations.
Non-Unique Synthesised items can no longer be obtained in 3.29, and the Harvest option that created a Synthesised item has been removed. Older guides that expect players to create rare Synthesised rings with maximum Endurance Charge implicits no longer describe the current progression path.
Patch 3.29 adds possible Vaal corruption implicits granting +1 to a maximum Frenzy, Power, or Endurance Charge on rings. Corruption is still a gamble and can replace other useful implicits or damage the item. Obtain a functional ring first and treat the maximum-charge outcome as an aspirational upgrade.
The corruption update also introduces potential shield implicits involving maximum resistances, Block mechanics, minimum charges, and socketed gem quality. These outcomes can improve an endgame character but do not replace the shield’s fundamental Armour or Evasion requirement.
Flasks
The standard flask setup reinforces Armour and mobility before introducing a Diamond Flask for the completed critical-strike version.
- Divine Life Flask: Instant or rapid recovery with Bleeding and Corrupted Blood protection when those effects are not solved elsewhere.
- Quicksilver Flask: Mapping speed and easier boss repositioning.
- Granite Flask: Additional base Armour that also supports Molten Shell.
- Basalt Flask: Further Armour for encounters dominated by physical hits.
- Flexible Flask: Sulphur for general damage and recovery or Diamond after completing the critical transition.
Use flask suffixes to cover the character’s real weaknesses. Freeze, Shock, Curse Effect, Armour, and Attack Speed are useful, but duplicating protection already supplied by equipment or passives wastes a modifier.
Endgame Defenses, Map Mods, and Common Mistakes
The completed Juggernaut survives by combining several defensive systems. It must still recognise map modifiers and damage-over-time mechanics capable of bypassing or weakening those systems.
How the Defensive Layers Work Together
Armour reduces physical damage from hits, Endurance Charges provide additional physical and elemental protection, Fortification reduces damage taken from hits, and Block prevents or partially mitigates incoming attacks according to the selected setup.
Molten Shell converts the high Armour total into a temporary protective barrier. Life Regeneration, leech, Enduring Cry, and other recovery then repair damage that passes through the mitigation layers.
These defenses are not universal immunity. Armour is less effective against very large physical hits than against numerous smaller hits. Ordinary Armour does not reduce elemental spell damage, and neither Armour nor Block automatically protects against damage over time. Maintain capped elemental resistances, invest in positive Chaos Resistance, and secure enough recovery to escape dangerous ground effects.
Attack Block alone does not solve spell hits. Add Spell Block when the route is efficient or compensate with maximum resistances, additional Life, recovery, and other appropriate defenses. When using Emperor’s Vigilance, remember that Glancing Blows allows blocked hits to deal a portion of their original damage.
Map Modifications to Check
Read Map modifiers before adding Scarabs or other difficulty multipliers because several individually manageable modifiers can become lethal when combined.
- Physical Reflect: Skip unless the character has confirmed immunity to reflected physical damage.
- Cannot Leech: Dangerous when Life or Mana sustain depends on leech.
- No Life or Mana Regeneration: Uncomfortable and potentially unsafe when other sustain sources are insufficient.
- Reduced Recovery Rate: Particularly dangerous when combined with damaging ground, poison, or other degeneration effects.
- Reduced Armour or Block: Weakens core defensive layers and becomes dangerous beside increased monster damage.
- Reduced Aura Effect: Weakens Determination, Pride, and other reservation-based bonuses simultaneously.
- Critical Strike Modifiers: Require caution unless the character has reduced extra damage taken from Critical Strikes.
The build handles ordinary Atlas progression reliably, but map risk should be evaluated before combining difficult modifiers with league mechanics. The PoE mapping and modifier guide explains how Map tiers, modifiers, and sustain affect progression.
Common Shield Crush Mistakes
Most failed versions lose damage or survivability through incompatible mechanics rather than one missing expensive item.
- Upgrading the weapon instead of the shield: Local weapon damage does not improve Shield Crush.
- Keeping an outdated shield for resistances: This quietly removes both offense and defense.
- Using Brutality with elemental campaign scaling: Added Fire Damage and other elemental additions stop contributing.
- Removing Resolute Technique too early: A critical build needs accuracy, Critical Strike Chance, multiplier, and suitable equipment together.
- Assuming every attack hits twice: Two waves connect only when the target is positioned in their overlap.
- Counting temporary buffs as permanent damage: Flasks, Vaal skills, Frenzy Charges, and conditional effects do not have guaranteed boss uptime.
- Reserving too much Mana: The character still needs enough Mana to begin attacking before leech starts.
- Treating Glancing Blows as full Block: Blocked hits continue to inflict partial damage.
- Ignoring degeneration: High Armour does not make the character immune to poison, burning ground, or other damage over time.
- Buying charge-stacking items separately: Charge stacking requires coordinated changes to equipment, supports, passives, and resistances.
Shield Crush Endgame Progression
The build has three clear investment stages: a non-critical physical foundation, a coordinated critical-strike transition, and an optional high-budget Armour or Endurance Charge stacking version.
The first objective is a stable non-critical character with a strong rare shield, a five-link or six-link, capped resistances, dependable Impale, Fortification, Endurance Charges, Mana sustain, and enough Armour for Molten Shell. This version can progress through the Atlas without requiring a critical conversion.
The second stage improves the foundation with a better shield, high-Armour body armour, stronger jewels, positive Chaos Resistance, ailment protection, Reservation Efficiency, and useful item implicits. Improving the shield and defenses together is normally more effective than buying one luxury damage item while basic equipment remains weak.
Begin the critical transition only after obtaining Emperor’s Vigilance or another suitable shield, Seething Fury where appropriate, sufficient accuracy, Critical Strike Chance, Critical Strike Multiplier, and Assassin’s Mark. Remove Resolute Technique only after the complete package is ready. A partial transition can deal less real damage than the inexpensive non-critical setup.
Armour stacking with Replica Dreamfeather is the specialised final direction. It uses total Armour as an additional global damage multiplier and requires coordinated flasks, jewels, auras, equipment, and recovery. Endurance Charge stacking is similarly expensive and becomes stronger through maximum-charge passives, support gems, specialised equipment, and 3.29 ring corruptions.
Shield Crush Juggernaut is suited to players who want a durable melee character with measurable equipment upgrades and room for long-term investment. Its coverage will not match the fastest mapping archetypes, but its shield-based damage and layered defenses make it a dependable option among the wider selection of best PoE 3.29 builds.