Deadlock Advanced Laning Guide: How to Win Lane, Soul Denying, and Jungle Timings

Most players stuck at a rank plateau in Deadlock already have decent aim. What separates them from the players climbing past them is a set of mechanical habits around Souls, timing, and map geometry that high-rank and pro players treat as automatic. This advanced Deadlock laning guide breaks down how to win lane consistently: the soul denying mechanics that decide who actually profits from a trade, the jungle camp timings that turn random farming into a schedule, and the map geometry that turns ganks from coin flips into near-certain kills.
Deadlock Soul Denying Guide: How Orbs Actually Work
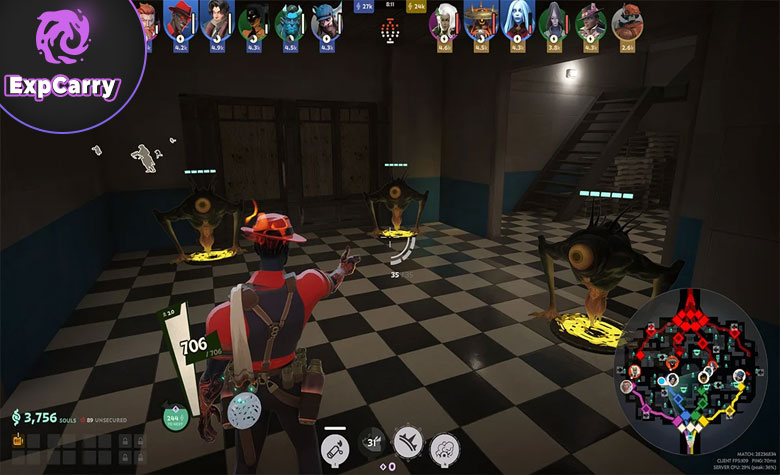
Every Trooper kill in Deadlock splits its Soul value into two separate components, and most players only ever interact with one of them. On the current three-lane map, where teams start in a 2-2-2 formation, true solo lanes are rare, but solo-style laning still happens constantly whenever a partner rotates, shops, or dies, which makes these individual mechanics matter in both duo and solo situations. Before the 10-minute mark, the killing blow on a Trooper grants a direct Soul payout to whoever lands it, while the corpse also releases a Soul orb worth additional value. A ranged kill always drops this orb; a melee kill does not, which is why melee finishes are the single highest-value mechanical choice in early lane play. Killing with melee grants the full Soul amount instantly with nothing left on the ground to contest, while a ranged kill leaves an orb that either team can shoot or punch to claim.
This is where rank separation actually happens. The orb is a flying, contestable object for a short window, then a portion settles to the ground where it can be picked up by proximity instead of a precise hit. After 10 minutes, the math flips entirely: Troopers stop paying Souls on the kill itself, and the orb becomes the only source of value, meaning a Trooper kill with no orb confirmation is worth nothing. The practical habit this creates is simple to state and hard to execute under pressure: the moment a Trooper's health crosses the last-hit threshold, your aim should already be moving toward where the orb will appear, not staying locked on the Trooper's body. Players who keep tracking the corpse after the kill are a half-second late to every contested orb, and that half-second is exactly the window an opponent needs to deny it.
The Deny Window
Denying works on the same orb mechanic in reverse. A friendly Trooper below roughly 25 percent health can be killed by either team, and doing so denies the full Soul value to the side that was farming it. This is the core asymmetric skill of laning: a player who reliably secures their own orbs and denies the enemy's orbs is extracting close to double the value of a player who only last-hits cleanly. Since orbs persist on the ground for a limited window early in the match and longer as the game progresses, stepping forward to grab a ground orb is a calculated risk, not a free action. The decision to take that pickup should depend on whether your retreat path and cover are still available, not on whether the Souls are simply sitting there unclaimed.
Deadlock Wave Control Guide: Reading Lane State to Win Without Forcing Fights
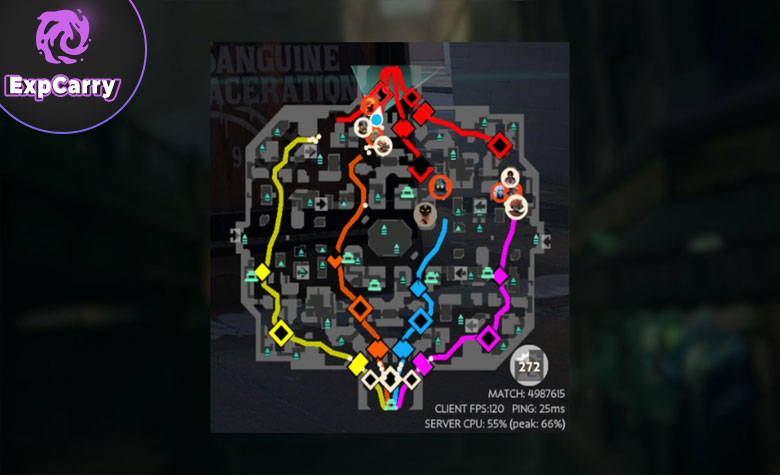
Trooper waves spawn on a fixed clock independent of player action, which means the wave's position on the map at any moment is a direct consequence of who has been clearing it and where. There are three practical wave states worth knowing by name, because each one changes what's safe to do. A held wave sits closer to your own side, which keeps you near your Guardian's protection and lets you collect ground orbs without overextending. A slow-pushed wave is kept alive deliberately, with the Trooper kills going only to last hits while Troopers themselves stay alive longer, building toward a bigger group that can be crashed into the enemy side all at once. A crashed wave is that buildup released, creating a window where the enemy is forced to either lose the wave for free or commit time and risk to clearing it under pressure.
The strongest repeatable tempo pattern in lane is built from these three states in sequence: slow-push a wave to build size, crash it into the enemy's side, then use the minute or two the enemy spends clearing that crashed wave to shop or reset without losing ground yourself. This works because it converts Souls into stats immediately rather than holding them, reduces the number of Troopers you lose while away from lane, and returns you to a lane where the enemy is still catching up on both wave state and your new item advantage. Most players either hold every wave passively, which caps their income, or push every wave instinctively, which exposes them to ganks with no wave between them and an approaching enemy.
Wave state also functions as a map-reading tool independent of vision. Because waves are a forced point of interest, an enemy who is not visible at their wave is either rotating, contesting an objective, or setting up a gank, and the wave's neglect is itself the information. A Trooper wave sitting untouched near a lane is one of the most reliable tells in the game that the player assigned to that lane has left it, and reacting to that signal faster than your opponent reacts to yours is a meaningful chunk of the skill gap at higher ranks.
Deadlock Jungle Camp Timings: Why a Schedule Beats Instinct
Neutral camps, listed in-game as Denizens, run on a fixed global clock that starts the moment the last creep in a camp dies, not on a simple respawn timer from when the camp first spawned. As of the most recent balance pass in May 2026, small camps spawn at the 2-minute mark and respawn 1 minute 25 seconds after being fully cleared, while medium camps now spawn at 5 minutes instead of the previous 6-to-7-minute window, a change that pulled meaningful early Souls forward in the timeline. Hard camps remain a later-game target once a hero has enough sustained damage to clear them efficiently, typically once core items are online. Every Denizen's health and damage also scales by roughly 0.5 percent per minute of match time, so a camp that was trivial at the 5-minute mark is not the same fight at 20 minutes.
The One-Creep Timer Exploit
A camp only resets its timer once every creep inside it is dead, which creates a deliberate exploit available to any player: leaving a single weak creep alive in an enemy-side camp denies that camp's respawn entirely, since the timer can't start until it's fully cleared. This is a low-effort way to deny enemy Souls income without committing to a fight, and it costs nothing beyond walking past one extra creep. On your own side, the opposite logic applies: always fully clear a camp you're farming, since a half-cleared camp on a delayed timer is wasted Soul income over the rest of the match.
The efficient farming pattern is to treat jungle clears as filler between lane waves rather than a separate activity that pulls you away from lane. Since Trooper waves spawn roughly every 25 seconds, the gap between waves is exactly enough time to clear a nearby small camp and return before the next wave needs attention. Clearing camps on this rhythm, rather than making a special trip to the jungle, is what separates a player gaining steady Soul income from one who is either undertapped on map resources or constantly out of position when a wave or a gank arrives. Sinner's Sacrifice machines, found inside some medium camps, and periodic Bridge Buffs add temporary stat bonuses on their own independent timers; taking a Bridge Buff even when it's a weak roll is usually correct, since denying it from the enemy has value on its own.
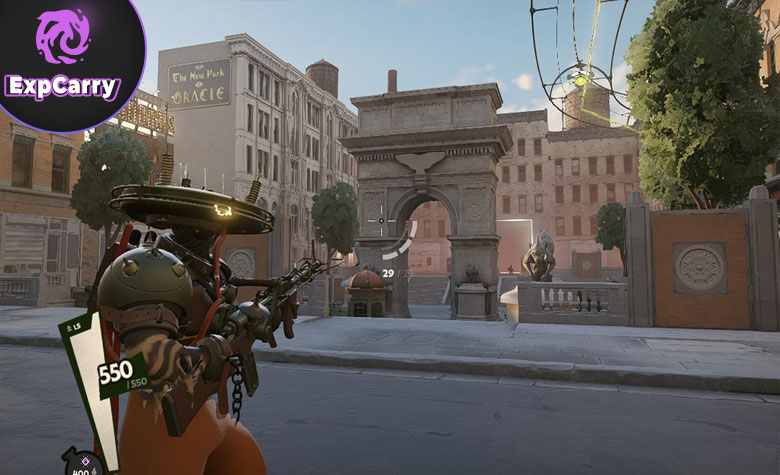
Deadlock Map Geometry Guide: Cover, Camera Angle, and the Safe Triangle
Deadlock's third-person camera sits fixed over the hero's right shoulder, which means peeking a corner from the right side exposes meaningfully less of your hitbox than peeking the same corner from the left. This is a constant, exploitable asymmetry: in any lane trade where you have a choice of which side of cover to play from, taking the right-side angle gives you a frame advantage on every exchange, since your opponent has to expose more of their model to land the same shot you can land while showing less of yours.
Positioning in lane comes down to maintaining access to three things at once, sometimes called the safe triangle: cover you can break line of sight behind, the wave itself as both income and a physical shield against incoming fire, and a retreat path that isn't blocked if a second enemy shows up. A player standing somewhere that satisfies only one or two of these is taking on hidden risk even if the current fight looks winning, because a single additional enemy arriving removes the option to disengage. The instinct to chase a low-health enemy out of this triangle is one of the most common avoidable deaths in the game; a short, clean trade that ends with both players resetting is worth more over a full match than a kill secured by abandoning cover and wave control.
Map verticality extends this logic upward. Rooftops and elevated paths give vision over street-level fights and let a roaming player choose the angle and timing of an engagement instead of walking into one. The general rule used by experienced rotations is that street level is where a player gets farmed by whoever already holds the high ground, while rooftops are where a player gets to dictate the fight. Reaching those rooftop paths quickly and exiting onto them safely is itself a movement skill, not just a positioning choice.
Deadlock Zipline Tech Guide for Faster, Safer Rotations
Ziplines are tied to lane control, not just present by default: the line only extends as far as your team's Troopers have pushed, so losing ground in a lane physically shrinks your fastest rotation option in that lane. This makes ziplines a direct extension of the wave-control habits already covered, since a held or crashed wave is also deciding how far your team can travel on the map a minute later. Where you choose to exit a zipline matters as much as how you exit it. A predictable center-lane dismount is exactly where ambushes happen, since it's the obvious path every opponent expects; exiting higher onto a rooftop, or exiting closer to a teammate rather than alone, removes that predictability when the map is dark and you have no information on enemy positions. When enemies are visible on the map and their position is known, taking a faster but more exposed route is reasonable, because the information you have outweighs the risk; without that information, the correct adjustment is to ride the line longer and dismount somewhere less central, trading speed for safety. Shooting is also fully functional while riding a zipline, which makes the line itself a viable tool for finishing a chase or covering a teammate's retreat rather than something to abandon the instant a fight starts.
The Zip Dash
Dismounting a zipline by pressing crouch instead of jump preserves significantly more forward momentum than a standard jump exit, carrying speed into a slide, dash, or wall jump instead of losing it to a dead stop. Chaining a crouch dismount directly into a dash, sometimes called a zip dash, multiplies the distance covered in the first second after leaving the line and is one of the most repeatable high-value movement habits a player can build, since it applies on essentially every rotation.
Deadlock Ganking Guide: Using Wave Pressure and Geometry Together

Roaming for a gank works because Trooper waves force enemies into predictable locations at predictable times; the wave itself is the bait, and the roaming player's job is to arrive at that location before the lane's defender expects a third hero. The most reliable ganks come from approaching along an angle the laner isn't watching, which usually means a rooftop or side-alley path reached via zipline or a wall jump rather than walking directly down the lane the target is defending. Arriving from a sightline the enemy hasn't checked converts an even lane matchup into a free kill, because the laner's safe triangle was built around threats coming from the lane, not from above or behind.
Timing a gank against ability cooldowns compounds this further. In most lane fights, the outcome is decided by a single cooldown window rather than sustained shooting; tracking when an enemy laner has used their strongest defensive or escape ability and mentally starting a timer on its return gives a roaming player a clear signal for when an engage is safe versus when it walks into a guaranteed counter. A gank attempted while the target's escape tool is available is a coin flip at best; the same gank attempted during that tool's cooldown is close to a guaranteed kill, and the only difference between the two is whether the roaming player tracked the timer.
Deadlock Laning: Common Questions From the Lane Phase
Is there still a solo lane in Deadlock's current map? Dedicated solo lanes are rare on the modern three-lane, 2-2-2 map, but solo-style laning happens constantly in practice whenever a duo partner rotates, shops, or dies, leaving one player to hold the lane alone using the same orb-securing and wave-control habits described above.
How do I know whether to hold a wave or push it? Hold when you're behind on health, uncertain about enemy rotations, or simply need the safety of farming near your own Guardian. Slow-push or crash when you want to shop, roam, or open a Guardian pressure window with Troopers absorbing the damage for you.
Can I win a lane without getting any kills? Yes, and this is the laning win condition most players overlook. A lane that ends with no kills on either side but with you holding a full item lead and an untouched Guardian is a won lane. Souls per minute and wave position decide more match outcomes than kill count does.
Final Thoughts
None of these mechanics individually feel dramatic, which is exactly why they go unnoticed by players stuck at a rank plateau. Denying an orb instead of only securing your own, clearing a jungle camp on the 25-second wave rhythm instead of as a separate trip, holding the right-side camera angle in a trade, and zip-dashing off a rooftop exit instead of a predictable center lane dismount are all small individual gains. Stacked across a full match, they add up to the Soul and tempo lead that decides whether a lane is won outright or lost by inches. The players who climb consistently aren't doing one secret trick; they're doing all of these small, correct things by default, on every wave, every camp clear, and every rotation, until the habits stop requiring conscious thought.