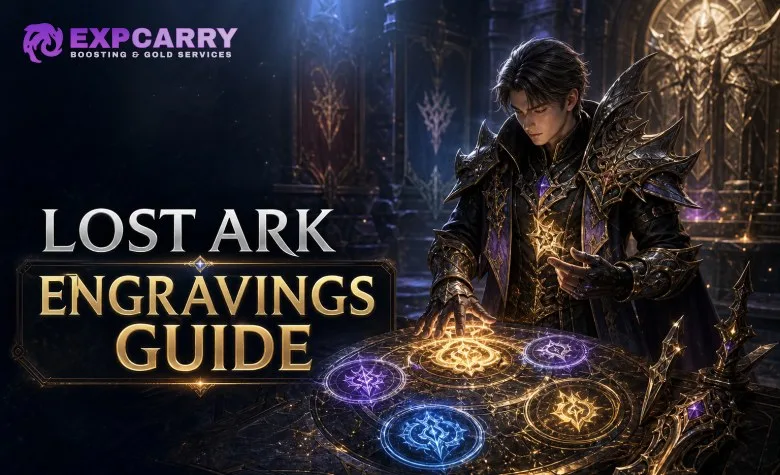
Lost Ark engravings are no longer a single gearing puzzle. In the current Western version, your setup depends on whether the character is using the Tier 3 engraving system or the Tier 4 Ark Passive system. Combat engravings are selected and leveled through Engraving Recipes, while class identity is handled through Ark Passive Enlightenment Effects in Tier 4. The correct upgrade path is therefore: choose the class build first, activate the appropriate system, stabilize your combat engravings, and only then spend heavily on accessories, ability stones, and premium upgrades.
What This Lost Ark Engravings Guide Covers
This guide is for new characters, returning players, and anyone rebuilding a class after moving from Tier 3 into Tier 4. It explains how engravings fit together, how to read a build guide without copying it blindly, which upgrades usually provide the most value, and which mistakes waste gold or materials.
The most important distinction is simple:
- Tier 3: combat engravings are assigned through the traditional engraving interface, accessories, and ability stones. Engraving Support can provide five Level 3 engravings for eligible characters.
- Tier 4: combat engravings are individually leveled with Engraving Recipes, while class engravings are replaced by Ark Passive Enlightenment Effects.
- Gear Presets: presets can save different engraving and equipment arrangements, but the system you use must match the content and gear tier of the character.
Do not combine a Tier 3 class engraving plan with a Tier 4 Ark Passive build. A class may keep familiar terminology in community guides, but the actual setup method and scaling can be different after the transition to Tier 4.
How Engravings Work in the Western Version
Combat engravings
Combat engravings are general effects that can be used by many classes. They can improve outgoing damage, critical performance, attack speed, cooldowns, survivability, resource management, or support utility. Examples include Grudge, Adrenaline, Cursed Doll, Hit Master, Raid Captain, Awakening, Expert, and Heavy Armor, although the correct choices depend on the class and build.
In Tier 3, combat engravings are normally assembled from engraving points on accessories, ability stones, and learned engraving effects. The goal is to reach useful engraving levels without activating unnecessary negative effects.
In Tier 4, five combat engravings can be equipped, and Engraving Recipes directly improve the bonus provided by an engraving rather than simply adding traditional nodes. Relic Engraving Recipes provide the highest value increase within that system. This makes the quality and level of your learned books a long-term account investment rather than a temporary accessory requirement.
Class engravings and Ark Passive
Class engravings traditionally define two different versions of an advanced class. One may focus on transformation uptime, identity gauge generation, burst damage, summoned units, or a specific skill family, while the other supports a different rotation or combat identity.
In Tier 4, class engravings are replaced by Ark Passive Enlightenment Effects. These effects work more like a class-specific skill tree and allow the character’s identity and playstyle to be customized through the Ark Passive system. A Tier 4 build guide should therefore list the relevant Enlightenment Effects, not only the old class engraving names.
When comparing a build, check whether the guide is written for Tier 3 or Tier 4. A screenshot showing a familiar class engraving is not automatically valid for a Tier 4 character.
Engraving Support: When to Use It
Engraving Support is designed to let progressing characters use a functional setup before they can afford a complete accessory and ability-stone build. In the Western system, Tier 3 characters at Item Level 1250 or higher can activate the feature and use five Level 3 engravings.
When active, Engraving Support replaces the engraving effects assigned through the character’s accessories and ability stone. It can be disabled if your actual equipment provides a better setup. The status is also saved to the current Gear Preset when you replace Engraving Support or equip different gear.
Use Engraving Support when:
- You are progressing through Tier 3 content and do not yet own suitable accessories.
- Your character is an alt that needs a functional build without a large gold investment.
- You are testing a class before committing to expensive books, stones, or accessories.
- Your current accessories have poor quality, incorrect stats, or incomplete engraving combinations.
Disable it when your real equipment offers stronger effects, better combat stats, or a setup required by your class guide. Engraving Support is a bridge, not a reason to postpone learning how your final build works.
Explore services related to this guide, selected from our Lost Ark catalog.
View All Lost Ark Services

Build Logic: Choose the Class Plan Before Buying Gear
The most expensive engraving mistake is purchasing items before deciding what the character actually plays. Start with the class identity, then select the combat engravings that support that identity.
Step 1: Identify the class build
First determine whether you are playing a class engraving or Ark Passive path focused on sustained damage, burst windows, transformation, positional attacks, summons, or support utility. The choice affects your stats, skill points, gems, tripods, cards, and engraving priorities at the same time.
For example, a build that relies on back attacks may value positional damage and require consistent rear positioning. A non-positional build may prefer effects that work from any angle. A support build has different priorities entirely, often emphasizing buff uptime, shielding, awakening frequency, or party utility rather than personal damage.
Step 2: Check the stat requirement
Engravings do not operate independently from combat stats. A specialization build may need enough Specialization to reach its identity and burst goals. A swiftness build may depend on Swiftness for cooldown and movement benefits. A critical build may use Crit as its primary damage stat or obtain part of its critical rate from class effects and party synergies.
Do not copy an engraving list while ignoring the stat line. A technically correct engraving setup can perform badly if the accessories have the wrong combat stat.
Step 3: Separate mandatory effects from flexible effects
Most builds have a small group of core effects and a flexible final slot. Core effects directly enable the class rotation or provide reliable damage and utility. Flexible options may change according to content, party composition, personal skill, or budget.
Label each engraving in your notes as one of the following:
- Build-defining: required for the selected class identity or rotation.
- High-value: strong in most of the content you play.
- Conditional: powerful only when its trigger is consistently active.
- Budget or temporary: acceptable during progression but replaceable later.
This classification prevents you from spending heavily on a conditional effect before your character can reliably activate it.
Tier 3 Setup: A Practical Order of Operations
- Activate Engraving Support if you qualify and need a temporary build. This gives the character a usable baseline while you collect better equipment.
- Choose the correct class engraving path. Confirm the skill rotation and combat stats before buying accessories.
- Set your combat stats first. Correct Crit, Specialization, or Swiftness is generally more important than forcing a high engraving score with incorrect accessories.
- Use an ability stone as part of the complete plan. Do not cut stones randomly without knowing which two positive engravings and which negative engraving your build can support.
- Complete the accessory set gradually. Replace the weakest or incorrectly statted pieces first rather than rebuilding everything after every upgrade.
- Check negative effects before equipping anything. A higher positive node count may not be an upgrade if it activates a damaging penalty.
For a fresh or returning character, a stable temporary setup is usually better than an expensive half-finished build. You need enough power to clear your current content efficiently before investing in upgrades aimed at a much higher item-level bracket.
Tier 4 Setup: Recipes, Ability Stones, and Ark Passive
Engraving Recipes
Tier 4 Engraving Recipes improve the actual effect of the selected combat engraving. Recipe rarity matters because higher grades provide larger improvements. Relic recipes are the premium long-term target, but buying them immediately is not always correct.
Prioritize recipes that are used by your main class and that remain valuable across multiple builds. A widely used combat engraving can be a better first investment than a narrow class option, especially if your roster contains several characters that can use it.
Ability stones
Tier 4 ability stones use faceting results to determine their engraving level. The system provides several levels based on the number of successful nodes, with the highest level requiring the strongest faceting result. A faceting level bonus can also apply when the total faceting level is sufficiently high.
Because the result is random, do not treat one failed stone as a disaster. Set a budget, identify the minimum acceptable result, and stop when the expected improvement is smaller than the cost of continued attempts. A good stone is valuable, but it should not consume the gold needed for correct accessories, gems, or honing.
Ark Passive Enlightenment Effects
At Tier 4, the class path is built through Ark Passive Enlightenment Effects. These effects should be selected together with the class’s skills, identity rotation, and stat distribution. The strongest-looking option on paper is not necessarily the best choice if it changes the rotation in a way you cannot execute consistently.
When reading a Tier 4 build, verify:
- Which Enlightenment Effects are selected.
- Which skills generate or spend the class identity resource.
- Whether the build is burst-oriented or sustained.
- Whether the rotation requires front attacks, back attacks, or no position.
- Which combat engravings complement the selected Enlightenment path.
Engraving Upgrade Priorities
| Priority | What to improve | Why it matters |
|---|---|---|
| 1 | Correct class path and combat stats | A build cannot perform correctly if its identity effects or primary stat are wrong. |
| 2 | Functional temporary engravings | A complete baseline helps you clear current content and earn future upgrade materials. |
| 3 | Core combat engravings | These provide the most reliable improvement across your normal activities. |
| 4 | Accessory quality and efficient node distribution | Better quality improves stats, while efficient nodes reduce wasted gold. |
| 5 | Ability stone improvement | A strong stone can finish a build, but repeated gambling is expensive. |
| 6 | Conditional or luxury engravings | These are valuable after the character already performs reliably. |
The practical meaning of this order is that you should not chase a perfect stone or expensive recipe while the character still has incorrect stats, incomplete accessories, or an untested class rotation.
For a main character
Invest first in effects that will remain useful as the character enters harder raids and higher Tier 4 content. Account-wide or roster-friendly recipe choices can be especially efficient because they reduce the cost of gearing future characters.
For an alt
Use Engraving Support where available, a budget accessory setup, or transferable roster resources before committing to premium pieces. The goal is to make the alt efficient at its current content, not to copy the final build of a fully progressed main immediately.
For a support
Prioritize the effects and stats that improve party buffs, shields, healing, awakening access, and uptime. Do not evaluate a support only by personal attack damage. A support with excellent damage engravings but poor buff or defensive uptime is not necessarily better equipped.
Common Engraving Mistakes
- Using an old Tier 3 class engraving plan in Tier 4. Check whether the class path has moved to Ark Passive Enlightenment Effects.
- Buying accessories before choosing the build. This often creates expensive mismatched stats and unusable nodes.
- Ignoring combat stats. Engraving levels cannot compensate for an accessory set built around the wrong stat.
- Forcing conditional effects. An engraving that requires full health, positional attacks, a specific distance, or constant uptime is only strong when you can maintain its condition.
- Overpaying for a stone. Faceting is random. Decide the minimum result you need before spending gold.
- Activating negative engravings accidentally. Always inspect the final character sheet after changing accessories or stones.
- Copying a raid build without understanding the rotation. A build guide is a starting point; you still need to know how its effects are triggered.
- Rebuilding too early. Replace temporary gear when the next upgrade materially improves your current content, not simply because a more expensive option exists.
How Engravings Fit Into Overall Progression
Engravings are one part of the character’s damage or support profile. They work alongside combat stats, gems, ability stones, Ark Passive effects, equipment progression, skill setup, cards, and player execution.
If your character is failing a content check, inspect the complete setup in this order:
- Is the character using the correct class path?
- Are the primary combat stats correct?
- Are the main skills, tripods, and gems aligned with the rotation?
- Are the core engravings active at the intended level?
- Are conditional effects being triggered during actual gameplay?
- Is the character’s equipment and item level appropriate for the content?
This prevents the common mistake of treating engravings as the only source of performance. Sometimes replacing a low-quality accessory, improving a key gem, or learning the rotation gives more practical value than adding another expensive engraving level.
When Outside Progression Help Makes Sense
If your engraving plan is ready but a weekly routine, raid clear, or material bottleneck is slowing the character down, you can review the Lost Ark services available from ExpCarry. For routine-heavy progression, the Lost Ark Weekly Bundle is relevant when the issue is completing recurring weekly and daily activities rather than understanding the build itself.
For players who need materials from repeated farming content, the Lost Ark Chaos Dungeons service addresses that specific bottleneck. These options do not replace choosing the correct class setup; they are most useful after you know exactly which character progression target you are pursuing.
Related Lost Ark Guides
For broader progression planning, visit the Lost Ark guides and news section. The current Lost Ark catalog also includes a Lost Ark Gear Progression Guide, which is useful when deciding whether your next investment should go into engravings, honing, equipment, or another part of the character.
FAQ
Should I buy engraving accessories before learning the class rotation?
No. Test the class path, confirm the combat stats, and understand the rotation first. Temporary support systems or inexpensive equipment are preferable while you are still deciding whether the build suits you.
Are class engravings still used in Tier 4?
Tier 4 replaces class engravings with Ark Passive Enlightenment Effects. Older guides may still use class engraving terminology because they describe Tier 3 builds or were written before the system change.
Is Engraving Support better than real accessories?
It is a strong temporary option for eligible Tier 3 characters, especially when your accessories and ability stone are incomplete. Disable it when your real equipment provides better stats or engraving effects.
Which engraving should I upgrade first?
Upgrade the core combat engraving that your class uses consistently and that remains valuable in your regular content. Avoid prioritizing a conditional or luxury engraving while your stats, class path, or basic accessories are incomplete.
How much should I spend on an ability stone?
Set a fixed budget and a minimum acceptable result before faceting. Because outcomes are random, continued attempts can consume more gold than the performance gain justifies. A solid temporary stone is often enough until the rest of the build is complete.
Changelog
Published: July 22, 2026 — Initial version based on official Western information available on this date.