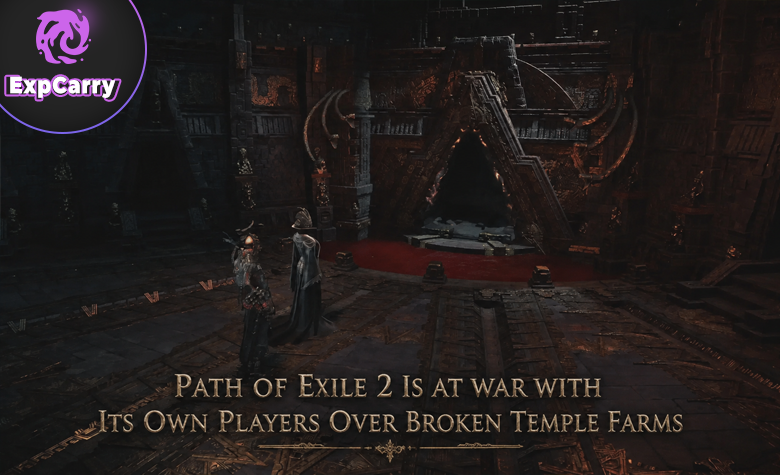

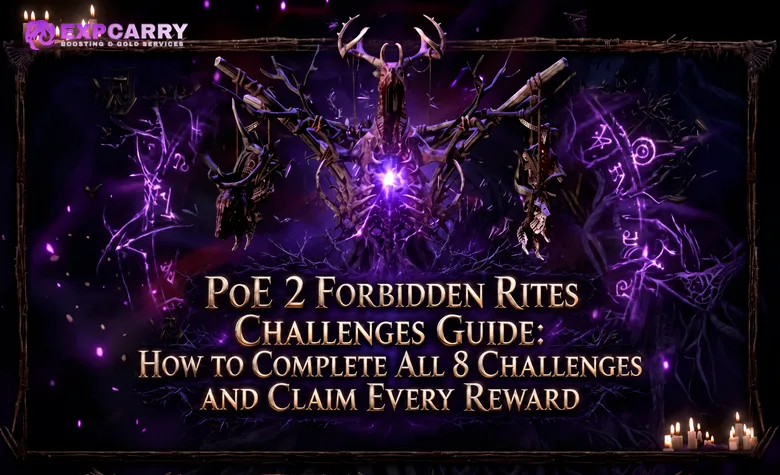
The eight Forbidden Rites challenges in Path of Exile 2 look manageable until you examine what they actually demand: eleven complete campaign Ritual chains, fifteen specific Rare monsters, fifty Unique items from Ritual rewards, eighteen different Omens, three fully allocated Atlas trees, and three endgame Pinnacle Bosses. Add all eight Ascendancy Points and level 90, and you have a challenge run that stretches from Clearfell to some of the most dangerous encounters in Wraeclast. This guide covers the Forbidden Rites event league introduced in Early Access patch 0.5.5, including subsequent fixes through 0.5.5e. The fastest way to earn every cosmetic is to complete several objectives simultaneously instead of treating them as eight separate grinds.
Short answer: Complete all eleven campaign Rites, kill any fifteen of the twenty listed Rare monsters, earn eight Ascendancy Points, reach level 90, obtain fifty Uniques through Ritual rewards, use eighteen different Ritual Omens, fully allocate the Ritual, Delirium and Abyss Atlas trees, and defeat The Aberration, Xesht and Atziri. Every completed challenge upgrades the Forbidden Rites Totem, while the major cosmetic rewards unlock at two, four, six and eight challenges.
All 8 Forbidden Rites Challenges and Their Requirements
Forbidden Rites uses its own challenge set, separate from the Runes of Aldur league. You must create and play a character in the Forbidden Rites event league to earn these event rewards; progress on an older character does not substitute for the new challenge track. The objectives below come from the current Forbidden Rites challenge records, with the event structure and cosmetic milestones confirmed in Grinding Gear Games' official 0.5.5 patch notes.
| Challenge | Exact requirement | Best time to finish |
|---|---|---|
| The Riteseeker | Complete all 11 named campaign Ritual Rites | During Acts 1–4 and the three Interludes |
| The Hunter | Defeat any 15 of 20 listed named Rare monsters | During the same campaign run |
| The Ascendant | Complete all four Ascendancy milestones and earn 8 points | Campaign and early endgame |
| The Master | Reach character level 90 | While progressing through the Atlas |
| The Reliquarian | Receive 50 Unique items from Rituals | Campaign boss Rites and endgame Ritual farming |
| The Nameless | Use 18 different Omens from the specified list of 24 | During Ritual farming and item crafting |
| The Cartographer | Fully allocate Ritual, Delirium and Abyss Atlas passive trees | Endgame mechanic progression |
| The Vanquisher | Defeat The Aberration, Xesht and Atziri | Endgame Pinnacle Boss progression |
The most important distinction is between objectives that happen naturally and those that require deliberate tracking. Level 90 progresses while you map, but an uncollected Ritual Unique does nothing for The Reliquarian. Likewise, reaching the endgame does not automatically complete The Cartographer: the required passive points must actually be allocated in the three specified trees. Use the challenge panel as your checklist after every major milestone, particularly before leaving a campaign act.
1. The Riteseeker: Complete All 11 Campaign Ritual Rites
The Riteseeker asks you to banish every Rite by finishing eleven named Ritual chains spread across Acts 1–4 and the three Interludes. These are not simply eleven random Ritual altars. Forbidden Rites places marked clusters of Ritual Effigies on the campaign World Map: two chains in each main act and one in each Interlude. When you complete an encounter, defeated bosses are carried into the next link, turning the last altar into a dangerous multi-boss fight.
Where to Complete Every Named Rite
Follow the marked Ritual route as you encounter its areas during the story. Each row below represents one challenge objective, not one altar, so finish the entire sequence before assuming that Rite is complete. The World Map's Ritual Effigy indicators are the final in-game reference if a zone layout makes the next encounter difficult to locate.
| Act | Named Rite | Areas to clear in the Ritual chain |
|---|---|---|
| Act 1 | Grim Portents | Clearfell → Mud Burrow → The Grelwood → The Grim Tangle |
| Act 1 | Grave Tidings | Cemetery of the Eternals → Mausoleum of the Praetor → Tomb of the Consort → Ogham Village |
| Act 2 | Desert Omens | Vastiri Outskirts → Mawdun Mine → Traitor's Passage → The Halani Gates |
| Act 2 | Ash and Bone | Buried Shrines → Bone Pits → Titan Grotto → Spires of Deshar |
| Act 3 | Savage Wilds | Sandswept Marsh → Jungle Ruins → Chimeral Wetlands → Jiquani's Machinarium |
| Act 3 | Blood Offerings | Jiquani's Sanctum → Azak Bog → Apex of Filth → Temple of Kopec |
| Act 4 | Blood in the Water | Shrike Island → Isle of Kin → Volcanic Warrens → Journey's End |
| Act 4 | Tidal Omens | Whakapanu Island → Singing Caverns → Halls of the Dead → Solitary Confinement |
| Interlude 1 | Shadow Over Ogham | Scorched Farmlands → Holten → Wolvenhold |
| Interlude 2 | Sands of Ruin | The Khari Crossing → Sel Khari Sanctuary → The Galai Gates |
| Interlude 3 | Death in the Ranges | Kriar Village, Glacial Tarn and Howling Caves; follow the marked chain through its three encounters |
The first chain demonstrates how the system works. In Clearfell, complete the Ritual associated with the area's boss; continue through Mud Burrow and The Grelwood without skipping their linked encounters. By The Grim Tangle, the earlier bosses return alongside the final opponent. You are no longer fighting an ordinary leveling boss, so bring a current weapon, working resistances and enough single-target damage to end overlapping mechanics before the arena becomes chaotic.
The same approach applies later, when stronger bosses and additional arena hazards make careless movement expensive. Finish the Rite when your character first reaches the relevant areas rather than postponing every chain until after the story. For players planning a fast campaign route, the broader Forbidden Rites campaign and farming overview explains how ordinary Ritual encounters fit around story progression; this challenge requires the specific named chains listed above.
What to Do If a Ritual Does Not Count
First, check whether you completed the full named chain. Killing an area's boss without activating and finishing its linked Ritual is not the same objective, and an ordinary Ritual elsewhere in the zone does not replace a marked boss encounter. Return to the missing World Map marker, clear the enemies around the effigy, finish the fight and inspect your challenge counter before moving on.
Two launch issues are also worth knowing about. In patch 0.5.5b, GGG improved the guidance for completing the Ritual after killing Ketzuli in the Temple of Kopec. Patch 0.5.5e subsequently fixed a bug in which defeating certain bosses could prevent Ritual encounters from starting. If an old walkthrough describes one of those failures as unavoidable, check your current client and the in-game marker before repeating the entire area.
2. The Hunter: Find 15 of the 20 Named Rare Monsters
The Hunter is a location challenge disguised as a combat challenge. You need to kill fifteen named Rare monsters from a specific list of twenty, and several are hidden inside side areas or behind interactable objects. Ordinary Rare enemies with similar modifiers do not count. The efficient route is to defeat the listed monsters while collecting campaign Ritual completions, then return for whichever targets you missed once your character has better movement speed and damage.
| Named Rare monster | Act | Zone and exact landmark |
|---|---|---|
| Areagne, Forgotten Witch | 1 | The Grelwood — Areagne's Hut |
| Vargir the Feral Mutt | 1 | Ogham Farmlands — Crop Circle |
| The Ninth Treasure of Keth | 2 | The Lost City — The Galleria |
| The Brood Queen | 3 | Infested Barrens — Larva Hollow |
| Ranbu the Pale Shaman | 3 | Sandswept Marsh — Orok Campfire |
| Narag of the Vile Word | 3 | The Matlan Waterways — Shaman's Hut |
| The Noxious Behemoth | 3 | Chimeral Wetlands — Toxic Bloom |
| Mimbok, the Enslaved | 4 | Isle of Kin — Beast Pen; open the enclosure |
| Magmanore, the Molten | 4 | Volcanic Warrens — Volcanic Nest |
| Clawcrunch | 4 | Whakapanu Island — Crabshell Cavern |
| Adelina, Guardian of the Pearl | 4 | Singing Caverns — interact with the Beckoning Clam |
| Forael, the Soulkeeper | 4 | Abandoned Prison — The Chapel |
| Fallen Quartermaster | 4 | Abandoned Prison — The Armoury |
| Harano, the Meat Carver | 4 | Ngakanu — Mad Butcher landmark |
| Moltenmettle | Interlude 2 | The Khari Crossing — Skullmaw Stairway |
| Bloodgulp | Interlude 2 | The Khari Crossing — area around Torbik |
| Fleshpierce | Interlude 2 | The Khari Crossing — area around Torbik |
| Bloodbilge | Interlude 2 | Qimah Reservoir — room near a checkpoint |
| Ashen Arachnid | Interlude 3 | Ashen Forest |
| Frozen Mandibles | Interlude 3 | Ashen Forest — near a checkpoint |
There are fourteen eligible targets in Acts 1–4 alone: two in Act 1, one in Act 2, four in Act 3 and seven in Act 4. That makes fourteen campaign kills plus one Interlude kill a straightforward route to fifteen, provided you find all fourteen earlier targets. If you miss a hidden monster, The Khari Crossing offers several eligible alternatives close together, while Ashen Forest provides two more opportunities in Interlude 3. You do not need to track down all twenty to complete the challenge.
Pay special attention to the enemies that require an interaction. Opening the Beast Pen is part of finding Mimbok, and the Beckoning Clam leads to Adelina. Forael and the Fallen Quartermaster occupy different landmarks within the Abandoned Prison, so killing one does not mean the other has been cleared. Some of these Rares also spawn with random modifiers, so a previously easy target may hit considerably harder on another visit.
The cleanest habit is to check The Hunter counter after each act and record the missed names, not simply the number of kills. Once you have fifteen confirmed entries, stop hunting the remaining five unless you want their normal drops or experience. The challenge offers no additional completion credit for killing all twenty.
Explore services related to this guide, selected from our Path of Exile 2 catalog.
View All Path of Exile 2 Services


3. The Ascendant: Earn All 8 Ascendancy Points
The Ascendant requires every Ascendancy milestone, not merely choosing an Ascendancy class. You must complete four qualifying trials and claim all eight points. The first two milestones naturally appear during the campaign, while the third and final milestones require more demanding versions of the Trial of the Sekhemas or Trial of Chaos. Selecting the route your build handles reliably is usually more valuable than forcing a trial with punishing mechanics just because its entrance is nearby.
- First milestone: Defeat Balbala, the Traitor in Act 2's Traitor's Passage, then complete the qualifying Trial of the Sekhemas to earn the first two points.
- Second milestone: Defeat Xyclucian, the Chimera in Act 3's Chimeral Wetlands to access the Trial of Chaos progression and earn the next two points from a qualifying completion.
- Third milestone: Complete an eligible three-floor Trial of the Sekhemas or the appropriate ten-round Trial of Chaos to unlock the next two points.
- Final milestone: Complete an eligible four-floor Trial of the Sekhemas or the final Trial of Chaos route, including the Trialmaster encounter and its required fragments, to reach eight points.
Always inspect the trial item's eligibility before starting. A successful run at the wrong milestone does not necessarily award the missing Ascendancy Points, and defeating the final opponent is not enough if you leave without completing the relevant reward interaction. If you choose Trial of Chaos for the final milestone, prepare for repeated ten-round completions and the fragment requirements leading to the Trialmaster; this is not simply another ordinary ten-room run.
Patch 0.5.5 improved Trial of Chaos progression substantially. GGG added the ability to leave and resume a run, placed reward chests after individual rooms, and allowed qualifying ten-round Ultimatums to continue into further runs that award different Trialmaster fragments. Those changes make the Chaos route more manageable, but difficult modifiers can still destroy a build that relies on standing still or lacks consistent recovery. Plan your Trial of the Sekhemas progression around your defenses and damage type, and use the Ascendancy Trials guide for the broader unlock system.
4. The Master: Reach Level 90 Without Wasting Progress
The Master has the simplest requirement and one of the easiest ways to lose time: reach character level 90. There is no special boss, hidden item or event-only experience source attached to it. The difficulty comes from building enough experience efficiently while surviving higher-level maps. Once your campaign build becomes a stable mapper, The Master should progress alongside The Reliquarian and The Cartographer.
Run map tiers that you can finish consistently instead of choosing the hardest modifiers available. A slightly lower-reward map completed quickly is often better for experience than a dangerous map that repeatedly kills you or forces lengthy boss attempts. Keep elemental resistances, maximum Life or Energy Shield, recovery, and an escape or mobility option in working order as the Atlas becomes more demanding. Treat experience preservation as part of your farming strategy rather than something to think about only at level 89.
If level 90 is your last unfinished requirement for the next cosmetic milestone, focus on reliable monster density and short downtime between maps. Otherwise, your leveling progression can overlap with Ritual, Delirium and Abyss content that also awards challenge credit. Save high-risk Pinnacle attempts for moments when your character is properly prepared rather than interrupting a productive mapping session with undergeared boss fights.
5. The Reliquarian: Receive 50 Unique Items From Rituals
The Reliquarian does not ask you to find fifty random Unique drops. Its condition is specifically to receive fifty Unique items from Rituals, which means acquiring them through the Ritual reward system. A Unique found on the ground, purchased from another player or obtained from an unrelated reward source is not an alternative to that condition. This is why the challenge can take longer than it initially appears, even on a character that already owns plenty of Unique equipment.
Best Ritual Loop for 50 Unique Rewards
Start counting during the campaign. Completing the marked boss Ritual chains can provide Unique reward choices, so The Riteseeker and The Reliquarian naturally overlap. Once the campaign ends, continue through endgame Ritual encounters and prioritize opportunities to acquire eligible Uniques with Tribute. The PoE 2 Ritual guide explains the wider Tribute and Favour system if you need a refresher before committing to longer farming sessions.
- Complete boss Ritual chains as you level. These are more useful for challenge progression than skipping straight to the next story objective.
- Inspect the reward panel after each encounter. Look for obtainable Unique items and compare their Tribute costs with the other rewards available.
- Purchase eligible Uniques when the cost makes sense. A weak Unique can still contribute one item to the challenge; its market value is a separate consideration.
- Check the challenge counter after collecting rewards. This confirms your purchases are being counted before you repeat the same farming approach for hours.
- Continue in endgame Ritual maps. Combine the hunt for more Uniques with Omen collection and Ritual Atlas progression.
Do not assume that merely seeing a Unique in the reward window counts. The challenge requires you to receive the item, so complete the purchase or collection step. Also avoid spending your entire Tribute budget on an expensive item solely because it is rare if several affordable eligible Uniques would advance the objective more efficiently. You are trying to reach fifty qualifying items, not build the most valuable Unique collection possible.
6. The Nameless: Use 18 Different Ritual Omens
The Nameless is one of the easiest challenges to misunderstand. Its objective is to use eighteen different Omens from a fixed list of twenty-four, not to collect eighteen Omen items or activate the same inexpensive Omen repeatedly. Many Omens are consumed when a particular action occurs, so they may sit in your inventory without triggering anything. Plan which eighteen you can realistically use before spending currency on expensive crafting effects.
Every Omen Eligible for The Nameless
The list includes utility effects, crafting modifiers and situational encounter triggers. You can skip six of the twenty-four, which gives you room to avoid costly or awkward options. The names below follow the Forbidden Rites challenge records; always read the item's current in-game tooltip before using crafting currency because the exact effect matters.
- Gambling and vendors: Omen of Gambling; Omen of Bartering.
- Recovery and death: Omen of Refreshment; Omen of Amelioration; Omen of Resurgence.
- Exalted Orb crafting: Omen of Greater Exaltation; Omen of Sinistral Exaltation; Omen of Dextral Exaltation; Omen of Catalysing Exaltation.
- Chaos Orb crafting: Omen of Sinistral Erasure; Omen of Dextral Erasure; Omen of Whittling.
- Orb of Annulment crafting: Omen of Sinistral Annulment; Omen of Dextral Annulment.
- Essence crafting: Omen of Sinistral Crystallisation; Omen of Dextral Crystalisation.
- Chance Orb crafting: Omen of the Ancients; Omen of Chance.
- Divine Orb crafting: Omen of the Blessed; Omen of Sanctification.
- Encounter interactions: Omen of Answered Prayers; Omen of Secret Compartments; Omen of the Hunt; Omen of Reinforcements.
Some of these are straightforward once you know the trigger. Omen of Gambling interacts with a gambling purchase, while Omen of Bartering applies to a vendor sale. Omen of Answered Prayers is triggered through a Shrine, and Omen of Secret Compartments involves opening a Strongbox. These are useful early candidates because they can fit into activities you would perform anyway rather than demanding an expensive crafting project.
The encounter-specific options require more planning. Omen of the Hunt interacts with a possessed monster, and Omen of Reinforcements concerns an encounter with a Rogue Exile. Do not count them as completed when you acquire them; arrange to meet the relevant condition and then check whether the named Omen has registered in the challenge panel. If you are targeting a precise set of eighteen, keep a written list of consumed names to avoid buying duplicates unnecessarily.
How to Finish The Nameless Without Burning Valuable Currency
Begin with the low-commitment utility and encounter Omens that are available to you. After that, evaluate your stash for crafting currency and suitable item bases before choosing the next Omen. A Sinistral or Dextral crafting effect may be valuable when you actually want to modify an item, but triggering it on an important piece of equipment just for one challenge counter can be a costly mistake. Use disposable bases for experiments where the outcome does not justify risking your main weapon or armour.
Recovery-related Omens deserve particular caution. Omen of Refreshment and Omen of Resurgence involve reaching low Life, while Omen of Amelioration relates to dying and experience loss. These are not invitations to deliberately risk a character close to level 90, especially in Hardcore. Handle such conditions during ordinary play if they fit your build and league rules, or leave them among the six Omens you do not need.
Every time you obtain another Omen from Ritual rewards, ask two questions: have you already used this exact name, and can you trigger it safely with resources you already own? This turns The Nameless into a controlled checklist instead of a late-game shopping spree. It also lets Ritual farming work toward both The Nameless and The Reliquarian at the same time.
7. The Cartographer: Fully Allocate Three Atlas Passive Trees
The Cartographer requires three specific league-mechanic Atlas passive trees to be fully allocated. It does not ask you to complete only the main Atlas passive tree, nor does unlocking a mechanic automatically finish its tree. The required totals are thirty-six Ritual points, thirty-one Delirium points and thirty-five Abyss points. In practice, that makes The Cartographer a major endgame project, particularly if your Atlas route has so far focused on unrelated mechanics.
| Atlas mechanic | Points to allocate | Relevant progression hub |
|---|---|---|
| Ritual | 36 | Caer Tarth and its associated Ritual progression |
| Delirium | 31 | The Withered Willow and surrounding Delirium progression |
| Abyss | 35 | The Well of Souls and surrounding Abyss progression |
Each mechanic has its own endgame activities and quest progression. When you first encounter one of these mechanics in mapping, follow its associated questline toward the relevant Atlas location, then clear the connected mechanic maps and encounters to earn more passive points. The surrounding Atlas areas are useful because they let you pursue a particular mechanic consistently instead of waiting for it to appear randomly during unrelated mapping. Pinnacle progression can also contribute substantial mechanic-tree rewards.
Start with Ritual. Its maps already feed The Reliquarian and The Nameless, making it the highest-value overlap for this particular challenge set. Delirium and Abyss should then become dedicated Atlas projects, although you can alternate between them when one route offers better maps or your build performs more reliably against the other mechanic. If you are comparing Atlas farming routes and time investment, keep the challenge counters—not just currency per hour—in mind.
After earning each batch of points, open the correct mechanic tree and spend them. The objective checks whether the required tree is fully allocated, so leaving points unspent can prevent completion even after you have finished the relevant bosses or questline. Do not confuse an unlocked node, a completed Atlas quest and an allocated passive: they are related steps, but not the same condition.
8. The Vanquisher: Defeat The Aberration, Xesht and Atziri
The Vanquisher is the final combat wall for many players because it requires three different endgame Pinnacle Bosses. These fights belong to different mechanics, so farming one encounter repeatedly cannot substitute for the others. You must defeat The Aberration from Expedition, Xesht, We That Are One from Breach, and Atziri, the Red Queen from Fate of the Vaal. The Arbiter of Divinity, The Bodach and other powerful Pinnacle encounters are separate bosses and do not replace a missing entry on this list.
The Aberration: Expedition and the Shattered Triskelion
The Aberration is connected to Expedition's endgame storyline. Progress through Expedition encounters and Logbooks, follow the route involving Olroth and the Obscure Island, and obtain the Shattered Triskelion required by the associated boss progression. For repeatable access, the Shattered Triskelion can be reforged through the relevant Runeforging process. Follow the quest prompts leading through the Ruins of Kingsmarch and the Fallen Star route rather than treating an ordinary Expedition encounter as the Pinnacle fight.
Before entering, prepare for a sustained boss battle rather than a standard Expedition pack. Keep movement available for telegraphed attacks, avoid attacking through dangerous arena effects simply to maintain damage uptime, and prioritize surviving unfamiliar phases on your first attempt. Your objective is one confirmed victory; there is no need to build a repeat-farming strategy unless you also want the boss's exclusive rewards.
Xesht, We That Are One: Breach Progression
Xesht belongs to the Breach questline. Work through Breach encounters to reach the Monastery of the Keepers, advance the Breach-related objectives, and follow the route involving Breachstones and the encounters leading toward the Twisted Domain. The quest route involves confronting It That Was Tul and It That Was Esh before the final Xesht encounter becomes available. A standard Breach in an ordinary map is not the boss fight required by The Vanquisher.
For Xesht, build preparation is as important as the access route. Make sure your damage remains functional while moving, because standing still during dangerous attack patterns can turn an otherwise successful fight into a failed attempt. Learn the major arena telegraphs before committing to extended damage windows, and avoid using a fragile mapping setup whose clear speed depends on killing many weak enemies.
Atziri, the Red Queen: Build the Temple Route
Atziri is reached through the Fate of the Vaal endgame system and Atziri's Temple, not through Expedition or Breach. Reveal and enter the Vaal Ruins through the relevant Ancient Beacon progression, then work through the Temple systems until you can access the required architect encounter. Defeating Xipocado and arranging the Royal Access Chamber are important steps, but they do not finish the task by themselves. You must build a connected route through the Temple to Atziri's Chamber and defeat Atziri in the final encounter.
This makes Atziri different from simply collecting a boss key and opening a portal. You need both the Temple access progression and an actual connected route to the boss room. Before committing to the fight, review your elemental defenses, recovery and ability to respond to large telegraphed attacks. A successful Temple construction is only the setup; The Vanquisher advances when Atziri herself is defeated.
These three routes are also detailed in the PoE 2 Pinnacle Boss access guide, which distinguishes first-clear quest access from repeatable boss entry. For Forbidden Rites, prioritize the first successful clear of each required boss. Repeat farming can wait until you have secured all three challenge entries.
Every Forbidden Rites Reward and How to Unlock It
There are four major cosmetic milestones and a Hideout decoration that grows with every completed challenge. GGG confirmed these rewards in the official Forbidden Rites announcement and the event patch notes. The important detail is that you do not receive eight completely different wearable cosmetics: every challenge contributes to the Forbidden Rites Totem, while the wearable or companion rewards unlock at the even-numbered milestones.
| Challenges completed | Reward unlocked | What it adds |
|---|---|---|
| 1 | Forbidden Rites Totem — first stage | Begins the Hideout decoration |
| 2 | Locust Footprints Effect + Totem progress | Footprint cosmetic |
| 3 | Forbidden Rites Totem — additional stage | Expands the Hideout decoration |
| 4 | Locust Swarm Rare Finisher Effect + Totem progress | Rare-monster finisher cosmetic |
| 5 | Forbidden Rites Totem — additional stage | Expands the Hideout decoration |
| 6 | Wildwood Guardian Pet + Totem progress | Companion cosmetic |
| 7 | Forbidden Rites Totem — additional stage | Expands the Hideout decoration |
| 8 | Wildwood Affliction Level-up Effect + final Totem stage | Level-up cosmetic and completed decoration |
The Totem is a record of how far you progressed during Forbidden Rites, not an additional challenge you must complete. After reaching a milestone, inspect the challenge reward status and the appropriate cosmetic or Hideout decoration inventory to confirm that the unlock has appeared. The event rewards are exclusive to the Forbidden Rites challenge track, so completing similarly named challenges in another league will not unlock them.
If you only want the Wildwood Guardian Pet, six completed challenges are sufficient; the level-up effect requires all eight. The decision becomes meaningful when you reach the endgame: a player struggling with expensive Omen crafting or Pinnacle Boss access can still aim for the earlier cosmetic milestones without pretending those final objectives are mandatory for every reward tier. For the complete set, however, all eight challenge entries must be finished.
Best Order to Complete All 8 Challenges Efficiently
The fastest overall route is built around overlap. Campaign Rituals and named Rares belong together, while endgame Ritual maps advance three separate objectives at once. Trial completion and level 90 should happen as part of normal character progression rather than as isolated detours. Only the final boss checklist needs a dedicated access plan after your build is prepared.
Phase 1: Campaign — The Riteseeker and The Hunter
As you move through Acts 1–4 and the three Interludes, clear every marked boss Ritual chain and check named Rare landmarks in nearby zones. Record progress at the end of each act so you can immediately identify missing targets. Take the early Ascendancy milestones when your character is ready, and collect affordable Unique Ritual rewards whenever they appear. By the time the campaign is complete, you should have made substantial progress on four challenges without needing a separate farming route.
Phase 2: Early Atlas — Ritual Uniques, Omens and Leveling
Begin endgame by establishing a reliable mapping setup, then follow Ritual progression toward Caer Tarth. Prioritize maps and encounters that let you spend Tribute, obtain qualifying Unique items and acquire unused Omens. This is also the time to finish missing Ascendancy milestones and keep gaining experience. Do not sacrifice a stable level 90 route for an unnecessarily difficult map simply because its potential drops look attractive.
Phase 3: Complete the Three Required Atlas Trees
Work toward full Ritual allocation first if you still need Unique items or Omens, then build out Delirium and Abyss. Follow each mechanic's questline and connected Atlas maps, spending the awarded points as they become available. Check all three trees after major bosses or mechanic milestones instead of waiting until the end. If The Reliquarian and The Nameless are already finished, shift the focus from Ritual reward efficiency to collecting the remaining Atlas points.
Phase 4: Pinnacle Bosses and Final Cleanup
Save the hardest fights for when your equipment, defenses and boss damage are ready. Complete the Expedition, Breach and Fate of the Vaal access routes, then defeat The Aberration, Xesht and Atziri. Review the challenge panel afterward and clean up any remaining level, Omen, Unique or Atlas requirement. This final check prevents a frustrating situation where you have beaten all three bosses but are still missing one unallocated Atlas passive point or one named Omen.
Common Mistakes That Delay Forbidden Rites Completion
Most wasted time comes from misunderstanding what each counter tracks. The game is specific about its objectives, and similar-looking actions are not always interchangeable. Keep these pitfalls in mind before committing a rare item, expensive map or long evening of farming.
- Stopping a named Rite too early: The Riteseeker requires the entire linked Ritual chain, not just the first boss altar in its route.
- Hunting every named Rare: The Hunter needs fifteen kills from twenty possible targets. Stop when fifteen are confirmed.
- Counting ordinary Unique drops: The Reliquarian specifies fifty Uniques received from Rituals, not fifty Uniques found anywhere.
- Buying Omens without triggering them: The Nameless is about using eighteen different named Omens. Holding them in your stash does not complete the objective.
- Repeating the same Omen: The challenge tracks different listed types, so a duplicate use does not replace a missing name.
- Completing the wrong Atlas tree: The Cartographer specifically requires Ritual, Delirium and Abyss, fully allocated.
- Attempting the wrong Pinnacle Boss: The Vanquisher lists The Aberration, Xesht and Atziri. Other powerful endgame bosses do not count as substitutes.
- Forgetting to claim Ascendancy Points: Finishing a trial encounter is not the same as securing its reward and confirming your eight-point total.
- Ignoring event league selection: Forbidden Rites cosmetics must be earned through the event's own challenge track.
The simplest prevention method is to check the relevant counter immediately after completing an unusual objective. Do it after a hidden Rare, a final campaign Rite, a new Omen trigger or an Atlas-tree milestone. If something did not register, fixing it while the location and conditions are fresh is much easier than reconstructing your route several days later.
Forbidden Rites Challenges FAQ
These answers cover a few practical questions that can affect planning even after you understand all eight objective lists. They are especially relevant if you started the event late or are trying to secure a particular cosmetic before the league ends.
Can I finish Forbidden Rites challenges with a Runes of Aldur or Standard character? No. Forbidden Rites has its own event-league challenge track. Create a character in the appropriate Forbidden Rites league variant and verify that its challenge panel displays the event objectives.
Will the Forbidden Rites cosmetic rewards remain available after the event? The cosmetics and Hideout Totem stages you unlock are account rewards rather than temporary combat items. GGG describes the Totem as a permanent record of event progress, but the opportunity to earn these particular challenge rewards is limited to Forbidden Rites. GGG has confirmed that the event will end with the Path of Exile 2 1.0 release, scheduled for December 11, 2026; check official announcements for the exact shutdown time.
Can I trade for the Unique items needed by The Reliquarian? Trading for a Unique does not satisfy the stated requirement to receive it from Rituals. Use Ritual Tribute to obtain the items through the relevant reward system and confirm each addition in the challenge panel.
Does every Ritual Omen count toward The Nameless? No. Only the twenty-four named Omens in the challenge list qualify, and you need to use eighteen different ones. An untriggered Omen or another copy of a name you already completed should not be treated as fresh progress.
Final Strategy: Turn Eight Challenges Into One Progression Route
The most efficient Forbidden Rites run begins by finishing every marked campaign Rite and collecting named Rare kills along the way. In the Atlas, Ritual becomes your main overlap activity for Unique rewards, Omens and passive progression, while leveling and the remaining Atlas trees advance in parallel. Save the three required Pinnacle Bosses for a properly prepared character, and verify every counter before declaring the run finished. That route gives you the clearest path from your first Ritual in Clearfell to all four cosmetics and the fully upgraded Forbidden Rites Totem.