Star Citizen ship PvP is decided by movement, target selection, weapon application, and the ability to manage shields, armor, and internal components under pressure. Winning a fight is no longer only about keeping the crosshair on an enemy until its hull health reaches zero. A weapon must be appropriate for the target, the pilot must control the engagement, and a coordinated crew must understand which ship systems or threats matter most.
This guide covers ship-to-ship combat in Star Citizen Alpha 4.10.2 LIVE, including the current flight and damage systems, light and heavy fighter matchups, weapon classes, shields, armor, component targeting, missiles, power distribution, solo flying, and coordinated group PvP. It preserves practical dogfighting fundamentals while accounting for the armor, shield, radar, and engineering changes introduced across the 4.7–4.10 update series.
Short answer: use matched weapons suited to the target's armor, manage range and shields before committing to an exchange, and aim for vulnerable components when hull damage is inefficient. Solo pilots should prioritize mobility and independently controlled weapons, while groups should assign target-calling, damage, interdiction, turret, and engineering responsibilities.
Alpha 4.10.2 LIVE was released on October 9, 2026. Its shield-resistance correction applies to the current combat system, but the experimental Time-to-Kill and Time-to-Disable changes tested during the 4.10.2 PTU cycle were a separate Tech Preview and are not part of the released LIVE balance. This guide does not use those experimental shield-health, weapon-damage, or armor-deflection figures as current statistics.
Star Citizen PvP Fundamentals
Every successful ship engagement combines movement, targeting, damage application, defense, and decision-making. A strong fighter or expensive weapon configuration does not compensate for losing control of the fight.
Every encounter can be reduced to five questions:
- Who controls the distance between the ships?
- Who controls the angle and available firing arcs?
- Which weapons can actually damage the selected target?
- Who manages shields, components, capacitors, thrusters, and boost more efficiently?
- Who recognizes when to press the attack, switch targets, or disengage?
New pilots often focus exclusively on landing shots. Experienced pilots evaluate the opponent's ship, relative movement, armor, weapon range, and available escape routes before committing to sustained fire.
For example, a light fighter may land repeated hits against a heavily armored vessel without producing meaningful hull damage. That does not necessarily mean its aim is poor. The weapon's per-projectile damage may be insufficient to overcome the relevant armor protection.
The correct response can be changing targets, attacking a vulnerable subcomponent, using heavier weapons, or calling in a teammate with a more suitable loadout.
Current Ship Combat Systems in Alpha 4.10.2
The present LIVE combat model combines several layers that should be understood separately.
| System | Current function | Combat implication |
|---|---|---|
| SCM and NAV | Separate combat maneuvering from high-speed travel | Mode selection affects combat readiness and disengagement |
| Shields | Absorb or resist incoming damage according to equipment and current balance | Shield condition and regeneration affect attack timing |
| Vehicle armor | Provides hull-specific protection and projectile damage thresholds | Weapon size and per-hit damage matter against armored targets |
| Hull and components | Receive damage after or through the relevant defensive layers | A ship may suffer critical component failures before complete destruction |
| Engineering | Manages power, equipment condition, cooling, and supported ship systems | Damage and resource allocation can affect continued combat capability |
| Radar and aim assist | Installed radar and allocated power affect supported targeting behavior | Target acquisition and effective aiming assistance depend on equipment |
| Hit markers | Provide feedback about the result of weapon impacts | Pilots can distinguish shield, armor, hull, and component interactions |
| Missiles and countermeasures | Enable guided attacks and defensive seeker disruption | Locks, movement, and countermeasure timing influence engagements |
| Quantum interdiction | Specialized ships can prevent or interrupt travel when their equipment functions | Control ships can determine whether targets escape |
These systems are related, but they do not form a simple universal damage formula. Individual ship armor, weapon type, impact location, power allocation, and current bugs can all change the outcome.
The official Alpha 4.10 patch notes document changes to vehicle armor and weapon balance. The Alpha 4.10.2 release notes document the current flat shield-resistance correction.
Best Flight Settings for Ship PvP
Flight settings should support precise, repeatable movement rather than reproduce another pilot's configuration. Mouse DPI, joystick curves, HOTAS or HOSAS hardware, and personal control preferences all affect the ideal setup.
For ship combat, the primary goal is to make small aiming corrections while retaining access to essential movement and defensive controls.
| Setting | Starting recommendation | Purpose |
|---|---|---|
| ESP strength | Begin at a moderate value and adjust according to aiming behavior | Assists fine aiming without overpowering deliberate corrections |
| Mouse or VJoy controls | Choose a setup you can recenter consistently | Improves nose control and predictable turning |
| G-Safe | Keep accessible; learn its effect before disabling | Helps manage pilot G-force exposure |
| Coupled / Decoupled | Bind to an accessible control | Allows deliberate switching between flight-control behavior |
| Speed limiter | Bind adjustment and reset controls | Supports closure-speed and range management |
| Boost | Use a dedicated comfortable bind | Enables acceleration, braking, vector changes, and escape |
| Power controls | Bind available weapon, shield, and thruster priorities | Reduces delay when changing combat priorities |
| Targeting | Bind hostile target cycling and subtarget controls | Speeds up threat assessment and component targeting |
| Countermeasures | Keep Decoy and Noise separately accessible | Allows an appropriate response to missile threats |
These are starting points, not mandatory values. Exact input labels and default bindings can change, so verify them in the current Controls and Keybindings menus.
Mouse Sensitivity and ESP
Start with a sensitivity that allows small movements around the target's predicted impact point without excessive overshoot.
If you repeatedly move past the aiming solution, reduce sensitivity or adjust the response curve. If the ship cannot follow the required turn even when the target is visible, examine both input settings and the vessel's actual maneuvering capability.
ESP is a precision-assistance feature, not automatic target tracking. Excessive assistance can make the crosshair feel resistant to deliberate corrections.
Radar-based aim-assist behavior also matters. Since Alpha 4.7, the installed radar model and assigned power can influence the distances at which supported aiming assistance operates.
Consequently, not every targeting difference can be corrected through mouse sensitivity alone.
Essential PvP Keybinds
A practical fighter configuration should provide rapid access to:
- Coupled and Decoupled toggle;
- speed limiter adjustment and reset;
- boost and spacebrake;
- nearest hostile and target cycling;
- target pinning and component subtarget selection;
- Guns and Missile Operator Modes;
- Decoy and Noise countermeasures;
- available power allocation controls or presets;
- shield-face controls where supported;
- look-behind and situational awareness;
- Precision Targeting Mode where available.
Test the complete configuration in Arena Commander before relying on it during a high-risk Persistent Universe encounter.
SCM, NAV and Combat Readiness
Star Citizen's Master Modes separate combat maneuvering from high-speed travel. SCM is the primary combat mode, while NAV supports traversal and quantum travel.
In SCM, weapons and shields provide their intended combat functions, but the ship operates within its combat-speed limitations.
In NAV, higher travel speeds and quantum-navigation functions become available, but the ship cannot use ordinary weapons as it would in SCM and does not receive normal effective shield protection.
Changing modes at the wrong moment can expose a ship to considerable danger.
Before entering combat:
- Return to SCM.
- Confirm shields have reached an appropriate charge state.
- Check weapons and available ammunition.
- Select the correct hostile target.
- Review available weapon groups and operator mode.
- Set the speed limiter for the expected engagement.
- Check power allocation and boost reserves.
- Confirm missile and countermeasure quantities.
- Identify an open disengagement route.
Do not enter a close-range fight while still waiting for combat systems to become effective after a mode transition.
Master Modes vs. Operator Modes
Master Modes determine the ship's broad flight state. Operator Modes determine which activity is currently controlled through the cockpit interface.
Relevant operator modes include Guns, Missiles, scanning, and other equipment-specific functions.
Missiles generally require their appropriate operator mode to lock and launch. Precision aiming and available gimbal controls also depend on the active combat interface.
Understanding this distinction is particularly important when switching rapidly between conventional guns, missiles, and navigation during an engagement.
Explore services related to this guide, selected from our Star Citizen catalog.
View All Star Citizen Services

Coupled vs Decoupled Flight in PvP
Coupled and Decoupled flight provide different methods of controlling the ship's velocity.
Coupled mode uses flight assistance to counteract movement when directional input stops. Decoupled mode permits the ship to preserve its momentum until another force changes its trajectory.
Use Coupled Mode For
- learning basic range control;
- close terrain and asteroid maneuvering;
- stable pursuit of a moving target;
- recovering from an uncontrolled vector;
- situations where automatic braking reduces workload.
Coupled is generally easier for learning the relationship between throttle, distance, and relative movement.
Use Decoupled Mode For
- maintaining one movement vector while aiming in another direction;
- drifting past an enemy while rotating the nose toward it;
- creating lateral or vertical separation;
- maintaining escape momentum while firing backward;
- advanced positional changes during a dogfight.
Decoupled is not automatically superior. Without reliable velocity awareness, the pilot can drift out of effective weapon range, collide with terrain, or expose the ship during an uncontrolled maneuver.
Learn the intended movement in Coupled first, then practice reproducing it in Decoupled with deliberate counter-thrust.
Speed Control and the Merge
The merge is the first close encounter between opposing ships. Its outcome often determines which pilot begins the sustained engagement with the positional advantage.
The best entry speed depends on the ships involved, the target's motion, available maneuvering space, and the attacker's intended weapon range.
Common Merge Mistake: Excessive Closure Speed
Approaching at maximum speed can create an extremely short firing window.
The attacking pilot may overshoot before dealing useful damage, while the defender gains time to turn and establish a better firing angle.
A more controlled merge follows this sequence:
- Approach with enough movement to remain difficult to hit.
- Reduce closure speed before the closest pass.
- Use lateral or vertical displacement to avoid a direct collision line.
- Begin firing when the aiming solution becomes useful.
- Decide whether to turn, extend, or change flight mode before passing the target.
The goal is to remain dangerous after the initial pass rather than produce one short burst followed by a long recovery turn.
Avoid Pure Nose-to-Nose Jousting
Repeated head-on exchanges favor ships with stronger direct-fire weapons, heavier protection, and greater tolerance for mutual damage.
Against a heavy fighter or gunship, a light fighter that repeatedly approaches from directly ahead may be giving away its primary maneuverability advantage.
Offset the approach, create an angle, and force the opponent to rotate before it can return accurate fire.
However, against heavily armored targets, an agile fighter should also consider whether its weapons can produce useful damage at all. Positioning alone does not overcome an insufficient armor-penetration threshold.
Positioning: How to Win the Angle
Good positioning allows a ship to maintain useful weapon coverage while limiting the opponent's ability to fire back.
For a fighter, this often involves controlling the space outside an opponent's forward weapon arc. Against a turret ship, the problem changes because several weapons can cover different angles simultaneously.
Use the Target's Turn Plane
Observe the direction in which the opponent is turning and avoid following the same predictable path.
Lateral and vertical movement can create a crossing angle that requires the target to change its rotation and disrupts its current firing solution.
Positioning should also account for the enemy's weapons. A ship with concentrated forward guns can be approached differently from a multicrew vessel with broad turret coverage.
Control the Rate Fight
A rate fight is a sustained turning engagement in which both pilots attempt to maintain weapon alignment while denying the same opportunity to the opponent.
Do not rely on continuous maximum pitch. Combine pitch, roll, yaw, strafe, and throttle adjustments according to the current ship's strengths.
When the opponent consistently turns faster:
- stop forcing the same turn;
- create separation;
- change the engagement plane;
- use boost for a deliberate vector change;
- re-enter from a different angle.
The aim is to create a new engagement rather than remain trapped in a maneuver the opponent performs better.
Use Vertical Space
Fighting entirely in a flat plane makes movement easier to predict.
Vertical strafing and oblique flight complicate an enemy's firing solution and can create opportunities to attack exposed surfaces or components.
However, constant strafing without deliberate range control can create excessive separation and reduce damage application.
Keep an Exit Vector
Before committing, identify the direction in which the ship can safely accelerate if shields fail, another hostile arrives, or a critical component is damaged.
Avoid allowing terrain, asteroids, stations, or other ships to block the intended disengagement route.
Also consider enemy quantum interdiction. An open escape vector is useful for conventional flight but does not guarantee access to NAV or quantum travel.
Weapon Ranges and Firing Discipline
Weapon selection is central to the current Star Citizen combat model because different weapon classes behave differently against small fighters, shields, armor, and internal components.
Maximum range, damage per second, damage per projectile, projectile velocity, ammunition capacity, capacitor use, and firing accuracy all contribute to effectiveness.
There is no universal best weapon for every ship or target.
| Engagement range | Typical use | Main problem |
|---|---|---|
| Long range | Initial pressure, target movement assessment, and specialist attacks | Agile targets have more time to change direction before projectiles arrive |
| Medium range | Sustained tracking and controlled damage application | Requires active management of relative movement and aim |
| Close range | High-probability firing windows and specialist burst damage | Overshooting, collision, and sudden positional reversals |
The effective range is the distance at which a pilot can consistently land enough damaging hits to justify the exposure.
Firing continuously from maximum HUD range may waste energy, ammunition, and time without producing meaningful damage.
Ship Weapon Classes
Ship guns are divided into families based on how they fire and how their damage is delivered. Weapon class and damage type are different concepts: a cannon may be an energy weapon or a ballistic weapon, while a gatling gun's primary characteristics depend on its own ammunition and firing behavior.
| Weapon class | Main strengths | Main weaknesses | Typical target |
|---|---|---|---|
| Laser repeaters | High firing cadence and frequent correction opportunities | Capacitor demand; individual shots may be inadequate against certain armor | Small and medium maneuvering ships |
| Laser cannons | Deliberate high-damage shots and useful pressure against tougher targets | Misses are more costly, particularly against evasive fighters | Medium and armored ships |
| Ballistic gatlings | Sustained projectile fire, with larger calibers relevant to heavier armor | Finite ammunition and resupply cost | Targets matched to the gun's size and penetration capability |
| Ballistic cannons and mass drivers | Concentrated per-shot damage | Lower firing cadence and higher precision requirements | Heavier ships, selected hull or component targets |
| Scatterguns | High close-range damage when multiple projectiles connect | Spread and severe loss of efficiency against small distant targets | Close-range engagements against suitable targets |
| Neutron and specialist energy cannons | Specialized damage delivery and weapon-specific characteristics | Variable heat, capacitor, cadence, or range limitations | Targets suited to the individual weapon's statistics |
| Distortion weapons | Pressure on supported electronic and component systems | Not interchangeable with conventional hull-destruction weapons | Ships targeted for disablement or system disruption |
| Missiles and torpedoes | Guided ordnance and specialized large-target attacks | Finite supply, locks, countermeasures, and target restrictions | Targets appropriate to the ordnance and engagement |
For individual weapon families, Sizes 1–7+, specific cannons, repeaters, gatlings, and loadout combinations, use the Star Citizen Ship Weapons Guide.
Repeaters vs. Cannons
Repeaters are often easier for learning combat because their firing cadence provides continuous aiming feedback.
Cannons deliver more concentrated damage and can be better suited to overcoming specific armor thresholds, but their effectiveness drops sharply when the pilot cannot land deliberate shots.
The armor damage-threshold changes introduced in Alpha 4.7 make this distinction more important.
At full health, sufficiently protective armor can prevent lower-damage projectiles from damaging the armor layer, underlying hull, or internal components. As the armor deteriorates, smaller projectiles can become more effective.
For this reason, a weapon with excellent displayed sustained DPS may still perform poorly against a heavily protected target if its individual impacts cannot overcome the relevant protection.
Weapon choice should therefore follow the enemy's hull and intended combat role rather than a universal rule that repeaters or cannons are always stronger.
Energy vs. Ballistic Damage
Energy and ballistic weapons interact differently with shields, armor, and related resistances.
The exact relationship depends on the weapon and current balance. It is not accurate to describe all laser damage as stopping completely at shields or all ballistic damage as automatically bypassing them.
Alpha 4.7 increased the effectiveness of energy weapons against shields. Alpha 4.8 adjusted shield health, regeneration, armor deflection, and several weapon characteristics.
Alpha 4.10 corrected the handling of destroyed armor and rebalanced important weapon families, including Size 4 ballistic gatlings.
Alpha 4.10.2 fixed a separate issue where shields configured with a single flat resistance value could fail to apply that resistance.
The practical conclusion is that damage type, weapon size, and the target's current defensive condition all matter.
Match Projectile Velocities
Different projectile velocities create different travel times and can complicate the HUD's aiming solution.
For a pilot learning fixed weapons, guns with similar projectile behavior are generally easier to use together.
Mixed weapon configurations can still be effective when their intended targets, firing groups, and timing differences are understood.
However, combining several weapons solely to maximize theoretical DPS may produce worse results when shots arrive at different times or require different aiming corrections.
Fixed Weapons and Gimbals
Fixed mounts reward precise positioning and ship movement. Gimbaled configurations can provide additional aiming flexibility within the restrictions of the supported mount and operator mode.
The correct choice depends on hardpoint compatibility, the gun's performance, the target's movement, and the pilot's ability to maintain alignment.
Not every weapon mount can be replaced freely. Some ships use bespoke weapons, integrated turrets, or restricted components.
Use the current Vehicle Manager and weapon statistics rather than assuming every ship supports the same fixed or gimbaled configuration.
Read the Hit Markers
The combat hit-marker system introduced in Alpha 4.9 provides useful feedback about the effect of a shot.
It can distinguish results such as:
- an impact that deals no damage or is deflected;
- a shield hit;
- an armor hit;
- a hull hit;
- a component hit;
- a destroyed component.
These markers make it easier to diagnose a bad weapon matchup.
If repeated impacts are being deflected, maintaining the same attack may be less useful than selecting another weapon, changing the target area, or engaging a different ship.
Alpha 4.10 included several fixes for misleading visual feedback involving shields and targeted components. Treat the indicators as important information while remaining aware that occasional display and damage-resolution bugs may still occur.
Power Management in Current LIVE
The current engineering and power-allocation systems make resource management an important part of ship combat. Weapons, shields, thrusters, and other onboard equipment depend on available power and their current operating condition.
Power distribution is not simply a permanent preset that remains optimal throughout every fight.
Actual controls and available allocations vary by ship and component configuration.
| Combat situation | Suggested priority | Purpose |
|---|---|---|
| Before contact | Shields or balanced | Enter the fight with suitable defensive readiness |
| Stable attack window | Weapons | Support available weapon operation and recovery |
| Maneuvering or separation | Thrusters | Support movement and escape capability where allocation affects performance |
| Taking heavy damage | Shields | Prioritize the relevant defensive systems |
| After disengaging | Balanced and system recovery | Restore readiness for another engagement |
The exact effect of reallocating power depends on the current equipment, component behavior, and available power controls.
Engineering systems may also require sufficient power for other functions, including radar, cooling, and life support. Do not disable essential equipment merely to imitate a simplified power preset.
Weapon Capacitor Management
Energy weapons rely on available capacitor capacity and replenishment.
Firing continuously when the target is unlikely to be hit can exhaust the weapon's usable energy before a favorable attack opportunity arrives.
A more effective sequence is to fire during useful tracking windows, pause when the aiming solution breaks, and use repositioning time to recover.
Ballistic weapons have different ammunition constraints. Their finite ammunition and cost make deliberate shot selection important even when capacitor management is not the primary limitation.
Shield Management
Shields are the first major defensive layer against many incoming attacks, but their behavior depends on the installed generators, current resistance, power allocation, and the direction or distribution of incoming damage.
Shield capacity and regeneration are not interchangeable statistics. A shield with a large pool may recover differently from one optimized around faster regeneration.
When the current ship and interface support directional shield management, monitor which face or protected area is losing strength.
Rotating the ship or temporarily breaking line of fire can help preserve a stronger defensive area while damaged protection recovers.
However, never rely on a shield face or regeneration timing from an old build without confirming how the current component behaves.
Vehicle Armor and Damage Thresholds
Armor is now a significant limitation on whether a particular projectile can inflict useful damage.
The Alpha 4.7 damage-threshold system allows intact armor to prevent certain lower-damage impacts from reaching the armor, hull, or internal components.
As the armor's health falls, that protection changes, allowing some previously ineffective weapons to become more useful.
Alpha 4.10 corrected an issue where destroyed armor continued reducing incoming damage. Under the corrected system, armor that has reached zero health should no longer continue applying the same mitigation.
Different hulls have different armor characteristics. Light, medium, and heavy protection are convenient descriptions, but they should not be treated as a universal official set of armor classes with one fixed threshold per category.
The Star Citizen Ship Weapons and Armor Guide covers shield interaction, armor thresholds, and weapon effectiveness in more detail.
Targetable Ship Components
Ships contain several important systems that can be affected when incoming damage reaches them.
Depending on the vessel and implemented engineering functionality, relevant components include:
- power plants;
- shield generators;
- coolers;
- radars;
- quantum drives;
- weapons and turrets;
- thrusters and other vulnerable subparts.
The effect of damaging an individual component depends on the actual ship systems and damage state. A compromised power plant or cooler can affect continued operation differently from a damaged weapon or thruster.
Turrets, thrusters, and certain other subparts can also have different deflection characteristics from the main armor layer, creating meaningful weak points.
Not every component is equally accessible on every ship. Internal geometry, shielding, armor condition, and available subtargeting information affect practical component attacks.
How to Target Components
Component targeting is especially useful against ships that cannot be efficiently destroyed through general hull damage.
- Identify and lock the intended ship.
- Use the available targeting interface to inspect supported subtargets.
- Look for an exposed or tactically significant component.
- Check whether the selected weapons can damage that component through the surrounding defenses.
- Maintain a firing angle that keeps the selected area exposed.
- Use hit markers and target-status feedback to evaluate the result.
- Change target area when impacts are being deflected or the selected system is already disabled.
The correct target is the system whose damage produces the greatest useful effect during the encounter.
For example, a group may prioritize an enemy's propulsion or defensive capability to prevent escape or reduce incoming fire, while a solo pilot may simply seek a quick kill on a lightly armored fighter.
Do not assume that destroying one specific component will always cause the same outcome on every hull.
Engineering, Cooling, Radar, and Power Plants
Power plants provide electrical capacity, coolers help manage heat, and radar supports detection and aiming functionality.
The complete ship configuration determines whether these systems can operate together effectively.
A large weapon upgrade can create additional power or thermal demands. A different shield generator can change protection and the amount of power needed to sustain it.
Since Alpha 4.7, installed radar and its power allocation affect supported aim-assist behavior. Radar selection is therefore relevant to some combat setups beyond ordinary target detection.
Higher equipment grades are not universally optimal. Compare capacity, performance, size, signature, power requirements, cooling, and practical availability before buying components.
Current engineering damage can also create ship-specific hazards, including fire-related problems. Alpha 4.10.2 still lists unexpected component fires among known issues, so not every observed failure should be assumed to represent intentional component balance.
Thruster and Boost Management
Boost supports acceleration, braking, and directional changes. It is not simply a tool for chasing an escaping target.
Use controlled bursts to adjust position and retain enough capacity for an emergency maneuver.
Holding boost continuously can leave the pilot unable to respond effectively when the enemy suddenly reverses, turns, or creates a dangerous firing opportunity.
During coordinated combat, preserving boost may also be necessary to remain within supporting distance of teammates.
G-Force, Blackout and Redout Control
High-G maneuvering can impair a pilot's vision and consciousness. The current flight model evaluates directional G-forces, while equipment can affect the character's tolerance.
Alpha 4.8 expanded the influence of pilot gear on G-force exposure.
Dedicated racing and combat flight suits provide improved tolerance, while ordinary combat armor can reduce the ability to sustain aggressive maneuvers. Full heavy FPS armor carries a particularly significant penalty.
To reduce blackout and redout risk:
- reduce speed before a sustained high-G maneuver;
- avoid holding maximum directional input continuously;
- change maneuver planes rather than repeating the same turn;
- use G-Safe when appropriate;
- release input when vision begins to close;
- avoid combining unnecessary boost with prolonged maximum turns;
- choose pilot equipment suited to flight rather than assuming heavier FPS armor is always better.
Better G-force tolerance does not make a ship more maneuverable by itself. It allows the pilot to remain effective during maneuvers that might otherwise impair visibility or consciousness.
If the opponent repeatedly forces a pilot into blackout-inducing turns, disengagement and repositioning are preferable to maintaining the same maneuver.
Missile Offense and Defense
Missiles provide guided attack capability and can force an enemy to move, expend countermeasures, or interrupt an otherwise favorable gun engagement.
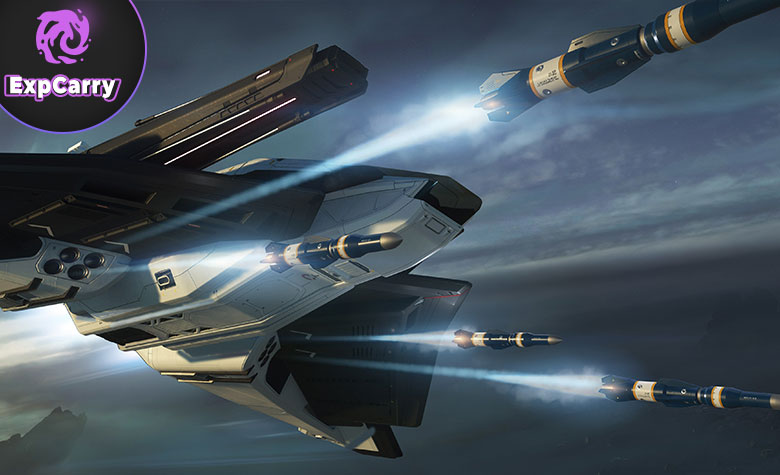
Missiles are most useful when fired at appropriate targets under favorable launch conditions. A successful lock does not guarantee a successful hit.
How to Use Missiles Effectively
- Launch against targets with limited cover or predictable movement.
- Use missile pressure to disrupt a fighter's maneuvering plan.
- Observe the opponent's countermeasure response before committing additional ordnance.
- Avoid wasting multiple missiles on a low-quality attack opportunity.
- Coordinate missile launches with teammates when possible.
- Consider missile size and the target's defenses before engaging heavy ships.
The Sabre Firebird is an example of a specialized missile-pressure fighter, while ships such as the Eclipse and Retaliator are designed around ordnance suited to substantially larger targets.
Missile effectiveness also depends on seeker behavior, lock conditions, available countermeasures, and the ship's intended role.
How to Defend Against Missiles
- Identify the incoming threat and available warning information.
- Deploy the appropriate countermeasure at a useful point in the approach.
- Change movement vector rather than continuing in a straight line.
- Use terrain, asteroids, structures, or wrecks where suitable.
- Avoid remaining in predictable flight after the initial defense.
- Reestablish situational awareness before returning to the attack.
Decoy and Noise countermeasures serve different defensive purposes. Their effectiveness depends on the missile and current implementation.
Repeatedly deploying every countermeasure without regard to threat timing can waste the defensive supply while leaving the ship exposed to a later launch.
Missiles vs. Guns
Missiles are valuable for guided pressure, opening attacks, and specialist damage delivery. Guns provide more direct control over the timing and location of repeated impacts.
Against agile fighters, gun damage can be more consistent when the pilot is able to maintain aim.
Against heavily defended or large targets, specialist ordnance may provide the necessary offensive effect, particularly when combined with escort support or a coordinated attack.
Neither weapon system replaces the need to select targets appropriate to the ship and mission.
Target Selection in Group PvP
Group combat rewards coordinated target selection. Attacking the nearest enemy is not always the best decision, and dividing damage among several ships can allow each opponent to recover without losing its critical systems.
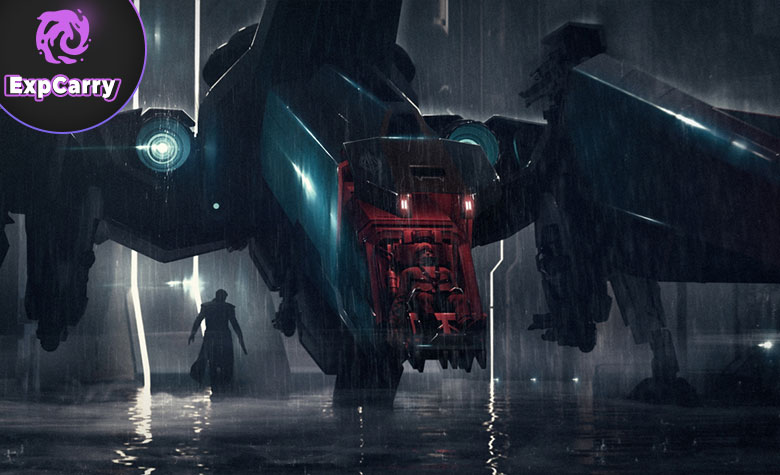
The ideal priority depends on which enemy is currently controlling the fight, threatening the objective, or preventing friendly ships from escaping.
Group Target Priority
A practical starting priority is:
- Quantum interdiction and control ships: where operational, these prevent friendly withdrawal or hold a target in the engagement.
- Electronic-warfare platforms: EMP and distortion-capable ships can interfere with important systems.
- Exposed missile or torpedo platforms: these can threaten valuable ships from favorable firing positions.
- Isolated or damaged fighters: quickly removing one attacker reduces total enemy pressure.
- Heavy fighters and gunships: engage once dangerous supporting ships have been controlled.
- Capital ships: concentrate suitable weapons and specialists on relevant defensive or internal systems.
This is a tactical framework, not a universal rule that control ships must always be attacked first.
If a hostile bomber is about to release a dangerous torpedo at a critical objective, stopping that threat may matter more than pursuing a distant interdiction vessel.
Quantum Interdiction and Dampening
Quantum snares and dampeners have distinct roles.
A quantum snare can pull eligible ships out of quantum travel. A dampener prevents nearby eligible ships from entering quantum travel while it is active.
Relevant ships include the Mantis, Cutlass Blue, Scorpius Antares, Guardian QI, and Sabre Raven EX, although their exact capabilities and crew requirements differ.
For example, the Guardian QI can provide solo-operated dampening, while some other platforms involve additional crew responsibilities.
There is an important Alpha 4.10.2 limitation: RSI currently lists problems involving missing quantum interdiction controls and ships being unable to activate their interdiction equipment.
Do not build an entire combat plan around guaranteed snare or dampener operation without confirming that the relevant ship's system works in the current LIVE session.
Coordinated Target Calls
One player should normally be responsible for deciding which enemy receives focused fire.
Useful information in a target call includes:
- target ship and identifying marker;
- relative bearing or position;
- current distance;
- target's defensive condition;
- observed damaged components;
- whether the target is trying to escape;
- the next attack or disengagement instruction.
Short, consistent communication is more effective than several players describing different enemies simultaneously.
When the selected target becomes ineffective or moves beyond the group's engagement range, the caller should communicate the next objective promptly.
Component Targeting in Group Combat
Against a large ship, coordinated component attacks can be more useful than distributing fire across unrelated hull surfaces.
A group may assign heavy weapons to armor penetration, precision weapons to exposed subsystems, and defensive ships to keep hostile fighters away from the attacking force.
However, the available damage model is ship-specific. Players should use current hit markers, subtargeting information, and observed damage rather than assuming that every capital ship has identical weak points.
The official Alpha 4.10.2 Known Issues also documents a case where Idris-P shields fail to stop most laser weapons. That behavior is a known defect, not the intended vulnerability of every capital ship.
Choosing a PvP Ship
Choosing a combat ship begins with identifying the intended role, crew size, and opponent class.
A light fighter provides agility and a smaller target profile, but may struggle against armored ships. A heavy fighter provides greater weapon power and protection, but is more vulnerable to unfavorable positioning against agile opponents.
A turret-dependent ship is most effective when it has the intended crew. A solo pilot cannot automatically use all of a multicrew fighter's theoretical combined firepower.
| Combat role | Example ships | Important consideration |
|---|---|---|
| Light dogfighter | Gladius, Arrow, L-21 Wolf | Mobility, positioning, and sufficient weapons for the target |
| Medium fighter | F7C Hornet Mk II, F7A Hornet Mk II, Meteor, S-65 Stingray | Balance between mobility, firepower, and survivability |
| Solo heavy fighter | F8C Lightning, M80, Mirai Guardian | Pilot-controlled weapons and heavier-target damage |
| Two-player heavy fighter | Hurricane, Scorpius | Effective turret operation and coordination |
| Long-range heavy fighter | Vanguard Warden, Sentinel, Harbinger | Endurance, primary weapons, and specialist equipment |
| Interdiction and control | Mantis, Guardian QI, Scorpius Antares, Sabre Raven EX | System availability, distance management, and survival |
| Missile pressure | Sabre Firebird | Target choice, lock timing, and countermeasure pressure |
| Heavy target attack | Ares Ion, Ares Inferno, Eclipse | Appropriate armor penetration or specialist ordnance |
| Multicrew gunship | Hammerhead, Redeemer, Tiburon | Turret coverage, crew coordination, and escorts |
| Fleet capital combat | Polaris | Specialist crew assignments and supporting ships |
These examples are role recommendations, not a universal ranking of current win rates.
For broader ship comparisons and current acquisition considerations, see the Star Citizen Ship Tier List.
Best Solo PvP Roles
A solo player benefits from a ship that can complete the relevant offensive and defensive tasks without leaving the pilot seat.
The Gladius and Arrow are useful platforms for learning range control and maneuvering. The L-21 Wolf rewards more aggressive ballistic weapon use, while medium fighters such as the Meteor and Hornet Mk II provide other balances of firepower and agility.
Heavy fighters such as the Guardian, M80, and F8C provide greater firepower for players who accept the maneuvering limitations of larger combat platforms.
Solo pilots should avoid building their entire strategy around turrets that require another player to operate.
Best Two-Player Combat Roles
Two-player combat works best when the second player provides continuous tactical value rather than occupying an unused seat.
The Hurricane and Scorpius are strong examples because their offensive capability depends substantially on their turret operator.
The pilot should position the ship so the gunner has a useful firing arc while avoiding unnecessary exposure to concentrated return fire.
For electronic warfare, ships such as the Scorpius Antares use a different division of responsibilities and should not be compared directly with a conventional gun-turret configuration.
Group Combat Roles
A coordinated combat group can distribute responsibilities across several ships or stations.
| Role | Primary responsibility | Typical platform |
|---|---|---|
| Target caller | Select targets and coordinate engagement priorities | Lead fighter or command ship |
| Interceptor | Pressure or isolate agile enemies | Light or medium fighter |
| Damage dealer | Apply sustained fire against assigned targets | Medium or heavy fighter |
| Control specialist | Prevent escape or disrupt systems where equipment is functioning | Interdiction or electronic-warfare ship |
| Heavy-target specialist | Attack armor, exposed components, and larger hulls | Heavy weapons platform or bomber |
| Turret operator | Cover assigned arcs and protect the parent ship | Multicrew fighter or gunship |
| Engineer | Monitor power, component condition, and supported system recovery | Large multicrew ship |
| Escort | Prevent hostile fighters or missiles from disrupting a critical ship | Fighter or defensive gunship |
Not every group requires a ship for each role. Two or three players can still benefit from target calling, focused fire, and deliberately assigned responsibilities.
The main difference between solo and group combat is the ability to solve several problems simultaneously. A solo pilot must balance movement, offense, and defense personally. A crew can distribute those tasks, but only when communication and the ship's actual systems support it.
PvE vs. PvP Ship Selection
PvE opponents and human players do not always create the same tactical conditions.
Regular PvE combat generally rewards consistent damage application, sufficient ammunition or capacitor endurance, and the ability to complete multiple engagements without excessive resupply.
PvP places greater emphasis on unpredictable movement, range control, countermeasures, rapid decisions, and opponent-specific weapon selection.
A ship that performs well against large AI targets can struggle against a skilled light fighter. A nimble PvP fighter may be inefficient against a heavily armored PvE opponent when its weapons cannot overcome the relevant damage threshold.
Choose the ship and loadout for the expected targets rather than copying one configuration across every combat activity.
How to Disengage Without Dying
Disengagement is an essential combat decision. It should begin before shields, weapons, maneuvering capacity, or critical components are completely exhausted.
A good disengagement aims to reduce incoming fire, establish separation, and regain the option to re-enter combat or depart entirely.
- Identify an unobstructed escape vector.
- Stop making unnecessary head-on exchanges.
- Prioritize useful movement and defensive resources.
- Use boost to create separation or change trajectory.
- Travel along an offset line rather than a predictable straight escape path.
- Use nearby terrain or structures when appropriate.
- Deploy countermeasures if missiles are incoming.
- Check whether hostile interdiction is active.
- Switch toward NAV only when the situation provides enough separation and the ship can complete the transition.
Changing flight mode while stationary or still directly exposed to the enemy's guns can make the ship extremely vulnerable.
If quantum dampening is operating nearby, running away at maximum conventional speed may be only the first stage of escape. The pilot must also leave the relevant control area or otherwise overcome the threat.
When the enemy is too heavily armored for the available weapons, disengagement can be the correct outcome rather than a failed attempt at dealing damage.
Best PvP Practice Routine
Arena Commander remains a useful environment for practicing flight, targeting, and engagement fundamentals because repeated attempts do not require the same travel and recovery overhead as Persistent Universe combat.
However, its environment can have separate technical issues. RSI's Alpha 4.10.2 Known Issues list includes certain ships being unable to allocate power to thrusters in Arena Commander and some missing loadout options.
20-Minute Training Block
- Five minutes: follow a moving target while controlling range, without firing.
- Five minutes: practice controlled merges, limiter adjustments, and lateral displacement.
- Five minutes: fire only during useful aiming windows and observe the resulting hit markers.
- Five minutes: practice shielding, power changes, disengagement, and re-entry.
For additional practice, use a heavily armored target to observe how different weapons interact with armor and components.
Compare the difference between shots that hit shields, damage armor, strike the hull, and reach internal systems.
Change one variable at a time. Replacing the ship, weapon set, controls, and strategy simultaneously makes it difficult to understand why performance improved or declined.
Common Star Citizen PvP Mistakes
Many avoidable defeats come from tactical decisions made before the actual damage exchange.
Entering Every Merge at Maximum Speed
This creates overshoots, short firing windows, and unnecessary recovery turns. Control closure speed before committing.
Holding the Trigger Outside Effective Range
Firing too early can consume capacitor energy or ammunition before the target becomes vulnerable.
Using Only Pitch
Combine roll, yaw, and strafe to create better engagement angles rather than repeating predictable turns.
Keeping One Power Setting for the Entire Fight
Combat requirements change. Power allocation should support the ship's current offensive, defensive, or maneuvering objective.
Using Decoupled Without Velocity Awareness
Momentum is useful only when it is deliberately managed. Uncontrolled movement can expose the ship or cause collisions.
Boosting Until the Reserve Is Empty
Preserve enough boost for braking, direction changes, and emergency separation.
Chasing the Target Instead of Controlling Distance
A predictable pursuit often allows the opponent to establish a better turn or disengagement.
Copying a Meta Loadout Without Understanding Projectile Speed
Matched weapon behavior and consistent hits are generally more useful than a theoretical advantage the pilot cannot apply.
Using Small Weapons Against Armor They Cannot Penetrate
High sustained DPS does not guarantee useful damage against an armored hull. Check impact feedback and select weapons appropriate to the target.
Ignoring Shield and Component Damage
Continuing a losing exchange while defensive systems or critical components deteriorate can turn a recoverable position into a ship loss.
Focusing Only on Hull Destruction
Some engagements can be influenced by disabling important equipment or attacking exposed subcomponents instead of trying to destroy the entire hull as quickly as possible.
Choosing a Multicrew Ship Without Its Intended Crew
A fighter with a powerful gunner-operated turret is not automatically an excellent solo choice when that turret remains unused.
Splitting Fire Across Several Targets
Uncoordinated attacks allow enemy ships to remain operational and recover while the group fails to remove an immediate threat.
Assuming PTU Test Balance Is LIVE Balance
The experimental ship TTK/TTD changes seen during the 4.10.2 testing cycle were not intended to ship with Alpha 4.10.2 LIVE. Do not use those temporary damage or shield values to assess current matchups.
Star Citizen PvP FAQ
These answers summarize the main weapon, defense, targeting, and ship-selection questions.
What Is the Best Beginner PvP Ship?
The Gladius remains a practical training choice because it offers a balanced light-fighter platform. The Arrow and L-21 Wolf provide different agility and weapon trade-offs.
Should Beginners Use Coupled or Decoupled?
Begin with Coupled for range control and predictable movement. Add Decoupled after learning to manage momentum and counter-thrust.
What Is the Best Weapon Range?
The best range is where the target can be hit consistently and the weapon can produce useful damage. Maximum HUD range is not automatically the most effective distance.
Are Repeaters or Cannons Better for PvP?
Repeaters generally provide more opportunities to track agile targets. Cannons can be more suitable for deliberate attacks and certain armored opponents. Choose according to target, projectile behavior, and weapon size.
How Does Ship Armor Work?
Armor has hull-specific protection and projectile damage thresholds. Certain low-damage impacts can be ineffective against intact armor, while deteriorating armor changes what can penetrate or damage the hull and components.
Can Ballistic Weapons Bypass Shields?
Ballistic interaction with shields depends on the weapon and current absorption and resistance mechanics. Do not assume every ballistic projectile completely bypasses shields.
How Do I Target Ship Components?
Use the available ship targeting and subtargeting controls, identify a useful component, and attack from an angle where the selected weapon can damage it. Use hit markers and component feedback to evaluate results.
Where Should Power Go During Combat?
Use the available weapon, shield, and thruster allocations according to the immediate task while keeping essential systems operational. There is no universal distribution that is optimal for every ship.
Does Radar Affect Combat?
Yes. Installed radar and assigned power affect supported target and aim-assist behavior. The exact benefit depends on the radar and current ship configuration.
How Do I Stop Blacking Out?
Reduce entry speed, shorten sustained high-G turns, use suitable pilot equipment, and avoid unnecessary maximum-boost maneuvering.
How Do I Evade Missiles?
Use suitable countermeasures, change the ship's trajectory, and exploit available cover or unfavorable missile approach angles.
What Is the Best Solo Heavy Fighter?
The M80, Guardian, and F8C are strong examples with different priorities. The correct option depends on intended targets, combat style, acquisition, and current balance.
What Is the Best Two-Player Combat Ship?
The Hurricane and Scorpius are strong dedicated two-player fighter choices because their turret firepower benefits substantially from a coordinated gunner.
Are the Alpha 4.10.2 PTU TTK Changes in LIVE?
No. The experimental TTK/TTD balance test was separate from the intended Alpha 4.10.2 LIVE feature set. The public build retains its normal combat balance with the separately documented LIVE fixes.
Final Recommendation
Build a simple matched weapon loadout, bind available power controls, countermeasures, Decoupled mode, and the speed limiter, then practice controlled merges rather than maximum-speed jousting. Fight inside an effective range, attack from an offset angle, allocate power according to the current task, and reset before shields or boost are completely exhausted.
The fastest improvement comes from mastering one fighter and one repeatable practice routine. Positioning and resource timing will produce more wins than changing to every new meta ship.