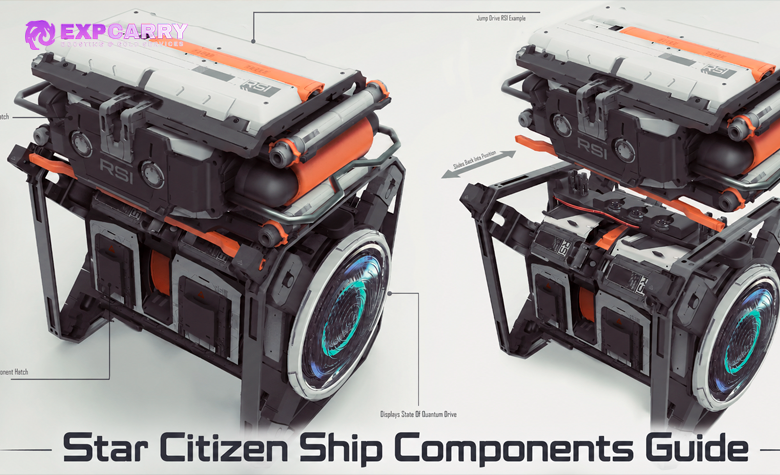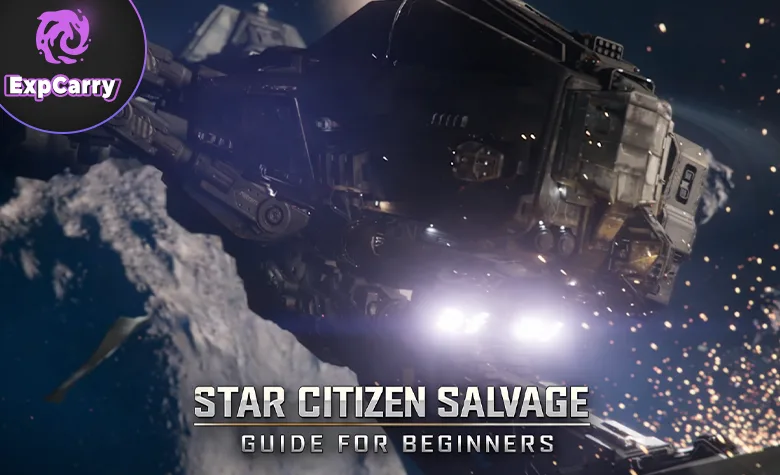
Star Citizen salvage is an industrial career focused on recovering cargo and components, scraping ship hulls for Recycled Material Composite (RMC), breaking wrecks into raw construction materials, refining those materials into Construction Materials (CMAT), and selling or delivering the recovered goods. In Alpha 4.10.2 LIVE, profitability depends on target selection, Adagio Holdings contracts, salvage rights, processing and refining costs, cargo handling, buyer demand, and travel risk.
Short answer: the Drake Vulture is a strong all-round solo salvage ship, while the RSI Salvation and MISC Fortune offer more automated cargo handling. The ARGO MOTH suits coordinated medium-scale salvage, and the Aegis Reclaimer handles the largest wrecks. Prioritize RMC, recover valuable cargo before destruction, and refine raw structural salvage before valuing it at CMAT market prices.
Star Citizen Alpha 4.10.2 reached LIVE on October 9, 2026, with Long Term Persistence preserved. RSI Discovery Month adds limited-time Adagio Holdings salvage assignments to the Collection career track. Outside the event, regular Adagio contracts, reputation progression, and scraper-module blueprints provide longer-term industrial goals.
Commodity prices are not fixed. Community trade reports synchronized on October 10 listed RMC offers up to approximately 8,900 aUEC per SCU and refined CMAT offers up to approximately 13,000 aUEC per SCU. These are reported prices, not guaranteed sales. CMAT prices apply to the finished commodity, not the raw material collected directly from a fractured wreck.
How Salvage Works in Star Citizen
A complete salvage operation involves locating an eligible target, inspecting its contents, recovering useful equipment, scraping the hull, processing the structure, handling any required refining, and delivering the resulting goods.
The main stages are:
- Find a target: scan for salvage panels, locate abandoned wrecks, or accept an appropriate contract.
- Check salvage rights: verify ownership, mission authorization, and local legal restrictions.
- Inspect cargo and components: identify valuable freight, weapons, and removable equipment.
- Scrape the hull: extract RMC using compatible salvage equipment.
- Fracture and disintegrate: break eligible structural sections into raw construction material.
- Package and secure: move generated containers into the ship's cargo storage.
- Refine when required: process raw Construction Rubble, Construction Pieces, or Construction Salvage into CMAT at a refinery.
- Sell or deliver: sell RMC and refined CMAT to compatible buyers, or deliver material required by a contract.
Hull scraping and structural salvage are different operations. Scraping produces RMC, while structural disintegration produces unrefined construction material. The latter must be distinguished from market-ready CMAT.
Scraping an intact ship requires its shields to be disabled. Structural fracturing of an intact vessel also requires its power to be shut off. Fracturing can destroy attached components and kill occupants, so recover valuables and check that the ship is empty before proceeding.
Alpha 4.8 improved long-range scanning for wreckage and salvage panels. During scraping, use the material information displayed by the interface to prioritize productive sections instead of spending excessive time on depleted surfaces.
Handheld equipment such as the Pyro RYT Multi-Tool with a Cambio-Lite SRT attachment or the dedicated Cambio SRT can collect small amounts of RMC for hull repairs. Selling filled handheld canisters is not a reliable commodity-production strategy; dedicated salvage ships are intended for profitable bulk recovery.
Panel Salvage: Reading Signatures Before You Fly
Free-floating salvage panels provide an alternative to paid salvage claims. They can be searched without purchasing access to a designated wreck, although finding useful clusters takes time.
Community scanning guides commonly use signatures around 2,000, 4,000, 6,000, and 8,000 as indicators of one, two, three, or four panels. These values are practical heuristics rather than guaranteed panel counts in every session or build.
For efficient panel hunting:
- Travel to a region where salvageable panels may spawn.
- Scan for appropriate signatures and narrow down promising contacts.
- Approach closely enough to confirm actual salvageable objects.
- Prioritize nearby clusters rather than distant isolated signatures.
- Inspect visible surfaces and begin with sections containing useful material.
- Move to another panel when the remaining yield no longer justifies the time.
Larger panels may justify more approach time because of their available scraping area, but size alone does not guarantee a fixed RMC yield. The best target is the one that provides useful material with minimal searching and repositioning.
Panel hunting removes claim fees but introduces uncertainty. Contract salvage offers clearer target access, while independent scanning may involve periods with no worthwhile discoveries.
Best Salvage Ships to Start With
The right salvage ship depends on crew size, target size, cargo capacity, processing equipment, and the amount of manual work required. A larger ship does not automatically earn more per player.
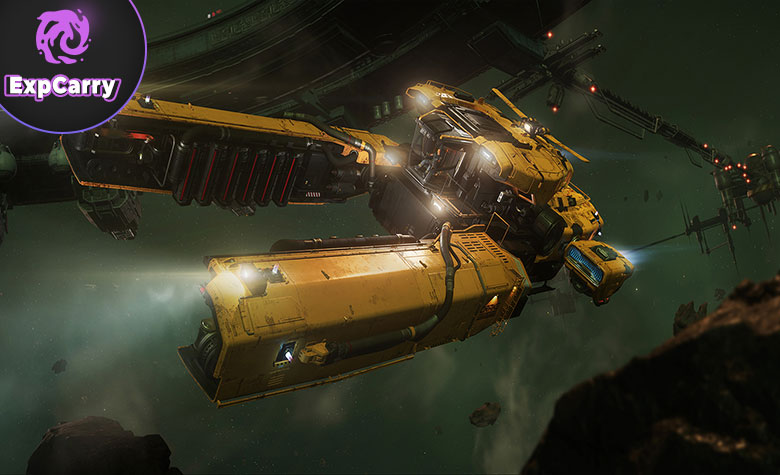
The current practical lineup includes the RSI Salvation, Drake Vulture, MISC Fortune, ARGO MOTH, and Aegis Reclaimer.
| Ship | Typical crew | Listed cargo capacity | Best role |
|---|---|---|---|
| RSI Salvation | 1 | 6 SCU | Compact entry-level salvage with automated loading |
| Drake Vulture | 1 | 12 SCU | Versatile independent salvage |
| MISC Fortune | 1 | 16 SCU | Solo salvage with automated external loading |
| ARGO MOTH | 2–4 | 224 SCU listed | Medium-scale salvage and coordinated crews |
| Aegis Reclaimer | 5–12 listed crew | 420 SCU | Heavy salvage and the largest wrecks |
The figures represent listed ship cargo capacity, not salvage yield from an individual target. The MOTH has multiple external storage grids and separate processing buffers; processing-buffer capacity must not be treated as an unlimited or automatically sellable cargo hold. Unsecured containers can also create transport and terminal-recognition problems.
Drake Vulture: Best Practical Solo Salvage Ship
The Drake Vulture is a balanced recommendation for players who want to complete the salvage loop independently. Flight and salvage controls are accessible from the pilot seat, while material packaging and cargo handling require additional attention.
Its 12-SCU secured cargo grid and internal material buffer support manageable sessions, but pilots must stop to create and move containers. The Vulture can scrape hulls and perform structural salvage on eligible smaller targets, including ships up to approximately the Mercury Star Runner class under the documented fracture restrictions.
The Vulture is useful for:
- learning hull scraping and structural processing;
- panel hunting and smaller authorized claims;
- short RMC-focused sessions;
- recovering suitable raw Construction Rubble;
- regular trips to buyers and refineries.
Its main advantage is flexibility without crew requirements. Its main weakness is downtime caused by manual packaging and cargo movement. Efficient Vulture runs generally prioritize valuable surfaces, manageable targets, and short unloading routes.
MISC Fortune and RSI Salvation
The MISC Fortune and RSI Salvation offer different solutions to the most inconvenient part of solo salvage: handling containers.
The Salvation has a 6-SCU cargo grid and automatically places generated 1-SCU containers onto its external storage. This lets the pilot remain seated during normal production until the limited storage fills. Its compact design is useful for smaller wrecks, but it has much less secured cargo capacity than the Vulture.
The Fortune provides 16 SCU of listed cargo capacity, including 12 SCU on automated external grids and another 4 SCU on its rear cargo lift. Its external filler system reduces manual loading during production. With one salvage head, it favors convenience over maximum scraping coverage compared with a suitably configured Vulture.
Both ships can perform structural salvage within their supported size limits. Their light-salvage processing produces raw Construction Rubble, which requires refining before it becomes finished CMAT.
Aegis Reclaimer: Heavy Salvage and Crew Operations
The Aegis Reclaimer is designed for substantial wrecks and coordinated industrial work. Its large hull, structural-salvage equipment, separate operating stations, and 420-SCU listed cargo capacity support long operations.
The Reclaimer can fracture ships beyond the size limits of lighter salvage vessels. It also has large scraper heads and processing stations capable of packaging material into larger containers.
Its standard equipment includes Trawler scraper modules with a wide working area but comparatively low extraction efficiency. That trade-off can be useful for covering large surfaces but should not be mistaken for the best return on every valuable hull.
Solo Reclaimer operation is possible, but moving between flight, scraping, structural processing, and cargo stations introduces downtime. Security is also more difficult without crew members operating defensive equipment.
High material throughput is not equivalent to high net income per player. Refining, transport, crew coordination, and sale completion determine the final economic result.
Best Solo Ship and Best Crew Ship
For versatile solo salvage, the Vulture is a strong default choice. Choose the Salvation for compact, lower-capacity operations with automatic loading, or the Fortune when its automated external cargo system better suits your workflow.
The ARGO MOTH fills the medium-crew role. It has pilot-controlled structural equipment, three manned salvage turrets, and substantial external cargo handling. The Reclaimer remains the heavy option for large wrecks and organized crews.
Size limitations matter: the Salvation supports relatively small ships up to the Freelancer class, the Vulture supports targets up to approximately the Mercury Star Runner, and the MOTH can handle larger targets such as the 600i or Starfarer. The Reclaimer offers the broadest structural-salvage capability.
The Star Citizen Ship Tier List provides a wider look at available vessels. For salvage, operational efficiency and crew size are more important than an overall ranking.
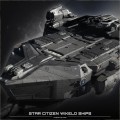
Explore services related to this guide, selected from our Star Citizen catalog.
View All Star Citizen Services

Salvage Contracts and Adagio Reputation
Adagio Holdings provides salvage contracts and reputation progression. Some assignments grant access to designated wrecks, while supply missions require specific recovered commodities or components to be delivered.
A paid salvage claim and a material-supply mission have different objectives. One provides access to a target for a fee; the other rewards successful delivery. Some claim missions also award Adagio reputation.
Check the Contract Manager for the applicable ship, material, location, time limit, fee, and reward before beginning work.
Paid Salvage Claims
Paid claims reduce the time spent searching for wrecks by providing a designated salvage opportunity. They do not guarantee that a particular target will produce enough material to repay the claim fee.
Evaluate each claim using:
- the access fee and any mission reward;
- target type, hull condition, and accessible scraping area;
- recoverable cargo and components;
- fracture compatibility with your ship;
- expected raw material and refining requirements;
- travel time, cargo handling, and buyer availability.
Large claims are most useful when your salvage ship and crew can process the target efficiently. Do not confuse an amount paid to accept a claim with the reward for delivering contract materials.
Adagio Reputation and Higher-Tier Contracts
The Adagio reputation ladder includes Junior Contractor, Contractor, Senior Contractor, Veteran Contractor, Head Contractor, and Elite Contractor.
Senior Contractor is an important progression milestone because higher-value salvage claims, including approximately 100,000-aUEC access-fee opportunities, have been associated with that level. Large-hull contract pools have included Hercules-series vessels and the 890 Jump, but target availability must be checked in the current game.
Grinding higher reputation requires repeated missions, fees, and time. The highest rank is not automatically the most profitable goal if its currently available assignments offer little additional value.
Paid claims can contribute reputation, but players interested in blueprints should not rely exclusively on that contract type.
Adagio Material Supply and Blueprint Contracts
Material-supply contracts can request RMC, raw construction materials, or designated components. Some allow alternative eligible materials, while others require an exact combination.
Mission data includes scraper-module blueprints such as Trawler, Abrade, Comer, Hart, and Cinch in reward pools for qualifying Adagio supply assignments. Rewards and eligible missions depend on the contract and progression stage.
Completing introductory and lower-rank supply missions is worthwhile when collecting blueprints, since the available contract pool can change as reputation increases.
Read whether a mission requests raw Construction Rubble, Construction Pieces, Construction Salvage, or finished CMAT. They are not interchangeable unless the mission explicitly accepts alternatives.
Material delivered for a contract cannot simultaneously be counted as cargo sold independently. Only leftover commodities remain available for a separate sale.
RSI Discovery Month Salvage Contracts in Alpha 4.10.2
RSI Discovery Month is a limited-time event introduced with Alpha 4.10.2. Its Collection career track includes recycling work from Adagio Holdings.
The official release notes mention recycling assignments involving Kruger Merlins, Archimedes, and Constellations. Completing eligible contracts contributes to the event's progression and associated rewards.
These event assignments are separate from the permanent Adagio reputation loop. Their availability, target types, and rewards should not be treated as permanent salvage features.
Follow the current mission's instructions and verify whether it requires destroying a particular ship, recovering material, or completing a specified delivery.
See the official Alpha 4.10.2 patch notes for the event's release details.
Legal Salvage vs. Risky Salvage
A stationary or apparently abandoned ship is not automatically legal to salvage. Ownership, mission authorization, monitored space, and local restrictions determine whether an operation creates criminal risk.
Authorized contracts are the most straightforward way to work on designated wrecks, but they do not permit stealing unrelated cargo or damaging unrelated player ships.
| Situation | Legal concern | Practical risk |
|---|---|---|
| Authorized salvage claim | Permission applies to the designated target | Fees, mission timers, or target bugs |
| Destroyed wreck or salvage panel | Verify current salvage eligibility | Visibility, competition, or limited yield |
| Intact ship marked Gamerules | Ownership information can indicate a previously claimed ship | Local restrictions, shields, and Armistice Zones |
| Active player-owned ship | Unauthorized damage may be criminal | CrimeStat and player confrontation |
| Recovered third-party cargo | Cargo rights can differ from hull rights | Restricted buyers or confiscation |
| Lawless salvage area | Security enforcement may differ | Hostile players and difficult extraction |
How to Keep a Salvage Run Lawful
Scan intact ships to identify ownership. The owner label Gamerules can indicate that the previous player has already claimed a replacement, but it does not override every location-specific restriction.
Avoid salvaging intact ships within Armistice Zones: the action can result in an Armistice Violation even when the vessel otherwise appears abandoned.
Turn off shields before scraping and power before fracturing an intact eligible vessel. Make sure no occupants remain inside before structural destruction.
Adagio's own contract descriptions warn that the contractor remains responsible for compliance with applicable UEE laws.
Risky and Unauthorized Salvage
Unauthorized work may lead to CrimeStat, fines, hostile encounters, or loss of recovered goods. The legal status of a hull also does not automatically establish ownership rights over its cargo.
Operating in less secure regions can expose a salvager to piracy, especially when using slow industrial ships carrying valuable material.
The extra potential value of an illegal target should be compared with the risk of losing the ship, cargo, mission progress, and time. For consistent income, clearly authorized wrecks and accessible salvage panels are usually more predictable.
Cargo and Component Recovery: Check Before You Scrape
Wrecks may contain freight, weapons, and functional components worth more than some of their hull material. Inspecting these items before structural destruction can improve the value of a salvage run.
However, recovered equipment is not equivalent to RMC. Its condition, ownership, compatibility, buyer availability, and transport requirements affect its actual resale value.
Recovering Cargo from a Wreck
Inspect accessible containers before fracturing or disintegrating the ship. Check the type and amount of cargo and whether a legitimate buyer will accept it.
Before keeping a container, consider:
- commodity type and quantity in SCU;
- cargo ownership and legal status;
- current buyer availability and quoted price;
- space in the salvage ship or support hauler;
- the time and risk involved in moving it.
A valuable container may justify interrupting material recovery. Ordinary low-value freight may not be worth the handling effort, especially in a Vulture with limited cargo space.
Removing Ship Components and Weapons
Suitable tractor equipment can recover detachable weapons, shields, power plants, coolers, quantum drives, and other supported components. Some items require ships with physicalized components and accessible, unlocked component ports.
Not every item is removable or marketable. Components may be damaged, restricted, nonfunctional, or incompatible with the available buyer.
Check resale potential before transporting a bulky component. A few minutes of additional hull scraping may be worth more than an item that is difficult to detach and sell.
Why Recovery Order Matters
For an eligible and accessible wreck, use this order:
- Confirm salvage authorization and target condition.
- Inspect cargo, weapons, and removable components.
- Recover worthwhile items before destruction.
- Scrape valuable hull sections into RMC.
- Shut down any intact target's systems before fracturing.
- Fracture and disintegrate supported structural sections.
- Secure the raw construction material and remaining cargo.
- Sell RMC, deliver mission goods, or take structural material to a refinery.
Not every ship deserves complete stripping. Stop when the expected additional return falls below the value of moving to another target.
Structural Salvage: RMC vs. Construction Materials
RMC and Construction Materials belong to different processing stages. RMC comes directly from hull scraping. Structural salvage produces raw material that must be refined into finished CMAT before a normal CMAT commodity sale.
The distinction matters because 1 SCU of unrefined structural material does not automatically become 1 SCU of saleable CMAT.
| Characteristic | RMC | Raw structural material | Refined CMAT |
|---|---|---|---|
| Source | Hull scraping | Fracture and disintegration | Refinery processing |
| Material types | Recycled Material Composite | Rubble, Pieces, or Salvage | Construction Materials |
| Additional refining | Not required for ordinary sale | Required for finished CMAT | Already processed |
| Main destination | Compatible commodity buyer | Refinery or applicable raw-material contract | Compatible commodity buyer |
| Reported October 10 price | Up to 8,900 aUEC/SCU | Not the finished CMAT price | Up to 13,000 aUEC/SCU |
Market reports are reference values, not guaranteed terminal quotes. Structural salvage calculations must also include refinery yield, processing fees, work-order time, and transportation of the refined output.
Recycled Material Composite (RMC)
RMC is obtained by scraping the outer surface of eligible ships and wreckage. Its yield depends on remaining hull material, scraping equipment, extraction efficiency, and how much of the target is accessible.
Ship-produced RMC can be packaged and sold directly through terminals that accept the commodity. It also has supported repair and industrial uses.
For solo operations, RMC offers a relatively direct route from salvage work to commodity sale because a separate refinery work order is not required.
Construction Materials (CMAT)
Structural salvage produces raw materials rather than immediately producing market-ready CMAT. The raw category depends on the salvage ship used:
- Construction Rubble: produced by light salvagers such as the Salvation, Vulture, and Fortune; relatively fast to refine but with a lower refined yield.
- Construction Pieces: produced by the medium ARGO MOTH; intermediate refining behavior.
- Construction Salvage: produced by the heavy Reclaimer; generally slower to refine but with a higher refined yield.
All three raw types can be processed into Construction Materials through supported refinery work orders. The resulting amount is determined by the raw material, refining method, and relevant processing conditions.
To obtain market-ready CMAT, transfer the raw material through the station's supported cargo and inventory systems, submit an appropriate refinery order, wait for completion, load the refined commodity onto a cargo ship, and sell it at a compatible terminal.
Some raw materials may also be relevant to direct material-delivery missions or supported raw-material sales. Follow the precise terminal or contract requirements, but never value the raw cargo using the refined CMAT price without accounting for conversion.
Which Material Should You Prioritize?
Choose RMC when hull surfaces are productive, the ship has efficient scraping equipment, and you want a simpler sale without a refinery stage.
Choose structural salvage when a target contains sufficient eligible mass, your ship can fracture it, and the expected refined CMAT value exceeds the additional refining and transport costs.
For mission deliveries, the requested material and reward may outweigh ordinary market considerations. A contract requiring unrefined construction material does not necessarily require you to refine it first.
Never compare a full hold of raw Construction Rubble directly with a full hold of finished CMAT at the same SCU volume.
Salvage Scraper Modules and Efficiency
Scraper modules determine extraction efficiency, relative processing speed, and coverage radius. Greater coverage can simplify work on large hulls but may reduce the percentage of material retained.
The following values come from available Alpha 4.10.1 game data. They are useful reference specifications for Alpha 4.10.2, but players should verify current equipment tooltips before upgrading.
| Module | Extraction efficiency | Relative speed | Relative radius |
|---|---|---|---|
| Hart | 100% | 0.8× | 1× |
| Cinch | 100% | 0.6× | 1.5× |
| Abrade | 90% | 0.15× | 3.5× |
| Comer | 80% | 0.7× | 1.5× |
| Trawler | 60% | 0.05× | 6× |
These are equipment modifiers, not guaranteed income rankings. A wide module may cover a large surface conveniently, while a more efficient module can preserve more valuable RMC.
Choose modules according to the target type and practical handling requirements. Refining yields from structural salvage are a separate mechanic and should not be confused with scraper extraction efficiency.
Best Salvage Locations in Star Citizen
Good salvage regions combine suitable wrecks, manageable distances, and access to buyers or refinery services. The highest displayed selling price is not always the most profitable destination.
Stanton, Pyro, and Nyx provide different industrial opportunities and levels of operational risk.
Stanton: Predictable Industrial Routes
Stanton is a convenient place to learn salvage because it has established stations, trading locations, and refinery infrastructure.
Lagrange-point regions and suitable asteroid areas can be used to search for panels or wrecks. Authorized contracts offer another way to locate salvage targets.
For RMC, compare suitable commodity buyers. For structural material, plan a refinery stop before transporting finished CMAT to its buyer. Select routes that minimize avoidable travel and cargo handling.
Pyro: Greater Risk and Alternative Buyers
Pyro offers salvage opportunities and additional market locations, but its less predictable security environment increases the danger of transporting valuable cargo.
Community data has reported RMC buyers at locations such as Patch City, Rustville, Fallow Field, and Seer's Canyon. Availability, demand, and prices should be checked before departure.
A distant buyer's apparent price premium may be less valuable than a safer sale in Stanton once travel and possible cargo losses are considered.
Nyx: Salvage and Frontier Logistics
Nyx offers salvage-related activity, including Adagio assignments connected to Levski and other available destinations.
Longer travel routes and frontier security conditions make logistics especially important. Check target locations, material requirements, delivery points, and refinery access before committing to large operations.
Where to Sell RMC and Construction Materials
RMC and finished CMAT can be sold only at terminals that buy the corresponding commodities. Unrefined construction material follows a different processing or delivery workflow and must not be confused with finished CMAT.
Trade sites may show both the price at which a terminal sells a commodity to players and the price it pays to buy that commodity. Salvagers need the latter.
The following reference figures are based on community reports synchronized on October 10, 2026, for the Alpha 4.10.2 period. They are not guaranteed live prices.
| Material | Reported buyer | System | Reported price |
|---|---|---|---|
| RMC | Terra Mills HydroFarm | Stanton | 8,900 aUEC/SCU |
| RMC | Seer's Canyon | Pyro | 8,500 aUEC/SCU |
| RMC | Rustville | Pyro | 7,700 aUEC/SCU |
| RMC | Patch City | Pyro | 7,700 aUEC/SCU |
| Refined CMAT | Everus Harbor Admin | Stanton | 13,000 aUEC/SCU |
| Refined CMAT | Port Tressler Admin | Stanton | 13,000 aUEC/SCU |
| Refined CMAT | ARC-L1 Admin | Stanton | 13,000 aUEC/SCU |
Actual sales depend on current prices, buying capacity, demand, and server conditions. Reports can be outdated even when their data source is regularly updated.
The VerseToolkit Salvage Calculator provides reported RMC and CMAT prices and a reference comparison of salvage ships and scraper equipment. It does not establish a guaranteed raw-to-refined conversion rate or profit per wreck.
Selling at TDD and Commodity Terminals
Trade and Development Division terminals and selected station admin offices buy certain salvage commodities. Always confirm the accepted material before transporting a full load.
- Find a buyer that accepts RMC or finished CMAT.
- Transport the material to the required location.
- Store or position the ship according to terminal requirements.
- Open the commodity trading interface.
- Select the correct ship and inventory.
- Verify the sellable quantity and current price.
- Complete the sale only when the displayed transaction is correct.
If cargo is missing from the terminal inventory, check how the containers are stored and whether the location recognizes the ship's cargo.
Scrapyards and Riskier Selling Locations
Scrapyards and remote outposts can buy selected commodities or recovered cargo, but they are not universal buyers for every form of salvage output.
Some offer useful alternatives when other terminals cannot accept a commodity. Others impose additional travel or security risks.
Evaluate the complete route rather than selecting a destination only because of a reported high price.
Contract Delivery vs. Commodity Sale
Adagio and RSI Discovery Month assignments may require delivery through a designated freight elevator or mission destination instead of an ordinary commodity terminal.
Mission materials must meet the stated type and quantity requirements. A raw structural material contract may be completed without refining if the assignment explicitly requests that raw material.
Do not count the same containers both as fulfilled mission cargo and as commodities sold on the market.
Star Citizen Salvage Profitability: Vulture vs. Reclaimer
Profitability should be calculated after the complete operation, including extraction, cargo handling, refining when applicable, transportation, and sale.
A practical formula is:
Net aUEC = RMC sales + refined CMAT sales + recovered cargo/component sales + contract rewards − claim fees − refinery fees − operating costs − losses.
For raw material that has not yet been refined or sold, do not include a theoretical finished-CMAT sale as realized income.
Net aUEC per hour = completed net income ÷ total operating hours.
Multicrew operations should also consider income per participating player.
How Much Can a Vulture Earn?
The Vulture has a 12-SCU secured cargo grid. A fully loaded RMC hold can be valued at the relevant buyer price without assuming a fixed material yield per wreck.
| RMC cargo | Selling price | Gross sale value |
|---|---|---|
| 6 SCU | 7,100 aUEC/SCU | 42,600 aUEC |
| 12 SCU | 7,100 aUEC/SCU | 85,200 aUEC |
| 12 SCU | 8,900 aUEC/SCU | 106,800 aUEC |
These amounts represent gross RMC sale values, not a guarantee of earnings per contract or hour. A claimed 200,000–250,000 aUEC return from one ordinary secured 12-SCU Vulture load is inconsistent with the listed RMC selling prices.
Additional trips, transfers, or a support hauler can increase total session revenue, but those are separate logistics arrangements. Raw Construction Rubble collected by a Vulture must be valued using its actual refining outcome, not the finished-CMAT price multiplied by its original raw volume.
How Much Can a Reclaimer Earn?
The Reclaimer's listed 420-SCU cargo capacity supports larger potential sales, but cargo capacity alone does not predict salvage yield or hourly income.
At 8,900 aUEC per SCU, a hypothetical full 420-SCU load of saleable RMC would have a gross value of 3,738,000 aUEC.
At 13,000 aUEC per SCU, a hypothetical full 420-SCU load of already refined CMAT would have a gross value of 5,460,000 aUEC.
The second example assumes that 420 SCU of finished CMAT have already been obtained and loaded. It does not mean that 420 SCU of raw Construction Salvage collected from wrecks will refine into 420 SCU of CMAT.
Actual returns depend on raw material volume, refinery yield, refining fees, time, transport, compatible buyers, and crew productivity. A large gross sale may become much smaller when costs and player profit splits are considered.
Contracts vs. Free Panel Salvage
Paid claims provide clearer target access but require an up-front expense. Free panel hunting avoids that fee but requires time to find worthwhile surfaces.
A claim is beneficial when the additional recoverable value and search time saved justify the fee, processing requirements, and travel.
For example, a 100,000-aUEC fee must be covered before the operation becomes profitable. The cost of refining structural material, if produced, must be deducted as well.
Solo players may prefer short panel routes, while organized Reclaimer crews can make better use of substantial authorized wrecks. Neither approach has a guaranteed income rate.
Profitability by Operation Type
Different salvage methods offer different cost, time, and risk profiles.
- Solo panel hunting: no claim fee, flexible sessions, uncertain target availability.
- Small authorized contract: defined target access or material-delivery objective.
- Large Adagio claim: potentially substantial hulls with higher fees and processing requirements.
- Multicrew MOTH or Reclaimer: greater industrial capacity but more coordination and logistics.
- Structural salvage and refining: additional potential revenue with conversion losses, fees, and processing time.
- Risky cargo recovery: possible extra value with additional legal and security exposure.
- RSI Discovery Month contracts: temporary event progression and applicable mission rewards.
The strongest operation is the one that consistently converts available targets into completed, profitable sales without excessive downtime.
The Best Beginner Salvage Loop From Start to Sale
New salvagers should learn a repeatable process rather than attempting to maximize the value of a single large wreck.
- Choose a suitable ship. Use the Vulture for versatile solo work or the Salvation or Fortune if their automated loading is preferable.
- Select a convenient region. Begin in Stanton near services, buyers, and refinery infrastructure.
- Find a legal target. Accept an affordable claim or scan for salvage panels.
- Inspect the wreck. Confirm ownership, shields, power, cargo, and removable components.
- Recover worthwhile items. Secure valuable freight or equipment before destruction.
- Scrape the hull. Prioritize productive surfaces and collect RMC.
- Perform structural salvage when worthwhile. Fracture and disintegrate a target within your ship's limits.
- Secure the cargo. Organize RMC and raw construction material separately where practical.
- Handle the materials correctly. Sell RMC directly, fulfill eligible raw-material contracts, or refine structural salvage into CMAT.
- Complete the final sale. Deliver finished CMAT to a compatible buyer after refining and loading it.
- Evaluate the run. Subtract fees and expenses, and compare earnings against the full session duration.
After mastering the basic loop, progress into Adagio reputation, blueprint missions, larger salvage claims, or crew operations.
For organized salvage, assign responsibilities for scanning, scraping, structural processing, cargo handling, transport, and security before starting.
Common Beginner Salvage Mistakes
Most avoidable mistakes result from using outdated prices, misunderstanding structural-material refining, or ignoring the time required to handle cargo.
Using Old RMC Prices
Do not rely on prices from earlier alpha builds. Check the intended buyer's current quote and demand.
Confusing a Buyer Price With a Selling Price
Confirm that a reported value represents what a terminal pays the player, not what it charges to sell the commodity.
Assuming Every Wreck Is Legal Salvage
Check authorization and ownership, including the restrictions that apply to intact ships in Armistice Zones.
Ignoring Cargo and Components
Examine valuable freight and removable equipment before destroying the wreck, but recover only what is worth transporting.
Scraping Depleted Surfaces
Stop working on exhausted areas when better surfaces or nearby targets are available.
Overpaying for Contracts
A large hull does not guarantee that recovered material will cover an expensive access fee.
Assuming the Largest Ship Has the Best Hourly Income
Large ships require additional stations, cargo handling, transportation, and sometimes several crew members.
Ignoring Cargo Grid Capacity
Plan around usable secured cargo space rather than treating processor buffers or unsecured containers as guaranteed sale capacity.
Trying to Sell Every Material at the Same Terminal
RMC, raw construction material, and refined CMAT have different processing and sale requirements.
Counting Contract Materials Twice
Do not include mission-delivered material in ordinary market revenue calculations.
Taking Unnecessary Selling Risks
A reported price premium may not justify carrying valuable cargo through dangerous territory.
Ignoring Time and Operating Costs
Include scanning, extraction, packaging, refining, fuel, transport, fees, unloading, and losses when comparing operations.
Valuing Unrefined Material as Finished CMAT
Raw Rubble, Pieces, and Salvage require conversion. Their original SCU quantity is not the amount of finished CMAT you can automatically sell.
Final Thoughts
Star Citizen salvage in Alpha 4.10.2 combines scanning, legal target selection, cargo recovery, RMC scraping, structural salvage, refining, and commodity sales. The most important economic distinction is between directly saleable RMC, raw construction material collected through disintegration, and finished CMAT produced through refinery processing. Treating all three as interchangeable leads to incorrect profit calculations.
The Vulture remains a versatile solo option, while the Salvation and Fortune provide convenient automated loading. The MOTH supports medium-scale team operations, and the Reclaimer handles the largest structural targets. Adagio Holdings provides a progression path through claims, supply missions, and blueprints, while RSI Discovery Month adds temporary assignments in Alpha 4.10.2. Choose a ship and target that match your available crew, cargo capacity, refining logistics, and selling route. Consistent profit comes from completing the entire process efficiently, not simply recovering the largest possible amount of material.