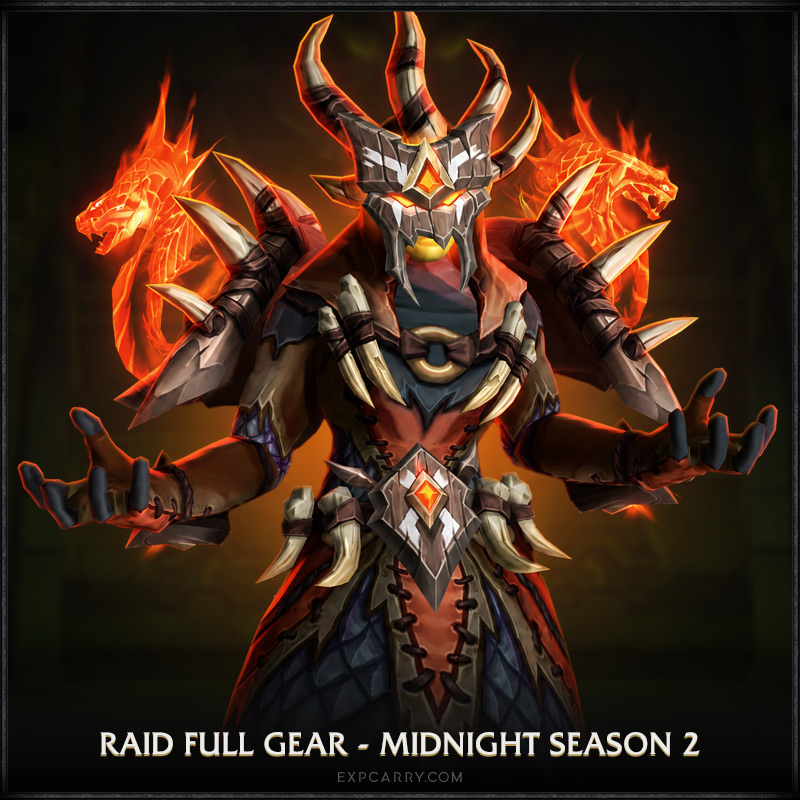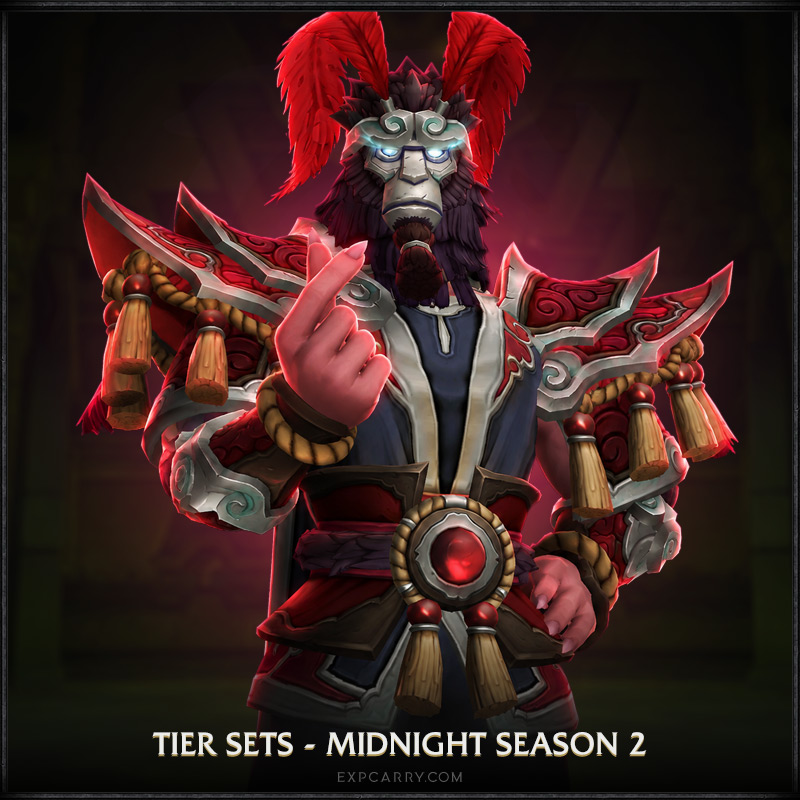
WoW Midnight Season 2 tier sets are the single biggest power gain you bank all season. Every specialization gets a five-piece class set, but only four pieces are needed for the complete bonus — which means one slot always stays free for a stronger off-set item.
The short version: head, shoulders, chest, hands and legs are the only slots that count. Two pieces give the 2-piece bonus, four give the 4-piece, and the fifth gives nothing extra. Get to 4-piece before you optimise anything else — the set bonus almost always beats a few item levels on one slot.
Three sets changed materially since launch: Retribution Paladin's 4-piece was corrected upward by a huge margin, Restoration Druid's 4-piece had its Genesis extension doubled, and Enhancement Shaman's 4-piece was bugged until September 4. If you benched any of those based on launch-week impressions, re-test them.
Best Season 2 Tier Sets
This ranks the set bonuses themselves, not the specs. A spec can have an excellent set and still underperform on baseline tuning, and the reverse happens just as often. Use this to decide how hard to chase 4-piece, not which spec to play.
| Rating | Sets | What they have in common |
|---|---|---|
| Top | Demonology Warlock, Retribution Paladin, Restoration Druid, Arcane Mage, Guardian Druid, Devastation Evoker, Brewmaster Monk, Windwalker Monk, Frost Death Knight, Beast Mastery Hunter | Large measurable throughput plus a rotational effect you actually notice. Several of these were buffed after launch, which is why they sit above their pre-season placement. |
| Strong | Devourer Demon Hunter, Vengeance Demon Hunter, Feral Druid, Preservation Evoker, Marksmanship Hunter, Survival Hunter, Frost Mage, Mistweaver Monk, Protection Paladin, Discipline Priest, Elemental Shaman, Restoration Shaman, Enhancement Shaman, Fury Warrior, Protection Warrior | Genuinely good, but more dependent on encounter type, proc consistency or a specific talent build. |
| Solid | Blood Death Knight, Unholy Death Knight, Balance Druid, Augmentation Evoker, Holy Paladin, Assassination Rogue, Outlaw Rogue, Shadow Priest, Affliction Warlock, Destruction Warlock | Reliable throughput with fewer interesting decisions. Still worth 4-piece; just not worth reshaping your build around. |
| Weak | Havoc Demon Hunter, Fire Mage, Holy Priest, Subtlety Rogue, Arms Warrior | Bonuses that lean on awkward talents or narrow windows. Get 4-piece anyway — a weak set bonus still beats no set bonus. |
Important context: even the weakest 4-piece in Season 2 is a meaningful gain. This ranking tells you whether to burn a Catalyst charge early or wait for a better-track piece — it never means "skip the set".
Biggest Winners Since Launch
Three tuning passes and one hotfix have landed since the raid opened. These are the sets whose real-world value changed, and the reason our pre-season assessment no longer holds for them.
Divine Arbiter's four-piece damage was raised by 150% on the main target and 75% on secondary targets. We had this set in the weakest group before launch. That is no longer defensible — it is now one of the strongest sets in the game.
The four-piece Genesis extension was doubled to 8 seconds, alongside buffs to Rejuvenation, Germination and Wild Growth. The set went from good to a genuine reason to play the spec.
Four-piece Cobra Shot scaling improved, then Beast Cleave went 55% → 70% and all pet damage rose 7% across the following passes. The set was already smooth; now it is also strong.
The two-piece Wild Imp and Implosion effect was improved as part of a roughly 12% AoE buff. Demonology now has both the best set and the best live performance in Mythic+.
Four-piece activation chance raised from 20% to 25%, plus 5% more healing. A small number that meaningfully improves how often the reset actually happens.
The Venomous Abyss four-piece was not working correctly on Crash Lightning until September 4. If you tested this set in the first three weeks and found it underwhelming, that was a bug — re-evaluate it now.
Sets that lost ground
Baseline damage rose but Reap, Cull, Eradicate and the four-piece package were all cut. We had this as the single most promising set pre-launch; it is still good, but no longer the standout.
Baseline went up 6% while four-piece scaling was reduced. The practical effect is that Fury is strong before the set and gains less from completing it than most specs.
Two-piece stack values were reduced while baseline damage climbed sharply across three passes. The spec is far stronger overall, but a larger share of that power now sits outside the set.
The pattern worth understanding: Blizzard has been moving power out of set bonuses and into baseline abilities for several specs. That makes the 4-piece slightly less decisive than at launch, and makes it more acceptable to wear a higher-track off-set piece while you wait for the right tier drop.
Weakest Tier Sets
These five sets ask the most from your build and give back the least. None of them is a reason to skip 4-piece, but all of them are a reason to spend your Catalyst charge somewhere more urgent first.
| Set | The problem | What to do about it |
|---|---|---|
| Havoc Demon Hunter | Tied tightly to Essence Break and Cycle of Hatred, which narrows talent flexibility rather than adding to it. | Take 4-piece from raid drops, but do not reshape your talents around it. |
| Fire Mage | Depends on Pyroclasm windows that movement and interruption routinely ruin. | Value it lower on high-movement fights; it is fine on patchwerk-style bosses. |
| Subtlety Rogue | Invests heavily in Backstab, Shuriken Storm and Lingering Shadow interactions that stay narrow. | Still worth completing; just do not expect it to change how the spec feels. |
| Arms Warrior | A stacking Slam bonus that competes with the priority buttons you already want to press. | Arms is elite on baseline tuning — the set is the least important part of its power. |
| Holy Priest | Renew-centric design that only pays off in a build many Holy Priests do not run. | Consider the Renew-heavy talent path if you intend to use the set seriously. |
Explore services related to this guide, selected from our Gear catalog.
View All Gear Services


Which Slot Should You Leave Off?
Since only four pieces count, one tier slot is always spare. The honest answer is that there is no universal fifth slot — the right one is wherever you own the strongest non-tier alternative. What follows is the framework that decides it.
Work through these in order:
- Drop the lowest upgrade track first. A Champion-track tier piece next to four Hero-track options is the obvious one to bench, whatever the slot.
- Then drop the smallest stat budget. Between two equal-track pieces, shoulders and hands lose the least when replaced. Chest and legs carry the most stats and should stay.
- Then check for a special effect. If a non-tier piece in one slot carries a cantrip or unique effect, that slot becomes your spare — this overrides the budget rule.
- Never break 4-piece for item level alone. A few item levels on one slot loses to the full set bonus in almost every case. Sim it if you think you have an exception.
Season 2 wrinkle: because catalyzed pieces now keep the original item's secondary stats, a Catalyst-made tier piece can carry better secondaries than a raid drop in the same slot. Check the stats, not just the source.
How Season 2 Tier Sets Work
| Pieces equipped | Effect | What to do |
|---|---|---|
| 1 | No set bonus | Wear it only if it is a direct item level or stat upgrade. |
| 2 | 2-piece active | Equip as soon as possible unless both pieces are large downgrades. |
| 4 | Full set active | The real gearing goal for every spec. |
| 5 | No additional bonus | Bench the weakest one and use an off-set item instead. |
Bracers, belts, boots and cloaks can be catalyzed for the matching appearance, but they do not count toward either bonus. Only head, shoulders, chest, hands and legs do.
Tier Tokens and Which Boss Drops What
The Venomous Abyss does not use one universal token. The prefix tells you the armor type and the suffix tells you the slot.
| Prefix | Armor | Classes |
|---|---|---|
| Venomwoven | Cloth | Mage, Priest, Warlock |
| Venomcured | Leather | Demon Hunter, Druid, Monk, Rogue |
| Venomcast | Evoker, Hunter, Shaman | |
| Venomforged | Plate | Death Knight, Paladin, Warrior |
Suffixes: Idol = hands, Effigy = head, Remnant = shoulders, Icon = chest, Relic = legs.
| Boss | Slot | Cloth | Leather | Plate | |
|---|---|---|---|---|---|
| Entombed Sentinels | Hands | Venomwoven Idol | Venomcured Idol | Venomcast Idol | Venomforged Idol |
| The Lost Explorers | Shoulders | Venomwoven Remnant | Venomcured Remnant | Venomcast Remnant | Venomforged Remnant |
| Vashnik the Malignant | Chest | Venomwoven Icon | Venomcured Icon | Venomcast Icon | Venomforged Icon |
| Sszorak | Legs | Venomwoven Relic | Venomcured Relic | Venomcast Relic | Venomforged Relic |
| The Twin Fangs | Head | Venomwoven Effigy | Venomcured Effigy | Venomcast Effigy | Venomforged Effigy |
| Ula'tek | Any slot | Slumbering Coil Curio — exchange for whichever class-set slot you are missing | |||
The Coiled Altar and the second Twin Fangs encounter do not drop tier tokens. The Curio inherits the raid difficulty it dropped from and still produces exactly one slot.
Catalyst Rules
- One conversion costs one Venomblight Manaflux charge. See our Catalyst and Manaflux guide for how to earn them.
- The source must be an eligible Season 2 armor piece in one of the five functional slots.
- The converted item keeps its item level, upgrade track and secondary stats, including tertiary stats and eligible cantrip effects.
- Great Vault and Nebulous Voidcore items are convertible — this was broken early in the season and fixed by the August 26 and September 2 hotfixes.
- Profession-crafted armor is not a valid conversion source.
- Eligible Season 2 PvP class-set pieces count toward the same 2-piece and 4-piece bonuses.
The only Catalyst rule that matters: spend a charge on the conversion that activates 2-piece or 4-piece this week. A charge spent on a fifth piece, or on a low-track filler you will replace, is the most common way players waste the currency.
All 40 Tier Set Bonuses
Every specialization in one table. The source, functional slots and Catalyst eligibility are identical for all 40 sets — five bosses, five slots, one Manaflux per conversion — so this table shows only what actually differs: the bonuses and how much the set is worth to that spec.
Death Knight Venomforged / Plate
| Spec | 2-Piece | 4-Piece | Set value |
|---|---|---|---|
| Blood | Death Strike grants Blood Debt, +0.5% Strength per stack up to 5%. At 10 stacks the next Marrowrend consumes it for 10% Strength over 10 seconds. | Consuming Blood Debt makes Marrowrend generate 3 extra Bone Shield charges and deal Shadow damage around the target. | Solid |
| Frost | Remorseless Winter builds Freezing Tempest, increasing attack speed and Icy Death Torrent damage. Stack values reduced Aug 18. | Remorseless Winter ticks more often and Freezing Tempest lasts longer. | Top |
| Unholy | Magus of the Dead and Lord of the Dead cast stronger Necrotic Bolt and Withering Grasp. | Both upgraded attacks deal substantially more damage below 35% health. | Solid |
Demon Hunter Venomcured / Leather
| Spec | 2-Piece | 4-Piece | Set value |
|---|---|---|---|
| Devourer | Reap consuming 4+ Soul Fragments can make the next Consume instant and trigger area-damage Soulburst. | Soulburst generates 8 Soul Fragments and Moment of Craving; Reap damage increased. Reduced Aug 18. | Strong |
| Havoc | Blade Dance, Chaos Strike and Essence Break deal increased damage. | Essence Break interacts with Cycle of Hatred, hits harder initially and lasts 2 seconds longer. | Weak |
| Vengeance | Sigil of Flame deals stronger periodic damage; Soul Cleave extends it on the primary target. | Immolation Aura and Sigil of Spite deal much more damage to targets affected by Sigil of Flame. | Strong |
Druid Venomcured / Leather
| Spec | 2-Piece | 4-Piece | Set value |
|---|---|---|---|
| Balance | Starsurge damage increased; Starfall adds an immediate Astral hit. | Damage increased 10% during Eclipse, waning to 2% at the midpoint and rising back to 10% at the end. | Solid |
| Feral | After Berserk or Incarnation ends, combo points spent during the cooldown create a temporary damage increase. | Berserk and Incarnation last 10 seconds longer. | Strong |
| Guardian | Thrash can empower the next Mangle to deal double damage. | Thrash summons damaging thorns and can extend Berserk by up to 5 seconds. | Top |
| Restoration | Rejuvenation can trigger Genesis, increasing healing from active heal-over-time effects. | Nature's Swiftness, Tranquility and Incarnation or Convoke reliably trigger Genesis. Extension doubled to 8s on Aug 25. | Top |
Evoker Venomcast / Mail
| Spec | 2-Piece | 4-Piece | Set value |
|---|---|---|---|
| Augmentation | Upheaval cooldown reduced by 10 seconds. | After Upheaval, Fate Mirror echoes a larger share of allied damage for 8 seconds. | Solid |
| Devastation | Shattering Star deals substantially more damage and always behaves as a maximum-empower cast. | Causality gives extra empower cooldown reduction; Eternity Surge damage increased. | Top |
| Preservation | Consuming Essence Burst launches an empowered Living Flame at the target or a nearby injured ally. | Green spells heal for more and Verdant Embrace always grants Essence Burst. | Strong |
Hunter Venomcast / Mail
| Spec | 2-Piece | 4-Piece | Set value |
|---|---|---|---|
| Beast Mastery | Barbed Shot makes pets perform an additional reduced-effect Stomp. | Stomp empowers the next Cobra Shot with either reduced Beast Cleave or increased primary damage, stacking to 4. Scaling improved Aug 18. | Top |
| Marksmanship | Explosive Shot lasts 1 second longer with a small damage increase. | Aimed Shot and Rapid Fire deal more damage; each Explosive Shot burst reduces both cooldowns. | Strong |
| Survival | Mongoose Fury increases Wildfire Bomb damage. | Each Boomstick blast extends Mongoose Fury and its effects become stronger. | Strong |
Mage Venomwoven / Cloth
| Spec | 2-Piece | 4-Piece | Set value |
|---|---|---|---|
| Arcane | Arcane Missiles fires an additional missile and deals increased damage. | Each Arcane Missiles wave increases the next Arcane Blast, Arcane Pulse or Prismatic Bolt, stacking to 40%. | Top |
| Fire | Pyroclasm makes affected Pyroblast and Flamestrike casts guaranteed critical strikes. | Pyroclasm shortens their cast time and increases its damage bonus. | Weak |
| Frost | Freezing Shattered stacks can generate Icicles; Glacial Spike damage increased. | Glacial Spike can generate 5 Icicles over 1 second; Shatter damage increased. | Strong |
Monk Venomcured / Leather
| Spec | 2-Piece | 4-Piece | Set value |
|---|---|---|---|
| Brewmaster | Breath of Fire ignites the next Keg Smash for extra primary and area damage. | Ignited Keg Smash leaves a burning area and makes affected enemies take more Physical damage from you. | Top |
| Mistweaver | Rising Sun Kick deals more damage; Rushing Wind Kick heals significantly more. | Both abilities can reset themselves, making the next cast ignore cooldown and mana cost. Proc chance 20% → 25% on Sept 1. | Strong |
| Windwalker | Fists of Fury performs an additional reduced-effect strike at the start of the channel. | Each Fists of Fury strike empowers the next Rising Sun Kick or Spinning Crane Kick, stacking to 6. | Top |
Paladin Venomforged / Plate
| Spec | 2-Piece | 4-Piece | Set value |
|---|---|---|---|
| Holy | Infusion of Light gives a much larger bonus to Flash of Light healing and Greater Judgment absorption. | Judgment and Holy Light gain chances to generate Infusion of Light. | Solid |
| Protection | Consecration becomes larger and enemies inside it are easier to critically strike. | Judgment and Crusader Strike add extra Holy damage, with more after critical strikes. | Strong |
| Retribution | Divine Purpose activates more often; consuming it grants a temporary Holy damage increase. | Consuming Divine Purpose activates Divine Arbiter, releasing area Holy damage. Main target +150%, secondary +75% on Aug 25. | Top |
Priest Venomwoven / Cloth
| Spec | 2-Piece | 4-Piece | Set value |
|---|---|---|---|
| Discipline | Penance deals more damage and healing and reduces Mind Blast's cooldown. | After Mind Blast, the next Power Word: Shield or Void Shield absorbs more. | Strong |
| Holy | Up to three active Renew effects increase Critical Strike chance. | Renew heals for more; Light's Resurgence makes Prayer of Mending apply Renew to its first target. | Weak |
| Shadow | Tentacle Slam has a shorter cooldown and deals substantially more damage. | Tentacle Slam grants a free Void Volley at increased effectiveness. | Solid |
Rogue Venomcured / Leather
| Spec | 2-Piece | 4-Piece | Set value |
|---|---|---|---|
| Assassination | Envenom deals more damage and temporarily increases all damage dealt. | Your active Lethal Poison changes the bonus: Deadly strengthens bleeds, Amplifying improves auto-attacks, Wound strikes twice. | Solid |
| Outlaw | Dispatch deals increased damage. | Sinister Strike and Ambush can make the next Dispatch free and treat it as a maximum-combo-point finisher. | Solid |
| Subtlety | Backstab and Shuriken Storm cost less Energy and deal significantly more damage. | Lingering Shadow also increases Eviscerate and Black Powder damage at full effectiveness. | Weak |
Shaman Venomcast / Mail
| Spec | 2-Piece | 4-Piece | Set value |
|---|---|---|---|
| Elemental | Earth Shock, Elemental Blast and Earthquake deal increased damage. | When Stormkeeper or Ascendance ends, the next two primary casts deal more damage and the next Maelstrom spender is free. | Strong |
| Enhancement | Voltaic Blaze causes repeated Fire Novas around the primary target, with extra damage to it. | Fire Nova reduces Crash Lightning's cooldown and stacks a damage bonus for the next cast. Bugged until the Sept 4 hotfix. | Strong |
| Restoration | Healing Wave and Chain Heal can create a Healing Rain at the target's position. | Allies standing in Healing Rain periodically receive an absorption shield. | Strong |
Warlock Venomwoven / Cloth
| Spec | 2-Piece | 4-Piece | Set value |
|---|---|---|---|
| Affliction | Agony and Corruption deal increased damage. | Each active Unstable Affliction increases all damage up to 3 stacks; Seed of Corruption applies a reduced Unstable Affliction. | Solid |
| Demonology | Wild Imps and Implosion deal increased damage. Improved Aug 25. | When a Wild Imp runs out of energy it can throw itself at the target and trigger a stronger Implosion. | Top |
| Destruction | Incinerate deals more damage and has a higher chance to trigger Echo of Sargeras. | Targets struck by Echo of Sargeras temporarily take increased damage from all your spells. | Solid |
Warrior Venomforged / Plate
| Spec | 2-Piece | 4-Piece | Set value |
|---|---|---|---|
| Arms | Mortal Strike and Execute deal more damage; Slam also damages nearby enemies. | Overpower deals more damage; Mortal Strike or Overpower stack additional damage for the next Slam. | Weak |
| Fury | Raging Blow deals more damage and can extend Recklessness by up to 6 seconds. | Bloodthirst deals more damage and raises Recklessness' Critical Strike bonus. Scaling reduced Aug 18. | Strong |
| Protection | Free Revenge casts deal more damage and empower the next Shield Slam. | Ravager and free Revenge casts apply a 12-second bleed; Ravager's cooldown reduced by 30 seconds. | Strong |
Fastest Route to 4-Piece
- Kill the five token bosses. Entombed Sentinels, The Lost Explorers, Vashnik, Sszorak and The Twin Fangs. Direct drops cost you nothing.
- Open all three Great Vault rows. More options means more chances at a tier slot you still need.
- Spend a Catalyst charge only on an immediate 2-piece or 4-piece. Never on a fifth piece, never on a low-track filler.
- Save the Slumbering Coil Curio for your last missing slot. It is the only deterministic fix in the system — do not spend it on a slot the raid is likely to give you.
- After 4-piece, upgrade tracks, not slots. Replace Champion-track tier with Hero or Myth-track versions of the same pieces.
For the Dungeon row, the current Mythic+ runs and services cover weekly completions, specific key levels, gear progression, and other dungeon goals.
Tier Set FAQ
Do I need all five tier pieces?
No. Four functional pieces activate the complete bonus. The fifth gives no additional combat effect, so that slot should hold your strongest off-set item instead.
Which slots count toward the set bonus?
Head, shoulders, chest, hands and legs. Bracers, belts, boots and cloaks can be catalyzed for the matching appearance but never count toward 2-piece or 4-piece.
What are Venom Idols?
The hand-slot token family from The Venomous Abyss. The same logic covers the other slots: Effigy for head, Remnant for shoulders, Icon for chest and Relic for legs. The prefix gives the armor type — Venomwoven cloth, Venomcured leather, Venomcast mail, Venomforged plate.
What is the Slumbering Coil Curio?
A flexible token from Ula'tek that you exchange for whichever class-set slot you are missing. It inherits the raid difficulty it dropped from and produces exactly one piece, so save it for your genuinely last slot.
Which tier set is the best in Season 2?
Demonology Warlock, Retribution Paladin, Restoration Druid and Arcane Mage currently have the strongest bonuses. Retribution and Restoration Druid both moved up after their four-piece effects were buffed on August 25.
Which tier set is the weakest?
Havoc Demon Hunter, Fire Mage, Subtlety Rogue, Arms Warrior and Holy Priest. All five are still worth completing — a weak 4-piece beats no 4-piece — but they should not be your first Catalyst priority.
Which slot should I leave off?
Whichever slot holds your lowest upgrade track first. If tracks are equal, drop shoulders or hands, since they carry the smallest stat budgets, and keep chest and legs. If a non-tier piece in one slot has a special effect, that slot becomes the spare instead.
Do catalyzed pieces keep their stats?
Yes. Since Patch 12.1 the conversion preserves the original item's secondary stats, tertiary stats and eligible cantrip effects, which means a catalyzed piece can have better secondaries than a raid drop in the same slot.
Can PvP pieces count toward the set?
Yes. Eligible Season 2 PvP class-set pieces contribute to the same 2-piece and 4-piece bonuses.
Should I break 4-piece for a higher item level piece?
Almost never without simming it. The complete set bonus is usually worth more than a few item levels on one slot. The main exception is a very large track jump, such as Champion to Myth.
Related Season 2 Guides
- Catalyst and Venomblight Manaflux Guide
- Season 2 Gearing Guide
- Venomous Abyss Raid Overview
- Venomous Abyss Loot Table
- Season 2 DPS Tier List