




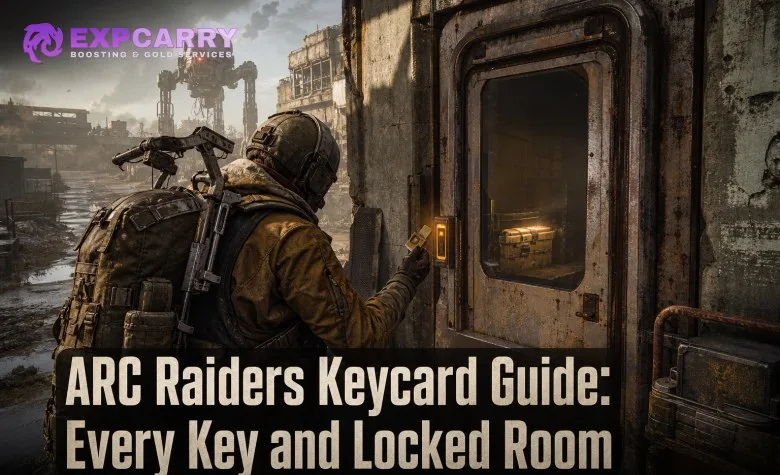
Keys and keycards in ARC Raiders are single-use items that open fixed locked rooms, hatches, vehicles, or special-access objectives. The important rule is simple: bring a key only when you intend to visit its matching location, keep an extraction plan ready, and do not assume the room will be safe once you unlock it. As of Live Update 1.39.0, the live key pool covers Dam Battlegrounds, Buried City, Spaceport, The Blue Gate, Stella Montis, and Riven Tides; Riven Tides is the newest map in the rotation.
How ARC Raiders keys work
Most location keys are consumed when you use them. They open a specific door or a small set of doors on one map, so their real value is not their sell price but the extra loot opportunities and protected interior space they create. A key room can still be empty, already opened by another Raider, or become a PvP trap before you finish looting. Treat every key run as a high-value objective, not a guaranteed profit run.
- Plan the route before deployment: Know the point of interest, likely approach lane, and at least one extraction option.
- Do not carry unrelated keys: A Buried City key has no use on Spaceport, and extra keys only create more risk if you die.
- Loot quickly and listen: Opening a locked door creates a predictable location where other Raiders may push you.
- Use cover at the doorway: Close the door if possible, watch alternative entrances, and avoid standing in a room's central sightline while sorting loot.
- Leave when the objective is complete: A full bag and a used key are usually a better reason to extract than to chase another fight.
Embark previously added exploit mitigation for locked rooms across all maps, so use the intended key access rather than trying to force your way through geometry. The current live update is Live Update 1.39.0, released on July 28, 2026; it does not list any key or locked-room changes.
Every Dam Battlegrounds key and locked room
Dam Battlegrounds has several key rooms concentrated around major industrial landmarks. It is a good map for key runs when your spawn is favorable, but Control Tower and Power Generation Complex routes can become highly visible because they connect to common rotations.
| Key | Where to use it | Locked room or access | Practical note |
|---|---|---|---|
| Dam Control Tower Key | Control Tower | Upper Control Tower locked room | High-risk vertical route; clear the lift-shaft approach and watch the roof and balcony lines. |
| Dam Staff Room Key | Research and Administration / Control Tower area | Staff Room | A quicker indoor stop than the tower top, but nearby entrances make it vulnerable to close-range pushes. |
| Dam Surveillance Key | Water Treatment Control | Surveillance room | Best used only when your rotation already passes Water Treatment; do not cross the map solely for a low-certainty room. |
| Dam Testing Annex Key | Testing Annex | One locked Testing Annex room per key | There are multiple locked doors in the annex. One key opens one chosen door, so decide before interacting. |
| Dam Controlled Access Zone Key | Controlled Access Zone, north of Power Generation Complex | Controlled Access Zone key room | This is separate from the cooperative puzzle access in the same area. Do not confuse the red key-room reader with objective doors. |
Dam key-run decision rule
Bring a Dam key when you spawn on the same side of the map or can reach the destination early without crossing open ground under pressure. The Control Tower Key is the most committal option because reaching the upper room advertises your position and limits your exits. A Door Blocker, a close-range secondary weapon, and enough healing to survive a forced retreat are sensible preparation, but the exact kit should match your budget. For current weapon choices and utility pairings, see the ARC Raiders weapons and gadgets guide.
Do not mistake the Power Generation Complex Power Rod door for a keycard room. It uses a Power Rod rather than a keycard, and it is therefore a separate access mechanic.
Every Buried City key and locked room
Buried City key routes are defined by dense interiors, multiple floors, and short sightlines. That makes them easier to approach without being seen than an exposed Dam route, but it also means other players can be much closer than their footsteps suggest.
| Key | Where to use it | Locked room or access | Practical note |
|---|---|---|---|
| Buried City Hospital Key | Hospital | Hospital locked room | Expect close-range contact and make sure your team does not stack in a single doorway. |
| Buried City JKV Employee Access Card | J Kozma Ventures building | JKV company room | Useful when you are already rotating through the business district; avoid lingering in exposed windows after looting. |
| Buried City Residential Master Key | Residential buildings | Selected apartment doors | One key can serve different apartment-door opportunities, so check your immediate building before making a long rotation. |
| Buried City Town Hall Key | Town Hall | Town Hall locked room | Town Hall is a recognizable destination. Check surrounding lanes before committing to the interior. |
The Residential Master Key deserves special treatment: it is not a single-room key in the same sense as the Town Hall Key. Use it when you can immediately test nearby residential doors rather than carrying it through a dangerous central rotation. If you need a broader plan for map objectives, materials, extraction timing, and progression, use the ARC Raiders full progression guide.
Explore services related to this guide, selected from our ARC Raiders catalog.
View All ARC Raiders Services


Every Spaceport key and locked room
Spaceport rewards route discipline. Its industrial layout creates longer firing lanes than Buried City, while warehouses and towers can suddenly force close-quarters fights. Do not take a key-room detour through open runway space if you have already found valuable loot.
| Key | Where to use it | Locked room or access | Practical note |
|---|---|---|---|
| Spaceport Container Storage Key | Container Storage | Container Storage room | Approach with cover in mind; container lanes can turn into long, exposed shooting galleries. |
| Spaceport Control Tower Key | Ground Control Tower | Ground Control Tower locked room | Vertical access and visible exterior angles make this a poor choice if you are already being tracked. |
| Spaceport Trench Tower Key | Trench Towers | Trench Tower locked room | Check the surrounding trench approaches before you start looting; players can wait below or cover exits. |
| Spaceport Warehouse Key | Shipping Warehouse | Warehouse locked room | Fast to reach on the right spawn, but warehouse interiors amplify footsteps and close-range ambushes. |
Spaceport's key rooms are strongest as part of a route, not as isolated objectives. If the key room is across a runway, an active combat zone, or your only safe extraction lane, skip it. A key is replaceable; a loaded extraction is not.
Every Blue Gate key, security code, and vehicle lock
The Blue Gate has ordinary locked rooms, Patrol Car access, Raider Hatches when the relevant map condition is active, and the separate Locked Gate security-code objective. These are different systems and should not be treated as interchangeable keys.
| Item | Where to use it | What it opens | Important limitation |
|---|---|---|---|
| Blue Gate Cellar Key | Old village area | Eligible cellar doors | Check nearby buildings first; it can be inefficient to force a long village rotation for one door. |
| Blue Gate Village Key | Old village | Village building room | Village interiors are tight and easy to hold from stairways or doorframes. |
| Blue Gate Communication Tower Key | Communication Tower | Communication Tower room | Expect exposed approaches and elevated sightlines. |
| Blue Gate Confiscation Room Key | Blue Gate tunnels | Confiscated-foods area | Tunnel audio and narrow lanes make a controlled entry more valuable than a fast entry. |
| Patrol Car Key | Blue Gate Traffic Tunnel or Riven Tides near Customs House | Rear door of a locked patrol car | Only use it on a visibly locked rear door; it is not a key-room card. |
| Raider Hatch Key | Maps with active Raider Hatches | Raider Hatch extraction | Availability depends on the active map condition, so confirm a hatch is actually present before bringing one. |
Locked Gate security codes
The Ancient Fort, Pilgrim's Peak, Raider's Refuge, and Reinforced Reception Security Codes belong to the Blue Gate Locked Gate objective. They are temporary codes used to override the main gate rather than permanent room keys. The activity requires all four codes, has no active Raider Hatches, and has its own raid conditions. Do not spend a normal locked-room run trying to force this objective unless you specifically intend to complete the code sequence with a coordinated group.
Every Stella Montis key and locked room
Stella Montis is built around interior pressure. Its key rooms can be valuable, but they are also vulnerable to teams hearing your breach or waiting on predictable corridors. Prioritize information, not speed: listen at the approach, clear the nearest corner, and avoid having every squad member enter at once.
| Key | Where to use it | Locked room or access | Practical note |
|---|---|---|---|
| Stella Montis Archives Key | Archives | Archives locked room | Use a teammate or a safe angle to cover the corridor while the room is looted. |
| Stella Montis Assembly Admin Key | Assembly | Assembly administration room | Expect contested interior movement and limited visibility around entrances. |
| Stella Montis Medical Storage Key | Medical Research | Medical Storage | Do not linger after opening containers; medical interiors are easy to collapse on from nearby lanes. |
| Stella Montis Security Checkpoint Key | Security Checkpoint | Security Checkpoint room | Check both your entry route and your retreat route before opening the door. |
When a key room becomes contested, your goal changes from maximizing every container to preserving the items already in your pack. The same applies to any rare blueprint, project material, or upgrade component you find. The ARC Raiders keep-or-sell stash guide can help you decide what deserves a protected extraction instead of a risky extra rotation.
Every Riven Tides keycard and locked room
Riven Tides added the largest group of location-specific keycards. The map officially features the Panorama Azzurro hotel and a dockyard/harbor area, which is why its keycards are split between hotel suites, Port Authority rooms, and Crane Houses. The map went live with the Riven Tides update on April 28, 2026.
| Keycard | Where to use it | Locked room or access | Practical note |
|---|---|---|---|
| Riven Tides Crane House Keycard | Crane Houses | Crane House locked room | Use nearby cover before approaching; harbor sightlines are often exposed. |
| Riven Tides Classified Records Keycard | Port Authority Building | Classified Records room | This room is part of a layered Port Authority route. |
| Riven Tides Secure Storage Keycard | Inside Classified Records, Port Authority Building | Secure Storage room | Requires access through the Classified Records room first, so bring both cards if you intend to open both doors. |
| Hotel Keycard No. 102 | Panorama Azzurro | Room 102 | Hotel-suite keycard. |
| Hotel Keycard No. 107 | Panorama Azzurro | Room 107 | Hotel-suite keycard. |
| Hotel Keycard No. 113 | Panorama Azzurro | Room 113 | Hotel-suite keycard. |
| Hotel Keycard No. 205 | Panorama Azzurro | Room 205 | Hotel-suite keycard. |
| Hotel Keycard No. 208 | Panorama Azzurro | Room 208 | Hotel-suite keycard. |
| Hotel Keycard No. 311 | Panorama Azzurro | Room 311 | Hotel-suite keycard. |
| Hotel Keycard No. 404 | Panorama Azzurro | Room 404 | Hotel-suite keycard. |
The Port Authority pair is the main exception to the usual one-key, one-room logic: Secure Storage sits beyond the Classified Records room. If you only have Secure Storage, do not deploy expecting to access it independently. For route planning around the hotel, harbor, exposed beach lanes, and vertical buildings, read the Riven Tides map guide.
Best practices for a locked-room run
- Match the key to your raid objective. A key run should be your primary plan or a low-risk detour, never an impulsive cross-map chase.
- Confirm the map and condition. Raider Hatch Keys are only useful when Raider Hatches are active. Security Codes are for Locked Gate activity, not routine Blue Gate loot runs.
- Take only the key you can use. This reduces loss risk and keeps your inventory focused on healing, ammunition, shield recovery, and loot space.
- Approach quietly, then clear deliberately. A locked door draws players because its value is obvious. Listen for movement, reloads, interactions, and nearby ARC pressure before opening it.
- Cover the exit before looting every container. A squad should assign a door watch. Solo players should loot the closest containers first and move when they hear a push.
- Extract after a successful room. Do not turn a completed key run into a reckless map-clear attempt unless your kit, health, and route justify it.
Key rooms reward preparation more than aggression. If another team holds the doorway, a clean disengage is often the winning play: rotate, preserve your key if it is unused, and return in a better raid. For practical rules on holding lanes, avoiding third parties, and deciding when to reset, see the ARC Raiders PvP guide.
Common keycard mistakes
- Using the wrong key category: Power Rod access, Patrol Car access, Raider Hatches, Locked Gate codes, and ordinary room keycards are separate mechanics.
- Expecting fixed loot quality: A locked room improves your opportunities, but container contents remain variable.
- Forgetting nested access: Riven Tides Secure Storage is inside Classified Records; bring the required route access, not just the final keycard.
- Opening a door before checking the area: Key rooms are predictable ambush points, especially in dense interiors and towers.
- Staying after the value is secured: Once the key is consumed and your inventory is valuable, extraction discipline matters more than one additional container.
- Following outdated exploit advice: Embark has specifically patched locked-room exploits. Use normal key access and avoid methods that risk a ruined raid or account action.
Every key in ARC Raiders is worth keeping until you can build a safe route around it. The best time to use one is not necessarily when you first find it; it is when you have the right map, a favorable spawn, enough supplies to survive a push, and a realistic way to extract after the room is open.





