
Gnarlroot Boss Tactics & Advanced Strategies
Nestled in the tranquil heart of Amirdrassil, known as the Hope of Dreams, stands a formidable guardian - Gnarlroot. This ancient protector casts a shadow with his imposing presence that seems to ripple through the very essence of the forest, disturbing its once peaceful cadence. The once melodious songs of nature are overshadowed by the looming challenge he poses, beckoning the bravest of champions to step forward.
Gnarlroot is not one to offer gentle melodies or soothing tunes. Instead, he presents a symphony of combat, a dance of danger and strategy. Every move, every mechanic is a note in this challenging composition, pushing adventurers to their limits. For those champions with the ambition to harness the raw power of the most formidable DK outbreak in World of Warcraft, Gnarlroot is the ultimate test. This encounter is not just a battle; it's a rite of passage, a measure of one's skill and determination in the face of overwhelming odds. If you want to skip the tactics and experience a raid with the pros, you can visit our service at Amirdrassil, The Dream's Hope Boost, and kill Gnarlroot and other bosses without any problems or wasted time.
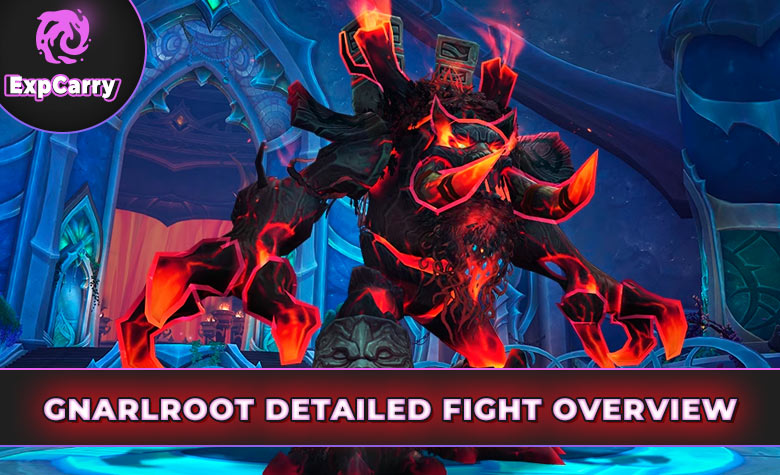
Gnarlroot Detailed Fight Overview
As you gear up to face Gnarlroot, approach this guide with a tactical mindset. This isn't merely a test of strength or agility; it's a strategic puzzle waiting to be solved. Each section of the Detailed Fight Overview offers crucial insights. Pay close attention to each detail, as even the smallest nuance can tip the scales in your favor. Now, let's get started with the Detailed Fight Overview.
Battle Style:
The encounter with Gnarlroot is primarily a Single Target fight. However, what makes this battle unique and challenging are the frequent spawns of adds. These adds, if not managed correctly, can quickly overwhelm the raid, making the fight's dynamics shift from single target to multi-target in a matter of seconds.
Team Composition Recommendations:
- Tanks (2): The dual tank setup is essential for managing the boss and the adds simultaneously. One tank will primarily focus on Gnarlroot, while the other will be responsible for gathering and controlling the adds, ensuring they don't wreak havoc on the DPS and healers.
- Healers (4): With four healers, the raid can ensure that there's ample coverage for both group-wide healing and spot healing. Given the various mechanics that deal raid-wide damage and the potential for players to make mistakes, having a robust healing team is crucial.
- DPS (14): The bulk of the raid will consist of damage dealers. Their primary role will be to focus on Gnarlroot but also switch to adds when necessary. The DPS team's versatility will play a significant role, with both melee and ranged DPS bringing their unique strengths to the encounter.
Key Utilities for the Fight:
- 4x Augmentation Evokers: These are essential tools that can enhance the raid's overall performance. Whether it's boosting damage output, increasing healing efficiency, or providing additional defensive capabilities, Augmentation Evokers can be the difference between a close call and a wipe.
- 1 Unholy DK (Lucky Charm): While it might seem superstitious to some, having a lucky Unholy Death Knight in the raid can provide that extra edge. Their ability to burst damage, especially with the right setup, can be invaluable, especially during critical phases of the fight.
Optimal Timing for Hero/Lust:
The use of Heroism or Bloodlust is a strategic decision that can significantly impact the fight's outcome. For the Gnarlroot encounter, it's recommended to deploy Hero/Lust during the intermission phase. This is when the raid receives a 100% damage buff, allowing them to maximize their damage output and potentially shorten the fight's duration.
In essence, the Gnarlroot encounter is a delicate balance of managing the main boss, dealing with adds, and navigating through various mechanics. Proper preparation, understanding the fight's dynamics, and having a well-coordinated team are the keys to a successful Gnarlroot takedown.
Gnarlroot Mechanics Breakdown
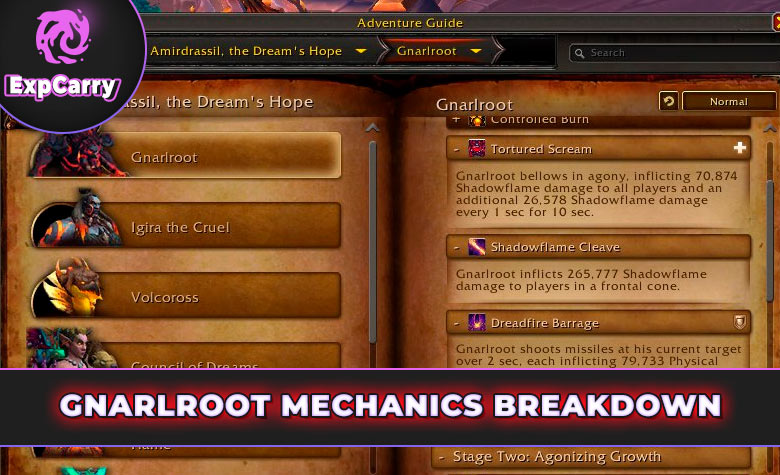
Before we dive into the nitty-gritty of the Gnarlroot encounter, it's essential to understand the mechanics that shape this battle. Each mechanic introduces a unique layer of complexity, demanding both individual skill and collective strategy. Let's take a closer look at the challenges that await and how best to tackle them in the Expanded Mechanics Breakdown:
- Description: These are smaller adds that, when active, amplify the damage taken across the raid. They are notorious for applying both magic DoTs and bleeds to the players they target.
- Counterplay: It's crucial to prioritize these adds and take them down swiftly to reduce the increased damage they cause. Healers should be on the lookout for players affected by their DoTs and bleeds, ensuring they receive timely healing.
- Description: This mechanic manifests as 4 swirling beams that dart across the battlefield. Players hit by these beams not only suffer damage but also inadvertently spawn Tainted Lasher adds, which remain inactive initially.
- Counterplay: Players must remain vigilant and dodge these beams. Crowd control abilities can be handy to manage the spawned Tainted Lasher adds.
- Description: Four players are chosen at random and marked with expansive circles. These circles deal minor ticking damage to anyone caught inside. After a short duration, they explode, leaving behind a hazardous puddle. Moreover, any Tainted Lasher adds hit by this explosion are activated.
- Counterplay: Marked players should quickly move away from the group and position themselves such that the explosion activates as many dormant Lasher adds as possible. The rest of the raid should steer clear of these circles to avoid unnecessary damage.
- Description: A classic tanking mechanic where the boss focuses on one tank for a while, applying a stacking debuff. Once the debuff reaches a certain threshold, the tanks must swap.
- Counterplay: Tanks need to communicate effectively and swap at the right time to ensure neither gets overwhelmed by the stacking debuff.
- Description: An inescapable raid-wide AoE that deals consistent damage to all players for a duration of 10 seconds.
- Counterplay: Healers should anticipate this damage and pre-cast healing spells. Players can also use personal defensive cooldowns to mitigate some of the damage.
- Description: A devastating frontal attack that Gnarlroot uses periodically. This attack deals significant damage and can easily wipe out players caught in its path.
- Counterplay: Players, especially non-tanks, should always stay behind or to the side of the boss to avoid this attack. Tanks should ensure they're the only ones in front of Gnarlroot when this mechanic is cast.
Understanding each mechanic's intricacies and having a counter-strategy is paramount to conquering Gnarlroot. Proper communication and coordination among the raid members can make the difference between a triumphant victory and a crushing defeat.
Gnarlroot Killing Tactics

Before diving into the intricate details of our strategy against Gnarlroot, it's essential to understand the gravity of the challenge ahead. This guardian, with its multifaceted mechanics and shifting dynamics, demands more than just raw power. It requires foresight, adaptability, and impeccable coordination. The following in-depth insights aim to equip adventurers with the knowledge and tactics needed to turn the tide of battle in their favor. Let's unravel the secrets to conquering this formidable foe.
Phase 1 Strategy Deep Dive:
- Positioning: The initial positioning of the raid around Gnarlroot is crucial. Spreading out ensures that the Controlled Burn mechanic doesn't overlap and cause unnecessary damage. It also provides players with ample space to dodge other mechanics and reposition as needed.
- Hero/Lust Timing: While many raids-service">raids might be tempted to use Heroism or Bloodlust at the start for a quick damage boost, it's more strategic to delay its use. The end of the first intermission presents a golden opportunity, with the 100% damage buff in play. This timing ensures the raid can capitalize on both the buff and Hero/Lust, leading to a significant spike in damage output.
- Mechanic Management: The swirls and frontal attacks from Gnarlroot are not just about dodging. They test the raid's awareness and reaction times. Proper communication, perhaps using voice chat, can help alert players to incoming mechanics. The Controlled Burn circles, when placed correctly on the Inactive Lasher adds, can turn a potentially challenging mechanic into an advantage. The new Ping system is a valuable tool here, helping coordinate players and reduce confusion.
- Add Management: Once the Lashers activate, it's a race against time. Tanks play a pivotal role here, quickly gathering the adds and positioning them for maximum cleave and AoE damage. DPS should switch focus immediately to these adds, ensuring they're taken down swiftly to reduce the strain on healers.
Intermission Strategy Deep Dive:
- Transitioning to Intermission: As Gnarlroot begins his Doom Cultivation cast, the raid's focus must shift. All active adds become a priority. Their swift elimination ensures the raid can focus on the next set of challenges without any lingering threats.
- Root Mechanics: The massive roots that spawn are more than just an obstacle. They're a DPS check, a coordination test, and a healer challenge rolled into one. The Soak and Burn combo requires players to be aware of their surroundings, communicate effectively, and act quickly. Any delay or misstep can lead to prolonged root phases, increasing the strain on the raid.
- Healer Challenges: The intermission phase is particularly taxing on healers. The constant ticking damage means healers must be on their toes, prioritizing group-wide heals while also keeping an eye out for players who might be taking additional damage. Efficient cooldown management among healers can be the difference between a successful phase and a raid wipe.
- Maximizing the Damage Window: Once the roots are dealt with, it's all hands on deck. With Gnarlroot taking 100% increased damage, every DPS cooldown, every trinket, and every damage-boosting ability should be used. This window is short but can significantly impact the overall fight duration.
Post-Intermission Nuances:
- Gnarlroot's increased damage post-intermission means the raid cannot afford to be complacent. Mechanics that were manageable before now pack a more significant punch. Adaptation and heightened awareness become crucial.
- Depending on the fight's tuning, multiple intermissions might be a reality. Raids should be prepared for this, adjusting their strategy and cooldown usage accordingly. The execute phase, when Gnarlroot is below 30% health, becomes a critical juncture, especially if it aligns with an intermission's end.
- Mastering the Gnarlroot encounter is a blend of understanding the mechanics, adapting to the fight's nuances, and impeccable team coordination. With the right strategy and a cohesive team, raids can navigate the challenges posed by Gnarlroot and emerge victorious.
Conclusive Thoughts
Gnarlroot, set within Amirdrassil's embrace, epitomizes the intricate challenges World of Warcraft presents. This guardian, while seemingly straightforward, demands a blend of individual prowess and collective coordination. The encounter underscores the essence of MMORPGs: teamwork. Every raid member, from tanks to DPS, plays a crucial role in determining the outcome.
The fight also emphasizes adaptability. With shifting phases and potential multiple intermissions, raids must remain agile in their strategies. Gnarlroot isn't just a boss; it's a testament to the game's depth, challenging players to strategize, adapt, and ultimately triumph through collaboration. In the annals of World of Warcraft, Gnarlroot will undoubtedly be remembered as a captivating blend of art and adversity.


