
An Expert's Guide to Igira the Cruel Boss Tactics & Strategies
Igira the Cruel is an intriguing boss encounter that seamlessly fuses the themes of love and combat. This duality is humorously emphasized by suggesting this boss battle as an offbeat Valentine's Day date. Amidst the romantic ambiance, the atmosphere undergoes a dramatic shift the moment Igira unveils her weapons. The gentle undertones of love are swiftly overshadowed by the impending threat of battle, serving as a poignant reminder to adventurers that love, in its myriad forms, can oscillate between gentleness and fierceness.
Gleaned from the Public Test Realm (PTR), insights suggest that the encounter with Igira might undergo refinements before its final release. While the PTR offers a glimpse into the potential dynamics of the battle, this guide is meticulously crafted, focusing on the quintessential essence of Igira's character and the anticipated gameplay experience. This approach ensures that adventurers are equipped with strategies that resonate with the core intent of the encounter, rather than the fluid specifics of the PTR version.
For adventurers looking to further enhance their raiding experience, consider the Amirdrassil, The Dream's Hope Raid Boost offered by our team. This premium service ensures you're well-prepared to face the challenges of Amirdrassil with confidence and expertise.
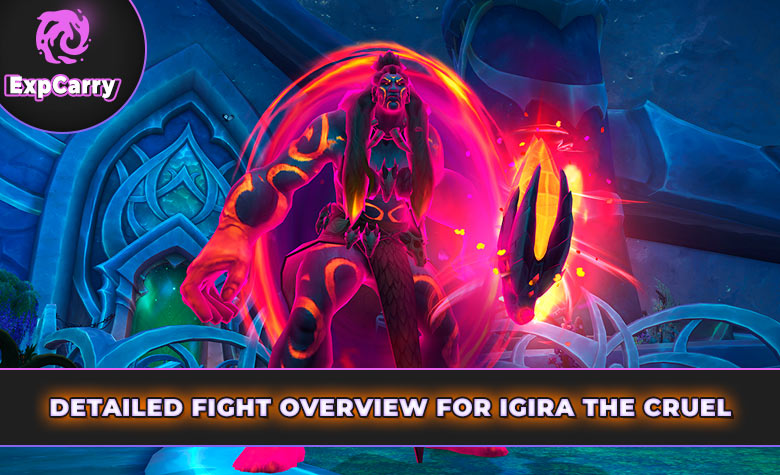
Detailed Fight Overview for Igira the Cruel
Venturing into the heart of Amirdrassil, adventurers will come face-to-face with the enigmatic Igira the Cruel. This boss encounter is a masterful blend of intricate mechanics and a compelling narrative, offering both seasoned raiders and newcomers a challenge like no other. Before diving into the specifics, let's set the stage with a brief introduction to what awaits in this epic confrontation.
Battle Dynamics:
The encounter with Igira the Cruel is a meticulously designed combat experience that challenges both the strategic planning and reactive capabilities of the raid team. While the primary focus remains on a single target, the boss, there are moments where the raid will need to swiftly shift their attention to handle Multi-DoT or Cleave targets, ensuring that the team is always on their toes.
Team Composition:
- Tanks (2): Essential for managing Igira's aggro and ensuring that the damage is appropriately distributed. Their positioning and timely taunts will be crucial to manage some of the boss's more lethal abilities.
- Healers (4): With the various damage-over-time effects and area-of-effect abilities that Igira employs, having a robust healing team is paramount. Their role isn't just to mend but to anticipate incoming damage and pre-heal or shield as necessary.
- DPS (14): The backbone of the raid's damage output. Their primary role is to bring down Igira's health while also dealing with any additional targets or mechanics that arise during the fight. Coordination among DPS, especially during Multi-DoT phases, will be crucial.
Key Utilities:
The Mass Dispel ability, specifically from a Priest class, will play a pivotal role in this encounter. Given the numerous debuffs and crowd control mechanics that Igira employs, having a timely Mass Dispel can mean the difference between a successful attempt and a raid wipe.
Initial Engagement:
The use of Heroism or Bloodlust (often referred to as "Hero/Lust") right at the pull is recommended. This tactic allows the raid to maximize their damage output during the initial phases of the fight when Igira is still adjusting to the onslaught, providing a significant advantage as the battle progresses.
In summary, the fight against Igira the Cruel is not just about raw power but also about strategy, coordination, and timely reactions. The detailed overview provides raid teams with a clearer picture of what to expect and how to prepare for this challenging encounter.
In-Depth Mechanics Breakdown for Igira the Cruel
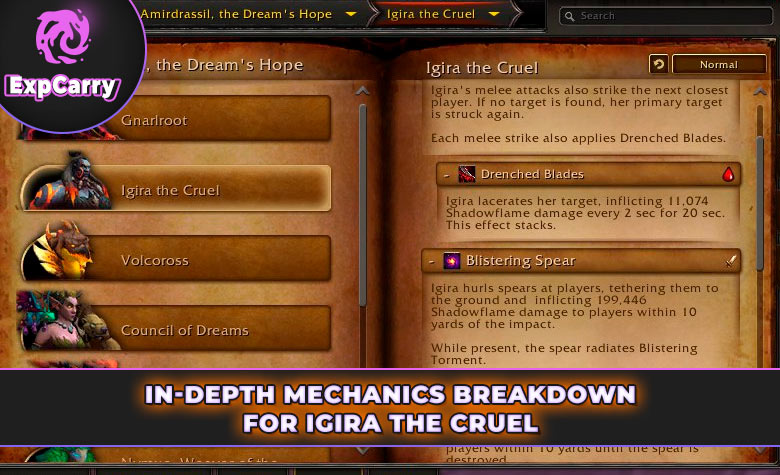
Igira the Cruel presents a series of intricate mechanics that demand both individual skill and team coordination. Each mechanic has its unique challenges, and understanding them is the key to mastering this encounter.
- Description: This mechanic targets proximity. The player closest to the active tank will bear the brunt of this attack. However, if no players are within the designated range, the current tank will suffer a more potent version of the attack.
- Counterplay: Tanks need to coordinate their positioning, ensuring that the off-tank is always the closest player to the active tank. This distribution will minimize the damage taken and prevent unexpected fatalities.
- Description: Multiple raid members will find themselves targeted, with large explosive circles forming around them. Once detonated, these circles not only deal damage but also create a hazardous puddle. Additionally, the affected players are chained and dragged into the puddle, remaining trapped until the Spear entity is defeated.
- Counterplay: Targeted players should quickly move to designated areas, ensuring minimal raid disruption. The team must prioritize destroying the Spear to free entrapped players and mitigate prolonged damage.
- Description: Igira selects a random player, directing three swift blades towards them. While these blades deal significant damage, they have a clear trajectory and can be dodged.
- Counterplay: Awareness is key. Players must remain vigilant and be prepared to move out of the blades' path swiftly.
- Description: A dramatic shift in the battle, Igira pushes players away and activates three weapons. The raid has a limited time to "soak" or stand within one weapon's circle, preventing a catastrophic raid-wide attack.
- Counterplay: Pre-assign groups to specific weapons, ensuring efficient soaking. Players must also dodge high-damage sparks during this phase.
- Description: The current tank becomes the focal point of this mechanic, with a circle forming around them. This circle must be shared or "soaked" by multiple players to distribute the impending damage. However, a stun effect accompanies the damage, immobilizing those within the circle.
- Counterplay: Coordinate a group, preferably with stun-resistance or immunity, to soak alongside the tank. Quick dispels post-impact are crucial.
- Description: Igira showcases her agility, leaping to various player locations. These leaps cause high damage and release damaging shadow waves.
- Counterplay: Spatial awareness and quick reflexes are essential. Players should spread out and be ready to move away from Igira's landing zones.
- Description: All players receive an absorbent shield. If not addressed, this shield will explode, dealing damage. However, removing the shield prematurely releases shadow orbs.
- Counterplay: Coordinate the removal of shields, ensuring that players are positioned to avoid or intercept the shadow orbs.
- Description: A passive mechanic that amplifies Igira's damage output after each intermission phase.
- Counterplay: Healers should be prepared for increased healing demands, and damage mitigation cooldowns should be used strategically.
In conclusion, each mechanic of the Igira the Cruel encounter tests a different aspect of the raid's capabilities. From positioning and movement to coordination and quick decision-making, mastering these mechanics is the key to a successful battle against Igira.
Tactics Guide for Igira the Cruel
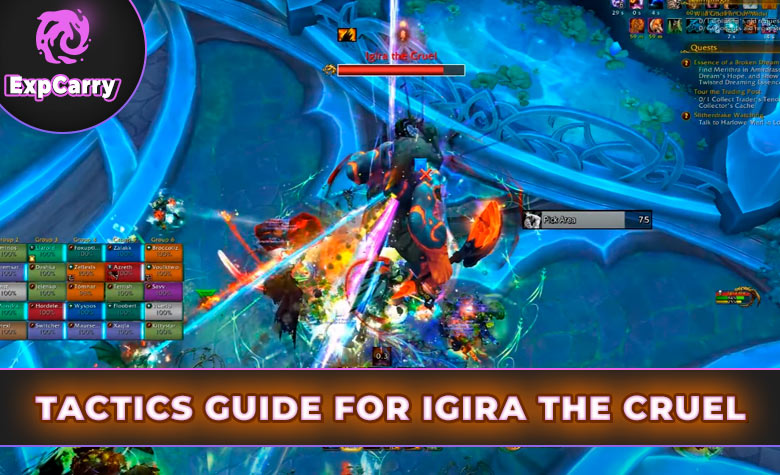
The battle against Igira the Cruel is not just about reacting to her mechanics but proactively setting up the raid for success. A well-thought-out strategy can significantly reduce the complexity of the encounter, allowing the team to focus on execution.
Positioning and Raid Organization:
- Weapon Assignments: Before the fight begins, split the raid into three distinct groups, each assigned to one of the weapons Igira activates during the "Marked for Torment" phase. Using world markers to label each weapon can help streamline this process and reduce confusion during the heat of battle.
- Boss Positioning: Igira should be tanked against a wall. This positioning minimizes the risk of raid members being inadvertently hit by her frontal attacks, such as the "Vicious Swing." The off-tank should always be ready to step in and take over if the main tank is incapacitated or overwhelmed.
Handling Key Mechanics:
- Blistering Spear Management: Players targeted by this mechanic should aim to place their explosive circles close to Igira. This positioning allows DPS players to deal cleave damage to both Igira and the spears, optimizing damage output. Once the spears are active, they should be a priority target to free chained players and mitigate the area denial caused by the puddles.
- Twisting Blade Awareness: While this mechanic can seem daunting, it's all about anticipation and quick reflexes. Players should always be on the lookout for Igira's blade targeting animation and be ready to sidestep the incoming blades.
- Intermission Phase: This phase is a race against time. Each assigned group should rush to their respective weapon as soon as the intermission begins. Coordination is key here: the group should move as a unit, dodging hazards and shrinking the weapon's circle. Given the potential for high damage during this phase, it's advisable to have a player with magic immunity in each group. This player can continue soaking even when the area is riddled with puddles, ensuring the weapon is deactivated in time.
Advanced Phases and Adaptation:
Phase 1 (Enhanced) as the fight progresses, Igira becomes more formidable, incorporating all her previous abilities and introducing a new one based on the last soaked weapon. The raid should be prepared for increased intensity and be ready to adapt on the fly.
- Slicing: Players should maintain a safe distance from each other, ensuring that when Igira leaps, the damage is isolated and doesn't affect multiple raid members.
- Flaying: This mechanic can be mitigated by having the entire raid stack in a single location. When the absorbent shield is removed, the resulting shadow orbs will radiate outward, posing minimal threat to the stacked raid.
- Hacking: This mechanic is all about damage distribution and control. Players with immunities and abilities to remove stuns should be at the forefront, assisting in soaking the tank's circle. Following the impact, a Mass Dispel can be invaluable in quickly removing the stun effects, especially from the tanks.
The strategy for Igira the Cruel is a blend of preparation, coordination, and adaptability. While the initial setup and assignments are crucial, the raid's ability to adapt to changing circumstances and unexpected challenges will determine the outcome. Experimentation with different weapon soaking priorities can also yield unique advantages, allowing each raid group to tailor the encounter to their strengths and preferences.
Conclusion
Embarking on the journey to confront Igira the Cruel is no small feat. This guide provides an in-depth analysis, shedding light on the multifaceted mechanics and strategies essential for triumphing over this formidable adversary. As with all dynamic encounters, it's crucial to remember that while preparation and knowledge are vital, flexibility in approach is equally important. The live mechanics may present unforeseen challenges, necessitating on-the-spot adaptations. Moreover, the diversity in team compositions means that weapon priorities might vary, and finding the perfect balance tailored to your team's strengths can be the key to success. So, as you gear up for this epic showdown, keep an open mind, trust in your team's synergy, and embrace the thrill of the challenge. Here's to victorious raiding and memorable moments in the heart of battle!


