
Larodar, Keeper of the Flame Boss Tactics & Strategies Guide Review
Our comprehensive 'Larodar, Keeper of the Flame' guide takes you on a journey through the enigmatic Amirdrassil. Set against the backdrop of this mystical realm, the encounter with Larodar is a testament to nature's dual nature - its serene beauty and untamed wrath. As you navigate the intricate dance of mechanics and strategy, the role of the healer becomes paramount, acting as a beacon of hope in the tumultuous battle. Our Amirdrassil, The Dream's Hope Raid Boost ensures that you're well-equipped with the insight and tactics to face Larodar's wrath and claim your rightful rewards. Dive in and let the adventure unfold.
Larodar Battle Overview: Decoding Fight Style & Setup
Every battle in the realm of Amirdrassil is a test of skill, strategy, and teamwork. The encounter with Larodar, Keeper of the Flame, is no exception. This guide's introduction offers a deep dive into the unique dynamics of this fight, emphasizing the importance of understanding both the style and setup. From the positioning of the boss to the coordination of the raid team, every detail matters. As we delve into the intricacies of this encounter, remember that preparation, communication, and adaptability are your keys to victory. Let's embark on this journey, equipping you with the knowledge to face and conquer the challenges ahead.
Encounter Dynamics
Embark on a journey into the heart of this elusive encounter. Larodar, Keeper of the Flame, offers a unique combat experience:
- Single-Target Fight Style: The primary focus remains on Larodar. Ensure the main tank captures Larodar's attention, allowing the raid to deliver consistent punches of damage.
- Cleave Damage Moments: These intervals showcase the boss's unique techniques. Players must be spatially aware, avoiding clustering to minimize the impact of these striking movements.
- Team Coordination: Beyond individual prowess, effective communication stands as the cornerstone of success. Utilize tools like Discord or Teamspeak for real-time coordination, especially during high-movement phases or intricate mechanics.
Recommended Raid Composition
- Tanks (2): Tasked with managing aggro, positioning Larodar, and mitigating the severe blows. A dual approach sees one tank engaging Larodar while the other prepares for adds or tank-switch patterns.
- Healers (5): A blend of single-target and AoE healing techniques is crucial. Prioritize the tanks' health while ensuring the raid's vitality. Efficient mana management and strategic cooldown rotations are essential components.
- DPS (13): A balanced mix of melee and ranged DPS optimizes the damage output. While melee DPS focuses on consistent strikes, ranged DPS handles distance-based mechanics and target switches.
Key Utilities
- Rescue: An invaluable tool, perfect for repositioning an ally in imminent danger.
- Life-Grip: A strategic counterpart to Rescue, aiding in repositioning allies during specific mechanics.
- Guardian Spirit: A game-changing defensive cooldown. Time its use during high-damage phases for maximum impact.
Hero/Lust Timing
- Optimal Usage: Phase 2: Amplify the raid's damage output with Heroism or Bloodlust. This strategy is particularly effective when Larodar reveals his most potent techniques or when the raid aims to swiftly eliminate critical adds.
Additional Tips:
- Gear & Consumables: Equip raid members with optimized gear, including the right enchants, gems, and consumables. Flasks, potions, and food buffs offer significant advantages.
- Practice Runs: Familiarity breeds success. Consider dry runs or watching videos of triumphant attempts to understand mechanics better.
Equip yourself with this comprehensive blueprint and brace for the challenges that lie ahead!
Larodar Mechanics Guide
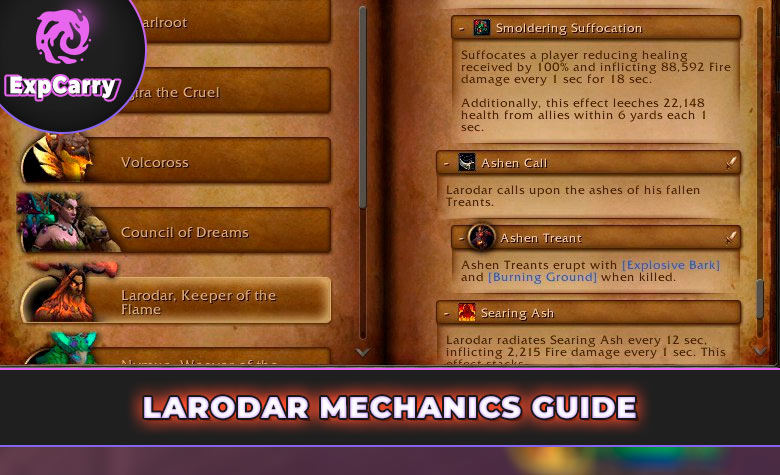
Understanding the mechanics of any boss encounter is the key to victory, and the Larodar fight is no exception. This battle is a symphony of intricate patterns, deadly threats, and strategic opportunities. Let's delve deeper into the core mechanics that shape this encounter.
- Seed of Life: Central to the fight, this seed, located in the room's heart, requires charging through Treants. Once energized, it becomes a vital tool to clear the menacing fire puddles that threaten the raid's safety.
- Fiery Brand: These menacing entities spawn near Larodar. Not only do they spread fire puddles, but they also possess an interruptible cast named Fiery Flourish. Upon their demise, they transform into Charred Treants, which, when healed, charge the Seed of Life.
- Scorching Roots: These are not your garden-variety roots. They fixate on random players, causing damage and immobilizing them. But there's a twist! Once defeated, they morph into Charred Bramble, which, when healed, becomes a Life-Tree, offering a protective barrier against Raging Inferno.
- Furious Charge & Blazing Thorns: These abilities target the tank and the raid, respectively. The damage from Furious Charge can be mitigated by distance, while Blazing Thorns requires players to dodge star-shaped swirls and collect the resulting orbs.
- Raging Inferno & Combusting Presence: When Larodar's energy peaks, he channels Raging Inferno, a lethal ability mitigated by standing within the Bramble Barrier. Combusting Presence, on the other hand, is unavoidable raid-wide damage that intensifies after each Raging Inferno.
- Burning Ground: These random fire puddles are a constant threat. However, the Seed of Life can be a solution to this fiery problem.
- Intermission & Phase 2 Abilities: The fight's dynamics shift dramatically during these stages. From Consuming Flame's raid-wide damage to the Falling Embers that need soaking, players must be on their toes. Abilities like Flash Fire and Fire Whirl introduce new challenges, while Smoldering Backdraft and Ashen Treant add layers of complexity to the tank and DPS roles.
In essence, the Larodar encounter is a test of adaptability, coordination, and strategy. Each mechanic intertwines with the next, creating a dance of danger and opportunity. By mastering these mechanics, raid teams can turn the tide of battle and emerge victorious.
Larodar's Strategic: Encounter Insights
When it comes to the Larodar encounter, it's not just about raw power or gear optimization; it's about strategy. This battle is a complex dance of mechanics, positioning, and timing. Let's delve deeper into the strategic layers that can lead your raid team to victory.
- Understanding the Terrain: Before you even engage with Larodar, take a moment to survey the battlefield. Recognize the key areas where certain mechanics will play out, such as the Seed of Life's location or where Fiery Treants might spawn. Familiarity with the environment can give you a significant edge.
- Adaptive Positioning: The Larodar fight is dynamic, with mechanics that can change the battlefield's landscape. Whether it's dodging Blazing Thorns or repositioning for the Furious Charge, being agile and adaptable in your positioning can mean the difference between life and death.
- Prioritization is Key: While Larodar is the main target, the encounter introduces various adds and mechanics that can't be ignored. Knowing when to switch from the boss to adds, or when to focus on mechanics like the Seed of Life, is crucial. It's not just about DPS; it's about smart DPS.
- Healer's Vigilance: This encounter can be particularly taxing on the healing team. With damage coming from multiple sources, healers must be vigilant, prioritizing their heals and using their cooldowns judiciously. Communication among healers is paramount to ensure efficient healing distribution.
- Phase Transitions: Recognize the signs of phase transitions. These moments can be particularly chaotic, but with proper preparation and awareness, your team can navigate them smoothly. Whether it's the rapid intermission phase or the DPS-intensive Phase 2, having a clear game plan for each phase is essential.
- Continuous Adaptation: No two raid attempts are the same. While you may have a strategy in place, be prepared to adapt on the fly. Whether it's adjusting to unexpected player deaths or changes in boss mechanics, flexibility can be one of your greatest assets.
In conclusion, the Larodar encounter is a test of both individual skill and collective coordination. While understanding the mechanics is foundational, crafting and executing a well-thought-out strategy is the key to success. Equip your team with this knowledge, practice regularly, and you'll be well on your way to conquering this challenging foe.
Conclusion
This guide is a comprehensive resource for tackling the Amirdrassil and Larodar boss fight. It combines detailed explanations of mechanics with strategic insights, ensuring raid teams are well-equipped to face the challenge. The light-hearted tone, combined with the depth of information, makes it both engaging and informative. Whether you're a seasoned raider or a newcomer, this guide is an invaluable tool for conquering this fiery encounter.


