




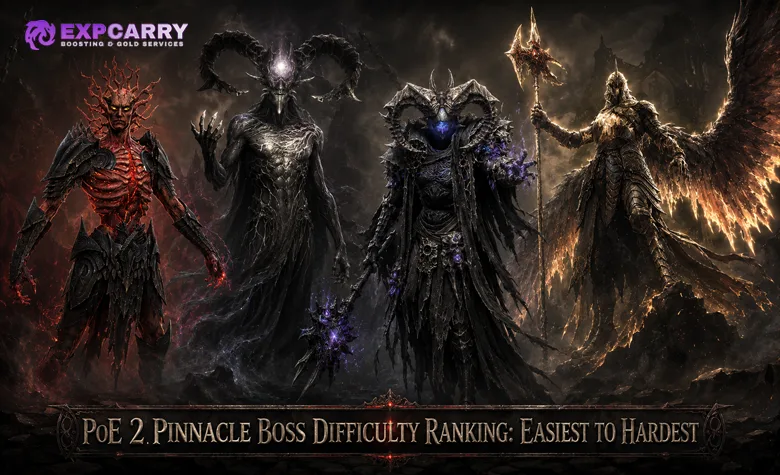
There is no universal Path of Exile 2 Pinnacle Boss order that fits every character. A mobile damage-over-time build, a low-damage melee setup, and a high-burst ranged character can experience the same encounter very differently. This ranking therefore uses a declared live baseline rather than presenting one player's clear time as an objective law. It belongs beside the wider Path of Exile 2 guide collection as a decision page: use it to choose the next quest boss, identify the build check behind a failure, and decide whether a repeat key is worth risking.
The article was rechecked on 13 August 2026 for patch 0.5.4f. The official 0.5.4f patch notes do not contain a boss balance change that alters the order below. The ranking does account for the earlier 0.5.4 Pinnacle changes, including reduced unintentionally high boss resistances, adjustments to the Arbiter of Ash, improved Orb of Divinity timing, reduced Lightless Serpent Burning Ground, and the fix that stops The Aberration's Meteor Rain after its death.
PoE 2 Pinnacle Boss Ranking at a Glance
The primary order compares the current quest or default versions at their baseline difficulty. It assumes solo play, no carry, no deliberate phase skip, no external encounter modifier, and a broadly capable character that can complete ordinary Tier 15 mapping. Tier 15 is an editorial comparison point, not an official entry requirement. The base Vessel of Kulemak kill is used for rank one; optional Lich empowerment is treated separately.
| Rank | Pinnacle Boss | Primary mechanical test | Baseline difficulty | Ranking confidence |
|---|---|---|---|---|
| 1 | Vessel of Kulemak | Clutter management and optional empowerment decisions | Lowest base version | Medium because empowerment and build profile matter greatly |
| 2 | Atziri, the Red Queen | Two-form pattern recognition and late-arena positioning | Low to moderate | Medium |
| 3 | The Aberration | Large physical impacts, mortar fire, beams, and web patterns | Moderate | Medium |
| 4 | The Bodach | Darkness traversal, persistent ground, and undodgeable slams | Moderate | Medium |
| 5 | The Raven Trickster | Multi-element mirror patterns and attacks from changing angles | Moderate to high | High |
| 6 | Xesht, We That Are One | Overlapping manifestations, hand slams, and sustained movement | High | High |
| 7 | The Arbiter of Ash | Temporary safe zones, seed interactions, and recovery denial | Very high | High, but footwork-sensitive |
| 8 | The Arbiter of Divinity | Long combinations, Aspects, Divine Power, and arena-wide sequences | Highest current baseline | High |
Ranks two through four form the closest group. Atziri, The Aberration, and The Bodach can exchange positions depending on damage uptime, melee range, visual clarity, and familiarity with their unique arena rules. The top half is more stable in current live observations: Tangmazu adds a larger pattern vocabulary, Xesht creates more simultaneous pressure, and the two Arbiters demand the most sustained execution.
Live Ranking Methodology
The method separates mechanical difficulty from access cost. Otherwise, an expensive but readable encounter would automatically outrank a harder quest fight. Current quest and repeat routes were cross-checked against the PoE 2 Pinnacle Boss Access guide, current quest data, and the official endgame overhaul. The official 0.5.4 notes were then checked again for balance and bug changes affecting the active fights.
| Evaluation axis | What the ranking measures | What it does not assume |
|---|---|---|
| Mechanical load | The number of distinct responses, transitions, and arena states that must be learned | That burst damage skips every dangerous sequence |
| Punishment | How quickly one missed cue becomes a death or an unrecoverable position | That every telegraphed hit can be tanked |
| Mobile damage | How much useful single-target output can continue while the player repositions | A stationary tooltip or showcase burst |
| Recovery pressure | Whether the encounter restricts recovery, chains damage, or provides few reset windows | Reliable flask or resource recovery from normal monster packs |
| Readability | How clearly the fight communicates safe lanes, target states, and the next required response | Perfect knowledge from a video watched beforehand |
| Failure cost | The key, fragments, route work, or Temple progress placed at risk in a repeat attempt | A permanent market price or universal farming time |
Official patch notes establish the live structure and balance changes. Current game data confirms encounter names, quest items, skills, damage types, and area rules. Player-tested evidence is used only to identify build-sensitive difficulty and practical ordering. No decimal score is assigned because the available evidence does not support that level of precision.
Which Encounters Are Included
The ranking covers eight current Atlas or endgame-story Pinnacle encounters: the Arbiter of Ash, the Arbiter of Divinity, Atziri, The Bodach, The Aberration, The Raven Trickster, Vessel of Kulemak, and Xesht. Together they represent the present Fortress, Fate of the Vaal, Ritual, Expedition, Delirium, Abyss, and Breach endpoints.
The King in the Mists is a Ritual prerequisite that supplies the Head of the King before the Rite of the Nameless. Olroth supplies the Shattered Triskelion used for The Aberration route. Kosis can appear in the current Simulacrum, but Tangmazu is the final Delirium Pinnacle. Trialmaster and Zarokh remain Trial endpoints with different entry, Honour, and modifier structures. Adding those fights to the same table would mix distinct progression models and reintroduce obsolete pre-0.5 boss roles.
Gear Readiness Before Following the Ranking
Character level and tooltip DPS do not prove Pinnacle readiness. The practical question is whether the build can deal meaningful damage while moving, survive one recoverable mistake, sustain resources against a single target, and preserve movement for a forced mechanic. Exact universal Life, Energy Shield, or DPS requirements would be misleading because mitigation, recovery, range, skill uptime, and Runic Ward change the value of every raw number.
| Readiness band | Practical standard | Suggested targets |
|---|---|---|
| Early Pinnacle | Build-appropriate elemental resistances are capped, a real physical defence is active, recovery works without adds, and movement remains available during the damage rotation | Base Vessel of Kulemak and Atziri |
| Developed bossing setup | The character survives routine boss hits, controls damaging ailments, and preserves output through repeated repositioning | The Aberration and The Bodach |
| Strong mobile bossing | Overlapping patterns remain readable, resources recover during long phases, and damage does not disappear whenever the target moves | The Raven Trickster and Xesht |
| Apex-ready | Mitigation, recovery, visual recognition, precise movement, and sustained damage remain dependable across repeated high-risk cycles | Arbiter of Ash and Arbiter of Divinity |
Visible Fire, Cold, or Lightning effects do not remove the need for physical mitigation, and useful Chaos Resistance should not be ignored in mixed-damage encounters. If several readiness rows fail at once, repair the foundation before consuming another repeat entry. A contextual PoE 2 build preparation option can be compared with self-gearing, but the real goal is stable defence, recovery, movement, and damage uptime rather than a larger hideout tooltip.
1. Vessel of Kulemak
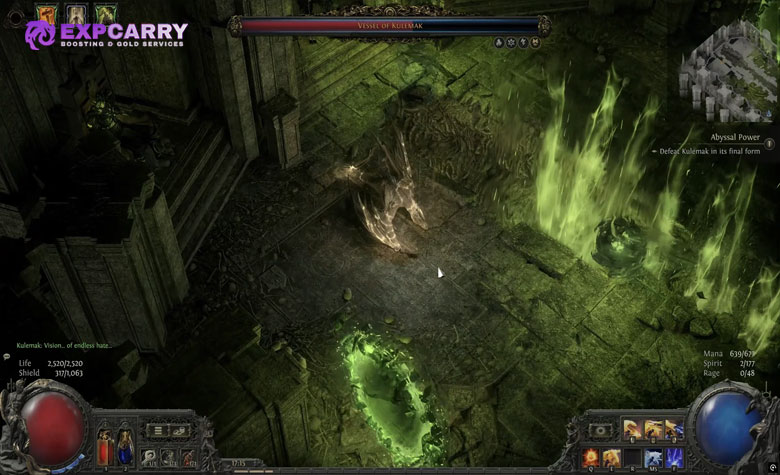
The base Vessel of Kulemak encounter takes first place because its default quest completion is generally the lowest mechanical barrier for a developed mapping character. Access begins with Kulemak's Invitation at the Well of Souls and leads into the Black Cathedral. The encounter does not have one fixed upper state: after a kill, the Vessel can be revived and empowered through stolen Lich power.
That variability is why only the base completion occupies rank one. The active skill set includes physical attacks, Lightning beams, Cold damage, persistent ground, mines, and teleport slams. Projectile and ground clutter can become far more dangerous for low-damage melee, while minions, damage over time, and high burst can preserve output as the player moves.
A fully empowered Vessel is not ranked as the easiest boss. It is a separate variable challenge whose difficulty depends on the powers added during the encounter and the character attempting it. Secure a clean base kill before choosing additional empowerment, and do not use rank one as evidence that every Kulemak state is trivial.
2. Atziri, the Red Queen
Atziri is the most reasonable second target in the current baseline, but the position is not a claim that the fight is simple. The encounter contains two consecutive forms: Atziri, the Red Queen, followed by Atziri, the Fell Serpent. Fire rings, Fire and Lightning runes, blood projectiles, storm markers, leaps, and forced lanes create more pattern variety than base Kulemak.
Flesh Bubble is the most commonly misunderstood late mechanic. It expands across almost the entire second arena and delivers a lethal physical spell explosion. Atziri can be damaged during the sequence, so strong damage may end the fight before detonation, but the mechanic should not be described only as a hard DPS check. The far arena corners nearest the Beast provide a positional fallback when the safe area is visible and reachable.
Atziri does not use a separate tradable external Pinnacle key. Reaching her depends on Energised Crystals, Temple connections, the Architect and Royal Access progression, and a completed route to Atziri's Chamber. Her mechanical rank is relatively low, but a failed attempt can carry a large time cost because the Temple route must be rebuilt under its current destabilisation rules.
3. The Aberration
The Aberration ranks third because it creates more continuous spatial pressure than Atziri without reaching the later fights' number of overlapping systems. Current game data confirms physical mortar impacts, Verisium storm hits, leg stomps, Cold and Lightning beams, projectile patterns, and the large web sequence. The model's size can also hide ground information when the player stands directly beneath it.
Ranged and damage-over-time builds usually preserve better visibility while the boss leaps or shifts position. Melee should work from the flank, leave before large body movements complete, and treat the physical component as a real defence check. The 0.5.4 fix makes the arena Meteor Rain stop after the boss dies; it removes an incorrect post-kill danger but does not simplify the live battle before death.
Repeat access requires The Triskelion Reforged, created from the Shattered Triskelion through the current Expedition and Runeforging route. That makes blind practice more expensive than the mechanical rank alone suggests. Confirm physical mitigation, recovery after a non-lethal impact, and adequate floor visibility before converting another key.
4. The Bodach
The Bodach sits at the upper edge of the middle group. Its states are readable once learned, but the fight contains several punishments that make a blind attempt more dangerous than Atziri or The Aberration. The opening head-and-hands section uses remote fists, projectiles, physical impacts, persistent ground, and a head slam that cannot be solved by relying on dodge-roll avoidance alone.
The darkness corridor is a navigation check rather than ordinary boss uptime. Stay with the visible route, avoid the damaging and slowing ground, and do not sprint beyond the readable path. The final full-body state adds bombardments, teleporting melee attacks, and major meteor-style slams. The dedicated PoE 2 Bodach guide owns the complete access chain and attack-by-attack responses.
Mobile single-target builds perform well because the boss repeatedly commits to attacks and changes position. Slow melee should use short attack strings rather than remaining in range through the next cue. Repeat access consumes five Call of the Shadows at the Caer Tarth effigy, so learn the corridor, persistent ground, and slam timing in the unlimited-revival quest encounter before farming.
5. The Raven Trickster
Tangmazu begins the more stable upper half of the ranking. The Raven Trickster combines Cold shards and walls, Lightning strikes, Fire projectiles, physical pillar attacks, mirrors, refraction beams, and phase transitions. The challenge is not one isolated hit; it is identifying which angle and damage pattern is active while the presentation deliberately competes for attention.
Damage-over-time and minion builds can preserve output while tracking mirrors and projectiles, although allied effects can hide the exact ground cue that matters. Ranged characters should avoid backing into the arena boundary without an exit. Melee benefits from short commitment windows and should not chase every teleport immediately.
The access chain must also be described correctly. A Grand Mirror starts the Trial of Madness and the linked fog-bank progression; it is not a direct Tangmazu summon. At full Deliriousness, the quest Simulacrum becomes available and awards Raven's Reflection. Further Simulacrum completions provide repeatable Raven's Reflections, which are used at the broken mirror in the Withered Willow.
6. Xesht, We That Are One
Xesht ranks below only the two Arbiters in the default comparison. The fight layers Breachlord manifestations, tracking attacks, expanding ring pressure, Cold projectile patterns, and large hand slams. Later sequences can overlap, so spending every movement option on the first telegraph often creates the next death.
Access is also part of the practical challenge. A Breachstone reveals a Breach domain instead of opening Xesht directly. Progress through the domain and defeat It That Was Tul and It That Was Esh to obtain a Breachlord Sac, then bring it to the Dreamer. The Twisted Domain begins with a timed Breach that must be extended until the boss is reached. The PoE 2 Xesht guide covers that complete current route.
Xesht rewards a build that combines clear speed for the approach with sustained boss damage after arrival. Mixed elemental, physical, and Chaos threats justify broad defence rather than one resistance swap. Mid-range positioning helps preserve visibility without surrendering the arena edge, while melee should move laterally around committed slams instead of retreating along their line.
7. The Arbiter of Ash
The Arbiter of Ash ranks second hardest because it repeatedly replaces normal positioning with temporary arena rules. Flame Seeds create circles that protect against the explosion outside them. Cascading seed patterns and moving fire pressure demand precise pathing while the Arbiter continues attacking. Sword sequences add beams, projectile rings, Chilled Ground, Blackflame, and mixed physical and Fire danger.
The paired Cold and Chaos sphere interaction must be handled rather than ignored. Leaving a sphere active can empower the Arbiter's sword, while touching the spheres in a controlled order clears the resulting ground states. Blackflame can prevent Life and Energy Shield recovery, so a character that normally survives through rapid recovery may become much less durable after one sword hit.
The quest Burning Monolith is the correct learning arena. Repeat attempts require Ancient, Faded, and Weathered Crisis Fragments from three different Citadels. The 0.5.4 update reduced the Chaos damage bonus from the Chaos Sphere and shortened the relevant sphere-granted damage bonuses, but it did not remove the seed, safe-zone, or recovery checks that keep Ash near the top.
8. The Arbiter of Divinity
The Arbiter of Divinity remains the hardest current default Pinnacle. It was added in Content Update 0.5.0, not 0.5.4, and is the endpoint of the Fortress progression beyond the Arbiter of Ash. The encounter combines a long two-stage fight with physical spear attacks, substantial Lightning pressure, arena-wide patterns, Aspects of Divinity, and short safe damage windows.
In the second stage, Divine Power appears on pedestals near the arena edge. Standing on a pedestal long enough grants the temporary buff used to survive specific pressure and damage the otherwise protected Aspects. The mechanic is not an instant pickup, so routing to the pedestal too late can leave the player stationary during another attack. Long spear combinations also punish an early roll because later sweeps and lunges continue after the first apparent escape.
Apex readiness means dependable physical mitigation, capped build-appropriate elemental resistances with particular attention to Lightning, strong recovery, clear visual settings, and damage that functions in short windows. The full PoE 2 Arbiter of Divinity guide explains the Origin Spark, Origin Cradle, Origin Core, Aspects, and Divine Power sequence. Repeat access consumes both Origin components, giving a failed farm attempt one of the highest opportunity costs in the current endgame.
The Price of Failure
Mechanical rank and failure cost answer different questions. The first estimates how difficult the fight is to execute. The second determines whether an access item should be used for practice, sold, or held until the build improves. Market prices change, so the table compares access structure rather than inventing permanent currency values.
| Boss | Repeat access at risk | Practical error cost | Best risk control |
|---|---|---|---|
| Vessel of Kulemak | Kulemak's Invitation plus any chosen empowerment state | Variable | Secure the base kill before adding Lich power |
| Atziri | Temple route, Energised Crystals, Royal Access work, and rebuild time | High in time | Confirm the route and learn the late safe position |
| The Aberration | The Triskelion Reforged | High | Verify physical defence and floor visibility first |
| The Bodach | Five Call of the Shadows | High | Learn the darkness path and undodgeable slams in the quest arena |
| The Raven Trickster | Raven's Reflection backed by a Simulacrum completion | High | Use the quest fight to learn mirror and phase changes |
| Xesht | Breachlord Sac plus the timed Twisted Domain approach | High | Bring both clear speed and boss-sustainable recovery |
| Arbiter of Ash | Three different Crisis Fragments | Very high | Recognize every seed and sphere rule before repeating |
| Arbiter of Divinity | Origin Spark and Origin Cradle combined into an Origin Core | Very high | Learn Divine Power timing and long combinations first |
Under the current 0.5 structure, standard quest Pinnacle encounters are the deterministic learning route and allow unlimited revivals, while repeatable versions offer greater difficulty and normally allow two. Atziri follows her Temple-specific route and instance rules rather than the standard external-key structure. If access farming, gearing, or Atlas travel is the actual bottleneck, a contextual PoE 2 hourly farming service can be compared with self-progression only after the exact objective has been identified.
Bossing Profiles That Change the Order
The ranking is a baseline, not a promise that every archetype experiences the same order. Move a boss upward when its core mechanic directly attacks the character's weakest system. Move it downward only when the build preserves both safety and useful damage without relying on an unrealistic phase skip.
| Bossing profile | Likely easier encounters | Likely harder encounters | Required adjustment |
|---|---|---|---|
| High burst | Base Kulemak, Atziri, and shorter Aberration windows | Divinity if damage disappears between short openings | Save major output for the dangerous active state instead of opening immediately |
| Damage over time | Bodach, Tangmazu, Xesht, and both Arbiters | Any fight where setup requires several stationary casts | Refresh only enough to preserve pressure, then move |
| Minions or companions | Kulemak, Bodach, and repositioning bosses | Darkness, web, mirror, or seed cues hidden by allied effects | Reduce visual clutter and track the player model |
| Slow melee | Readable post-attack windows on Atziri and Bodach | Kulemak clutter, Aberration body coverage, Ash safe zones, and Divinity combinations | Use short attack strings and leave before the telegraph completes |
| Ranged attacks or casts | Aberration, Tangmazu, and Xesht from controlled mid-range | Atziri, Ash, or Divinity after retreating into the boundary | Circle through open space instead of backing away in one line |
| Defensive low damage | Early fights with stable positional solutions | Long Ash and Divinity cycles where every repetition adds risk | Improve sustained single-target output without removing recovery |
| SSF progression | Deterministic quest routes already unlocked | Repeat targets requiring several independent components | Rank access time separately from fight mechanics |
Recommended Progression Order
Start with the base Vessel of Kulemak. Move to Atziri when a usable Temple route is already available, or take The Aberration first if its quest access is ready and the character has stronger physical mitigation than late-arena confidence. The Aberration, Atziri, and The Bodach are close enough that deterministic access and build profile can reasonably change their local order.
Attempt The Raven Trickster after multi-element patterns remain readable without losing damage uptime. Challenge Xesht when the build combines clear speed for the timed approach with recovery for a longer boss fight. Reserve the Arbiter of Ash for a character that can obey changing seed and sphere rules, then approach the Arbiter of Divinity only after long combinations and phase-two Divine Power routing are understood.
Quest availability should override a theoretical one-place difference. A deterministic encounter with unlimited revivals is usually more valuable for learning than waiting for an unavailable boss that ranks slightly lower. Use quest entries to learn, protect tradable repeat keys, and never buy another entry as a substitute for fixing the same documented failure.
When to Stop and Upgrade
Stop spending access when the same failure repeats without producing new information. One death to an unseen transition is learning; repeated deaths to a normal hit, empty recovery, hidden ground, or an immobile rotation identify a specific build or settings problem.
- If one ordinary hit ends the attempt, repair the relevant resistance, mitigation layer, or effective pool.
- If the first hit is survived but the next pattern kills the character, improve recovery and resource stability.
- If the arena becomes unmanageable late, increase sustained damage or mobile uptime rather than only opening burst.
- If ground markers disappear beneath allied effects, reduce visual clutter before buying gear.
- If movement is unavailable after the damage rotation, separate its resource from the main skill cost.
- If quest attempts are stable but repeat runs fail, account for the repeat version's greater difficulty and lower revival allowance.
Change one relevant variable before the next attempt. Replacing several items, controls, and skill links at once makes it impossible to know which change solved or created the problem.
How This Live Ranking Should Change
The order must be reviewed after any patch that changes boss damage, resistances, telegraphs, arena behaviour, revival rules, access items, or major build balance. A bug fix can matter even without a numerical nerf: removing a post-death Meteor Rain, correcting a Divine Power cue, or restoring a missing effect changes the encounter's practical fairness.
Economy changes affect the price-of-failure table but do not automatically change mechanical difficulty. A cheaper Raven's Reflection does not simplify Tangmazu, and expensive Call of the Shadows do not make The Bodach's slams mechanically harder. New live evidence should change the order only when it demonstrates a repeatable encounter or archetype effect rather than one exceptional kill.
Final Verdict
The most defensible current default progression is base Vessel of Kulemak, Atziri, The Aberration, The Bodach, The Raven Trickster, Xesht, the Arbiter of Ash, and the Arbiter of Divinity. Treat Atziri, The Aberration, and The Bodach as a close middle group rather than pretending their exact order is universal. Full-strength Kulemak is a separate variable challenge, failure cost is not the same as mechanical difficulty, and each build profile can move an encounter several places. Learn with deterministic quest access, protect repeat keys, and approach the two Arbiters only after the character can preserve defence, recovery, movement, and damage through the full mechanic set.


