




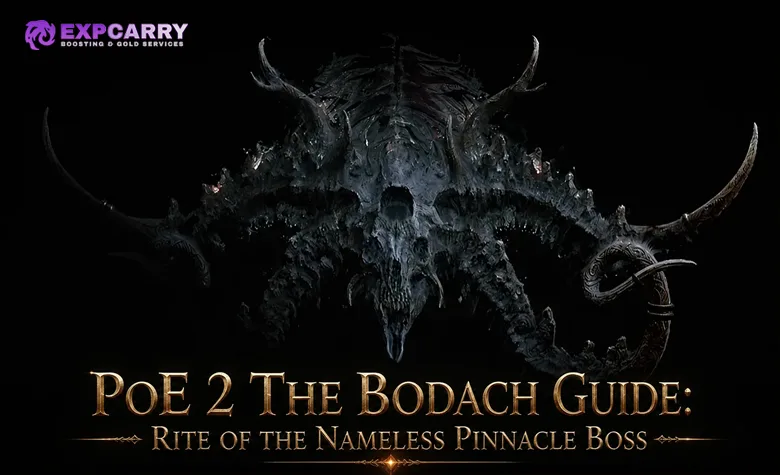
The Bodach is the current Ritual Pinnacle Boss in Path of Exile 2. The encounter waits beneath Caer Tarth at the end of the Legacy of the Maji storyline and tests three skills in sequence: controlled damage against a partly hidden target, precise movement through lethal darkness, and disciplined positioning against the boss's full form. This dedicated boss article sits alongside the wider Path of Exile 2 guide collection and focuses on the key, readiness, phases, dangerous mechanics, rewards, and repeat-farming decision.
The guide was checked against the live Path of Exile 2 0.5.4f patch notes. That update does not list a Bodach change, so the encounter still follows the rules established during the 0.5 endgame rework. First-time and repeat access are different: the quest route uses the Head of the King and five distinct effigy pieces, while repeat encounters consume five tradeable Call of the Shadows. The quest arena permits unlimited revivals; the repeatable Pinnacle version permits two.
The Bodach Quick Answer
Earn An Audience with the King through Ritual Tribute, defeat the King in the Mists, take the Head of the King to Caer Tarth, complete the five-map Rite of the Nameless, and attach all five quest pieces to the effigy. The fight has two combat stages separated by a mandatory darkness traversal. Stay out of black degeneration ground, leave the major slam circle instead of rolling through its center, and follow the illuminated path during the intermission.
| Question | Current answer |
|---|---|
| Where is The Bodach? | In the Pinnacle encounter reached from the effigy at Caer Tarth. |
| What opens the first fight? | The Legacy of the Maji quest route, ending with five distinct effigy pieces from the Rite of the Nameless. |
| What opens repeat fights? | Five Call of the Shadows placed on the completed Caer Tarth effigy. |
| How is the encounter structured? | Hidden head and hands, darkness traversal, then the revealed full body. |
| What is the main readiness test? | Mobile single-target damage, physical mitigation, useful chaos resistance, independent recovery, and clear visual recognition. |
| What does the quest clear do? | Completes Legacy of the Maji and unlocks Ritual Atlas passives gated by defeating the Ritual Pinnacle Boss. |
How to Unlock The Bodach
The initial route is longer than a normal Pinnacle key because it passes through the King in the Mists and a progressive five-map Ritual gauntlet. The official Return of the Ancients 0.5.0 notes establish the important rules: unspent Tribute can be offered toward an Audience, the King drops the Head of the King, the Head begins the Rite, and each selected Rite map awards one element needed for Pinnacle access.
First-time quest access
Use the following order for the deterministic quest encounter. Call of the Shadows is not required for this first route, and An Audience with the King opens the prerequisite boss rather than The Bodach itself.
- Reach Caer Tarth on the Atlas and speak with Aoife to advance Legacy of the Maji.
- Complete Ritual encounters and offer unspent Tribute until An Audience with the King is earned.
- Use the Audience to reveal the Crux of Nothingness on the Atlas.
- Enter the Crux, defeat the King in the Mists, and collect both the Head of the King and Aoife's body for the quest.
- Return to Caer Tarth and place the Head on the incomplete effigy.
- Select the five connected maps offered for the Rite of the Nameless.
- Complete the required Rituals and collect Tangled Torso, Mossy Arm, Frayed Cloth, Brittle Arm, and Ragged Cloth.
- Attach all five pieces to the effigy, activate it, and perform the Rite to enter the Pinnacle encounter.
The prerequisite encounter has its own maze, phases, and reward rules. Players who are blocked before obtaining the Head should use the separate PoE 2 King in the Mists guide instead of applying Bodach tactics to the Crux of Nothingness.
The five-map Rite of the Nameless
The selected maps form one escalating route. Monsters from previous Rituals return in later encounters, map bosses appear in the final Ritual of their map, and every map after the first can carry extra modifiers that affect difficulty and rewards. For the first clear, choose the safest available connections rather than the most lucrative combination. The practical threat is cumulative: a greedy early choice remains relevant when more monsters and bosses are added later in the Rite.
The wider PoE 2 Ritual guide covers Tribute management, altar routing, progressive map choices, and reward decisions. For Bodach access, the practical requirement is simpler: finish all five selected maps, secure the five different quest parts, and return every component to the Caer Tarth effigy.
Repeat access with Call of the Shadows
After completing the storyline, attach five copies of Call of the Shadows to the same effigy for another Bodach encounter. These fragments can appear at final Rite altars, can be traded, and were added to the Currency Exchange in the official 0.5.1 patch. Repeat access opens the harder farming version with two revivals, so value five fragments as one complete entry rather than as disposable practice items.
The broader PoE 2 Pinnacle Boss Access guide compares the Bodach route with other current quest and repeat keys. The distinction that matters here is that the five unique effigy pieces belong to the first quest clear, whereas five identical Call of the Shadows fund each later attempt.
Bodach Readiness Check
A character is ready when it can deal meaningful damage without standing still, survive a recoverable hit, and restore resources without depending on normal-monster kills. There is no honest universal Life, Energy Shield, or DPS threshold for every archetype. Test the build in the unlimited-revival quest fight and judge it by actual damage uptime, recovery, and the number of mechanics that must be tanked.
| Readiness area | What to verify | Why it matters |
|---|---|---|
| Single-target damage | The main skill damages one mobile target without walls, pack explosions, or kill-based setup. | The boss repeatedly disappears, repositions, and forces movement. |
| Physical mitigation | The build uses Armour, Deflection, Guard, block where applicable, or another dependable layer for ordinary physical hits. | Many direct attacks, projectile impacts, and ground hazards deal physical damage, although the major slams still require movement. |
| Chaos defence | Chaos Resistance is not neglected and the effective pool can survive long enough to leave black ground. | The head slam creates severe chaos degeneration. |
| Elemental baseline | Elemental resistances meet the build's endgame cap unless it uses a deliberate alternative defence model. | An unrelated resistance weakness should not be carried into a Pinnacle attempt. |
| Recovery | Life, Energy Shield, mana, and defensive resources recover during a boss fight without kills. | The arena does not provide a reliable pack-based refill loop. |
| Mobility | Sprint, dodge roll, and any movement skill remain available after the damage rotation. | The darkness route and major slams punish hesitation or an empty movement resource. |
| Visibility | Ground circles, black pools, remote hands, and the illuminated path remain visible through allied effects. | Visual clutter can hide the exact cues that prevent deaths. |
If the character fails several rows, fix the underlying build before spending repeat fragments. A current PoE 2 build preparation option can be used as a contextual comparison for gearing and skill setup, but the real target remains mechanical: the character must keep moving without losing all damage, recovery, or control.
The Bodach Fight Structure
The encounter is most usefully understood as two combat phases with one non-combat transition. Treating the darkness traversal as another damage phase encourages the wrong response because attacking there provides no benefit. The player's objective changes completely at each state.
| Encounter state | Primary task | Main failure risk |
|---|---|---|
| Combat phase one | Damage the exposed head while reading attacks from the head and remote hands. | Standing in black ground, losing the repositioned target, or committing during a slam. |
| Darkness intermission | Follow the path revealed by the green guide and avoid hostile corridor hazards. | Running ahead of the safe route, cutting through darkness, or following the wrong orb. |
| Combat phase two | Fight the revealed body from a controlled flank and punish completed sequences. | Rolling inside the major impact, stopping during a multihit pattern, or becoming trapped by persistent ground. |
Keep the camera centered on the active boss part whenever possible. The Bodach uses darkness, size, and remote limbs to make delayed attacks feel disconnected from their source. If a hand disappears, assume that its next appearance is an attack cue rather than a safe damage window.
Phase One: Head and Hands
The Bodach begins with its full body hidden. The exposed head, mouth, and enormous remote hands act as separate visual threats. The safest general position is medium range from the head, with enough room to see a hand rise and enough distance to move dangerous ground toward an edge.
| Visual cue | What happens | Correct response |
|---|---|---|
| Raised remote hand | A hand strikes the targeted area with a physical area slam. | Walk out early or roll across the outer edge after the target commits. Do not remain for a second hand. |
| Head pulls back before impact | The head crashes down with an exceptionally heavy hit and leaves long-lasting black chaos degeneration ground. | Leave the full impact area before the slam. Do not rely on block or a last-second dodge roll. |
| Marked ground beneath the character | A delayed physical geyser or projectile impact lands at the marked position. | Keep moving until the markers resolve, then return from clean ground. |
| Hands release circular projectiles | Several projectiles spread around the active limb and close nearby lanes. | Read the gaps, strafe into the widest lane, and avoid repeated panic rolls in one direction. |
| Rubble launches in chained clusters | Physical rubble projectiles create overlapping impact lines. | Move across the spread rather than retreating along its travel direction. |
| Head disappears and repositions | The next line or projectile sequence begins from a different angle. | Locate the head before attacking and move perpendicular to the incoming line. |
| Vacuum channel | The boss pulls the character toward a physical follow-up and can leave persistent physical damage ground. | Sprint outward at an angle and preserve a roll for the follow-up impact. |
The black ground left by the head slam is a space-management mechanic as much as a damage threat. Repeatedly baiting it through the center removes future escape lanes. Stand near the outer third of the usable arena before the cue, move inward after the impact, and rotate toward another edge only when the previous area becomes unsafe.
Reliable damage windows follow completed patterns: after a remote hand misses, after the marked impacts finish, and after the head completes a repositioned projectile sequence. Short bursts are more valuable than a long rotation that must be cancelled. Release target lock if it pulls the character toward a disappearing head or across damaging ground.
Darkness Intermission: Follow the Light
When the first combat stage ends, stop attacking and look for the moving green wisps and the grass path they reveal. The surrounding darkness deals rapid damage, while hostile orbs, moth bursts, and corridor bursts can strike along the route. Patch 0.5.1 specifically fixed the phase-change orbs so they deal damage, making older recordings that ignore them unreliable.
- Stop the damage rotation when the boss becomes unavailable.
- Wait for the green guide and identify the ground it illuminates.
- Enter the route behind the guide instead of sprinting into unrevealed darkness.
- Stay near the center of the safe strip and adjust around hostile objects without leaving its boundary.
- Use ordinary movement for small corrections and preserve dodge roll for a hazard blocking the path.
- At the endpoint, remain in the protected area while the automatic return to the arena completes.
The guiding light and floating hazards are not interchangeable. Follow the revealed ground rather than every moving orb. Fast characters can outrun the illumination and enter a section that is still lethal. Minion swarms, transformations, and bright effects should be controlled if they cover the route's edges.
If the path is lost, return to the last clearly illuminated segment instead of cutting directly through darkness toward the destination. A short dark screen at the endpoint belongs to the transition. If the automatic transport genuinely fails, use the quest revival and retry rather than searching for an invisible alternate route.
Phase Two: The Full Bodach
The final combat stage reveals the full body and replaces the deceptive head-and-hand presentation with larger physical attacks, teleports, bombardments, claw sequences, and persistent ground. The model becomes easier to track, but each commitment carries more danger. Begin at medium range from a flank and treat every large circle as a command to leave.
| Visual cue | Threat | Positioning answer |
|---|---|---|
| Large impact marker around Viridi's Tree or the target area | The Bodach performs a major slam or meteor impact whose center is exceptionally dangerous. | Move outside the full marked area before impact and return only during recovery. |
| Red mark followed by a disappearing boss or hand | A teleporting melee sequence attacks from changing angles. | Keep moving until the entire sequence ends and turn the camera with each marker. |
| High arcing projectile | A physical bombardment lands, followed by secondary impacts. | Leave the first marker and continue moving after the initial explosion. |
| Both arms prepare a forward strike | A forward claw attack continues into a backward or outward swipe. | Move to the side instead of directly behind the boss and wait for the backswing. |
| Boss emerges close to the character | A sudden reposition creates an immediate melee threat. | Roll away from the model, reacquire the target, and rebuild spacing. |
| Bramble ground remains | Persistent physical damage removes usable arena space. | Lead the next attack toward clean ground and rotate around the hazard. |
The slam or meteor impact is the defining readiness check. Patch 0.5.1 improved the telegraph for The Bodach slamming Viridi's Tree, and current encounter data marks the major impact as unable to be avoided by dodge roll, evasion, or block. Begin leaving as soon as the warning appears. Early recognition and movement speed matter more than precise button timing inside the danger zone.
Do not return after avoiding only the first part of an attack. Bombardment creates follow-up impacts, the teleport sequence changes angle, and the claw pattern can threaten space behind the body. The true damage window begins when the complete animation chain finishes.
Positioning by Build Archetype
The same mechanics create different uptime problems for melee, ranged, minion, and delayed-damage builds. The safest position depends on commitment time rather than one universal arena location. Every archetype should preserve visibility and a clean escape lane before beginning its full rotation.
Melee and short-range builds
Attack from either flank instead of directly in front of the head or body. Use compact bursts after a slam, then prepare to move. Chasing behind the revealed body can place the character inside the backward swipe, so cross toward the side and wait for the complete motion.
Ranged attackers and casters
Medium range keeps the target visible while leaving room to cross beams and projectiles. Extreme range can hide a reposition cue at the edge of the screen or make target lock pull the character through unsafe ground. Place persistent effects after the boss commits to an attack rather than before a teleport.
Minion and companion builds
Independent damage remains valuable while the player moves, but allied models can hide markers and the illuminated route. Reduce cosmetic clutter, keep moving even while minions remain engaged, and avoid depending on effects that require frequent kills. Test companion survivability during the quest encounter.
Damage-over-time and channeling builds
Damage-over-time characters can refresh an effect and move through the next mechanic. Channeling, combo, and stationary ramp setups should use the post-slam and post-teleport windows. If the main skill has a long lock, shorten the rotation rather than gambling the entire attempt for one additional damage cycle.
How to Recover After a Mistake
A recoverable hit becomes a death when the player resumes attacking from compromised ground. Use the same recovery order every time: create space, check the floor, identify the next cue, restore resources, and only then resume damage.
- After a normal hit: move toward the widest clean area, recover, and watch the boss before restarting the rotation.
- After touching black ground: leave the pool before using recovery; remaining inside can overwhelm the flask or regeneration.
- After missing a teleport cue: keep moving until the entire sequence ends rather than attacking the first reappearance.
- After losing target lock: release the input, locate the active boss part, and reacquire it from safe ground.
- After spending the movement skill: use Sprint and ordinary movement until the resource or cooldown returns.
- After dying in the quest version: identify the exact failed cue and use the unlimited revival to practise it.
- After dying in a repeat encounter: count the remaining revivals and correct visibility, controls, or setup before re-entering.
The Caer Tarth quest arena does not grant or remove experience and permits unlimited revivals. The repeatable version is protected by only two revivals, so its meaningful cost is the five-fragment entry. Learn the slam timings and darkness route in the quest encounter instead of treating Call of the Shadows sets as practice material.
The Bodach Rewards and Drops
The first quest clear completes Legacy of the Maji and satisfies the defeat requirement on Ritual Atlas notables such as Invigorated Sacrifices, Spreading Darkness, Magnanimous Offerings, and Mysterious Rites. Ritual Atlas Passive Skill Points come from separate Ritualistic Books of Knowledge, each granting two points; the Bodach quest clear is a progression gate rather than one six-point book. Bodach kills target a dedicated pool of equipment Uniques, Lineage Supports, and Ancient Augments. No official source provides permanent drop rates, and current market value depends on rolls, build demand, and the state of the economy.
| Reward | Type | Practical identity |
|---|---|---|
| Vestige of Darkness | Unique Tenebrous Crown | An Armour and Energy Shield helmet that connects physical Hit damage with Chill and Freeze and causes The Bodach to haunt the wearer's Presence. |
| Forgotten Warden | Unique Primal Markings | An Evasion and Energy Shield body armour built around Spirit Vessel, companions, and Deflection protection. |
| Liminal Coil | Unique Twisted Wand | Grants Coiling Bolts and supports a curse-oriented setup that gains additional physical and chaos Spell Hit damage. |
| Periphery | Unique Heartwood Shortbow | Grants Azmerian Swarms and combines elemental Attack damage with cross-element ailment contribution. |
| Sylvan's Effigy | Unique Stoic Sceptre | Grants Discipline and Azmerian Wolf, increases Spirit, and supports companion or marked-target setups. |
| Catha's Brilliance | Lineage Support | Causes supported Companions to blind and ignite nearby enemies, with Ignite based on Minion maximum Life. |
| Mórrigan's Insight | Lineage Support | Turns Freeze consumption into a damage payoff and triggers Nature's Exchange for Guard and Cold Thorns. |
| Carved Cunning | Ancient Augment | A slot-dependent Bodach carving with different normal and Bonded effects. |
| Carved Majesty | Ancient Augment | Provides companion and Spirit-oriented outcomes depending on equipment placement. |
| Carved Mischief | Ancient Augment | Offers offensive or defensive effects determined by the target slot and Bonded state. |
| Carved Tenacity | Ancient Augment | Provides movement and durability-oriented options whose result depends on placement. |
Each carving is limited to one Ancient Augment and changes effect according to the equipment slot; a Bonded item uses the separate Bonded line. Once socketed, the carving cannot be retrieved, but it can be replaced by another Augment. Read the current tooltip for the chosen slot before committing a valuable item. When pricing Uniques and Lineage Supports, compare actual modifiers and rolls through the methods in the PoE 2 trading guide instead of assuming that every copy of a named drop has equal value.
Repeat Farming Strategy
Repeat farming begins with one economic question: is the expected return from a successful Bodach kill worth five Call of the Shadows at the current market price? The answer changes with fragment supply, Unique demand, Lineage Support demand, carving value, clear time, and the character's failure rate.
- Complete the quest version and learn both combat stages before buying repeat sets.
- Price five Call of the Shadows as one total entry cost.
- Check current listings for all five equipment Uniques, both Lineage Supports, and the four carvings.
- Compare meaningful modifier rolls instead of only matching item names.
- Run a small measured batch and record deaths, clear time, and realised sale value.
- Stop or switch content if two-revival failures or slow sales erase the expected margin.
Self-farming fragments through the Rite produces additional Ritual rewards but adds five-map setup time and progression risk. Buying fragments saves that preparation while exposing every attempt to market swings. If time is the main bottleneck, a contextual PoE 2 hourly farming service can be compared with self-farming, but the requested objective should be defined precisely as Ritual progression, Call of the Shadows farming, gearing, or boss attempts.
Common Bodach Failures
Most failed attempts come from using the wrong access item, treating the darkness route as a race, or applying normal dodge habits to attacks that demand complete repositioning. Each error has a direct correction.
| Failure | Why it fails | Correction |
|---|---|---|
| Using An Audience with the King as Bodach access | The Audience reveals the King in the Mists encounter, which is only a prerequisite. | Defeat the King, use the Head at Caer Tarth, and complete the Rite. |
| Trying to reuse the Head for repeat fights | The Head starts the quest Rite, while repeat access uses another item. | Use five repeat fragments at the completed Caer Tarth effigy. |
| Choosing the greediest Rite maps | Accumulated monsters and modifiers can break the access chain before the Pinnacle fight. | Choose survivable connections for progression and add reward risk after consistent clears. |
| Rolling inside the large body-slam circle | The impact is not a normal evade, block, or roll-through check. | Leave the entire circle when its telegraph begins. |
| Following every floating light | Some transition objects are hostile hazards rather than guidance. | Follow the illuminated ground created by the green guide. |
| Outrunning the revealed path | Unrevealed darkness remains lethal even for fast builds. | Stay behind the guide and near the center of the safe strip. |
| Stopping after the first bombardment | Secondary impacts punish an early return. | Continue moving until the full projectile sequence ends. |
| Relying on on-kill recovery | The fight does not provide a stable supply of ordinary enemies. | Use boss-sustainable Life, Energy Shield, and mana recovery. |
| Learning on repeat access | Only two revivals protect the tradeable encounter. | Practise every transition with unlimited quest revivals. |
Pre-Entry Checklist
Complete this checklist before activating the effigy, especially when five tradeable fragments are attached. A short setup review prevents more losses than a small increase in stationary tooltip damage.
- Confirm whether the instance is the unlimited-revival quest fight or the two-revival repeat version.
- Verify that all five different quest pieces or all five Call of the Shadows are present.
- Review elemental resistances, physical mitigation, and Chaos Resistance.
- Equip recovery that works without killing normal monsters.
- Test Sprint, dodge roll, movement skill, and target-lock behaviour.
- Reduce visual effects that hide black ground, circles, hands, or the illuminated route.
- Use a single-target setup rather than a mapping-only configuration.
- Confirm that mana, Spirit, Guard, charges, and other required resources remain stable.
- Remember the slam rule: leave the circle instead of rolling at its center.
- Remember the darkness rule: follow the revealed ground without racing ahead.
Final Verdict
The Bodach is a mechanics-first Pinnacle encounter whose real cost begins before the arena. Complete the first route through the King in the Mists and the five-map Rite, use unlimited quest revivals to learn every pattern, and save Call of the Shadows sets for consistent farming. In phase one, preserve clean ground and track the hidden hands. During the intermission, follow the illuminated route without outrunning it. In phase two, leave the major slam circle and wait for complete attack sequences before committing damage. A build with reliable movement, physical and chaos defence, independent recovery, and clear visual cues can turn a confusing darkness encounter into a repeatable boss farm.


