
Amirdrassil, The Dream's Hope - Smolderon Boss Tactics & Strategies
Embark on a thrilling adventure in the mystical world of Amirdrassil, The Dream's Hope, where the formidable Smolderon, the Fiery CEO of Firelands, awaits. This comprehensive guide is meticulously crafted to arm you with the essential tactics and strategies needed to conquer this blazing adversary and emerge victorious.
Smolderon, a towering entity engulfed in flames, is a stark reminder of the perils that lie in playing with fire. However, for those brave enough to face the heat and master the mechanics, the rewards are monumental. This guide serves as your ultimate companion through the inferno, providing in-depth insights and strategies to navigate the battle and claim your victory.
Learn to dance with the flames, mastering the art of dodging, soaking, and striking with precision. The glory you seek and the numbers you desire are within reach as you unravel the secrets of Smolderon’s lair. Prepare for a challenge, gear up, and let this guide lead you through the fiery depths to triumph.
For many players, the allure of conquering these challenges is irresistible, but the path to victory can be steep. That's where we come in. We're proud to introduce our Amirdrassil Raid Boosting Service, a premium offering that partners you with the top guild in WoW Dragonflight 10.2. With their unmatched prowess and our commitment to excellence, you're set for an unparalleled raiding experience.
Smolderon Fight Specifications
When preparing to face a formidable foe like Smolderon, understanding the fight's specifications is crucial. These specifications not only provide a blueprint for the battle but also set the stage for the strategies and tactics that will be employed. Let's delve deeper into what these specifications entail:
Style:
The nature of the fight is a Single Target battle. This means that the entire raid's focus will be on Smolderon, without the distraction of additional enemies or adds. It's a test of the team's ability to concentrate firepower and coordination on one primary target.
Recommended Setup:
- Tanks (2): Essential for managing aggro and ensuring that the boss's attention is diverted from more vulnerable raid members. Their role is pivotal in controlling the pace and flow of the battle.
- Healers (4): Tasked with the vital job of keeping everyone alive. Given Smolderon's fiery attacks, the healers will need to be on their toes, ensuring that health bars are topped up and that any debuffs are quickly dispelled.
- DPS (14): The damage dealers of the group. Their primary objective is to bring down Smolderon's health as rapidly as possible while also adhering to mechanics that prevent unnecessary damage or deaths.
Defensive Utilities:
These are special abilities that can mitigate the damage dealt by Smolderon. AMZ, Barrier, Darkness, and Spirit Link are some of the key utilities that can be employed to reduce incoming damage, especially during the boss's more potent attacks.
Mobility Utilities:
Given the dynamic nature of the fight, movement is key. Speed-Totem, Roar, Timer Spiral, and Gateway are utilities that enhance the raid's mobility, allowing them to quickly reposition, dodge attacks, or get to safety.
Hero/Lust Usage:
This refers to the optimal time to use powerful raid-wide buffs that significantly boost damage output and healing. For Smolderon, it's recommended to use these during the last intermission, specifically when the boss is at around 30% health. This strategic use can be the difference between victory and defeat.
In conclusion, understanding the fight specifications is the first step towards crafting a winning strategy against Smolderon. It provides a framework that guides the raid's composition, positioning, and ability usage, ensuring that the team is well-prepared for the fiery challenges ahead.
Smolderon Mechanics Guide
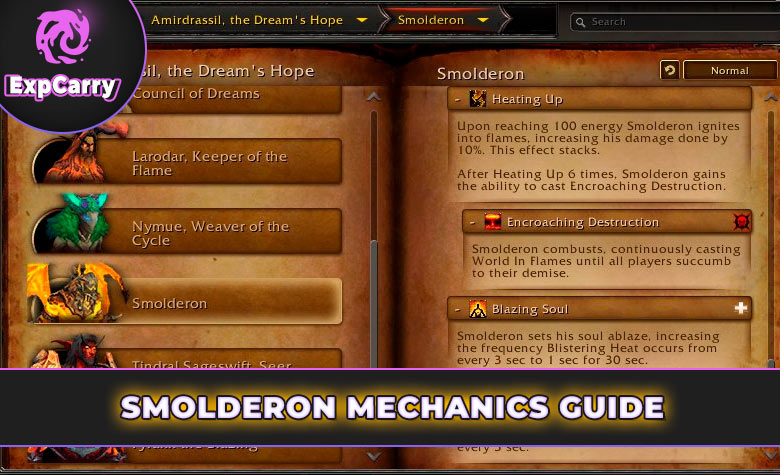
The battle against Smolderon is not just about brute force; it's a dance of intricate mechanics that require precision, timing, and coordination. Understanding these core mechanics is paramount to navigating the fight successfully. Let's delve deeper into each of these mechanics and their implications:
- Description: This multifaceted ability is central to the fight. The tank is marked with a circle, necessitating players without the Overheated debuff to soak the impact.
- Implications: Proper soaking ensures the raid doesn't take excessive damage. However, the challenge lies in managing the Overheated debuff, which prevents certain players from soaking. Coordination is key to ensure the right players are in position.
- Counterplay: Players need to be vigilant about their debuffs and communicate effectively. Mismanagement can lead to Smolderon gaining a significant damage buff, making the fight considerably harder.
- Description: A direct consequence of the Brand of Damnation, this debuff targets the tank, culminating in an explosive finale.
- Implications: The explosion's damage decreases with distance, so positioning becomes crucial.
- Counterplay: The affected tank must be quick on their feet, distancing themselves from the raid to minimize damage. Healers should be prepared to top off the tank's health post-explosion.
- Description: This mechanic targets half the raid simultaneously with Brand of Damnation. Affected players must spread out to prevent collateral damage.
- Implications: The ensuing fire tornadoes can wreak havoc if not managed properly.
- Counterplay: Spatial awareness is crucial. Players must ensure they're not too close to allies when the debuff expires to prevent unnecessary damage.
- Description: Randomly appearing swirls that pose a threat to the raid.
- Implications: These geysers not only deal damage but also leave behind puddles, restricting movement and potentially cornering players.
- Counterplay: Stacking up can bait these geysers, ensuring they spawn in predictable locations. This tactic keeps the battlefield relatively clean and navigable.
- Description: A relentless DoT that intensifies as the fight progresses.
- Implications: As the fight drags on, this mechanic can strain the healers, especially post intermissions when its intensity spikes.
- Counterplay: Healers must monitor affected players closely, ensuring they're topped off. Using cooldowns post intermission can help mitigate the increased damage.
In essence, the core mechanics of the Smolderon fight are a test of the raid's adaptability, coordination, and communication. Each mechanic interweaves with the others, creating a complex tapestry of challenges. However, with a clear understanding and the right strategies, these challenges can be overcome, leading the raid to victory.
Smolderon Boss Strategy Guide
Facing Smolderon is not just a test of strength, but a test of wit, coordination, and strategic planning. The strategy employed can make the difference between a triumphant victory and a crushing defeat. Let's delve deeper into the intricacies of the strategy required to conquer this fiery foe:
Positioning:
- Importance: The initial positioning sets the tone for the entire fight. Being close to the room's edge minimizes the risk of being cornered by mechanics like Lava Geysers.
- Tips: Regularly communicate with the raid to ensure everyone is aligned. Tanks should be vigilant about Smolderon's position, ensuring he remains near the edge.
Overheated and Brand of Damnation Combo:
- Importance: This combo is a significant damage source and can easily lead to player deaths if mishandled.
- Tips: Clear communication is key. Players should announce when they're affected by Overheated, allowing others to adjust. Using markers or designated areas can help streamline positioning.
Orb Management:
- Importance: The orbs not only boost player performance but also pose a risk if they reach Smolderon.
- Tips: Assign specific players or groups to certain orb zones to ensure efficient collection. Healers should be ready to top off players collecting multiple orbs.
Dance of Evasion:
- Importance: The shifting safe spots during the intermission are a test of agility and reaction time.
- Tips: Utilize mobility-enhancing abilities and items. Pre-planning routes and using tools like warlock gateways can help players navigate this phase efficiently.
Returning to Phase 1: The Heat Intensifies
- Importance: As the fight progresses, Smolderon's damage increases, making mechanics even more lethal.
- Tips: Stay vigilant and stick to the strategy. Adjustments may be needed based on the raid's health and Smolderon's damage buffs. Healers should prioritize keeping the raid topped off, and DPS should focus on maximizing damage output.
Endgame Considerations:
- Importance: As Smolderon's health dwindles, the temptation to rush the kill grows. However, this phase can be the most treacherous.
- Tips: Consider the raid's overall health and Smolderon's buffs. Sometimes, it might be strategic to skip certain mechanics to secure the kill. Tanks and healers should coordinate closely, ensuring the tank survives Smolderon's powerful blows.
In conclusion, the strategy against Smolderon is a blend of preparation, communication, and adaptability. Each phase presents its challenges, but with a well-thought-out approach, the raid can navigate the fiery maze and emerge victorious against this formidable adversary.
Smolderon Boss Conclusion
Facing Smolderon is not just a battle; it's an experience, a journey through a labyrinth of flames, tactics, and teamwork. As with any significant challenge in the World of Warcraft, the true essence of the encounter lies not just in the victory but in the lessons learned, the strategies devised, and the bonds forged among the raid members.
Understanding Smolderon:
At its core, the Smolderon encounter is a testament to the game's ability to craft intricate and memorable boss fights. It's not just about the mechanics or the loot but the story it tells—a fiery titan, a force of nature, challenging adventurers to bring their best or be consumed by the flames.
The Role of Strategy:
While raw power and gear play a role, the Smolderon fight underscores the importance of strategy. It's a puzzle, a dance of fire and fury, where every move, every decision, has consequences. The beauty of such encounters is that they push players to think, adapt, and overcome, fostering a sense of achievement that goes beyond mere victory.
Teamwork as the Cornerstone:
No player, no matter how skilled or geared, can face Smolderon alone. The encounter is a reminder of the importance of teamwork, communication, and trust. Every tank, healer, and DPS plays a pivotal role, and their synergy is the key to overcoming the inferno. It's a celebration of the MMO genre's core tenet: collaboration.
Looking Ahead:
As players emerge victorious from the fiery depths, the Smolderon encounter serves as both a culmination and a beginning. It's a stepping stone to even greater challenges, a benchmark of skill and strategy. But more than that, it's a memory, a story to be shared and recounted, a testament to the spirit of adventure that drives every World of Warcraft player.
In the grand tapestry of World of Warcraft's rich history, the battle against Smolderon will undoubtedly find its place as one of the standout encounters. It's a reminder of the game's enduring appeal, its ability to craft moments of challenge, triumph, and camaraderie. As the ashes settle and players move on to new adventures, the echoes of the battle, the lessons learned, and the friendships forged in the heart of the Firelands will remain, burning bright for years to come.


