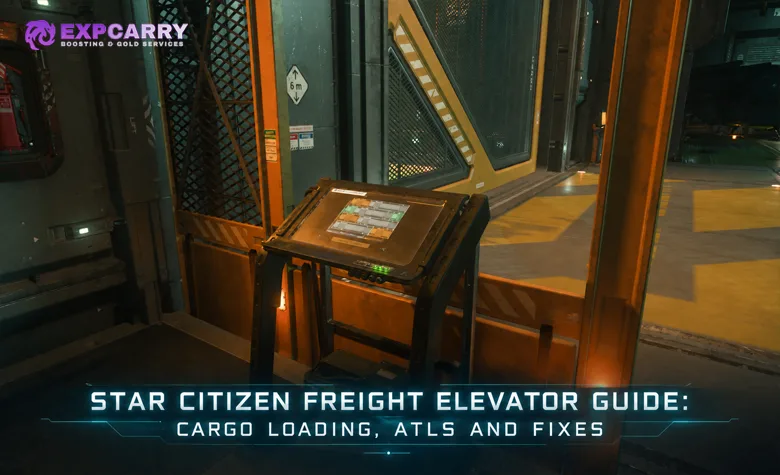
A Star Citizen freight elevator is the bridge between virtual location storage and physical cargo. For a normal hauling job, the working loop is simple in principle: move the contract boxes from the pickup warehouse to the elevator in Freight Manager, raise the platform, tractor the boxes into the ship and snap them to its cargo grid, fly to the destination, unload the correct boxes onto the destination freight elevator and snap them to its grid, send the cargo down, review the submission screen, and confirm the delivery in Freight Manager. The difficulty comes from crate size, ship access, tractor-beam positioning, and the fact that freight elevators can still fail in several different ways.
This Star Citizen freight elevator guide focuses on that physical cargo loop in Alpha 4.10 LIVE. It covers manual loading, ATLS use, standard container sizes, contract delivery, and safe troubleshooting when a freight elevator is not working. Commodity routes, buy prices, sell prices, and profit calculations are intentionally left to our Star Citizen trading guide, so this page can stay focused on getting cargo from storage to the ship and back again.
How the Freight Elevator Cargo Loop Works
The easiest way to understand freight elevators is to separate virtual storage from physical cargo. A warehouse can contain mission boxes, purchased commodities, personal storage containers, and other eligible items without those objects existing on the hangar floor. Freight Manager is the interface that assigns selected items to the elevator platform. Raising the platform creates the physical crates that you can move with a tractor beam.
For hauling contracts, the important distinction is that the contract cargo belongs to that mission. A box of the same commodity acquired somewhere else is not automatically a substitute. Before touching the elevator, read the contract again and confirm the pickup location, delivery location, total SCU or container count, and whether the job has more than one origin or destination.
- Accept and verify the contract. Check every pickup and delivery marker before choosing a ship.
- Travel to the correct pickup location. Use the freight elevator associated with the location named by the contract.
- Open Freight Manager. Make sure the freight elevator is in the correct transfer state, then locate the mission cargo in the warehouse inventory.
- Assign cargo to the platform. Move only the amount you can safely load, then raise the elevator.
- Load the ship. Tractor each container from the elevator to the ship and snap it to a valid cargo grid whenever the ship provides one.
- Fly to the destination. Keep the mission active and verify the destination marker before unloading.
- Unload onto the destination elevator. Put the correct mission boxes on the platform and snap them cleanly to the freight-elevator grid so the terminal can recognize and submit them.
- Send the platform down and submit the delivery. Review the Freight Manager submission screen, check the recognized and missing cargo, and click Confirm only when the required delivery is correct.
The official Alpha 4.10 LIVE Hotfix Central is the best place to check whether CIG has pushed a new server-side or client hotfix when cargo behavior suddenly changes. Alpha systems can change without making an older workaround useful again.
Freight Manager: Moving Cargo From Warehouse to Platform
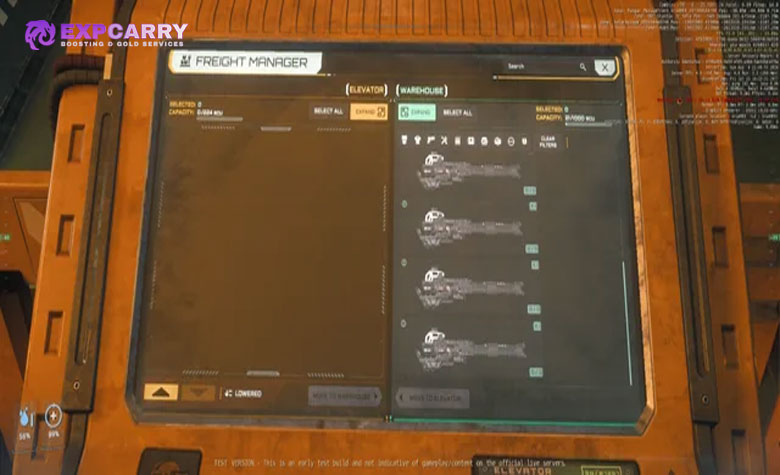
Freight Manager is where the physical cargo job begins. The interface exposes the location's stored inventory and the freight-elevator platform as separate states. Select the cargo you need, move it to the platform allocation, and then raise the elevator. When the transfer works, the selected containers appear physically on the platform and can be moved into the ship.
For a large contract, do not automatically place the entire warehouse batch on the elevator. First decide how much your ship can carry and how much room the platform has to present without creating an awkward wall of crates. Loading a sensible batch is safer than raising every container and discovering that the ship, ramp, or cargo bay cannot accept the arrangement you created.
- Filter by the mission cargo you actually need. Do not mix personal boxes, purchased cargo, and contract crates if you can avoid it.
- Keep partial loads deliberate. If the ship cannot take the full contract, leave the remainder stored rather than abandoned on a raised platform.
- Check the elevator before raising another batch. Loose objects, players, vehicles, or badly placed crates can interfere with a clean transfer.
- Do not treat a missing mission box as a reason to buy a replacement commodity. Contract recognition depends on the mission cargo, not simply the commodity name.
If you are learning hauling, tractor controls, and hangar flow at the same time, a Star Citizen coaching session can be used to practice the workflow without turning the article itself into a trade-route or profit guide. The core process remains the same whether the cargo is valuable or nearly worthless.
How to Load Cargo Into a Ship in Star Citizen
Once the elevator is up, loading becomes a physical handling problem. The safest workflow is to park the ship so the cargo bay has a short, unobstructed line to the elevator, open every ramp or cargo door you need before moving the first box, and create a clear path for the tractor operator. The shorter and straighter the transfer, the fewer chances there are to clip a crate into a door frame, landing gear, or another container.
Move one crate at a time until you understand the ship's grid behavior. When a container reaches a valid cargo position, the placement indicator should show that it can snap to the grid. A snapped box is far safer than a loose one because it is less likely to shift during flight and is easier to count when you unload. Ships with external cargo spindles or unusual cargo geometry may require a different angle than a conventional rear-ramp hauler.
| Container size | Standard dimensions | Practical loading note |
|---|---|---|
| 1/8 SCU | 0.5 x 0.5 x 0.5 m | Used for some small containers; practical for tiny items but inefficient for bulk hauling. |
| 1 SCU | 1.25 x 1.25 x 1.25 m | Easy to place but slow for large contracts because of the high box count. |
| 2 SCU | 2.5 x 1.25 x 1.25 m | Still flexible in narrow cargo bays and useful around awkward doors. |
| 4 SCU | 2.5 x 2.5 x 1.25 m | Good compromise when the ship has moderate clearance. |
| 8 SCU | 2.5 x 2.5 x 2.5 m | Fewer lifts, but height and doorway clearance start to matter more. |
| 16 SCU | 5 x 2.5 x 2.5 m | Check ramp width, turning space, and cargo-grid length before committing. |
| 24 SCU | 7.5 x 2.5 x 2.5 m | Long container that can be awkward in ships with bends or short internal bays. |
| 32 SCU | 10 x 2.5 x 2.5 m | Fast for bulk transfer only when the ship and loading path physically support it. |
These dimensions explain why nominal SCU capacity is not the same as practical compatibility. A ship can have enough total cargo capacity yet still be unable to accept a 24 or 32 SCU container because the doorway, ramp, lift, or grid shape is too short or narrow. The same principle applies to freight elevators: platform capacity does not guarantee that every possible crate arrangement is convenient at every location.
Explore services related to this guide, selected from our Star Citizen catalog.
View All Star Citizen Services


Using the ATLS for Cargo Loading
For Star Citizen ATLS cargo handling, the suit is most useful when the job involves repeated large-container moves and the loading path gives it a clear line of sight. CIG's official Argo ATLS Q&A lists 32 SCU as the ATLS tractor-beam handling limit. That makes it suitable for the largest standard cargo containers used in normal freight handling, but it does not mean the ATLS can physically access every ship bay or loading site.
A good ATLS setup resembles a stationary loading crane. Park the ship close enough that the operator can see both the elevator and the target cargo grid, leave enough room for the ATLS body to rotate or reposition, and keep the route free of players and vehicles. You gain very little by walking the ATLS back and forth if one position can cover the entire transfer.
- Raise a manageable batch. Start with the largest boxes that actually fit the ship.
- Position the ATLS outside the traffic lane. Do not block the ship ramp with the suit itself.
- Move the crate through the widest possible approach. Avoid dragging a long 24 or 32 SCU box diagonally through a narrow door.
- Align before final placement. Rotate the container while there is still open space rather than after it is inside the bay.
- Snap the crate to the cargo grid. Confirm placement before grabbing the next box.
The ATLS is not automatically faster for every ship. A vessel with a built-in ship tractor beam, a short external grid, or a cramped internal bay may be easier to load with another tractor source. The practical choice is the tool that minimizes re-aiming, walking, and failed alignment for the specific cargo grid. Players who want hands-on help with a particular ship or contract can use Star Citizen hourly assistance for a custom session rather than relying on a generic claim that one loading tool is always best.
Unloading Cargo and Completing a Hauling Contract
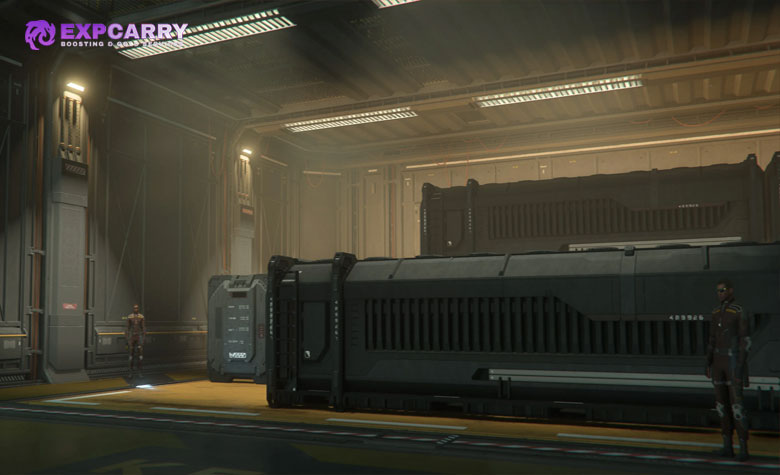
Delivery is the pickup process in reverse, but contract recognition adds one extra requirement: the destination must receive the correct mission cargo through the correct freight system. Do not assume that simply parking the ship at the marker is enough. You must physically remove the boxes, snap them to the destination freight-elevator grid, send the platform down, and confirm the submitted cargo in Freight Manager.
- Confirm the destination before opening the cargo bay. Multi-stop contracts are easy to misread when several markers are close together.
- Unload only the boxes intended for that destination. Keep cargo for later stops secured in the ship.
- Place boxes cleanly on the freight-elevator platform. Snap the mission boxes to the platform grid; loose cargo can prevent the elevator from lowering correctly or stop the terminal from recognizing the intended submission.
- Check the count before lowering the elevator. A missed box is easier to find while the cargo is still visible.
- Send the elevator down. Freight Manager should open the submission step and show which mission cargo it recognizes, including anything still missing.
- Confirm the mission delivery. Review the recognized amount, click Confirm when the submission is correct, and verify the contract state before leaving.
If the delivery screen says cargo is missing, stop before moving unrelated boxes. Recheck the contract destination, the number of containers, and whether you unloaded the actual mission-tagged cargo. A purchased crate of the same commodity should not be treated as a guaranteed replacement for a lost contract container.
Freight Elevator Not Working: Alpha 4.10 Troubleshooting
Freight-elevator failures need to be diagnosed by symptom because several different problems look similar from a distance. CIG's current Alpha 4.10 Known Issues page also makes clear that the published list is not exhaustive and asks players to contribute reproducible bugs through Issue Council. Do not assume that an old workaround from 4.8 or 4.9 is still valid just because the elevator animation looks the same.
Alpha 4.10 specifically addressed older hauling blockers involving missing pickup cargo and Freight Manager transfer behavior, so advice written around the broken 4.9 hauling state should not be used as the starting point for a 4.10 diagnosis. If the problem returns in a different form, identify the current symptom first.
| Symptom | What to check first | Safe next step |
|---|---|---|
| Mission cargo is absent from Freight Manager | Correct pickup location, active contract, every pickup stop, and the current Freight Manager state. | Do not buy replacement cargo or force unrelated transfers. Recheck every collection objective; if the cargo is still absent, document the exact location and symptom and use the current Issue Council or Hotfix Central guidance. |
| Elevator raises but expected stored cargo is missing | Whether the items were actually assigned to the platform and whether another elevator at the same location exposes the same storage. | If another elevator visibly shows the same inventory, test it with one non-critical item before moving important cargo. |
| Platform is stuck or kiosk closes unexpectedly | Whether the elevator is still moving, obstructed, or in a transfer state. | Wait for the state to settle, reopen the terminal, and avoid repeatedly forcing large batches through a platform that is already desynced. |
| Cargo will not snap to the ship grid | Container orientation, valid grid space, ramp clearance, and whether another crate blocks the snap point. | Pull the crate back into open space, rotate it, and approach the target grid again. |
| Delivery does not recognize cargo | Correct destination, mission-tagged boxes, required count, whether the boxes are snapped to the freight-elevator grid, and whether the submission screen recognizes them. | Do not confirm an incomplete submission. Recheck the remaining mission objectives and cargo placement before moving or discarding any boxes. |
| ATLS cannot place a large crate | Line of sight, container length, ship doorway, and available rotation space. | Reposition the ATLS or ship. Do not assume a 32 SCU handling limit guarantees physical ship compatibility. |
One current community workaround for a broken personal-hangar elevator is to test an accessible external freight elevator at the same location if it visibly exposes the same stored cargo. Treat this as a narrow recovery attempt, not a universal fix: start with a disposable item before risking mission or valuable cargo. Older tricks that spam the raise control and close the terminal have mixed results and can move the platform without restoring the cargo state, so they should not be presented as a dependable Alpha 4.10 solution.
Common Cargo Loading Mistakes
Most avoidable cargo problems happen before a bug is involved. The best freight-elevator workflow is conservative: verify the contract, move a controlled batch, keep boxes snapped to grids, and confirm every transfer before leaving a location. This reduces the number of unknowns when something actually fails.
- Raising more cargo than the ship can accept. This creates unnecessary handling and makes the platform harder to inspect.
- Choosing a ship by total SCU alone. Large 16, 24, and 32 SCU containers can fail to fit through the physical loading path even when the ship has enough theoretical capacity.
- Leaving contract cargo loose. Secure boxes to the ship grid whenever the vehicle supports it.
- Mixing delivery stops. Keep multi-stop cargo organized so the wrong boxes are not lowered at the first destination.
- Assuming the ATLS solves bad geometry. Tractor strength cannot make a long crate pass through a doorway that is physically too small.
- Using old patch workarounds as current fixes. A workaround for a 4.9 missing-cargo bug can waste time or create a new problem in 4.10.
- Leaving before delivery confirmation. Check the contract state after lowering the cargo rather than assuming the physical transfer completed the mission.
For broader progression help, ship preparation, or other Star Citizen activities beyond freight handling, the Star Citizen services hub covers the wider game. The freight-elevator process itself does not require a particular profit route and should be learned independently of commodity speculation.
FAQ
These are the practical questions that matter most when a player is trying to move cargo rather than optimize a trade route.
How do I load cargo in Star Citizen with a freight elevator?
Move the required cargo from warehouse storage to the elevator platform in Freight Manager, raise the elevator, tractor each physical box into the ship, and snap it to the cargo grid where possible.
How do I complete a hauling contract after unloading?
Unload the correct mission cargo onto the destination freight elevator, snap the boxes to its grid, send the platform down, review the recognized and missing cargo in Freight Manager, and click Confirm when the submission is correct.
What is the largest standard cargo box the ATLS can handle?
CIG's ATLS Q and A lists a 32 SCU maximum for the ATLS tractor beam. Physical access still depends on the ship, doorway, cargo grid, and loading area.
Why is my Star Citizen freight elevator not working?
First identify whether the problem is missing warehouse cargo, a stuck platform, a transfer-state failure, an obstruction, or cargo that is not recognized at delivery. Those symptoms have different causes and should not share one universal workaround.
Can I replace lost mission cargo by buying the same commodity?
Do not rely on that. Hauling contracts track their own cargo and delivery requirements, so a normal purchased crate with the same commodity name is not a guaranteed substitute.
Should I always use 32 SCU containers for faster loading?
No. Larger boxes reduce the number of lifts but require enough doorway width, internal length, rotation room, and cargo-grid compatibility. Smaller containers are often faster when ship geometry is restrictive.
Conclusion
A reliable Star Citizen freight elevator workflow is a chain of confirmed transfers: contract to pickup warehouse, warehouse to elevator, elevator to physical cargo, cargo to the ship grid, ship to destination elevator, and destination elevator to the Freight Manager submission screen. Treat each step as its own checkpoint. If the cargo count and location are correct before you move on, troubleshooting becomes much easier when a later step fails.
Use the ATLS when its 32 SCU handling capability and clear line of sight genuinely shorten the job, not simply because it is available. Match container size to the ship's real geometry, keep mission cargo separated and snapped to grids, and diagnose freight-elevator problems by their exact symptom instead of reaching for an old universal fix. That approach keeps the guide useful even as individual cargo routes, commodity values, and profit calculations change elsewhere.