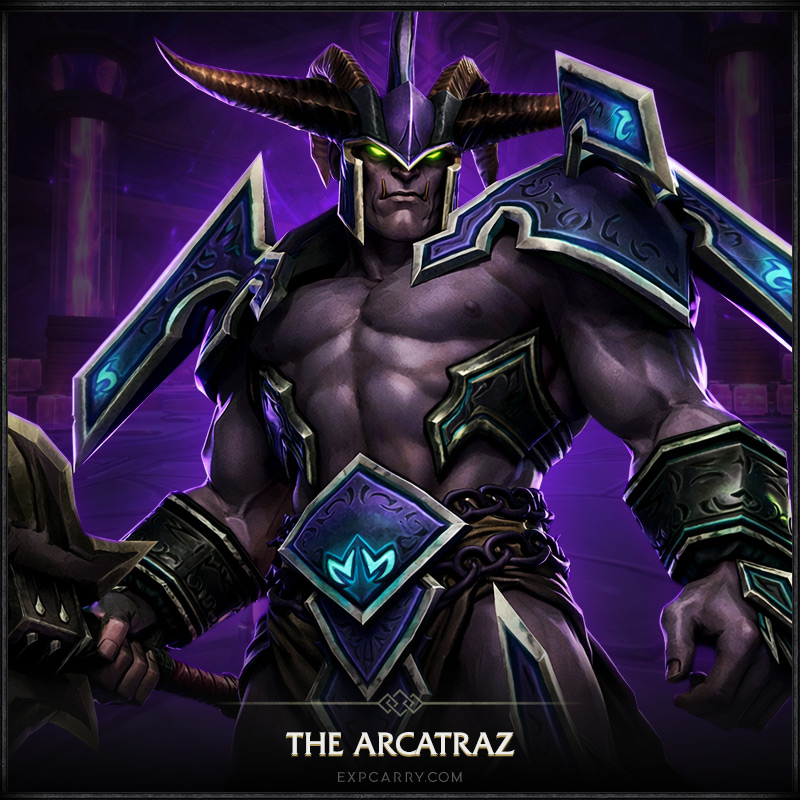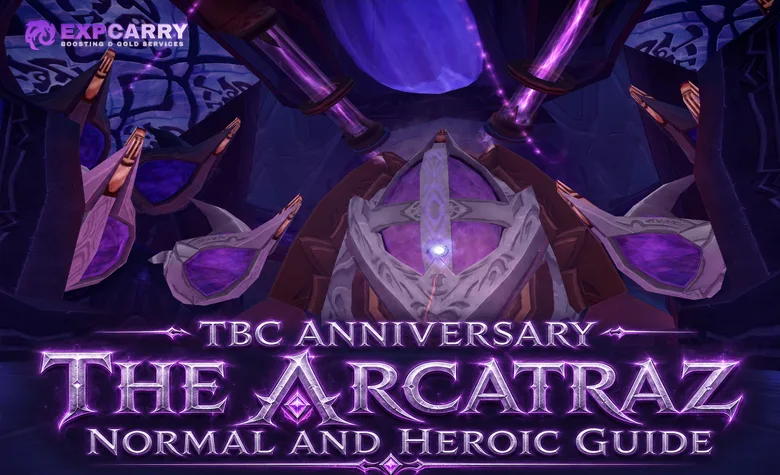
The Arcatraz is the level 70 prison wing of Tempest Keep and one of the most punishing five-player dungeons in TBC Classic Anniversary. Both difficulties contain four bosses, but Heroic adds much higher incoming damage, personal Heroic access requirements, a Badge of Justice from every boss, Heroic-only epic drops, and a guaranteed Primal Nether from Harbinger Skyriss. The current Outland progression and level 70 cap are documented in Blizzard's official Anniversary overview.
This guide covers the entrance, the physical door key, Heroic access, group preparation, the complete route, dangerous trash, every boss, the Warden Mellichar prison event, active quests, The Sha'tar reputation, and the most important Normal and Heroic loot. The requirements were checked against the live Anniversary rules on August 7, 2026.
The Arcatraz Overview
| Category | Normal | Heroic |
|---|---|---|
| Level requirement | Minimum 65; a full level 70 party is recommended | Only level 70 characters may enter |
| Boss count | Four | Four |
| Standard boss order | Zereketh, Dalliah, Soccothrates, Skyriss | Zereketh, Dalliah, Soccothrates, Skyriss |
| Physical entrance | One group member opens the outer gate | One group member opens the outer gate |
| Difficulty access | No faction item is required | Personal Tempest Keep Heroic access is mandatory |
| Associated reputation | The Sha'tar through Exalted | The Sha'tar through Exalted |
| Major repeatable rewards | Reputation, level 70 blue gear, dungeon set pieces, and a tailoring recipe | All shared drops plus four Badges of Justice, Heroic epics, gems, and a Primal Nether |
Normal is not a casual leveling run. Several trash enemies can wipe a level 70 party when their mechanics are ignored, and Zereketh applies heavy group pressure before the party reaches the more complex prison event. Heroic magnifies those failures, so a controlled Normal clear is useful practice even for experienced players.
Location and How to Enter
Fly to approximately 74, 58 in Netherstorm. The Arcatraz is the high northern satellite of Tempest Keep, above The Mechanar and The Botanica. Every character needs Expert Riding to enter. A flying mount, Flight Form, or a summon from players already on the platform solves the separate travel step. Blizzard's official Burning Crusade hotfix archive records the Expert Riding requirement for The Arcatraz, The Botanica, and The Mechanar.
A locked metal gate stands before the instance portal. Only one member of the party needs the Key to the Arcatraz to open it. The alternative is a level 70 Rogue trained to 350 Lockpicking. This is a physical door check on both difficulties and is separate from the personal key that unlocks Heroic mode.
Key to the Arcatraz Questline
The physical key comes from How to Break Into the Arcatraz. The full prerequisite chain begins in Netherstorm with the Aldor or Scryers version of Assisting the Consortium, continues through the Consortium story, and eventually sends the character from Special Delivery to Shattrath City to A'dal.
- Complete the Netherstorm Consortium chain until A'dal offers How to Break Into the Arcatraz.
- Clear The Mechanar and defeat Pathaleon the Calculator while the quest is active. Loot the Bottom Shard of the Arcatraz Key.
- Clear The Botanica and defeat Warp Splinter while the quest is active. Loot the Top Shard of the Arcatraz Key.
- Return both shards to A'dal in Shattrath City.
- Collect the permanent Key to the Arcatraz and use it to open the gate outside the dungeon.
The shard names describe their positions in the finished key, not the order of the dungeons. Pathaleon carries the Bottom Shard, while Warp Splinter carries the Top Shard. Only players currently on the quest can loot the required shard, so accept the task before scheduling either run.
Explore services related to this guide, selected from our Dungeons catalog.
View All Dungeons Services

Heroic Access and Anniversary Alt Keys
Heroic access is checked separately for each level 70 character. The standard unlock requires Revered with The Sha'tar, after which Almaador in Shattrath's Terrace of Light sells the Warpforged Key. This same key covers Heroic The Mechanar and The Botanica.
TBC Anniversary also provides the account-bound Communal Warpforged Key for eligible alts. The character using it must be level 70 and Friendly with The Sha'tar. The key can be mailed between characters on the same account. It grants the same Heroic dungeon access, but it does not open the locked outer gate.
| Access item | Purpose | Who needs it |
|---|---|---|
| Key to the Arcatraz | Opens the gate outside the instance portal | One key holder in the party, or a Rogue lockpick |
| Warpforged Key | Unlocks Heroic Tempest Keep dungeons | Every character using the regular Heroic key route |
| Communal Warpforged Key | A transferable account key for alt Heroic access | A level 70 alt that has reached Friendly |
Do not confuse the two checks. A five-player group can have personal Heroic access on every character and still be unable to reach the portal because nobody can open the outer gate.
Recommended Group Setup and Preparation
Build the party around a sturdy tank, a healer capable of sustained group recovery, and three damage dealers. The dungeon mixes Humanoids, Demons, Elementals, and other enemies with different control immunities, so no single crowd-control spell solves every pull. Interrupts, magic dispels, curse removal, and at least one dependable Demon control make early clears safer.
- Bring a Mage or Druid for curse removal. Several late enemies apply dangerous curses, including reduced healing taken and increased magic damage taken.
- Bring a Priest, Paladin, or another dependable magic dispel for Seed of Corruption, hostile buffs, and emergency control effects.
- Use Warlock Banish on valid Demon targets and Rogue Sap or Blind on suitable Humanoids.
- Assign interrupts before Dalliah so both Heal and Gift of the Doomsayer are covered.
- Prepare Fear protection or recovery tools for Harbinger Skyriss.
- Restock health and mana consumables, food, drinks, and class reagents, then repair before switching to Heroic.
- Mark the original Skyriss before combat and decide how the group will control a mind-controlled player.
Damage dealers need enough reserve burst to finish Death Watchers after Death Count begins. The healer should expect long stretches of group damage rather than isolated tank damage, while the tank must use walls and clean ground to control knockbacks, charges, and frontal attacks.
Route and Boss Order
| Stage | Route objective | Heroic concern |
|---|---|---|
| Lower prison | Clear to Zereketh and secure the room | Void Zones and Shadow Nova can overwhelm weak group healing |
| Fragment room | Open the Arcane Container when a party member has the Karazhan quest | Patrols and the fragment guardian punish careless timing |
| Shared boss chamber | Clear hidden enemies, then kill Dalliah before Soccothrates | Greater Invisibility patrols and overlapping fire create wipe risks |
| Upper prison | Handle Eredar, Sentinels, Abyssals, and Doombringers one pull at a time | Threat resets, stuns, charges, and Meteors can kill exposed players |
| Final chamber | Complete four cell releases and defeat Skyriss | Keep Millhouse alive for Tenacity and kill illusions quickly |
Dalliah should normally die before Soccothrates. Her fight uses little space, while Soccothrates repeatedly moves and leaves Felfire across the chamber. Clearing Dalliah first creates a safer movement area and lowers the chance of engaging both bosses.
Players who still need the long entrance chain can review the Arcatraz key route before forming the run. The physical key service does not replace any character's personal Warpforged Key requirement on Heroic.
Dangerous Trash and Kill Priority
| Target | Threat | Counter |
|---|---|---|
| Death Watcher | Death Count starts at 50 percent health and kills the party after 15 seconds | Save burst, stop unnecessary target switching, and finish it before the timer expires |
| Entropic Eye | Chaos Breath is a dangerous frontal cone with multiple harmful effects | Tank it away from the party and cleanse the tank as needed |
| Eredar Deathbringer | Unholy Aura causes constant group damage and Forceful Cleave knocks targets back | Tank with a wall behind the tank and kill it before pressure compounds |
| Arcatraz Sentinel | Activates from an apparent corpse, drops threat, uses Energy Discharge, and explodes at low health | Use taunts and stuns, stay at range when possible, and move away during Explode |
| Skulking Witch | Greater Invisibility hides patrols and Gouge can remove the tank temporarily | Use Flare or Detect Greater Invisibility and avoid fighting multiple Demons together |
| Gargantuan Abyssal | Meteor deals split damage and can kill a player standing alone | Collapse together for Meteor, then return to safe spacing |
| Unchained Doombringer | War Stomp disables nearby players and Berserker Charge threatens an exposed target | Control threat, position carefully, and use defensive cooldowns during the tank stun |
There is no universal priority for every pack, but the group should remove enemies with instant wipe conditions first. Death Watchers require reserved damage, while Sentinels require movement and threat recovery. Do not turn a controlled single-target pull into an uncontrolled area-damage pull simply to save a few seconds.
Zereketh the Unbound Tactics
Zereketh is the first boss and the first major healing check. His core mechanics are Shadow Nova, Seed of Corruption, and persistent Void Zones. Heroic adds no new ability, but every source of damage becomes much less forgiving.
- Clear enough of the chamber that a Shadow Nova knockback cannot send a player into an extra pack.
- The tank holds Zereketh with a wall behind the tank and keeps the boss stable.
- Ranged players spread so Seed of Corruption does not damage several allies when it triggers.
- The Seed target moves at least 10 yards away from other players. Remove the debuff when a suitable dispel is available.
- Leave every Void Zone immediately. Do not finish a cast while standing in it.
- Use defensive and healing cooldowns when Shadow Nova overlaps with Seed damage or poor Void Zone placement.
Zereketh can be skipped by groups pursuing only the final objective, but a full clear should kill him for reputation, loot, and the Heroic Badge. Skipping him also removes the safest standard route for parties completing the Third Key Fragment objective.
Dalliah the Doomsayer Tactics
Dalliah shares a chamber with Wrath-Scryer Soccothrates, but they are separate encounters. Pulling both is usually fatal. Clear the chamber carefully, including invisible patrols, then fight Dalliah close to her starting position.
- Keep the party compact enough to avoid drifting toward Soccothrates, but leave melee room to escape Whirlwind.
- Assign separate interrupts to Heal and Gift of the Doomsayer. Missing either extends the fight or creates dangerous healing interactions.
- Melee move out as soon as Whirlwind begins and return only after it ends.
- The tank avoids unnecessary movement and keeps Dalliah away from Soccothrates.
- On Heroic, place a healthy ranged player farthest from the boss to receive Shadow Wave.
- Protect the Shadow Wave target because the debuff increases subsequent Shadow damage taken by 50 percent.
Damage is secondary to interrupt discipline. A longer clean fight is safer than an aggressive burn that misses Heal, breaks positioning, or drags the party into the second boss.
Wrath-Scryer Soccothrates Tactics
Soccothrates uses Knock Away, Charge, Fel Immolation, and Felfire Shock. His Charge leaves a dangerous Felfire trail, so the fight consumes floor space over time. Defeating Dalliah first gives the party the room needed to relocate safely.
- The tank begins near an edge with clean ground available for the next movement.
- Ranged players and the healer stay more than 15 yards from the boss to avoid Fel Immolation.
- After Knock Away and Charge, everyone checks the new Felfire line before moving back into position.
- The tank and melee avoid standing where the next Knock Away can launch them through existing fire.
- Healers react quickly to Felfire Shock, especially on Heroic where its burst is substantially higher.
- Move the boss into a fresh section of the chamber instead of forcing melee to fight beside overlapping trails.
The common failure is chasing the boss across fire immediately after a Charge. Let the tank establish the new position, then approach through clean ground. Heroic increases Felfire Shock and trail damage rather than changing the basic solution.
Warden Mellichar Prison Event
Warden Mellichar opens four prison cells before Harbinger Skyriss becomes active. The first, third, and fourth cells contain one hostile prisoner selected from two possibilities. The second cell releases Millhouse Manastorm, a friendly caster who assists the party and must survive for Trial of the Naaru: Tenacity.
| Cell | Possible release | Main response |
|---|---|---|
| First | Blazing Trickster or Phase-Hunter | Dispel Fire Shield from the Trickster; face and recover from the Phase-Hunter's Warp and Back Attack |
| Second | Millhouse Manastorm | Let him join the party, monitor his health, and heal him when necessary |
| Third | Sulfuron Magma-Thrower or Akkiris Lightning-Waker | Remove curses, leave Rain of Fire, and dispel Magic Grounding |
| Fourth | Blackwing Drakonaar or Twilight Drakonaar | Face breaths away, respect Mortal Strike, and keep vulnerable players outside short-range fire effects |
The Blazing Trickster casts Firebolt at random players and reflects pressure through a dispellable Fire Shield. The Phase-Hunter warps behind a random player, uses Back Attack, and gains Phase Burst attack speed that cannot be removed by ordinary dispels or enrage removal.
The Sulfuron Magma-Thrower casts Shadow Bolt, places Rain of Fire, and applies a curse that reduces healing received. Move it out of its ground effect and decurse quickly. The Akkiris Lightning-Waker uses group Nature damage and applies a curse that increases magic damage taken. Its Magic Grounding buff reduces incoming magic damage and should be dispelled or spellstolen.
Both Drakonaar variants should face away from the party. Blackwing uses Mortal Strike, a frontal black dragon breath, and Blast Wave within 20 yards. Twilight cycles through different brood powers that can stun, burn mana, slow attacks or casts, and apply fire pressure. Stabilize health and mana after every hostile release because the next cell opens only after the current enemy dies.
Harbinger Skyriss Tactics
Skyriss attacks after the three hostile prisoner waves are defeated. His abilities include Mind Rend, Mana Burn, Fear, and Complete Domination. At 66 percent and 33 percent health, he creates a low-health illusion that also attacks the party with Mind Rend.
- Mark the original Skyriss before the pull. New illusions appear without that raid marker.
- Use important offensive cooldowns early so a player taken by Complete Domination cannot turn unused cooldowns against the group.
- Control a dominated ally with stuns, Fear, Polymorph, or another safe option. Avoid killing the player.
- Interrupt or mitigate Mana Burn when possible and keep mana users away from avoidable damage.
- At 66 percent, switch to the illusion and kill it immediately. Its maximum health is less than 10 percent of the original boss.
- Repeat the illusion switch at 33 percent and continue controlling any dominated player.
- Keep Millhouse alive through the entire encounter when anyone is completing Tenacity.
Heroic does not redesign the encounter, but every prison enemy has more health and deals more damage, while Mind Rend becomes a much larger threat. Leaving both illusions alive can create overlapping Mind Rend damage that overwhelms the healer. Killing each illusion is the reliable strategy for progression groups.
The Arcatraz Quests
| Quest | Requirement | Dungeon objective |
|---|---|---|
| How to Break Into the Arcatraz | Long Netherstorm Consortium chain | Obtain the two key shards in The Mechanar and The Botanica before entering |
| Harbinger of Doom | Complete the entrance key chain | Defeat Harbinger Skyriss on Normal or Heroic |
| The Second and Third Fragments | Karazhan attunement chain | Open the Arcane Container after Zereketh and loot the Third Key Fragment from its guardian |
| Seer Udalo | Akama story and Black Temple attunement chain | Find Udalo near the end of the dungeon before the final chamber |
| Trial of the Naaru: Tenacity | Heroic only and the Tempest Key trial chain | Rescue Millhouse and keep him alive through the final event |
| Wanted: Arcatraz Sentinels | Normal-mode dungeon daily when offered; it can also be completed on Heroic | Destroy five Arcatraz Sentinels |
| Wanted: The Scroll of Skyriss | Heroic dungeon daily when offered | Loot the Scroll of Skyriss on Heroic |
Blizzard's official Outland attunement guide places Heroic The Arcatraz in the Trial of the Naaru sequence and confirms the Warpforged Key requirement for Tenacity.
The Third Key Fragment is in an Arcane Container in the room after Zereketh, on the northeast side. Opening it summons a Third Fragment Guardian, which must be killed and looted. Do not leave the room until every eligible player confirms the fragment.
Harbinger of Doom rewards a choice between the Potent Sha'tari Pendant, A'dal's Recovery Necklace, and Shattrath Choker of Power. Review each role option before turning in the quest because the choice is permanent.
The Sha'tar Reputation
Normal and Heroic kills in The Arcatraz grant The Sha'tar reputation all the way through Exalted. A complete Normal clear gives approximately 1,150 reputation, while a complete Heroic clear gives approximately 1,900. Exact totals can vary with skipped enemies, route choices, racial bonuses, and active reputation bonuses.
| Difficulty | Approximate full-clear reputation | Best use |
|---|---|---|
| Normal | About 1,150 | Repeatable reputation without a daily lockout, key quests, and shared blue loot |
| Heroic | About 1,900 | Higher reputation per clear, Badges, Heroic epics, and daily objectives |
Normal is the practical repeatable farm when the group can clear it quickly. Heroic is stronger per completed run but has a daily lockout and much greater failure risk. Players planning the Revered milestone or an Exalted finish can compare the broader Sha'tar reputation route with repeated Arcatraz, Botanica, and Mechanar clears.
Notable Normal Loot
The Normal table contains level 70 blue items for every armor type, several dungeon set pieces, a caster trinket, and a valuable tailoring pattern. The following targets are the most broadly useful reasons to schedule a full clear.
| Item | Boss | Primary value |
|---|---|---|
| Mana-Sphere Shoulderguards | Zereketh the Unbound | Cloth spell damage shoulders |
| Pattern: Whitemend Pants | Dalliah the Doomsayer | Rare tailoring recipe for a powerful healing set |
| Hallowed Crown | Harbinger Skyriss | Priest healing dungeon set head piece |
| Hood of Oblivion | Harbinger Skyriss | Warlock dungeon set head piece |
| Helm of Assassination | Harbinger Skyriss | Rogue dungeon set head piece |
| Breastplate of the Bold | Harbinger Skyriss | Warrior tank dungeon set chest |
| Doomplate Chestguard | Harbinger Skyriss | Plate damage dungeon set chest |
| Hungering Spineripper | Harbinger Skyriss | Fast one-handed dagger for physical damage builds |
| Shiffar's Nexus-Horn | Harbinger Skyriss | Spell critical strike trinket with a spell power proc |
Harbinger Skyriss carries most of the headline Normal drops, but key-chain groups should not overlook Dalliah's tailoring pattern or Zereketh's caster shoulders. Confirm loot priorities before the run so players do not confuse a dungeon set piece with an item for another class or role.
Notable Heroic Loot
Heroic retains the shared Normal loot table and adds epic items from Harbinger Skyriss. Every boss drops one Badge of Justice, producing four Badges from a complete clear. Skyriss also drops a guaranteed Primal Nether for profession crafting.
| Item | Source | Primary value |
|---|---|---|
| Belt of Depravity | Harbinger Skyriss | Epic cloth belt for spell damage builds |
| Shadowstep Striders | Harbinger Skyriss | Epic leather boots for physical damage dealers |
| Bracers of Dignity | Harbinger Skyriss | Epic plate healing bracers |
| Vileblade of the Betrayer | Harbinger Skyriss | Epic one-handed dagger with attack power |
| Deadly Fire Opal | Any Heroic boss | Bind-on-pickup hybrid gem |
| Durable Fire Opal | Any Heroic boss | Bind-on-pickup hybrid gem |
| Nimble Fire Opal | Any Heroic boss | Bind-on-pickup hybrid gem |
| Badge of Justice | Every boss | Currency for Heroic and later badge gear |
| Primal Nether | Harbinger Skyriss | Endgame profession crafting material |
Choose Heroic when the group can clear consistently and needs Badges, profession materials, or a specific Skyriss epic. If only a shared blue item is required, repeated Normal clears avoid the Heroic lockout and usually produce more attempts per day.
Common Mistakes
- Arriving with personal Heroic access but nobody able to open the physical gate.
- Running The Mechanar and The Botanica before accepting How to Break Into the Arcatraz.
- Confusing the Bottom Shard from Pathaleon with the Top Shard from Warp Splinter.
- Starting Death Watcher burst before damage cooldowns and resources are ready.
- Soloing Gargantuan Abyssal's Meteor instead of stacking to split its damage.
- Pulling Dalliah and Soccothrates together or discovering an invisible Witch during the boss pull.
- Missing Dalliah's Heal or Gift interrupt while focusing on damage.
- Chasing Soccothrates across a fresh Felfire trail.
- Failing to remove curses or Magic Grounding during the third prison release.
- Leaving Skyriss illusions alive and allowing multiple Mind Rends to overlap.
- Ignoring Millhouse's health while completing Trial of the Naaru: Tenacity.
- Leaving the fragment room before every eligible player loots the Third Key Fragment.
Pre-Run Checklist
- Level 70 is strongly recommended for Normal and mandatory for Heroic.
- Confirm Expert Riding for every character.
- Confirm a flying mount, Flight Form, or a planned summon to reach the platform.
- Confirm that one party member has the Key to the Arcatraz or a Rogue has 350 Lockpicking.
- For Heroic, confirm that every player has the Warpforged Key or an eligible Communal Warpforged Key.
- Collect Harbinger of Doom, The Second and Third Fragments, Seer Udalo, and any available daily before departure.
- For Heroic attunement, confirm Trial of the Naaru: Tenacity and plan to heal Millhouse.
- Assign Dalliah interrupts, curse removal, magic dispels, Fear recovery, and control for Complete Domination.
- Mark the original Skyriss and agree to kill both illusions immediately.
- Set loot priorities for dungeon set pieces, Shiffar's Nexus-Horn, Heroic epics, and Primal Nether.
- Repair, restock consumables and reagents, and enter with full health and mana.
Final Verdict
The Arcatraz is a compact but mechanically dense level 70 dungeon. Its physical key, flying requirement, and separate Heroic access make preparation as important as combat. Inside, the party must solve burst checks, frontal attacks, threat resets, dispels, curses, movement hazards, a four-cell prison event, and Skyriss illusions without losing control of the run.
Normal is valuable for repeatable Sha'tar reputation, attunement objectives, dungeon set gear, and specific blue drops. Heroic rewards a disciplined group with more reputation, four Badges of Justice, a Primal Nether, and exclusive epics. Bring the correct keys, clear methodically, protect Millhouse, and treat dangerous trash as seriously as the bosses.