
In the constantly changing world of Dragonflight 10.2, dragon riding has become a crucial skill, particularly important in the high-energy Tindral Sageswift boss battle. This challenge is more than just a conflict; it's a dance in the sky, a test of both skill and strategic thinking that will push even the toughest of Azeroth's warriors to their limit.
Our comprehensive guide is the key to navigating Tindral Sageswift's formidable arsenal. It is a carefully curated repository of knowledge, teeming with tactical insights and nuanced strategies that delve deeply into the core of this challenging confrontation. Here, high in Dragonflight's domain, your combat prowess is intertwined with your mastery of the skies.
For those who crave the glory of the raid without the grueling climb, our Amirdrassil Raid Boost is your solution. Our team of experienced veterans will serve as your vanguard and guide you through the labyrinth of aerial combat and ground-based tactics. With our boost, you can skip the trials and tribulations and land directly into the heart of the action, equipped with the best gear, tactics, and insider knowledge to ensure victory.
Tindral Sageswift Fight Overview
In the Heroic Tindral Sageswift encounter, raiders are tested on multiple fronts, combining the thrill of dragon riding with the traditional mechanics of a World of Warcraft boss fight. Here's a more detailed overview of what to expect and how to prepare:
Combat Dynamics
- Encounter Type: This is primarily a single-target fight, but don't let that fool you. The encounter is punctuated with bursts of AoE damage that will test the raid's ability to balance focus with widespread threat management.
- Raid Composition: A standard setup with 2 Tanks, 5 Healers, and 13 DPS provides a balanced approach to handle the mechanics while ensuring enough throughput to meet DPS checks and healing demands.
Key Abilities and Utilities
- Mobility Spells: Abilities like Tiger’s Lust and Hand of Freedom are invaluable for quickly moving out of harmful effects or reaching critical objectives, such as soaking mushrooms or collecting Dream Essences.
- Root Removal: Personal abilities to remove roots are essential, especially during Mass Entanglement. Classes with such abilities should be ready to use them to minimize downtime and damage taken.
- Platformer Skills: A nod to classic games, players will find that their experience with precision and timing in platformers can be a boon here, especially during dragon riding segments.
Timing and Resource Management
- Heroism/Bloodlust: Timing for Hero/Lust is crucial and is best saved for Phase 3, where the boss's health pool and the encounter's complexity reach their peak. This is the moment for the raid to unleash all their stored power and cooldowns for a final push.
Environmental Awareness
- Spatial Orientation: The fight will frequently challenge players' awareness of their surroundings. From avoiding the deadly edges of the platform due to Flame Surge to positioning for optimal AoE damage without stacking for Mass Entanglement, being mindful of your location and that of your raid members is key.
Phase Transitions
- Intermissions: These are not mere breaks in the fight but pivotal moments that require as much attention as the main phases. Successfully navigating from one platform to another while collecting buffs and avoiding debuffs sets the stage for the next phase.
Mental Preparedness
- Adaptability: As with any complex encounter, the ability to adapt on the fly to the unexpected will separate the good raids-service">raids from the great. Communication, quick thinking, and a thorough understanding of the fight's mechanics are the pillars of success.
The Tindral Sageswift encounter is a multifaceted battle that will test the mettle of every raider. From the ground to the skies, each phase offers unique challenges that require a blend of individual skill and collective coordination. As you gear up to face Tindral Sageswift, remember that every mechanic mastered and every movement perfected brings you one step closer to claiming victory in the skies of Dragonflight.
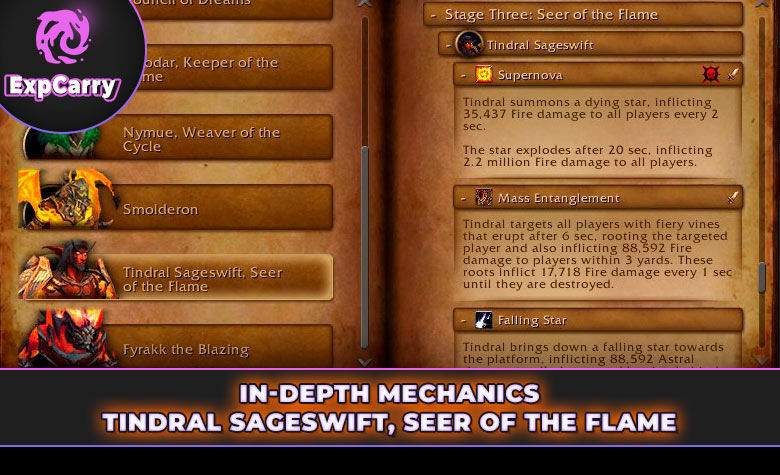
In-Depth Mechanics Tindral Sageswift, Seer of the Flame
The Tindral Sageswift encounter is a complex ballet of mechanics that requires precise execution and keen awareness from every member of the raid. Let's delve deeper into each mechanic and understand the intricacies involved:
Tindral Sageswift Form Mechanics
- Mass Entanglement: This mechanic is a test of spatial awareness and reaction speed. Each player will find themselves targeted by a confining circle. The key here is to avoid clustering too closely, as the explosion radius can catch unsuspecting allies. Quick removal of roots is paramount to maintain DPS uptime and mobility for upcoming mechanics.
- Falling Star: The entire raid must be on high alert as these celestial hazards come crashing down. The swirls that spawn are a call to action for every raider to find safe footing. It's a dance that requires attention and quick feet, as getting hit not only hurts the individual but strains the healers' resources.
- Fiery Growth: This mechanic introduces a risk-reward scenario. Targeted players will need to balance the urgency of removing the damaging DoT with the potential hazard of leaving behind a fire puddle. Positioning is crucial; players must communicate and move to safe zones for dispelling to minimize the impact on the raid.
- Blazing Mushroom: Tanks will face a high-stakes game of hot potato with these explosive fungi. Coordination and timing are vital, as each mushroom soaked increases the damage of the next. Tank synergy and communication must be flawless to prevent catastrophic raid damage.
- Searing Wrath: A straightforward yet punishing DoT that stacks with each melee hit. Tanks must monitor their stacks and health closely, calling for swaps to manage the escalating damage. Healers should be ready to focus their attention on the tanks during these swaps to ensure a smooth transition.
- Flame Surge: Staying vigilant of the fight's geography becomes crucial here. The edges of the platform are perilous, and players must resist the urge to backpedal into danger. Awareness and positioning will prevent unnecessary casualties.
- Supernova: This is a unifying moment for the raid, a collective DPS check that demands focus and coordination. Every DPS must pour their efforts into shattering this shield, while healers work overtime to keep the raid alive through the pulsing damage.
Additional Form Mechanics
- Sunflame & Fire Beam (Searing Moonkin Form): These unavoidable and targeted beams will test the raid's ability to handle sustained and focused damage. Movement and positioning once again come to the forefront, as players must spread to minimize Sunflame's impact and quickly sidestep Fire Beam's lethal path.
- Suppressive Ember & Flaming Germination (Burning Treant Form): These mechanics introduce a healing and control challenge. Absorb shields must be healed promptly, and the flaming mushrooms require immediate attention to prevent the spawning of additional threats. Quick target prioritization and movement are essential.
- Empowered Feather & Dream Essence (Flaring Owl Form): The encounter takes to the skies, and players must adapt to three-dimensional movement. Collecting Dream Essences provides a significant raid-wide buff, but it's a race against time and obstacles that will test the raid's aerial maneuverability.
Strategic Considerations
Each mechanic in the Tindral Sageswift encounter is designed to challenge different aspects of raid performance. From individual responsibility to group coordination, the mechanics demand a high level of play across the board. Understanding the nuances of each mechanic and the timing of their interactions is the key to mastering the encounter. Communication, adaptability, and situational awareness are the tools that will allow a raid to navigate this complex fight successfully.
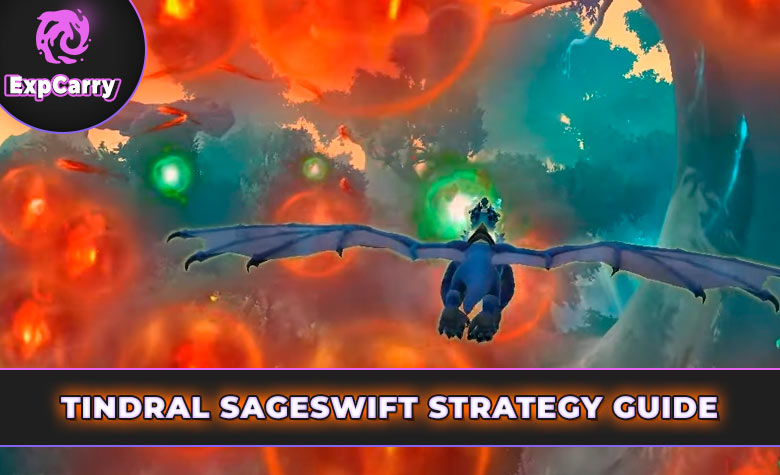
Tindral Sageswift Strategy Guide
Tackling the Tindral Sageswift encounter requires a well-thought-out strategy that addresses each phase's unique challenges. Let's break down the approach for each segment of the fight to ensure your raid group is prepared for victory.
Phase 1: Groundwork and Positioning
- Initial Positioning: Start by positioning Tindral at the side of the room, avoiding the edges to prevent unnecessary Flame Surge damage. This positioning sets the stage for efficient handling of mechanics like Mass Entanglement and Fiery Growth.
- Handling Mass Entanglement: Spread out to minimize overlap when the circles appear. Players with root-breaking abilities should use them immediately, while others may require assistance from healers or DPS with utility spells.
- Managing Fiery Growth: Affected players should signal for dispels after moving away from the group to prevent spreading the resulting fire puddle. Quick and clear communication is key to handling this mechanic without causing additional stress to the raid.
- Blazing Mushroom Soaks: Tanks must be in sync, alternating soaks and using speed boosts if necessary to reach mushrooms in time. The rest of the raid should be aware of their positioning to not impede the tanks' paths.
- Dodging Fire Beam: After the initial impact, prioritize dodging the smaller circles over the larger swirls. These circles deal more damage and can quickly lead to a raid member's demise if not handled correctly.
Intermission 1: Dragon Riding Skills
- Feather Collection: As soon as feathers drop, each player should collect one and transition into dragon riding mode. This is a critical moment where practice with dragon riding mechanics pays off.
- Navigating to the Next Platform: Use your dragon riding skills to weave through Dream Essences, collecting buffs while avoiding fire orbs. A clear path and understanding of dragon riding controls are essential.
- Supernova Shield: Upon landing, immediately focus on the Supernova shield. All DPS should concentrate their efforts to break it within the time limit, while healers manage the incoming raid damage.
Phase 2: Adapting to Complexity
- Adapted Ability Order: Be prepared for the change in ability sequence. Quick adaptation and maintaining the flow of mechanics from Phase 1 are crucial.
- Tank Soak and Roots: Tanks need to be freed from roots quickly to manage mushroom soaks. DPS and healers should prioritize root removal for tanks above all else during this phase.
- Mushroom Stomping: Assign raid members to specific mushroom clusters to ensure all are stomped promptly. Clear communication and rapid response are vital to prevent the spawning of Burning Trees.
Intermission 2: The Second Ascent
- Similar Flight Mechanics: This intermission mirrors the first, but stay vigilant for any new mechanics or increased damage that may be introduced.
- Efficient Flight: Aim for a swift transition to the next platform, focusing on collecting buffs and avoiding debuffs to set up for Phase 3.
Phase 3: The Final Confrontation
- All Forms Engaged: Prepare to face all of Tindral's forms and their associated mechanics. This is the most intense part of the encounter, requiring the highest level of execution.
- Heroism/Bloodlust: Now is the time to use Hero/Lust. Coordinate with all DPS to align cooldowns for maximum output.
- Managing Overlaps: Anticipate potential overlaps of mechanics, such as Fire Beam during tank soaks. Use defensive cooldowns and external assistance to survive these moments.
- Prioritization and Focus: As mechanics intensify, prioritize survival and the handling of key mechanics over raw DPS. Staying alive and maintaining control are paramount.
- Burn Phase: Once all mechanics are managed, and the raid is stable, focus on burning the boss down. This is a race against the mechanics, so every second and every point of damage counts.
Final Tips
- Practice Makes Perfect: The dragon riding segments, in particular, will benefit from practice. Encourage your raid members to hone these skills outside of the encounter.
- Cooldown Management: Assign cooldowns for predictable high-damage periods, such as after soaking mushrooms or during Supernova.
- Stay Calm: The intensity of the fight can be overwhelming. Maintain a calm and focused raid environment to facilitate clear communication and effective decision-making.
By following this comprehensive strategy and adapting to the dynamic nature of the encounter, your raid can look forward to a successful defeat of Tindral Sageswift. Remember, the key to victory lies in preparation, communication, and the ability to execute the strategy with precision.
Conclusion: Triumphing Over Tindral Sageswift
As the dust settles on the battlefield of the Tindral Sageswift encounter, the true depth of your raid's coordination, skill, and perseverance becomes evident. This encounter is not merely a test of combat efficiency but a measure of how well a team can adapt and react to an ever-changing combat environment. Here's an expanded conclusion to encapsulate the journey through this formidable challenge.
Reflecting on the Encounter
- A Symphony of Mechanics: Tindral Sageswift is a complex encounter that weaves together a symphony of mechanics, each with its own rhythm and beat. The encounter demands that each player not only knows their individual parts but also understands how they fit into the greater orchestration of the raid.
- The Dragonriding Edge: The unique aspect of dragon riding in this encounter adds an exhilarating twist to the traditional WoW raiding experience. It's a skill that, when mastered, can significantly tip the scales in favor of the raid group.
- The Importance of Adaptability: If there's one takeaway from this encounter, it's the importance of adaptability. The ability to adjust to the unexpected and to remain composed under pressure is what will ultimately lead to a successful kill.
Looking Ahead
- Continuous Improvement: Each attempt at Tindral Sageswift, whether successful or not, is a learning experience. Analyzing what went right and what went wrong after each pull is crucial for continuous improvement and eventual mastery of the encounter.
- Team Synergy: The bonds formed and strengthened through such a challenging encounter go beyond the game. The synergy developed here can carry forward into future raids, making the group stronger as a whole.
- Celebrating the Victory: When Tindral finally falls, it's not just a victory over a boss—it's a testament to the raid's collective effort and determination. Celebrate the achievement, for it is well-earned.
Final Words of Encouragement
As you and your raid team stand poised to face Tindral Sageswift, remember that every mechanic learned, every movement perfected, and every strategy adapted contributes to the path to victory. The skies of Dragonflight are unforgiving, but with the right preparation, communication, and execution, they can also be incredibly rewarding.
Embrace the challenge, for it is in these moments of high stakes and higher achievements that the most memorable experiences are forged. Here's to your success against Tindral Sageswift—may your tactics be sound, your reflexes quick, and your resolve unbreakable.


